Introduction:
With the growth of machine learning and artificial intelligence in our day to day life, Microsoft is also embracing ML and AI in Dynamics 365 CRM. With the recent Wave 2 general availability release, Microsoft has added some really good features and one them is – Business Card Scanner. Microsoft has combined its latest PowerApps Component Framework, machine learning and artificial intelligence to make this feature which can be termed as Business Card Reader Control or Component. You can quickly create a record in Dynamics 365 CRM (mobile or web) without manually entering the field value. Just scan and your record will be created.
Note – Business Card Scan feature is only available in US and EU regions.
By default Microsoft has provided this feature on some entity quick form but you can add this feature on any entity forms including OOB entities and Custom entities using few configurations.
A) The Default Scanner
To create record using business card, you can open any entity quick create form and you will find an option for scanning business cards. Now follow the steps given below to see how it is done:
Step 1 – Navigate to Email entity and open a new Email.
Step 2 – Click on ‘To’ look up and then click on ‘New Record’ to create a new contact record. A quick create form will be opened with ‘Scan Business Card’ option at the top.

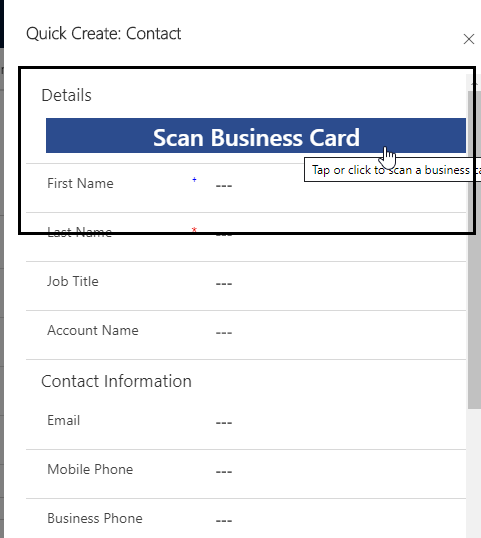
With this option you can scan a business card and for devices which don’t have camera, you can upload an image.
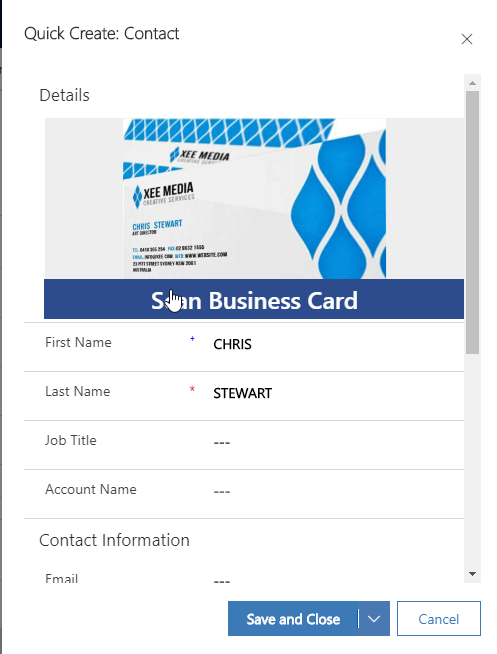
Once scanned your field will be auto populated. Further, you can add or change fields that needs to be populated and what values should be populated (refer Point B –> Step 4). If you are not able to find Scan Business Card option even with CRM of US or EU region, then we can use the second method i.e. ‘Configure the Business Card Reader Control’.
B) Configure Business Card Reader Control
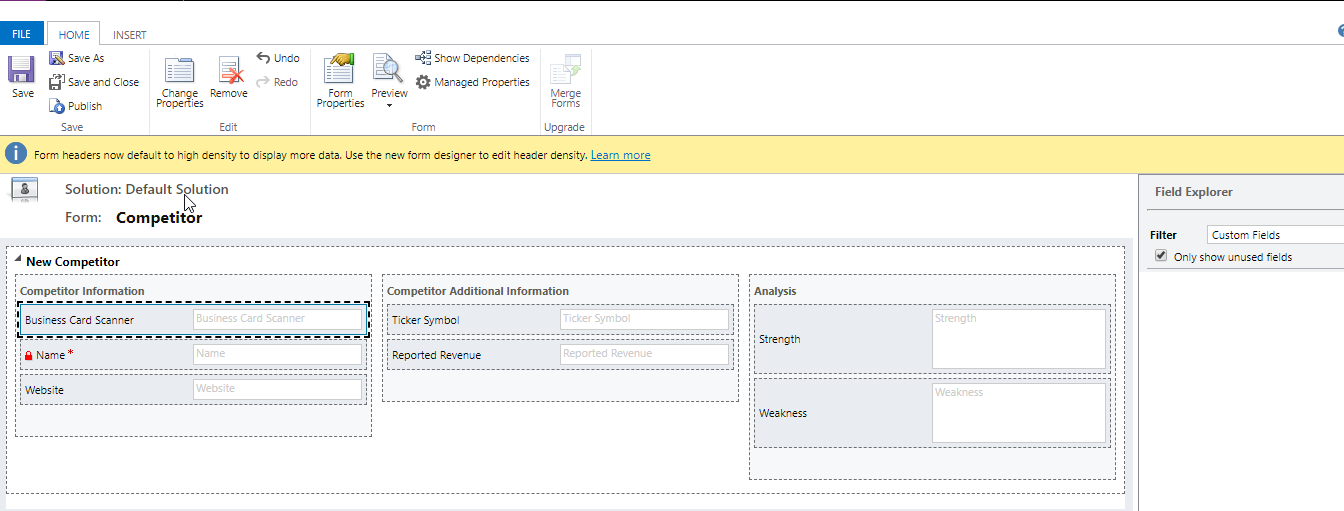
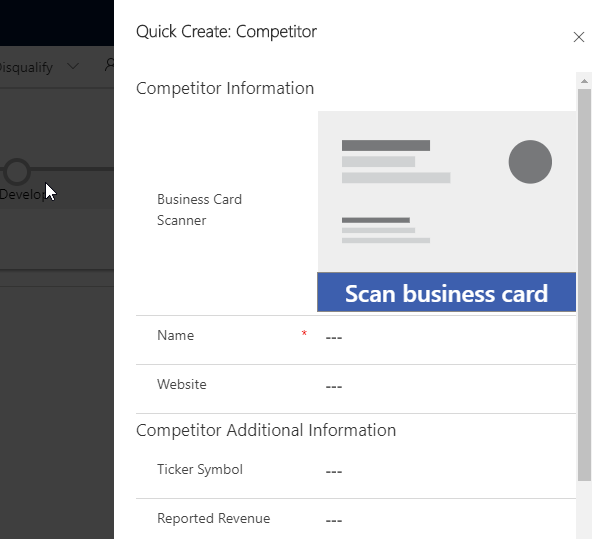
Here, we will configure Business Card Reader for Competitor entity.
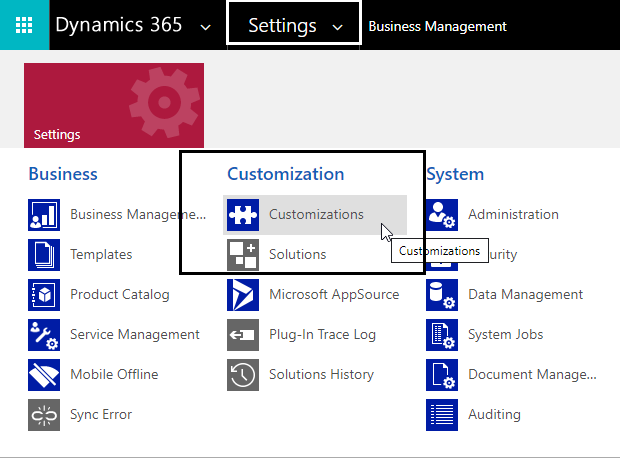
Step 1 – Go to Form Customization. For this, click on gear icon at top right –> Select Advanced Settings –> Settings –> Customizations –> Customize the System –> Select ‘Competitor’under Components –> Expand Competitor option and click on Forms.
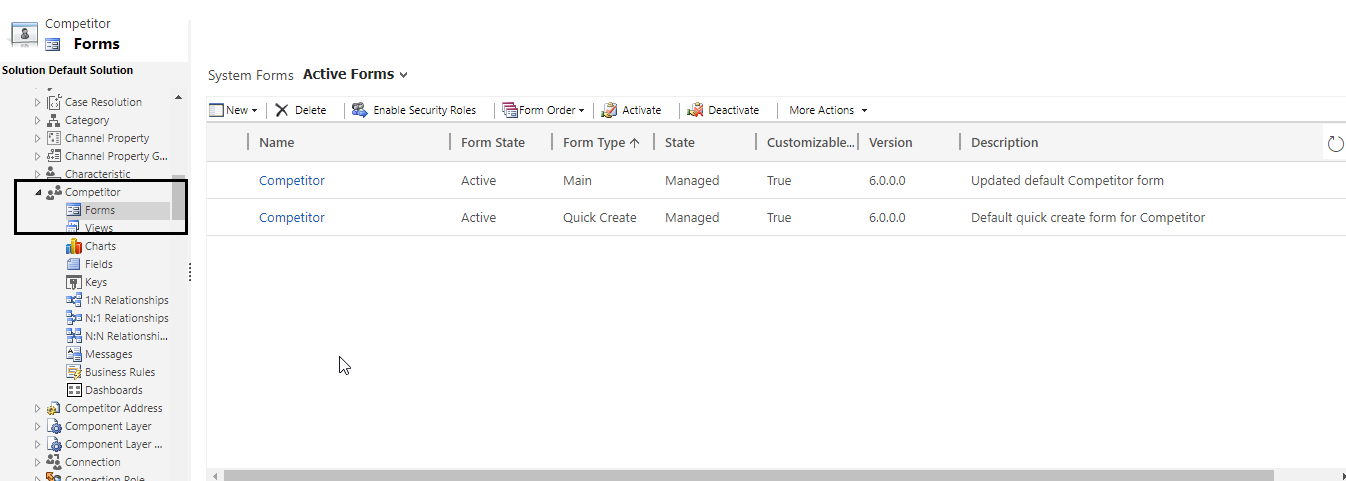
Step 2 – Select any form on which you need to configure the Business Card Reader. Here, we will use Competitor Quick create form. For Competitor Quick create there was no option to scan business card, so we will add Business Card Scanner on Competitor quick create.
Step 3 – For adding a Business Card Scanner you have to create a new field of ‘Single Line of Text’ or use any existing field.
Step 4 – After creating the field, drag and drop the field on form. Here, I have created a field named ‘Business Card Scanner’.
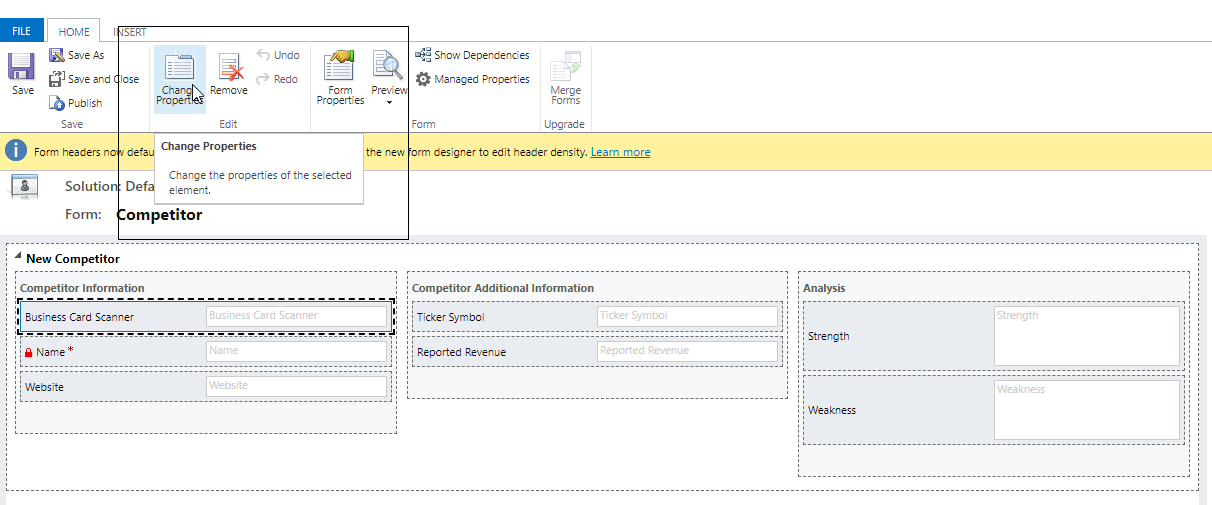
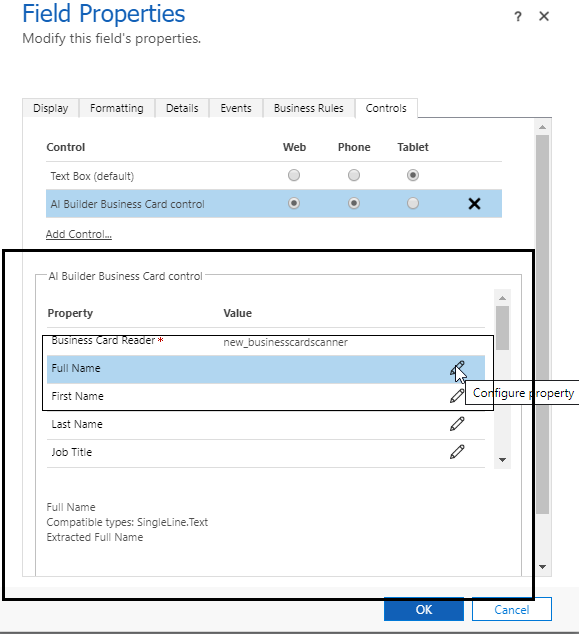
Step 5 – Select the field and click on ‘Change Properties’.
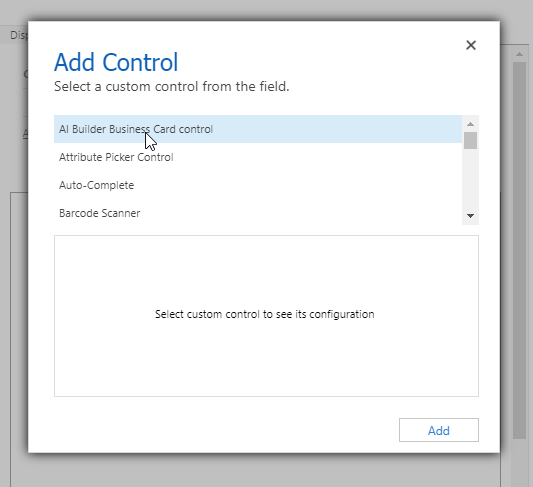
Step 6 – Click on the last tab – ‘Controls’ and then click on ‘Add Control’.

Step 7 – After clicking on Add Control select ‘AI Builder Business Card Control’ and then click on ‘Add button’.
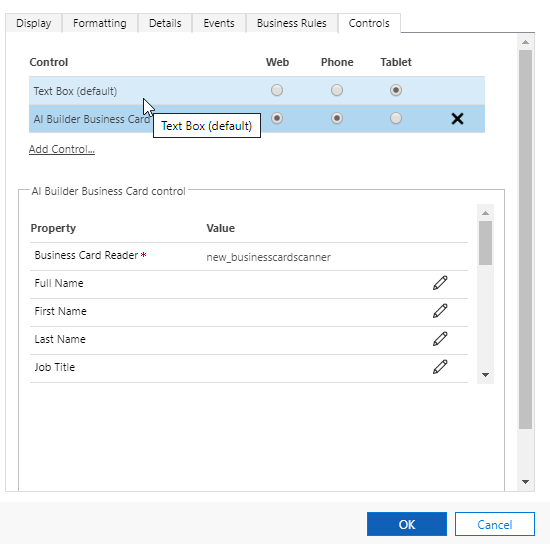
Step 8 – The radio button before AI Builder Business Card denotes where you can see the control. By default all the radio buttons are set to first option – Text Box.
If you want to use AI Builder Card on Web and mobile device then select those radio buttons before AI Builder Card as shown in below screenshot:
Step 9 – Populate Business Card data into Dynamics 365 CRM entity fields.
Below Add Control you will find options to configure the Business Card Reader.
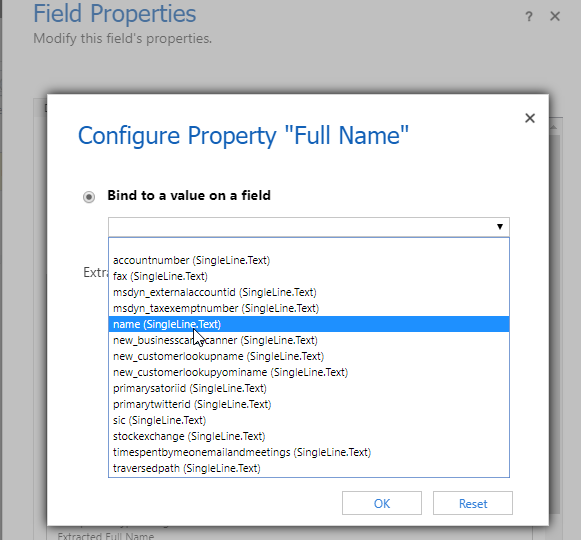
To populate name field select the Full Name edit option and then select ‘Name’ from the drop-down. The control will detect the name on business card and populate it on respective configured field.
Similarly configure all fields and then click on ‘Save’ and ‘Publish’. Your control is now ready to use.
Note – If there is bug for ‘Business Card Scanner’ then you can’t populate address fields (Address1 composite) like Address1 City, Address1 State, etc.
Now let’s see how to use this control.
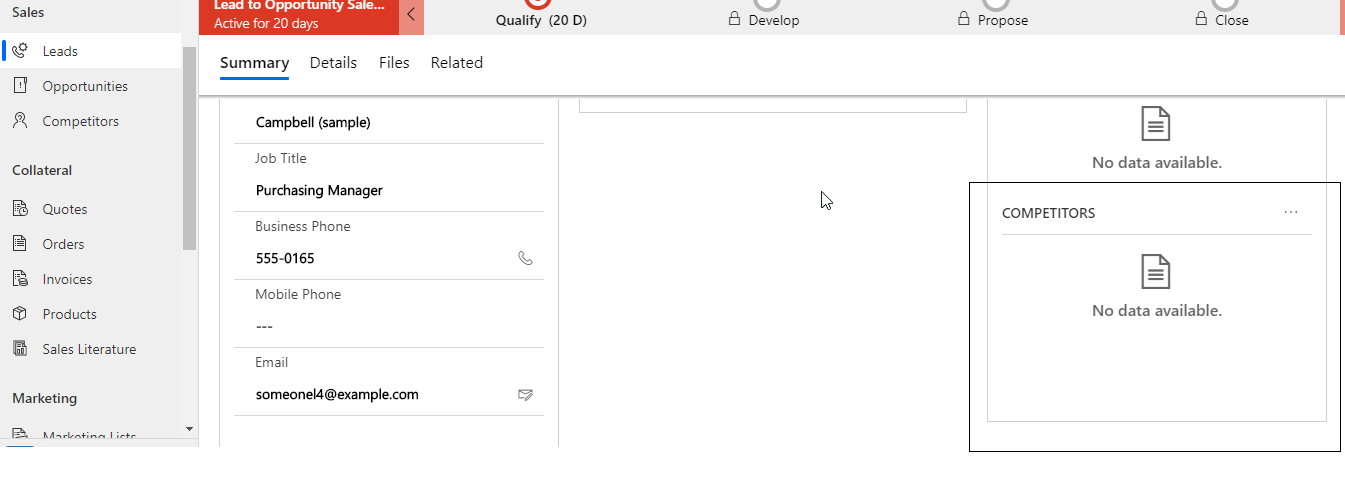
First navigate to Lead entity –> Open any record. Here, you will find a sub grid for competitors.
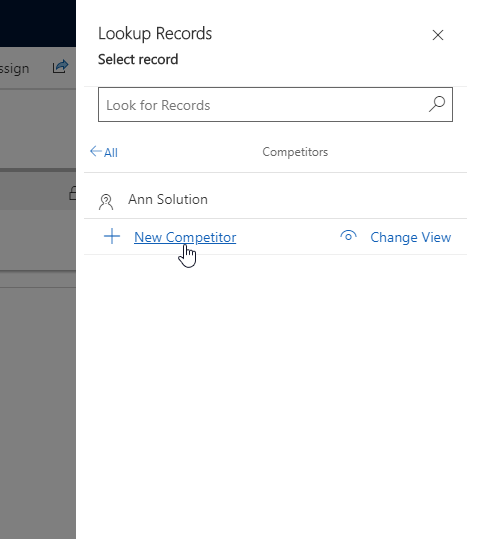
Now, click on ‘+New Competitor’ and scan the business card using ‘Business Card Scanner’.
Conclusion:
Thus, you can quickly create records in Dynamics 365 CRM by using the new Microsoft Wave 2 release feature – Business Card Scanner. This is not all, in near future we can expect more ML and AI based useful features in Dynamics 365 CRM.