Introduction
Recently, we had a business requirement where we wanted to change the status of Bookable Resource Booking record from ‘Entity List’ in Resco mobile app. So, in order to achieve this functionality we have used ‘Custom Command’ of ‘Entity List’.
Follow the steps given below to add ‘Custom Command’ on the ‘Entity List’.
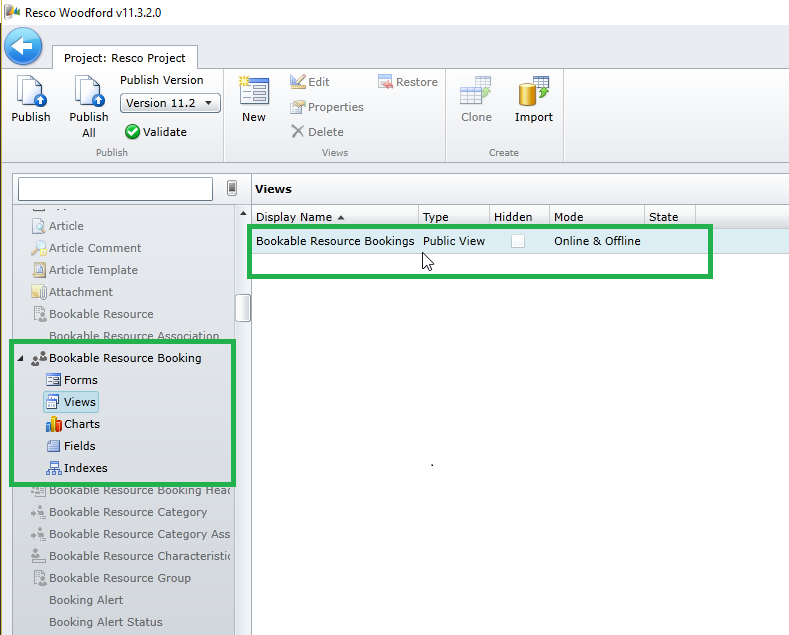
1. Navigate to the entity (e.g. Bookable Resource Booking) in Woodford Configuration Tool, open ‘Entity List’ (for which you want to add a ‘Custom Command’) and click on the ‘Buttons’ in order to open Commands window.
Please refer below screenshots:
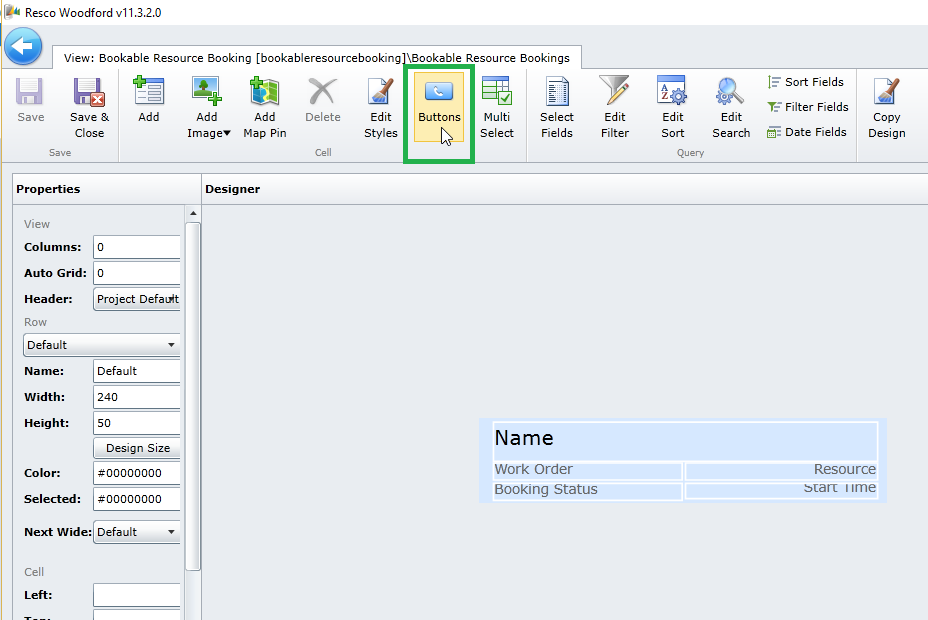
2. Then click on ‘New Command’ button in order to add new Command for that ‘Entity List’, and provide an appropriate name for the same (e.g. custom_ChangeStatus).
Please refer below screenshot:
3. Develop a HTML file with Java Script code for updating status of Bookable Resource Booking entity record.
Note: While developing, you will need to use ‘JSBridge reference file’ and use its MobileCRM.UI.EntityList.onCommand(“custom_ChangeStatus”, function (entityList){} funtion in order to get access to all the Resco Functions.
Code snippet:
 <!DOCTYPE html>

<html xmlns="http://www.w3.org/1999/xhtml">

<head>

<title></title>

<meta charset="utf-8" />

<meta http-equiv="X-UA-Compatible" content="IE=edge" />

<meta name="viewport" content="initial-scale=1, user-scalable=no" />


<link href="CSS/bootstrap.css" rel="stylesheet" />

<script src="JSBridge.js"></script>

<script type="text/javascript">

var brbRecord = null;

var brbID = null;

function fnLoad() {

try {


//function to capture command of Bookable Resource Booking entity list

MobileCRM.UI.EntityList.onCommand("custom_ChangeStatus", function (entityList) {


//Storing id of the record on which command is executed

brbID = entityList.context.entities[0].id != null ? entityList.context.entities[0].id : null;


//Check if Bookable Resource Booking contains data

if (brbID != null) {


//Load Bookable Resource Booking record using id

MobileCRM.DynamicEntity.loadById("bookableresourcebooking", brbID, function (Entity) {


//Set Booking as In-Progress

Entity.properties.bookingstatus = new MobileCRM.Reference("bookingstatus", "53F39908-D08A-4D9C-90E8-907FD7BEC07D", "In Progress");


//Set Actual Arrival Time

Entity.properties.msdyn_actualarrivaltime = new Date();


//Save the Bookable Resource Booking record

Entity.save(

function (err) {

if (!err) {

// store the Bookable Resource Booking id for further use

var brbID = this.id;

}

else

MobileCRM.bridge.alert(" An Error Has occurred \n" + err);

}, null);

})

}

});


} catch (e) {

MobileCRM.bridge.alert("An Error Has occurred " + e);

}

}


</script>


</head>

<body onload="fnLoad();">


</body>

</html>
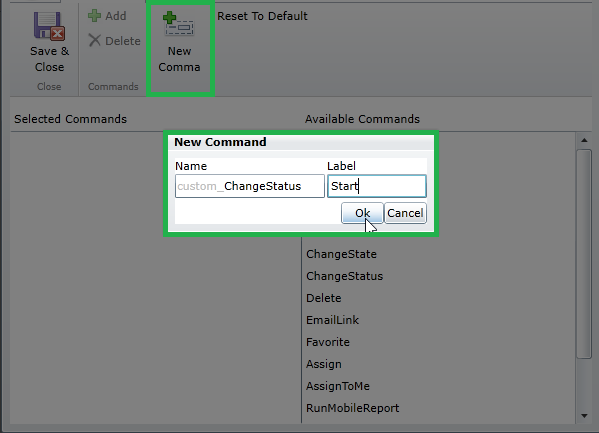
4. Then add this HTML File (with Java Script Code) in ‘Offline HTML’ section of Woodford.
Please refer below screenshot:
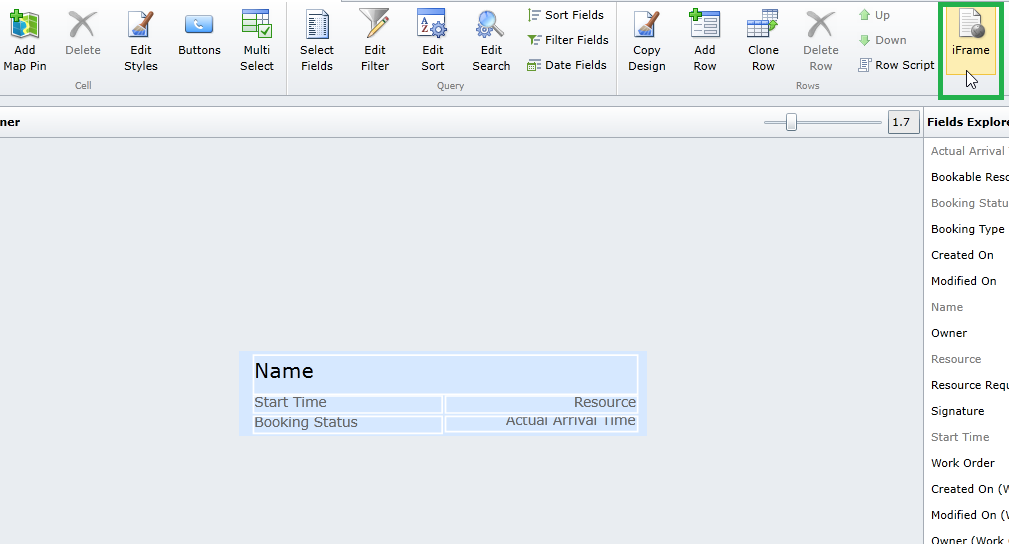
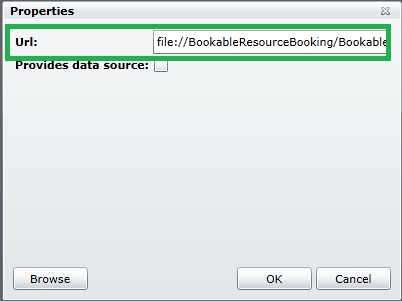
5. After uploading the HTML File, add an ‘IFrame’ on the ‘Entity List’ of Bookable Resource Booking entity.
Please refer below screenshots:
6. After adding the ‘IFrame’ on ‘Entity List’, save the ‘Entity List’ and publish the Resco Project on 11.2 or higher version.
Please refer below screenshot:
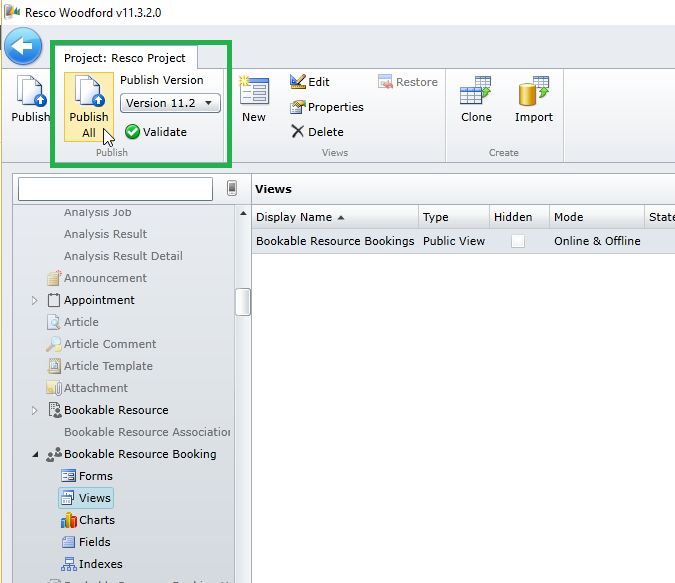
Note: The Custom Commands of the Entity Lists are only supported in Woodford Version 11.2 and higher.
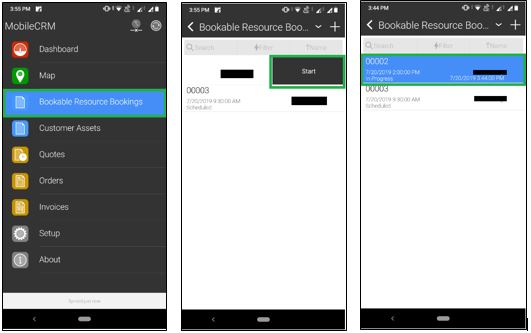
7. Then sync the Resco Mobile App with Dynamics 365 CRM.
8. Once the Resco Mobile App is synced, navigate to the Bookable Resource Booking entity, Swipe Left on any record and click the ‘Start’ button to update the record.
Please refer below screenshots:
Conclusion
As illustrated above, you can now add your own Custom Buttons on Entity Lists using Custom Commands.

The Same Way above you mentioned i applied but i am getting that button on my record.. i wan to show that button on headr can you help me out how can i acheive
Thanks & Regards
Yash
Hi,
In order to add “Custom Command” on Header of the Entity List or view we need to add the command in Multi Select option of the view.
Select Multi Select option of the view and add the new custom command as shown in the below screenshots,


Note: Here the prefix is custom_“Name”.
After adding this custom command in the Multi Select option, need to use the onCommand method of jsBridge with a valid command name in the JavaScript code. Then add the HTML page having JavaScript code in the Iframe of view.
Please refer below code for the onCommand method,
MobileCRM.UI.EntityList.onCommand(“custom_multiselect”,
function (entityList) {
MobileCRM.bridge.alert(“Selected Button clicked.”);
}
);
Note: The custom command won’t available if Iframe not added on the view having the onCommand method of jsBridge.
After save and publish the changes, open the Account view in the Resco app. Now we can see the “Selected” button (command) is visible when we select multiple records in the view as shown in the below screenshot,
Hope this helps,
Thanks!