In the earlier versions of Dynamics CRM we had the option of setting routing through the entity settings shown below:
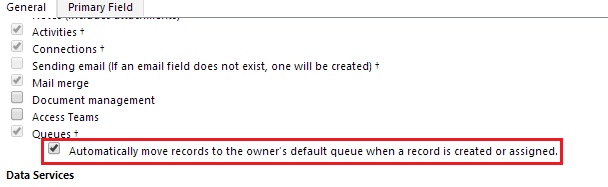
The entity could only be routed to default queue of the owner of the record when record is created or assigned. For any other conditional routing, custom development was the way to go.
Now with the Spring ’14 update for Dynamics CRM we can configures rules to automate routing of Cases. At the moment this feature is only available for Case Entity.
This blog will illustrate how to define Routing Rule Set and Rule item in order to route Cases automatically to queue based on the criteria specified in Rule item.
Create Routing Rule Set:
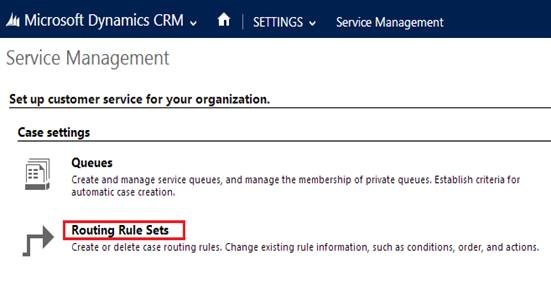
1. Go to Settings->Service Management->Routing Rule Sets
2. Create a new Routing Rule Set. One Routing Rule Set can have multiple rule items. Provide the Routing Rule Set Name and save the record to create rule items under this rule set.
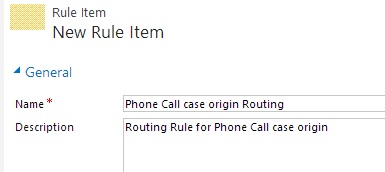
3. In the Rule item you can specify the Criteria and Queue/User/Team that the Case should be automatically assigned to.
4. Then add Rule criteria as below. You are presented with the familiar Advanced Find designer where you can set up easy to complicated criteria using AND/OR conditions.

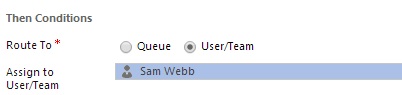
5. Next Select the Queue to route to. You can also select a user/team if you would like the case assigned to a User/Team.

6. You can create multiple rule items under one rule set. If you have different queues that you maintain and classify cases under separate queues, you could setup different criteria for routing the cases differently.
7. Since we can have multiple rule items you can order the sequence in which the rule items are to be processed. The rule item that is successfully validated will be applied to the case and the rest down the order will be ignored.

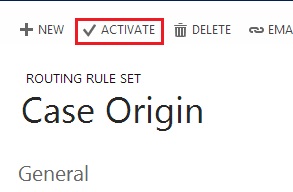
8. You need to Activate the Routing Rule Set by clicking on Activate button so that the rules are processed.
In the above example, when Case is created from phone call i.e. origin is Phone, then as per the criteria defined in Rule Item this case will route to PC Queue.
When Case is not created from phone call then this case will route to PO Queue.
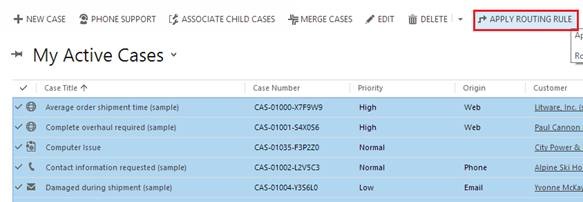
You can also manually apply Routing Rule on the Case by selecting one or more cases from the Case homepage.
Select list of cases that we want to add to queue and then click on Apply Routing Rule button.
Note:
• If you select User/Team for Route To option as below in Rule Item, when Route Rule criteria match then case record will be assign to selected user.
• Though you can create multiple Routing Rule Sets, you can only activate one Rule Set at a time.
• If we create cases by importing bulk records, we can control whether to apply routing rules on cases. Add “Route Case” column in spreadsheet and add value as “No” for record that we don’t to apply routing rule and to apply routing rule on case add value as “Yes”.
Security Role Management:
The Service Management area in Spring update introduces various new entities. The access and privileges to these entities can be controlled by the new Service Management tab added to the Security Role.
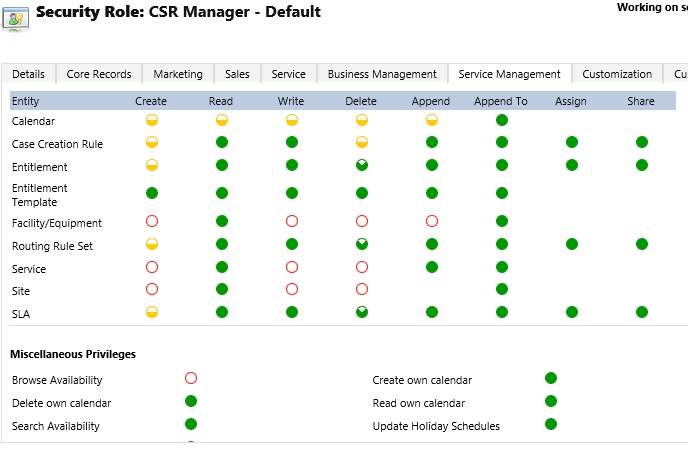
Users should have access to Routing Rule Set to be able to create new Routing Rule Set. By default all security roles have been provided organization level read access to Routing Rule Set and can apply routing activated rule on the Cases.