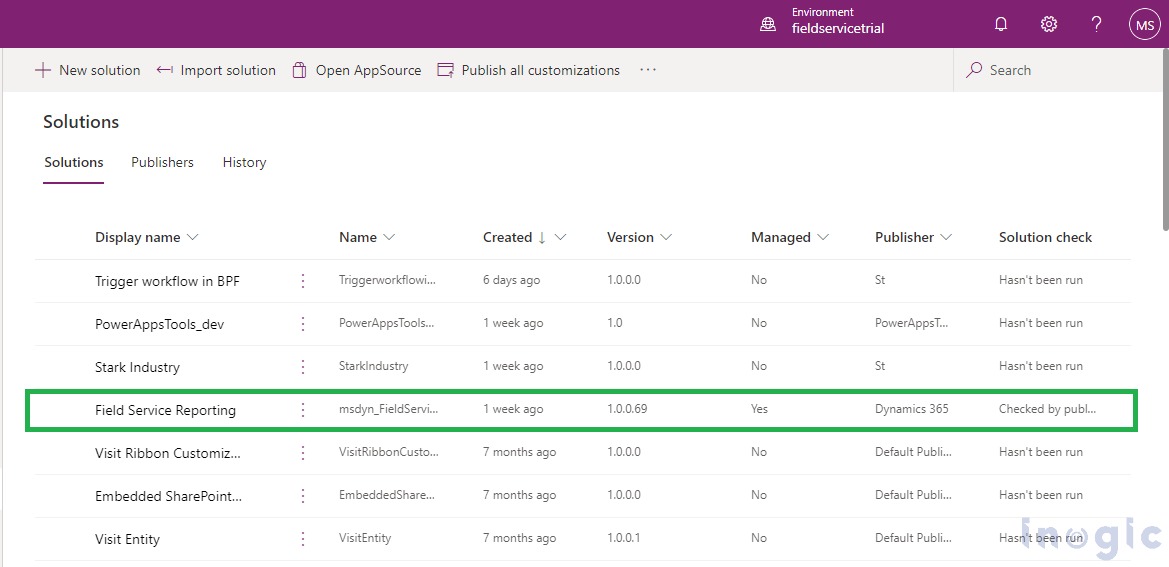
Recently we had a requirement from one of our clients for incorporating the customization in the OOB Field service technician service report in the field service mobile and web app. Microsoft Field Service Reporting is a managed solution that can be installed in the environment.
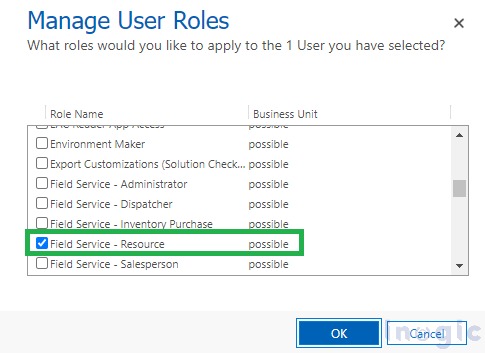
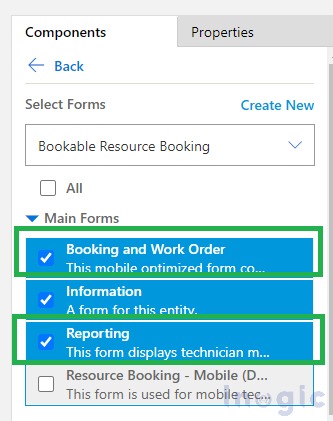
Once you install the solution, the Report will appear on the Booking entity but if you are unable to see the report then you need to make sure the following two configurations are in place:
1. Make sure that the logged-in user is having “Field Service – Resource” security role
2. In the field service mobile app, make sure that the below two forms are added to your app.
- Reporting
- Booking and Work Order
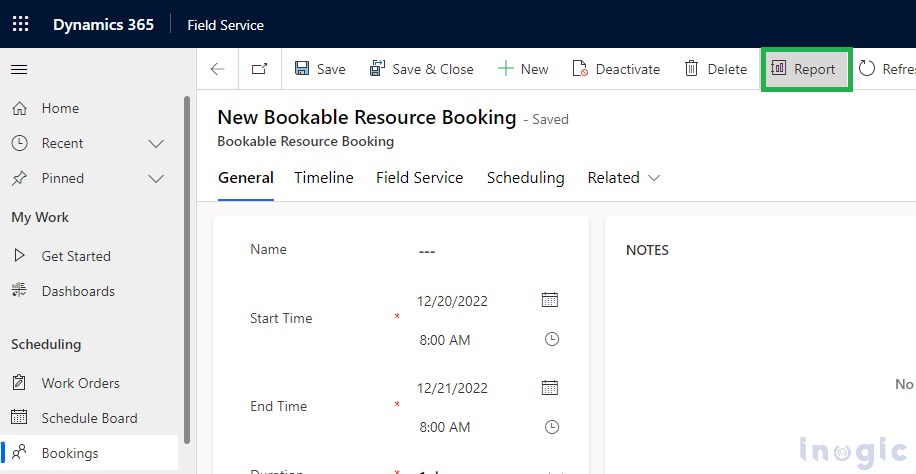
So, the OOB report will be viewed from the Bookable Resource Booking entity using the “Report” button.
Now, we want to modify the above report, so let’s see the steps to modify this OOB field service report using the custom PCF control:
This report is developed using PCF control so, we need to modify this PCF control as per our need and upload it with a new name with the new version.
Let us understand how to incorporate the below changes:
- Modify the Logo
- Change the Company Name & Address
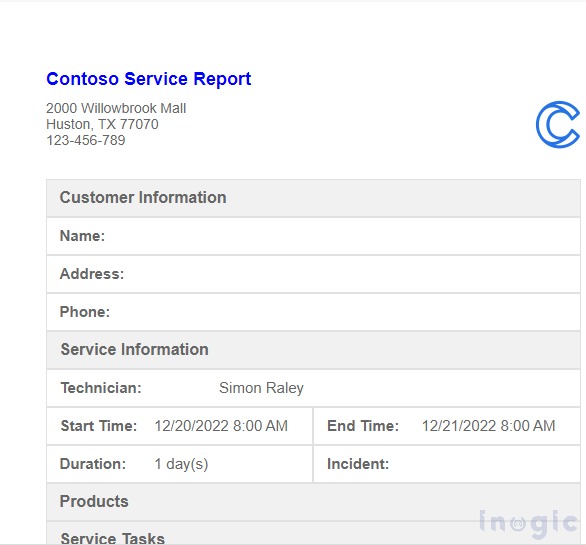
The below screenshot shows the OOB field service reporting header:
You need to first download the sample PCF code component solution used for the existing service report from here. Also, some prerequisites need to be installed in the machine to modify the report.
- Visual Studio Code (recommended for ease) or any IDE
- Node Js
- Power Platform Tools
Following are the steps to update the report.
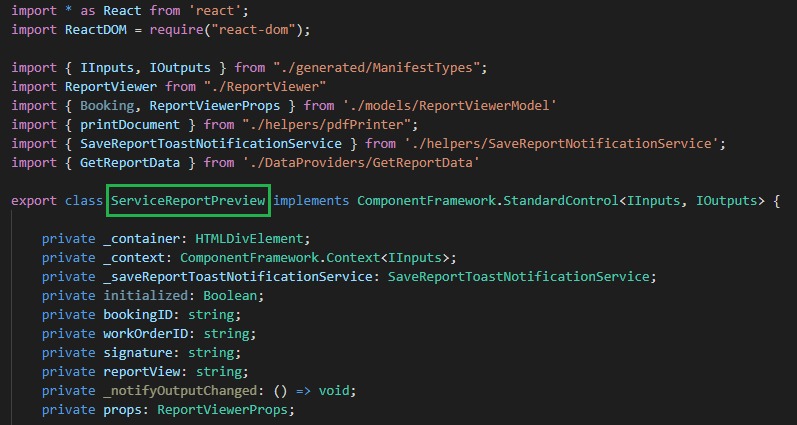
1. Open the sample code solution in the visual studio code and open Input.xml. We need to rename the control namespace, constructor & display-name-key as already a PCF control exists within the CRM with this same specific namespace and constructor. Just to avoid the duplicate name conflict issue later.

Here, of-type=” SingleLine.Text” since we need to bind this control to the single line text field of property name ‘bookingid’.
2. After #1, Update the class name in the ts file by using the same name as the constructor that we used above. For demonstration, we have used the name “ServiceReportPreview” here.
3. Open the visual studio code terminal and run the npm install
This will simply install the node module and create a subfolder that consists of all required packages for the project.
![]()
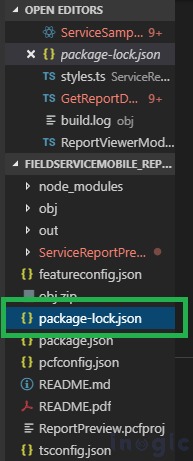
Note: If you are not able to install node modules with the above commands then delete package-lock.json and try to install npm again.
4. Once the node module is installed in #3 (it takes a few minutes), we can now modify the report.
The dummy logo has been placed under the image.ts file. This file consists of a logo that has been converted to base64. To place your logo, convert the logo to base64 with any image using a base64 converter. Once the image is converted to base64, place the code in the SAMPLE_IMAGE variable.

NOTE: for displaying any image in the report using PCF you need to first convert the image into Base64 format as explained above
5. Navigate to the ReportPreview Folder and open tsx file that contains the report code which defines the look and feel of the report.
In the default function, you will be able to view the dummy company and address that was initially seen while displaying the OOB field service report.
You can rename those values as per your requirements. As demonstrated below, I have changed the company name and address which were used in the header of a report previously:
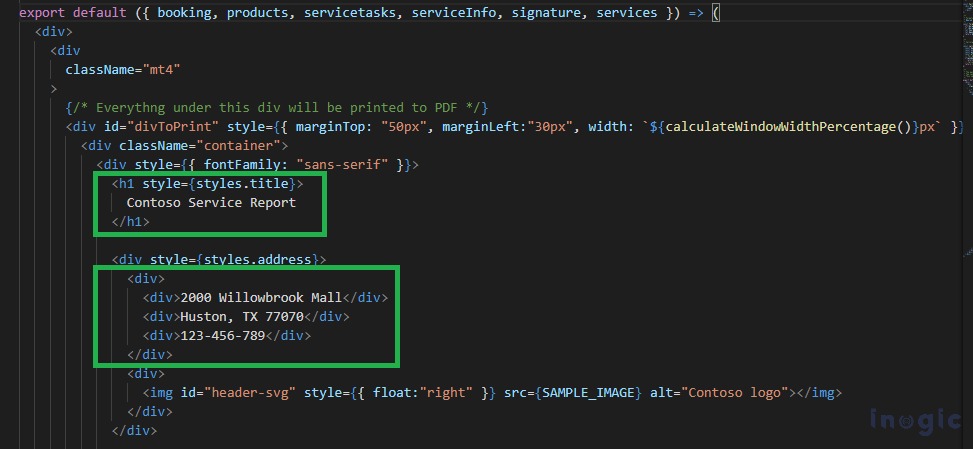
OOB sample company and address details used in header previously:
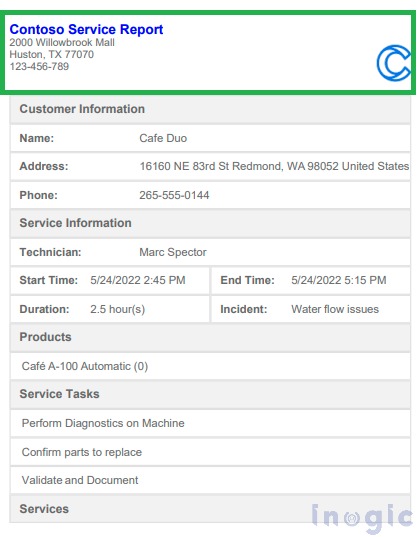
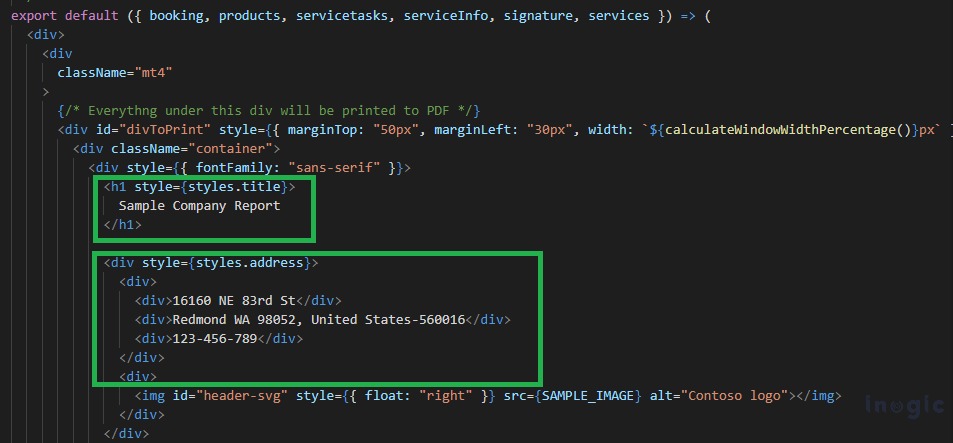
Modified company and address details in header afterward:
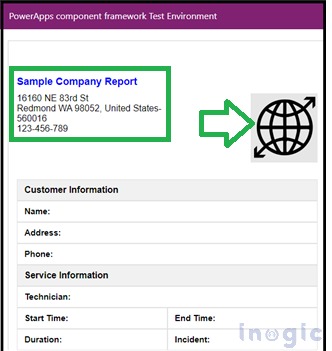
Once done, you can verify the changes in the local host first before deploying the final changes in CRM. For doing so you can open the terminal and enter npm start to run the report in the local host.
As shown below our test went well in the local host:
6. To connect to your Dataverse CRM, enter pac auth create –URL https://xyz.crm.dynamics.com. In the URL enter your organization link.
![]()
7. List the details of the environment by entering the pac auth list and selecting the environment using the index pac auth select –index <index of the active profile>
8. Push the component solution to the environment by entering the publisher name pac PCF push –publisher-prefix <your publisher prefix>

Note: If the import fails then make sure that the .NET Framework developer pack has been installed on the machine.
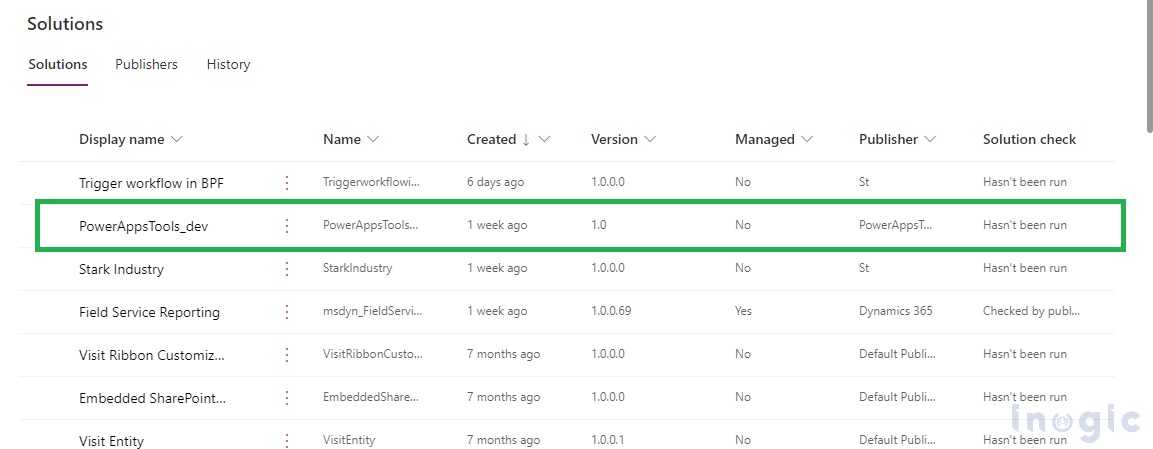
9. Once the solution has been imported into the CRM environment. “PowerApps_dev” is the name of the solution that is imported into the CRM.
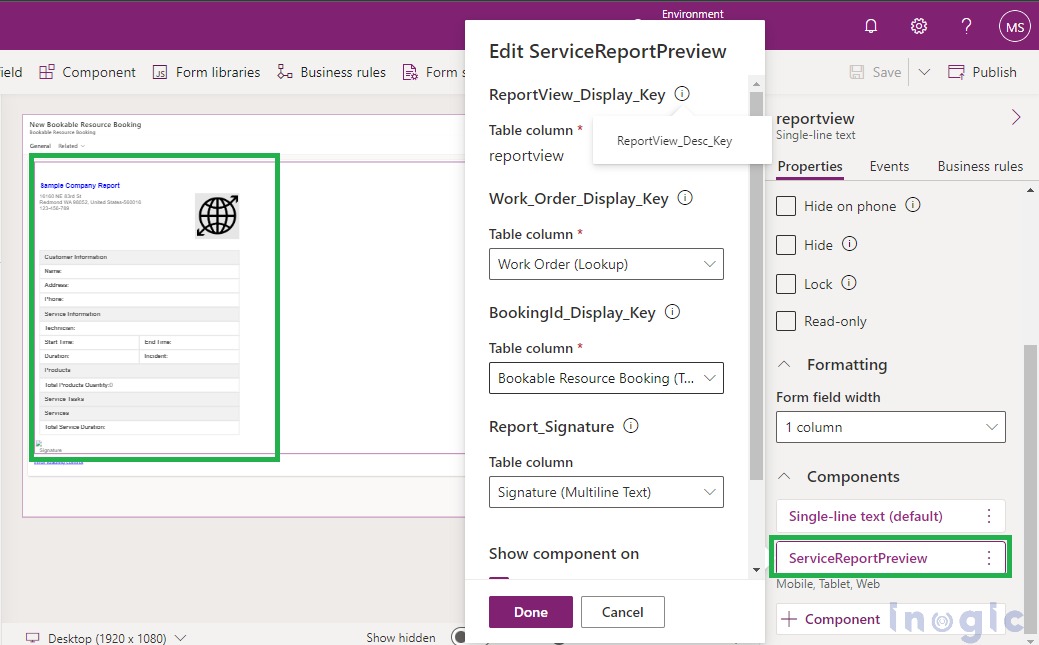
10. After #9, the next step is to select the custom PCF control of the reportview
NOTE: By default, OOB control is selected for the reportview field. You need to explicitly select your custom control, in this demonstration I have selected the “ServiceReportPreview” custom control, save the form and publish it.
While adding the control make sure you are selecting the appropriate input parameters as below:
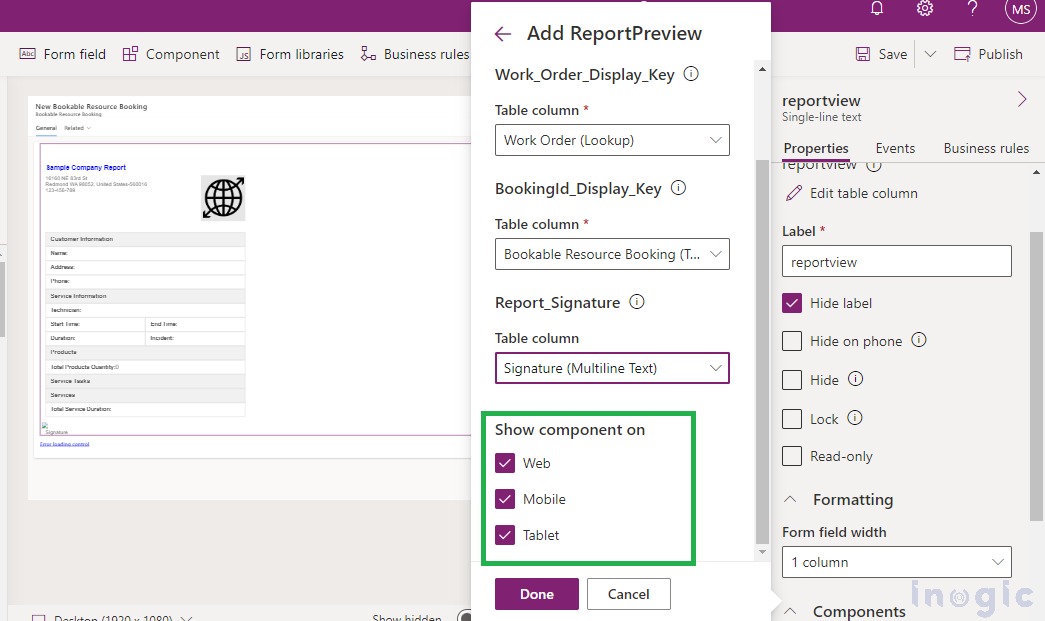
And also select the platform like Web, Mobile, and Tablet, etc. from where you would like to access this report as shown below:
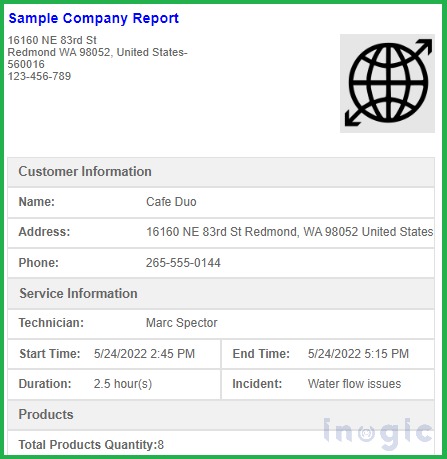
In our scenario, if we access the modified sample custom report from Web then it will look like this-
Conclusion
We can customize the existing field service technician service report as per our requirement by simply modifying the existing PCF code provided by Microsoft.
Need any help with Microsoft Dynamics 365 Field Service module / Microsoft CRM / Power Platform development?
Want to manage your field services portal more effectively? Contact us at crm@inogic.com and our Inogic- Professional Services Division will help you modify, optimize, and automate all our requirements within Microsoft Dynamics 365 Field Service!
Happy Servicing!