Resco Woodford has introduced a new feature in the latest release i.e., the Bulk Update option on view. This feature is available in the latest version on Woodford i.e., 15.1.
Till now there was no functionality to update multiple records in a single click same as a web client. Now this “Bulk Update” feature shall allow us to select multiple records on view and to perform bulk update operations from the mobile app as well.
Let’s take a look at the configurations to edit multiple records from the view.
Note: To use this feature make sure the Woodford and Resco Mobile CRM App both are upgraded to version 15.1 or later. Additionally “Field Service Mobile – Xamarin” is no longer available, so using the Resco Mobile CRM App, will require an additional license from Resco.
The first step is, we need to create the Bulk Update Form for the entity, which will be available when we perform a bulk update operation.
So let’s create the form. Here we will create the Bulk Update form for the Contact entity.
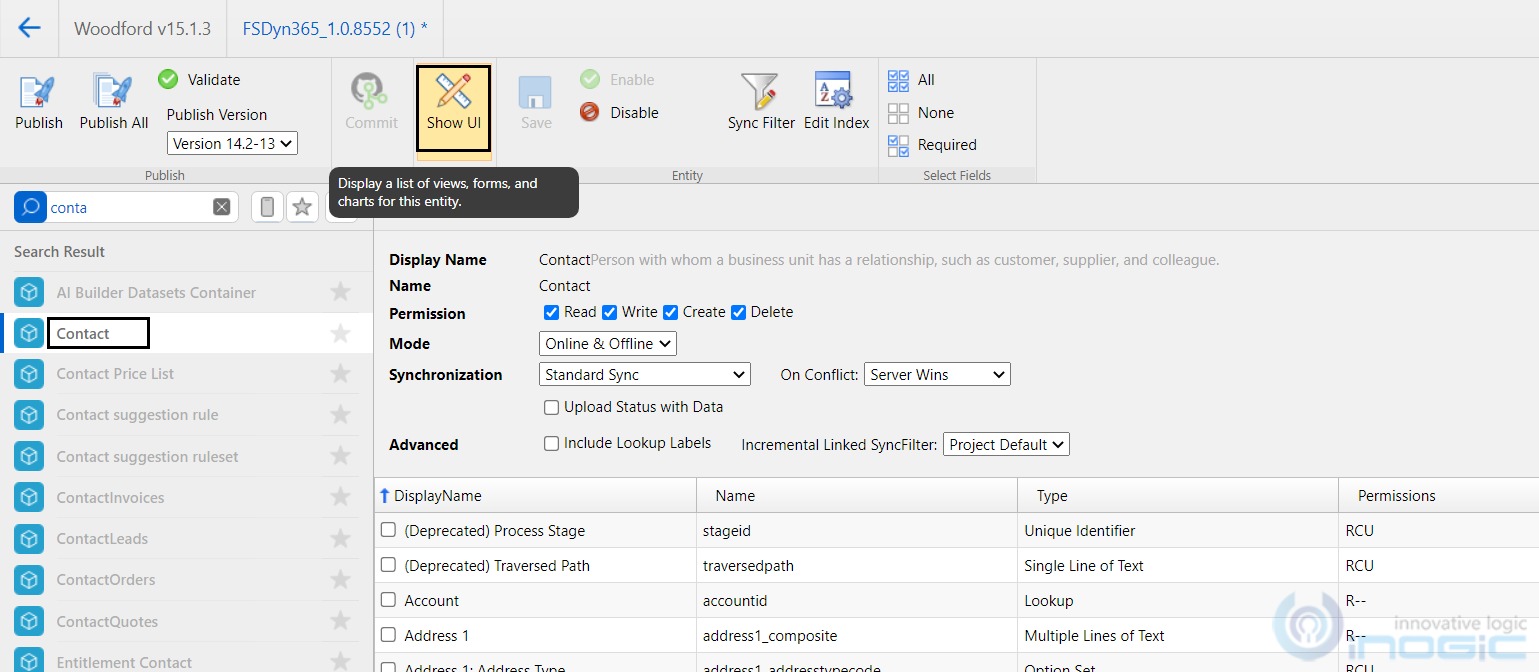
- Select the Contact Entity => Show UI => create the new form.

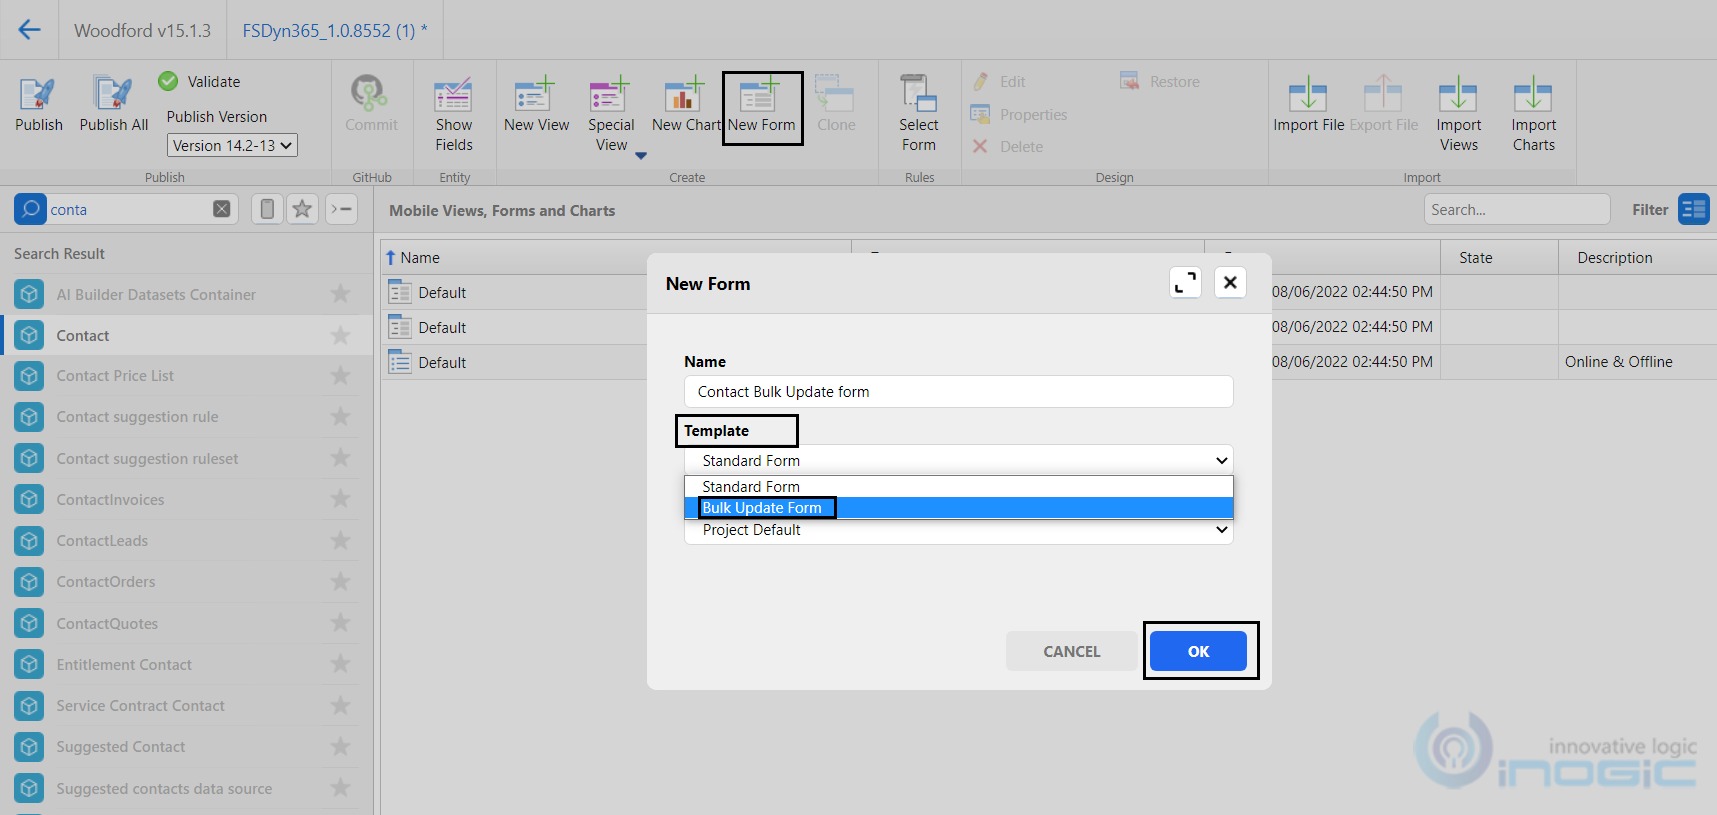
- While creating a new form, select the “Template” as “Bulk Update form” and click on the OK button.

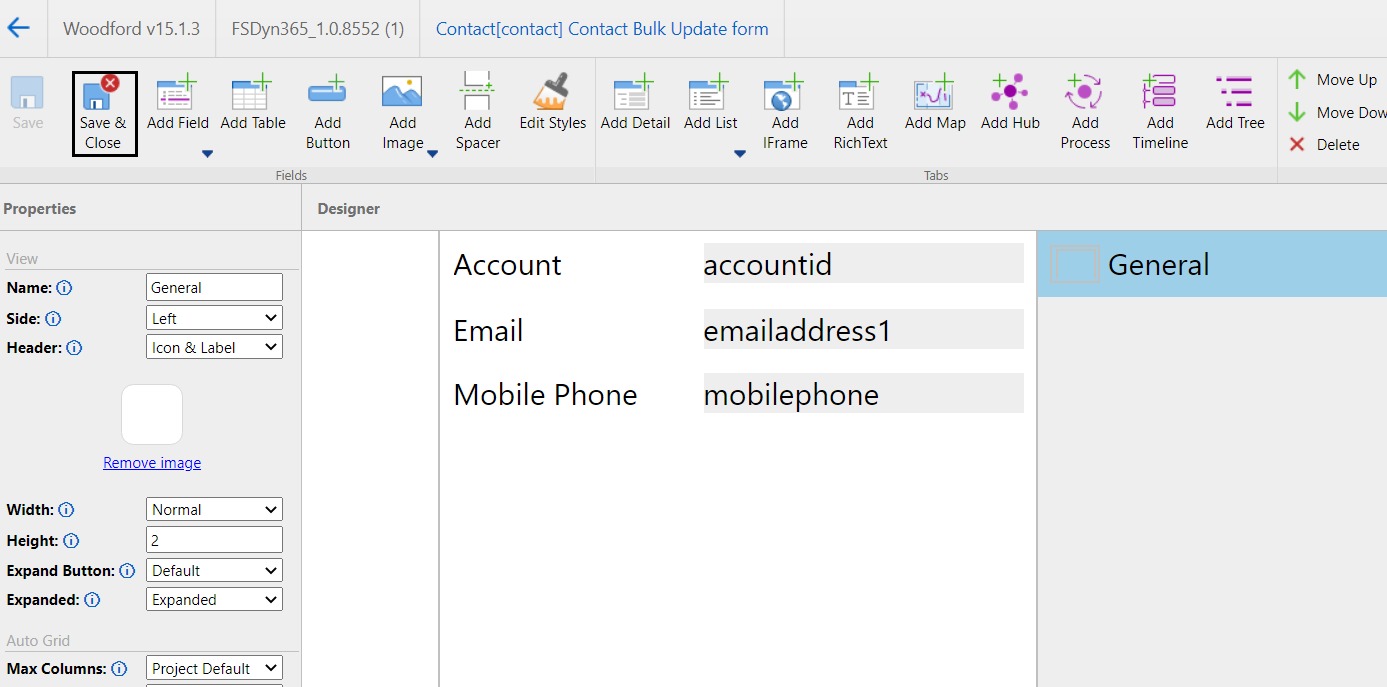
- As soon as we clicked on the OK button, it will open the form to add fields of the Contact entity. Now we can add the fields that we want to enable for the bulk update option.

- Once done with adding the fields on the form, Save and Close the form.
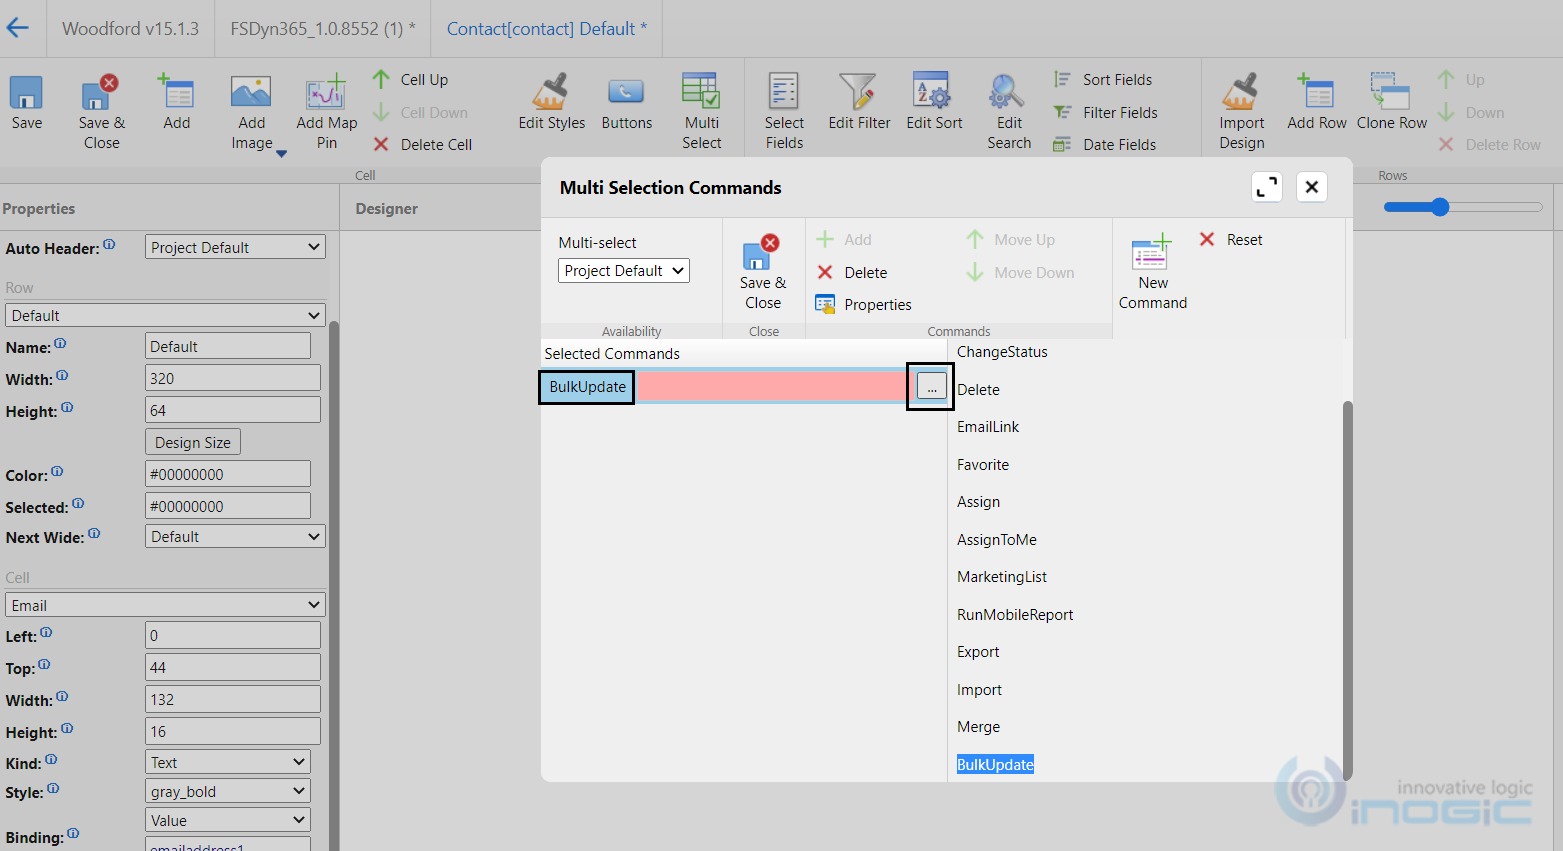
- Now we need to add the “Bulk update” command to the view. So, to add this command, select the view on which we want to show this “Bulk Update” command.
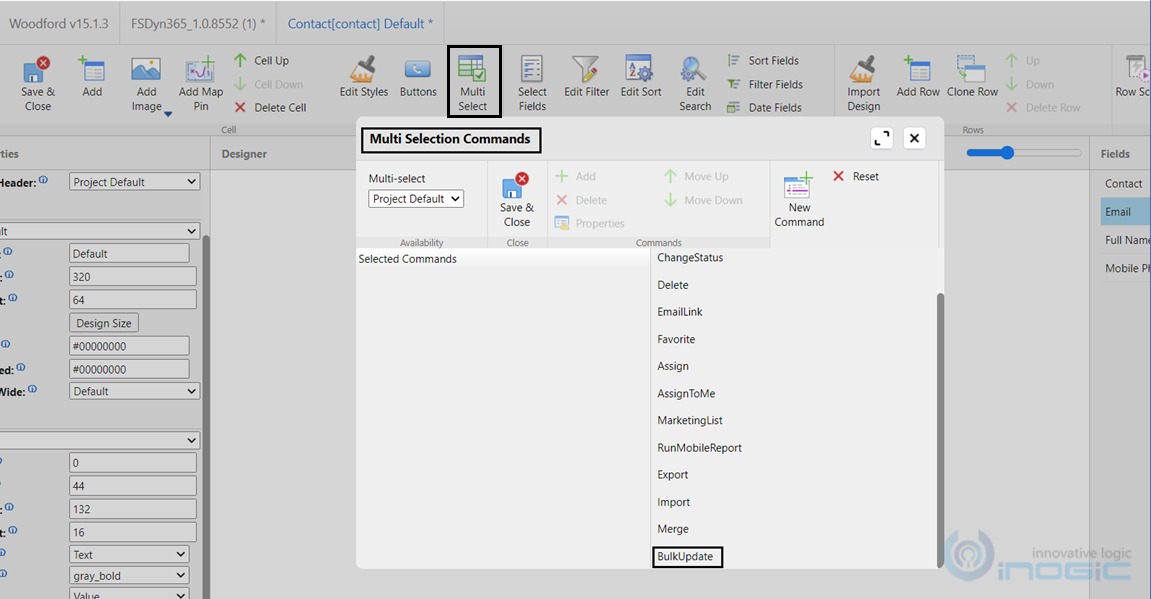
- Open the selected view and click on the “Multi Select” option.
- In the Available Commands of the Multi Selection commands dialog, we can find the “BulkUpdate” command.

- Move the “BulkUpdate” command to the Selected Command.
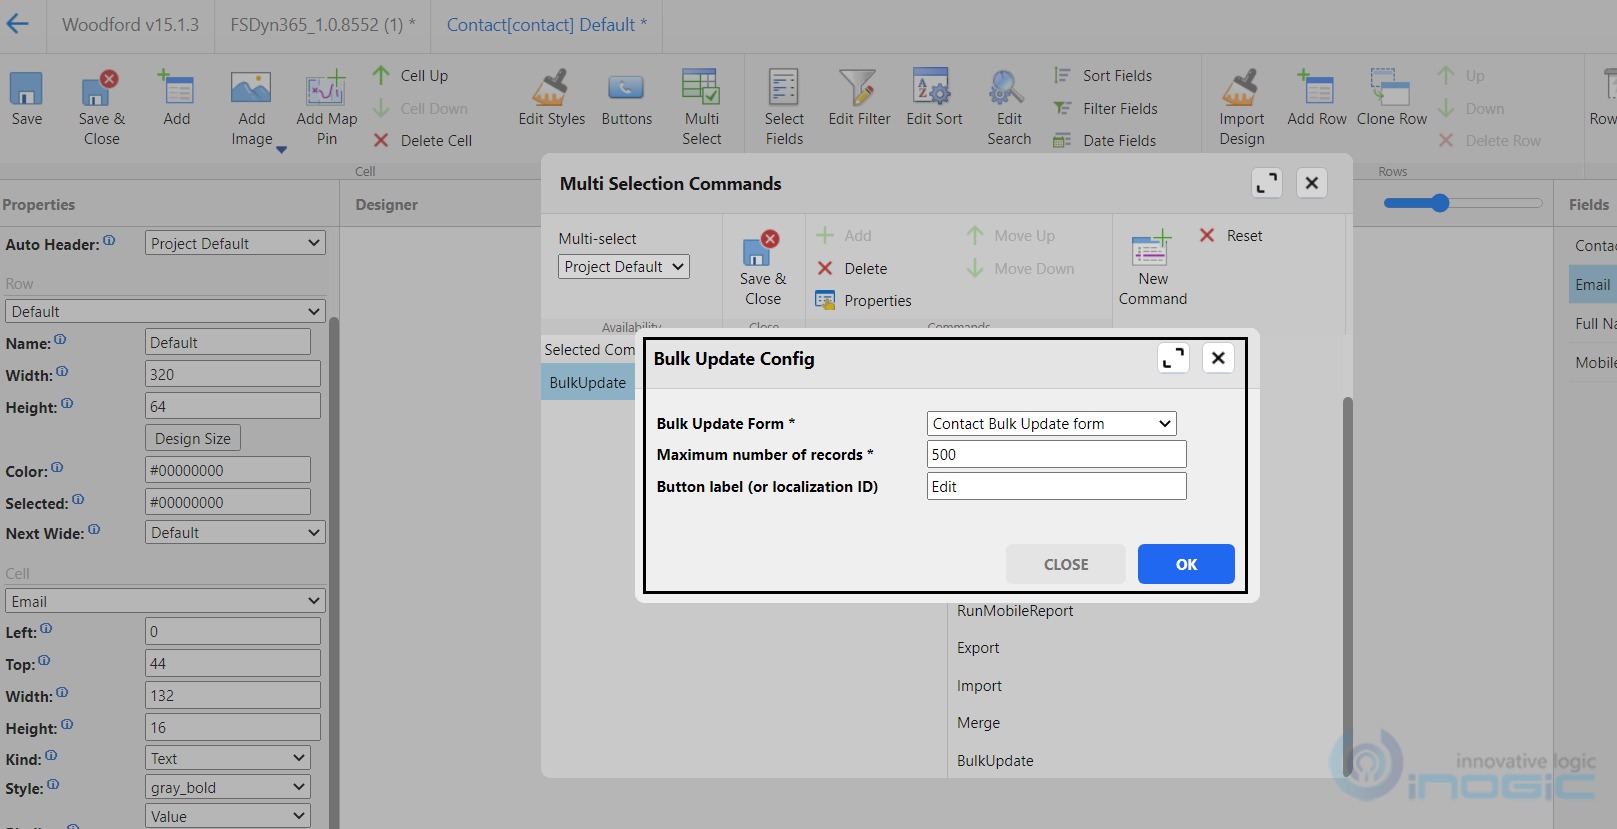
- Once added the “Bulk Update” command on view, add the required configurations as shown in the below screenshots,


- Save all the changes and publish the mobile project to reflect the changes on the mobile app.
Now, let’s check the working of this Bulk Update command on the Mobile app.
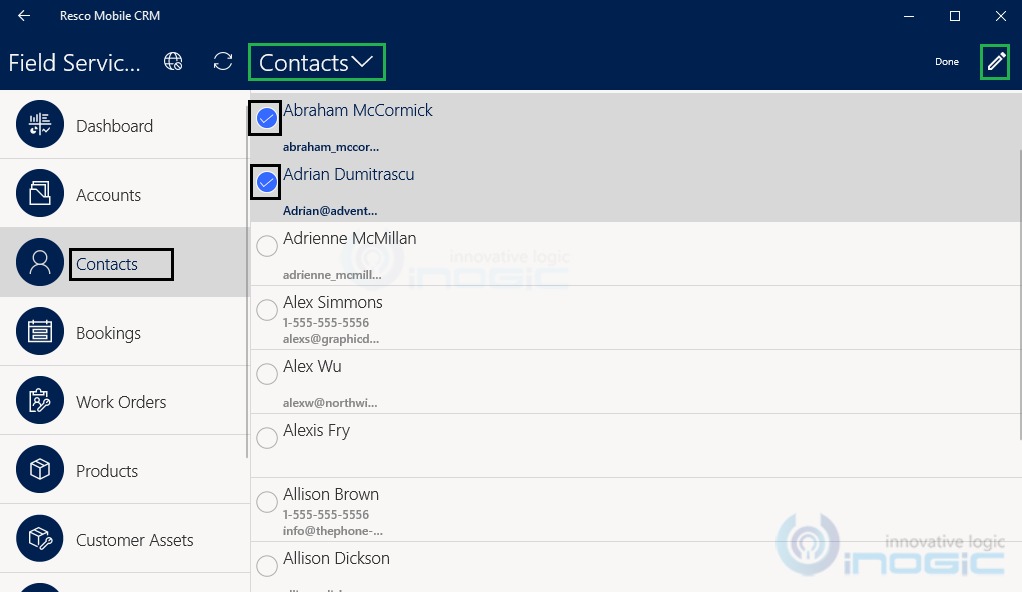
- Log in to the mobile app
- Select the entity and the view in which we have added this bulk update command. In this example, we added the button to the “Contact” entity’s default view, so will be navigating to the same.
- Select multiple records, once we have selected the records the “Edit” command will be visible at the top right corner of the view,

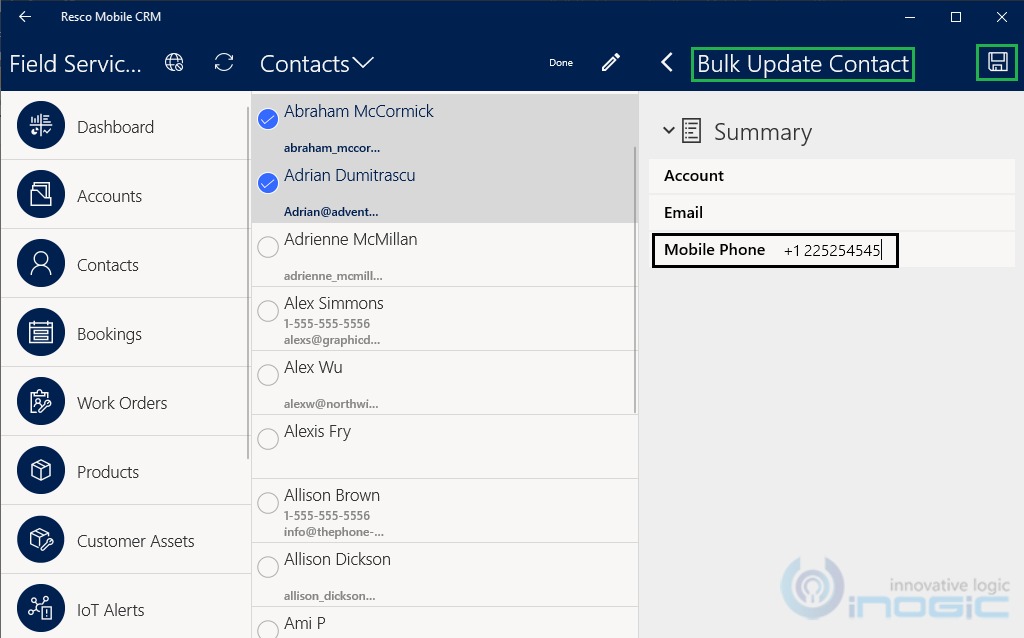
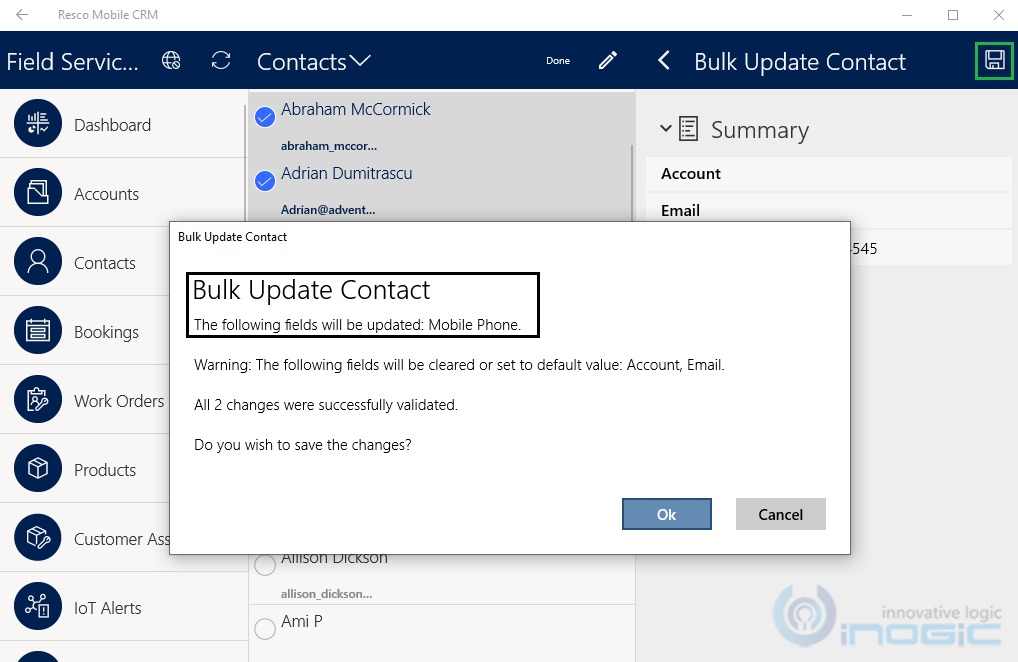
- Once we have clicked on the “Edit” button, the bulk update form will open to fill in related data. Update the field(s) and save.

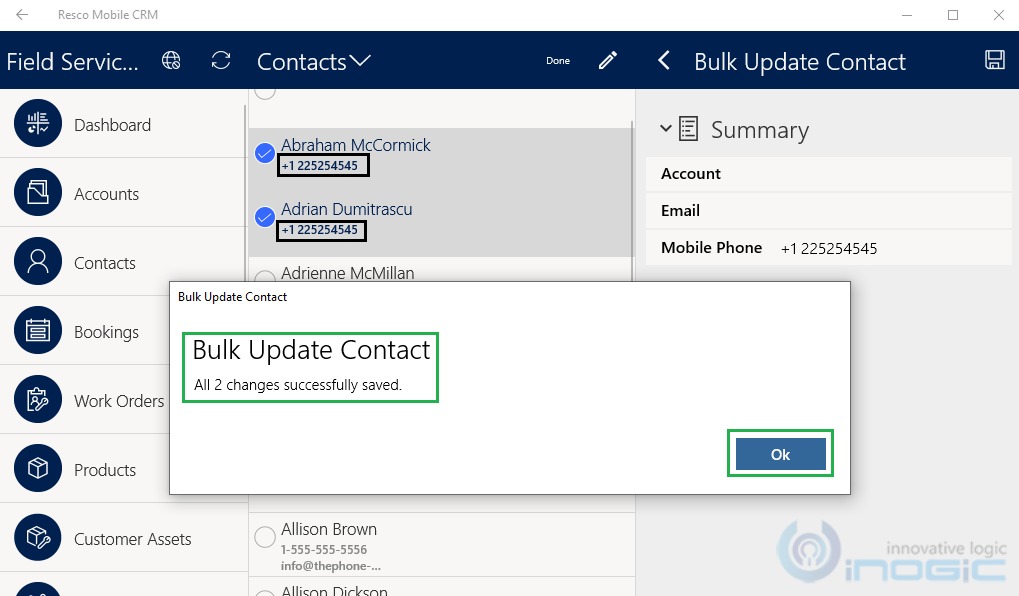
Once clicked on the Save button, we will receive a dialog box as below stating that the Bulk Update operation has succeeded.
Conclusion:
By using the “Bulk Update” command we can easily edit multiple records in Resco Mobile App same as Web.