Introduction
In this blog, we will see how to show/hide header and footer parts using Client API.
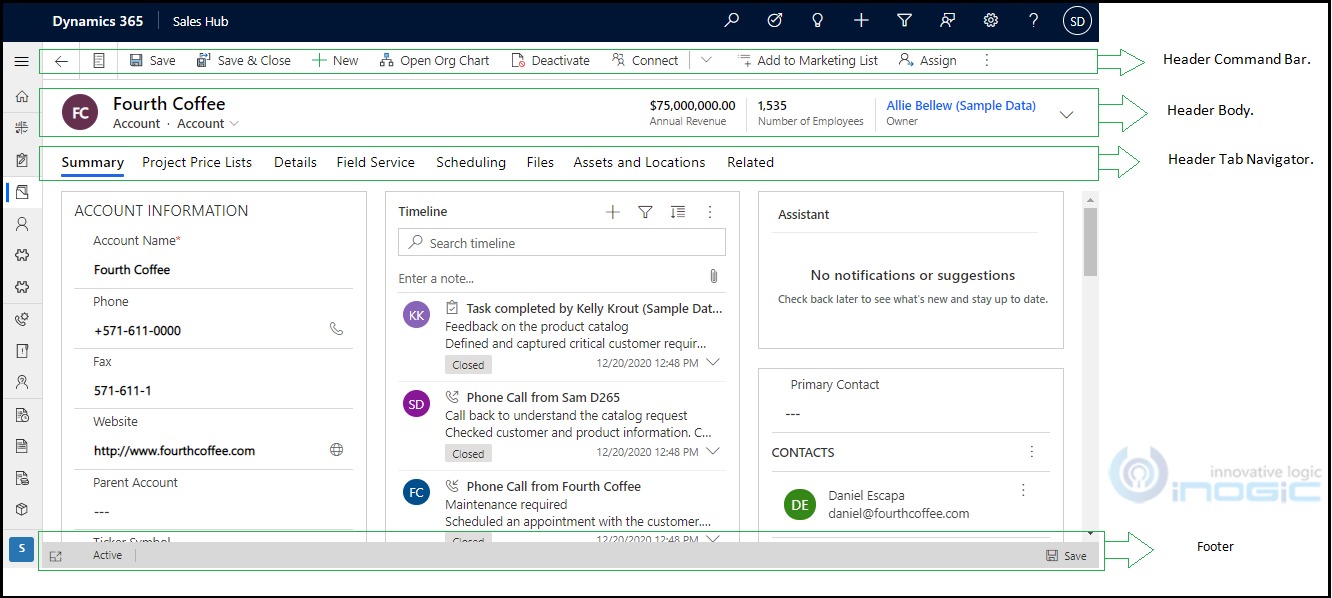
As we know, form is divided in 3 parts i.e. Header, Body and Footer.
Let’s discuss how to show/hide header and footer section using script.
Header Section:
The header is divided into 3 elements
1. Header Command Bar.
2. Header Body.
3. Header Tab Navigator.
To show / hide one of the above, we can use the below 3 methods:
setCommandBarVisible
syntax: formContext.ui.headerSection.setCommandBarVisible(bool);
Here, bool is the parameter, specify true to show the command bar; false to hide the command bar.
Let’s show/hide Command Bar using below client API:
Show: formContext.ui.headerSection.setCommandBarVisible(true);
Hide: formContext.ui.headerSection.setCommandBarVisible(false);
Example: Use below typescript code to get and set Form Command Bar on load of form.
But, we need Javascript code to upload it into CRM. You need to compile this code into Javascript, so to compile this code, you can open Visual Studio Code and run command “tsc filename.ts”. You can see how to compile typescript file at this link. If you face any issue relate to Xrm while compiling this code, run “npm install –save-dev @types/xrm” command before compiling.
<Code>
namespace CRM {
//Namespace
export namespace Entity {
//Class
export class Lib {
//Function
public onLoad(executionContext: Xrm.Events.EventContext) {
//declaring local variable
let functionName = “onLoad”;
let formContext: Xrm.FormContext = null;
try {
//Get Form Context
formContext = executionContext.getFormContext();
//returns true or false
let commandBar = formContext.ui.headerSection.getCommandBarVisible();
//To hide Command Bar
if (commandBar == true) {
formContext.ui.headerSection.setCommandBarVisible(false);
} else {
//To show Command Bar
formContext.ui.headerSection.setCommandBarVisible(false);
}
}
catch (ex) {
Xrm.Navigation.openAlertDialog({ confirmButtonLabel: “Ok”, text: ex.message, title: functionName });
}
}
}
}
}
//initializing object
let _crmLib = new CRM.Entity.Lib();
</Code>
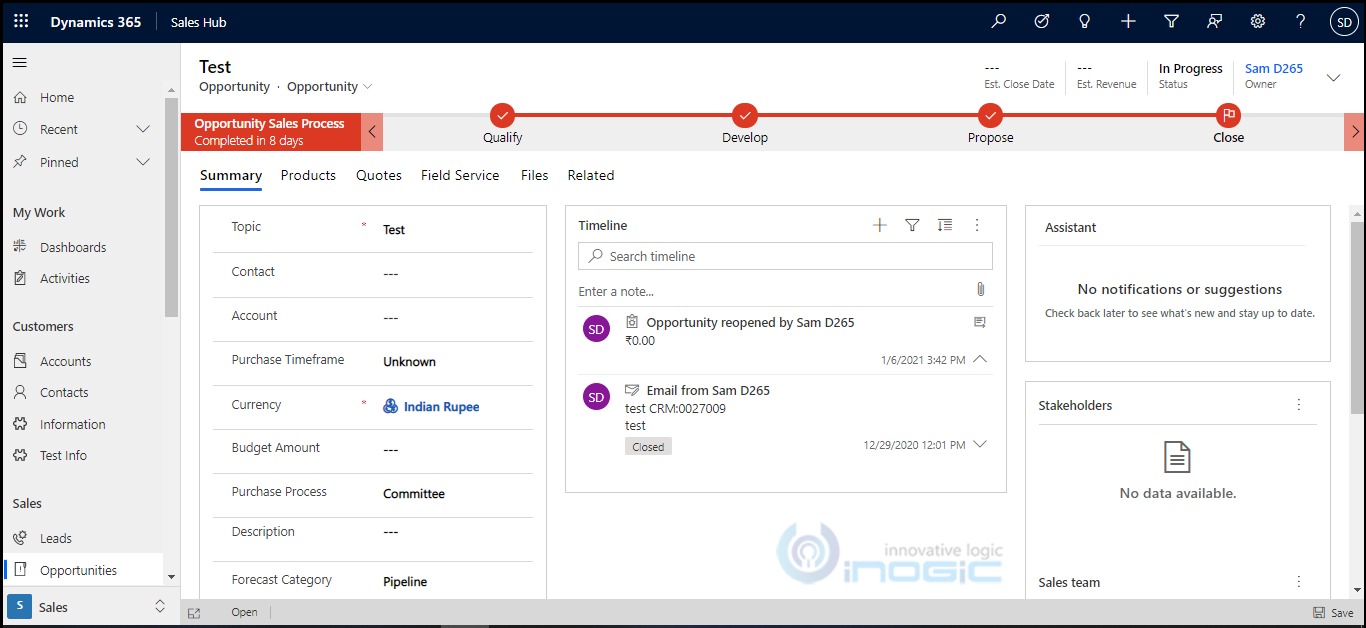
Output: You can see the below screenshot, the ribbon buttons are hidden.
setBodyVisible
syntax: formContext.ui.headerSection.setBodyVisible(bool);
Here, bool is the parameter, specify true to show the body; false to hide the body.
Let’s show/hide Header body using the below client API:
Show: formContext.ui.headerSection.setBodyVisible(true);
Hide: formContext.ui.headerSection.setBodyVisible(false);
Example: Use below typescript code to get and set Form Header Body on load of form. But, we need Javascript code to upload it into CRM. You need to compile this code into Javascript, so to compile this code you can open Visual Studio Code and run command “tsc filename.ts”. You can see how to compile typescript file at this link. If you face any issue relate to Xrm while compiling this code, run “npm install –save-dev @types/xrm” command before compiling.
<Code>
namespace CRM {
//Namespace
export namespace Entity {
//Class
export class Lib {
//Function
public onLoad(executionContext: Xrm.Events.EventContext) {
//declaring local variable
let functionName = “onLoad”;
let formContext: Xrm.FormContext = null;
try {
//Get Form Context
formContext = executionContext.getFormContext();
//returns true or false
let headerBody = formContext.ui.headerSection.getBodyVisible();
//To hide header body
if (headerBody == true) {
formContext.ui.headerSection.setBodyVisible(false);
}else{
//To show header body
formContext.ui.headerSection.setBodyVisible(true);
}
}
catch (ex) {
Xrm.Navigation.openAlertDialog({ confirmButtonLabel: “Ok”, text: ex.message, title: functionName });
}
}
}
}
}
//initializing object
let _crmLib = new CRM.Entity.Lib();
</Code>
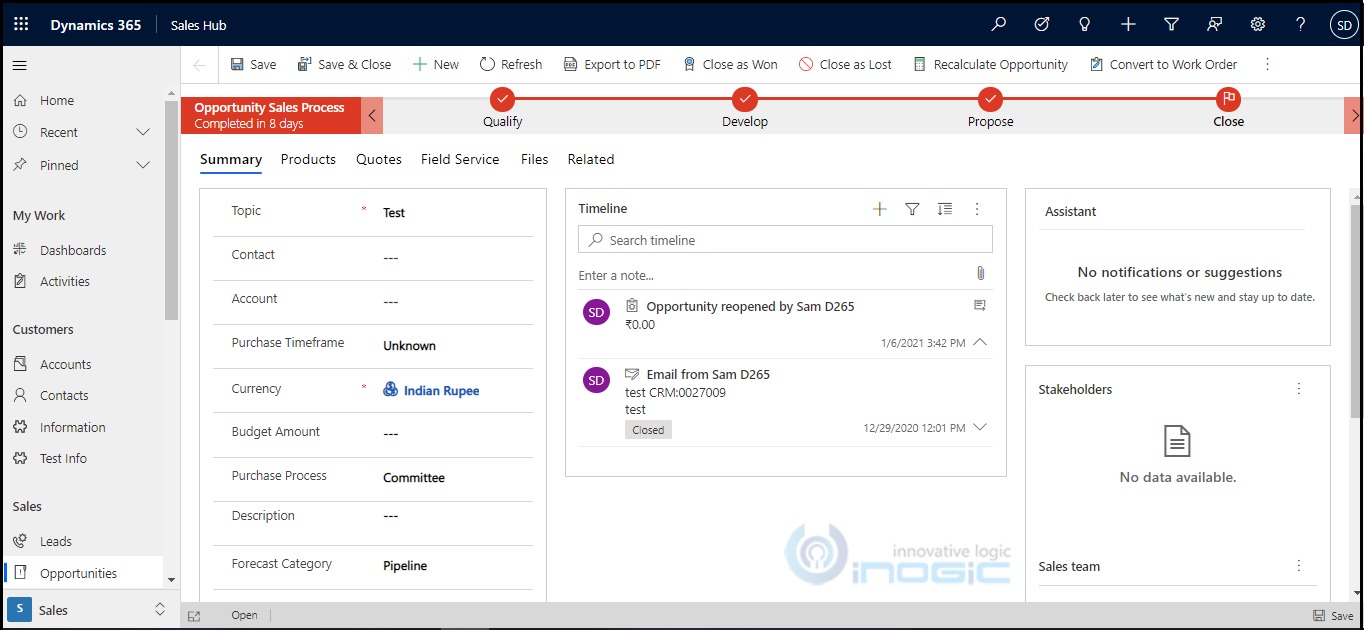
Output:
You can see Head body is hidden in the below screenshot.
setTabNavigatorVisible
syntax: formContext.ui.headerSection.setTabNavigatorVisible(bool);
Here, bool is parameter, specify true to show the tab navigator; false to hide the tab navigator.
Let’s show/hide Tab Navigator using below client API:
Show: formContext.ui.headerSection.setTabNavigatorVisible(true);
Hide: formContext.ui.headerSection.setTabNavigatorVisible(false);
Example: Use below typescript code to get and set Form Tab Navigator on load of form.
But, we need Javascript code to upload it into CRM. You need to compile this code into Javascript, so to compile this code you can open Visual Studio Code and run command “tsc filename.ts”. You can see how to compile typescript file at this link. If you face any issue relate to Xrm while compiling this code, run “npm install –save-dev @types/xrm” command before compiling.
<Code>
namespace CRM {
//Namespace
export namespace Entity {
//Class
export class Lib {
//Function
public onLoad(executionContext: Xrm.Events.EventContext) {
//declaring local variable
let functionName = “onLoad”;
let formContext: Xrm.FormContext = null;
try {
//Get Form Context
formContext = executionContext.getFormContext();
//returns true or false
let tabNavigator = formContext.ui.headerSection.getTabNavigatorVisible();
//To hide Tab Navigator
if (tabNavigator == true) {
formContext.ui.headerSection.setTabNavigatorVisible(false);
} else {
//To show Tab Navigator
formContext.ui.headerSection.setTabNavigatorVisible(true);
}
}
catch (ex) {
Xrm.Navigation.openAlertDialog({ confirmButtonLabel: “Ok”, text: ex.message, title: functionName });
}
}
}
}
}
//initializing object
let _crmLib = new CRM.Entity.Lib();
</Code>
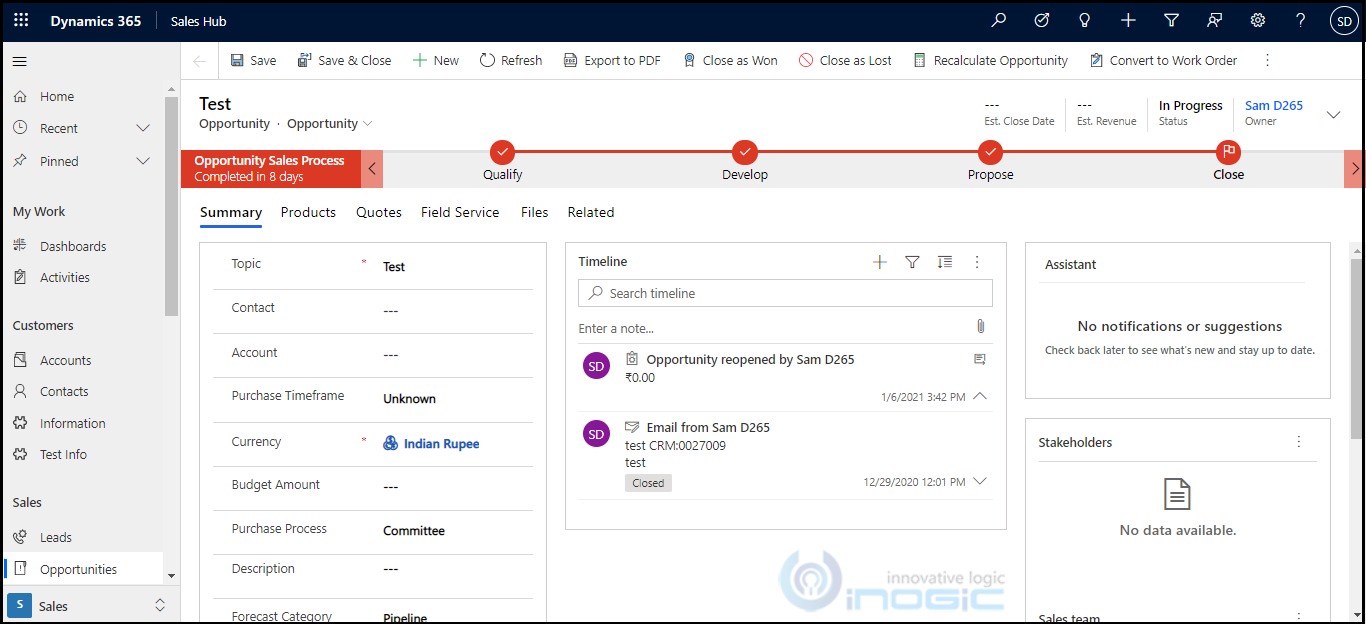
Output:
You can see in the below screenshot navigation bar is hidden.

Footer Section:
setVisible
syntax: formContextformContext.ui.footerSection.setVisible(bool);
Here, bool is the parameter, specify true to show the footer section; false to hide the footer section.
Let’s show/hide Footer Section using below client API:
Show: formContext.ui.footerSection.setVisible(true);
Hide: formContext.ui.footerSection.setVisible(false);
Example: Use below typescript code to get and set Form Footer on load of form
But, we need Javascript code to upload it into CRM. You need to compile this code into javascript, so to compile this code, you can open Visual Studio Code and run the command “tsc filename.ts”. You can see how to compile typescript file at this link. If you face any issue relate to Xrm while compiling this code, run “npm install –save-dev @types/xrm” command before compiling.
<Code>
namespace CRM {
//Namespace
export namespace Entity {
//Class
export class Lib {
//Function
public onLoad(executionContext: Xrm.Events.EventContext) {
//declaring local variable
let functionName = “onLoad”;
let formContext: Xrm.FormContext = null;
try {
//Get Form Context
formContext = executionContext.getFormContext();
//returns true or false
let footer = formContext.ui.footerSection.getVisible();
//To hide Footer
if (footer == true) {
formContext.ui.footerSection.setVisible(false);
} else {
//To show Footer
formContext.ui.footerSection.setVisible(true);
}
}
catch (ex) {
Xrm.Navigation.openAlertDialog({ confirmButtonLabel: “Ok”, text: ex.message, title: functionName });
}
}
}
}
}
//initializing object
let _crmLib = new CRM.Entity.Lib();
</Code>
Output:
You can see the below screenshot, the footer section is hidden like Status Column has disappeared.
Note:
– You need to compile the Typescript code and convert it into JavaScript and then upload that JS file in the CRM web resource.
– Above methods is only supported in Unified Interface.
Conclusion
Using Client API, we can show/hide header and footer of the FORM in Dynamics 365 CE.
