Custom logic has until now and still being developed mostly as plugin or workflow assemblies. If you wanted to extend the default behavior of the platform on certain actions like create or update record, you developed either a plugin or workflow and then had to use the Plugin Registration Tool to register this on the appropriate message.
The entire process speaks of pure Dev skills required. Say as a developer you registered the plugin on specific messages and sent it out as part of a solution for the biz users to import and get going from there, but if they needed it now to be registered on another message or entity – go find the Plugin Registration Tool in XRMToolbox and ask the developer for the steps to get it done.
Step in Power Automate – the low code / no code platform for Biz Users or Citizen Developers as they are sometimes referred to as. Flows are similar to the traditional plugins and workflows that we have had as an option to extend and add custom code/logic. Flows infact are now being recommended as the preferred option moving forward for your automation needs in Power Platform including the first party apps like Dynamics 365 CE.
Custom Connectors are a way to wrap your biz logic in a container and present it for biz users’ consumption as a simple click, drag, drop interface. If you have worked with Power Apps or Power Automate, you would be familiar with this screen
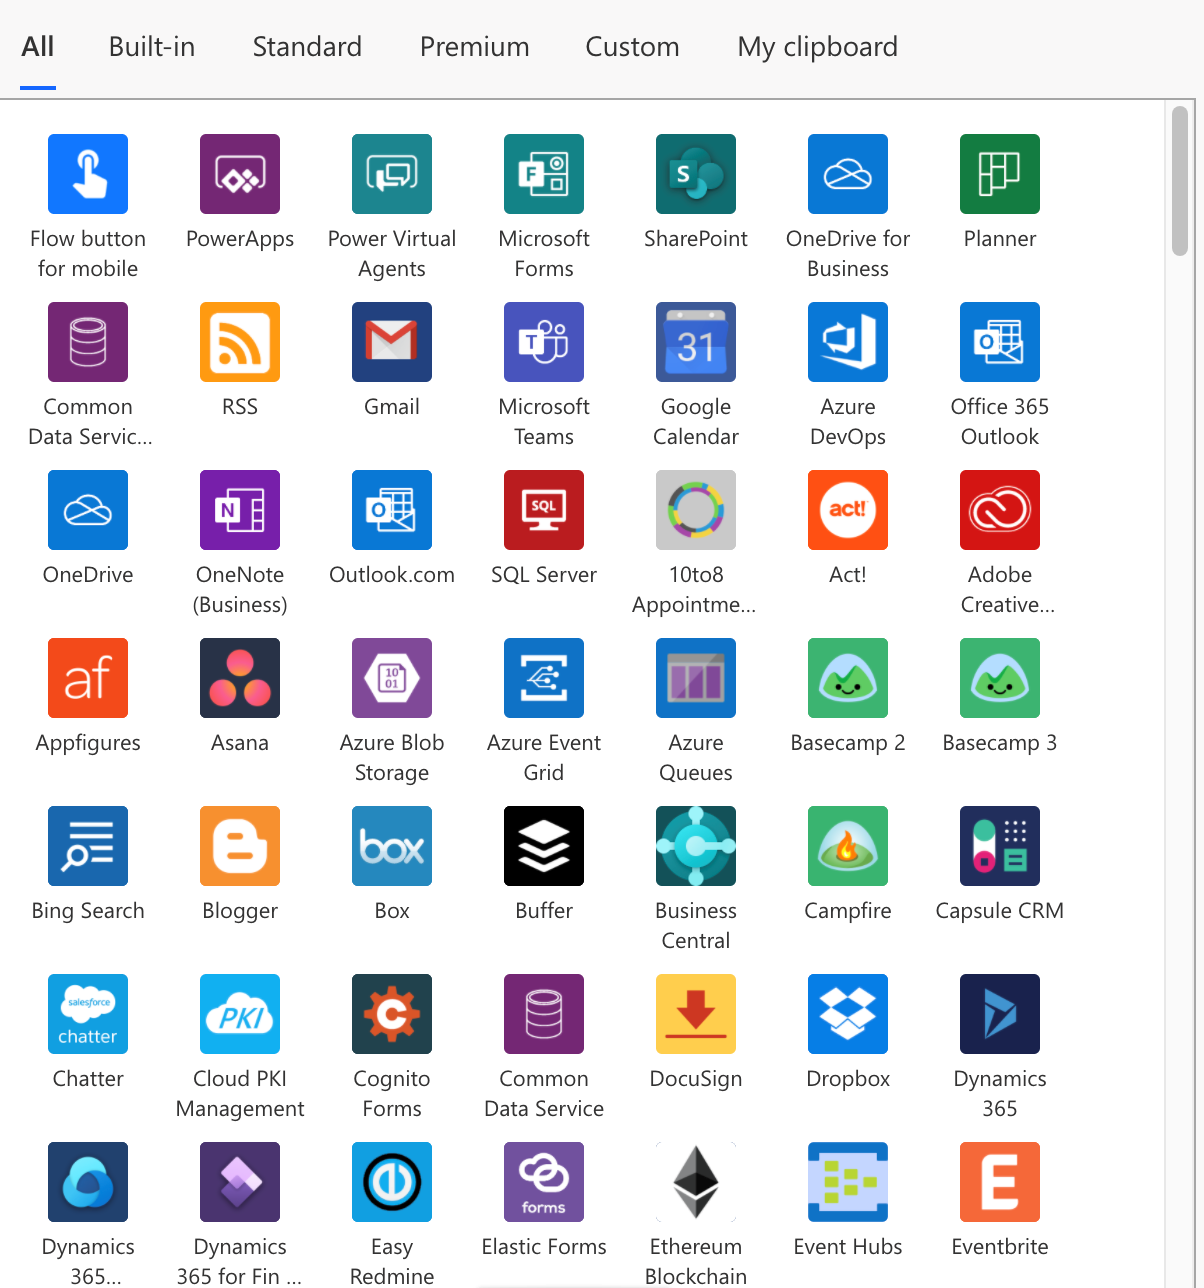
These are connectors to various apps that perform specific actions within those apps and you as a consumer need not know how these have been implemented behind the scenes.
Azure Functions:
Custom Connectors are a wrapper around Web API or Azure functions. Azure functions in simple terms is your code base hosted on Azure. You can call your code through an http request and it can accept parameters passed either as a query string or the body of the request.
Any Azure function of the type http request, can be consumed directly from Power Automate Flows using the http connector
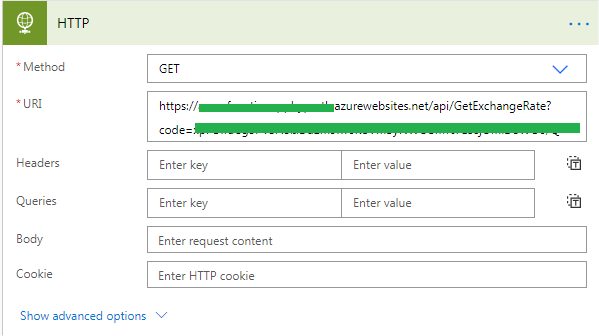
Using this connector would however require the user to know and understand, tech concepts like query parameters, headers, body and configuring this is prone to errors especially when handled by citizen developers.
Wrapping this API/Azure function into a Custom Connector, provides the ability to present the user with an easy to use and configure interface.
Steps to building a connector
- Build and host Azure function
- Secure the Azure function
- Configure the custom connector
- Setup the security configuration for your connector
- Consume your connector from Power Automate Flows
Build and host Azure Function
You can start designing Azure function right from within Visual Studio 2019
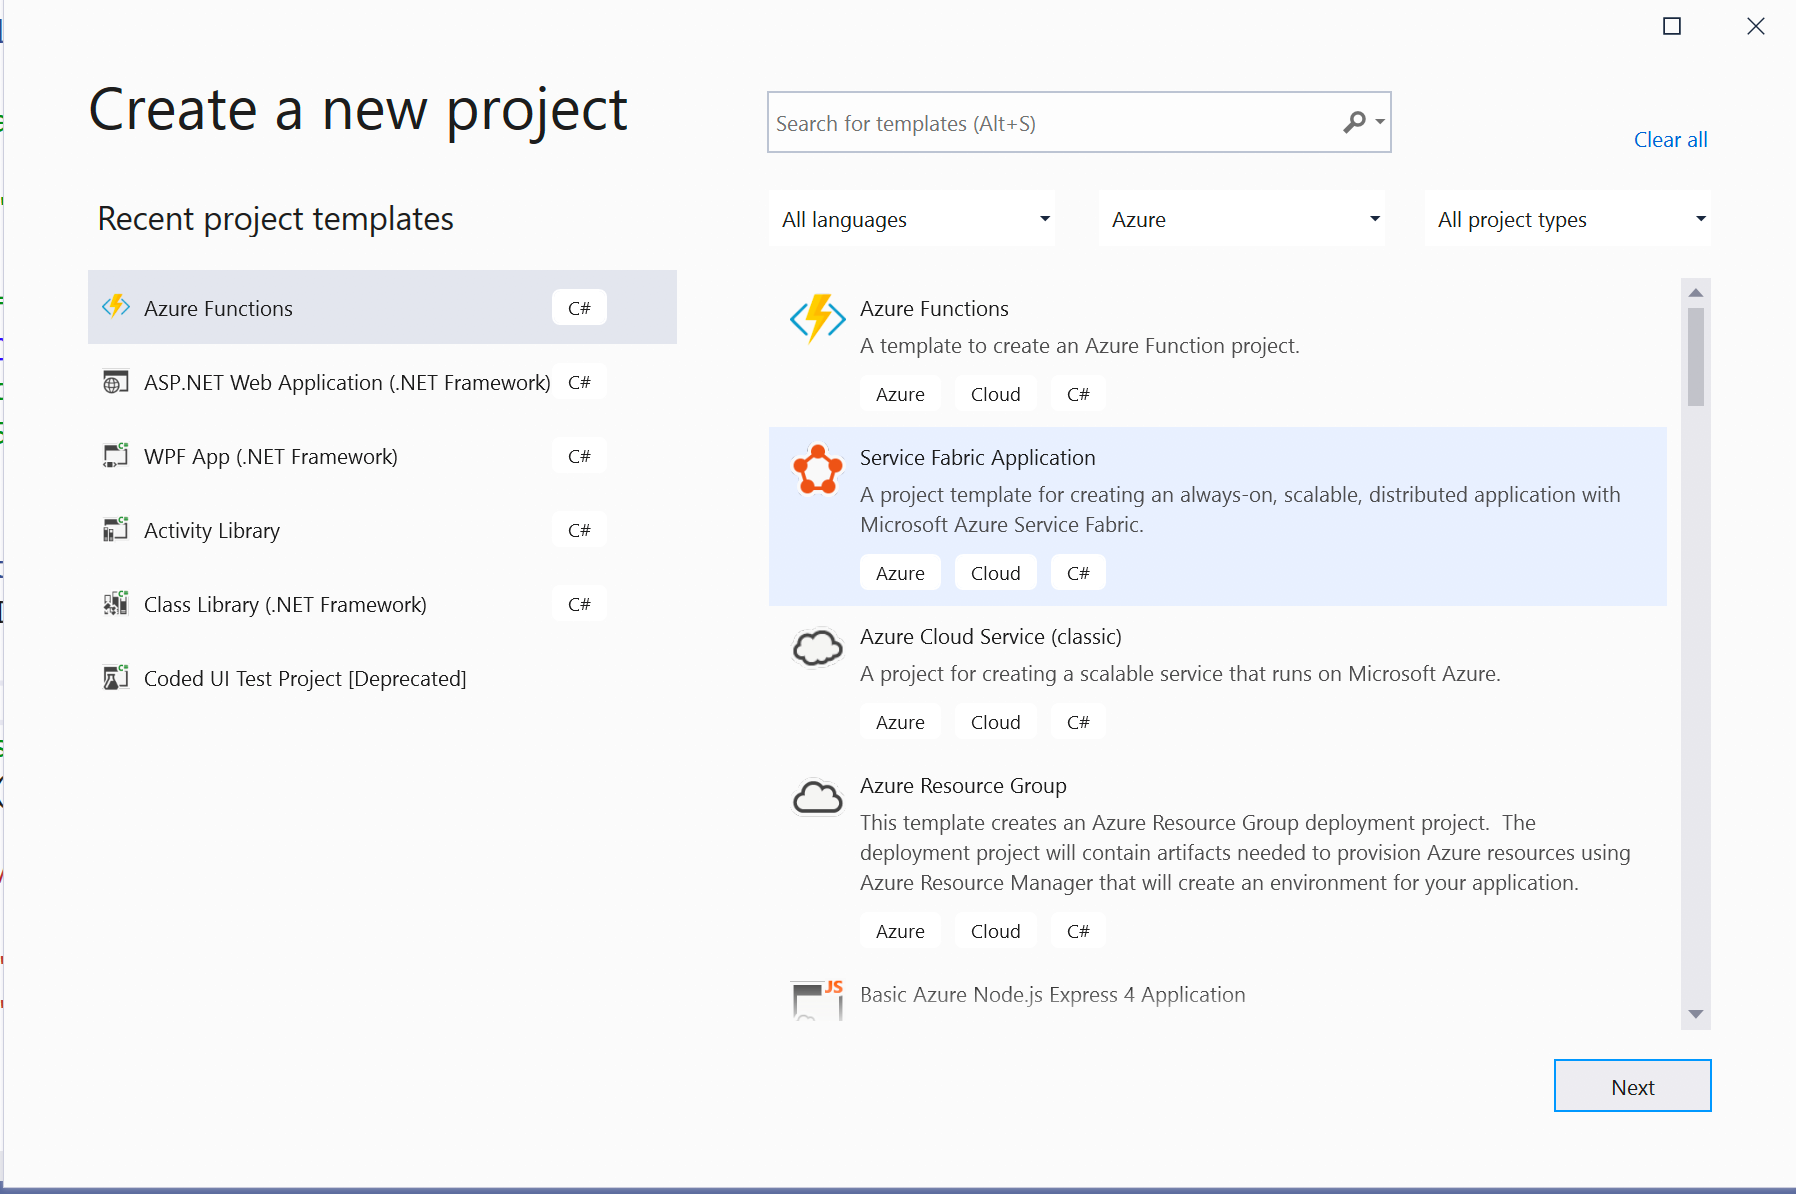
Next choose the Azure Version and Trigger for your function
Set it to Azure Function v2 and choose the Http trigger listed at the end.
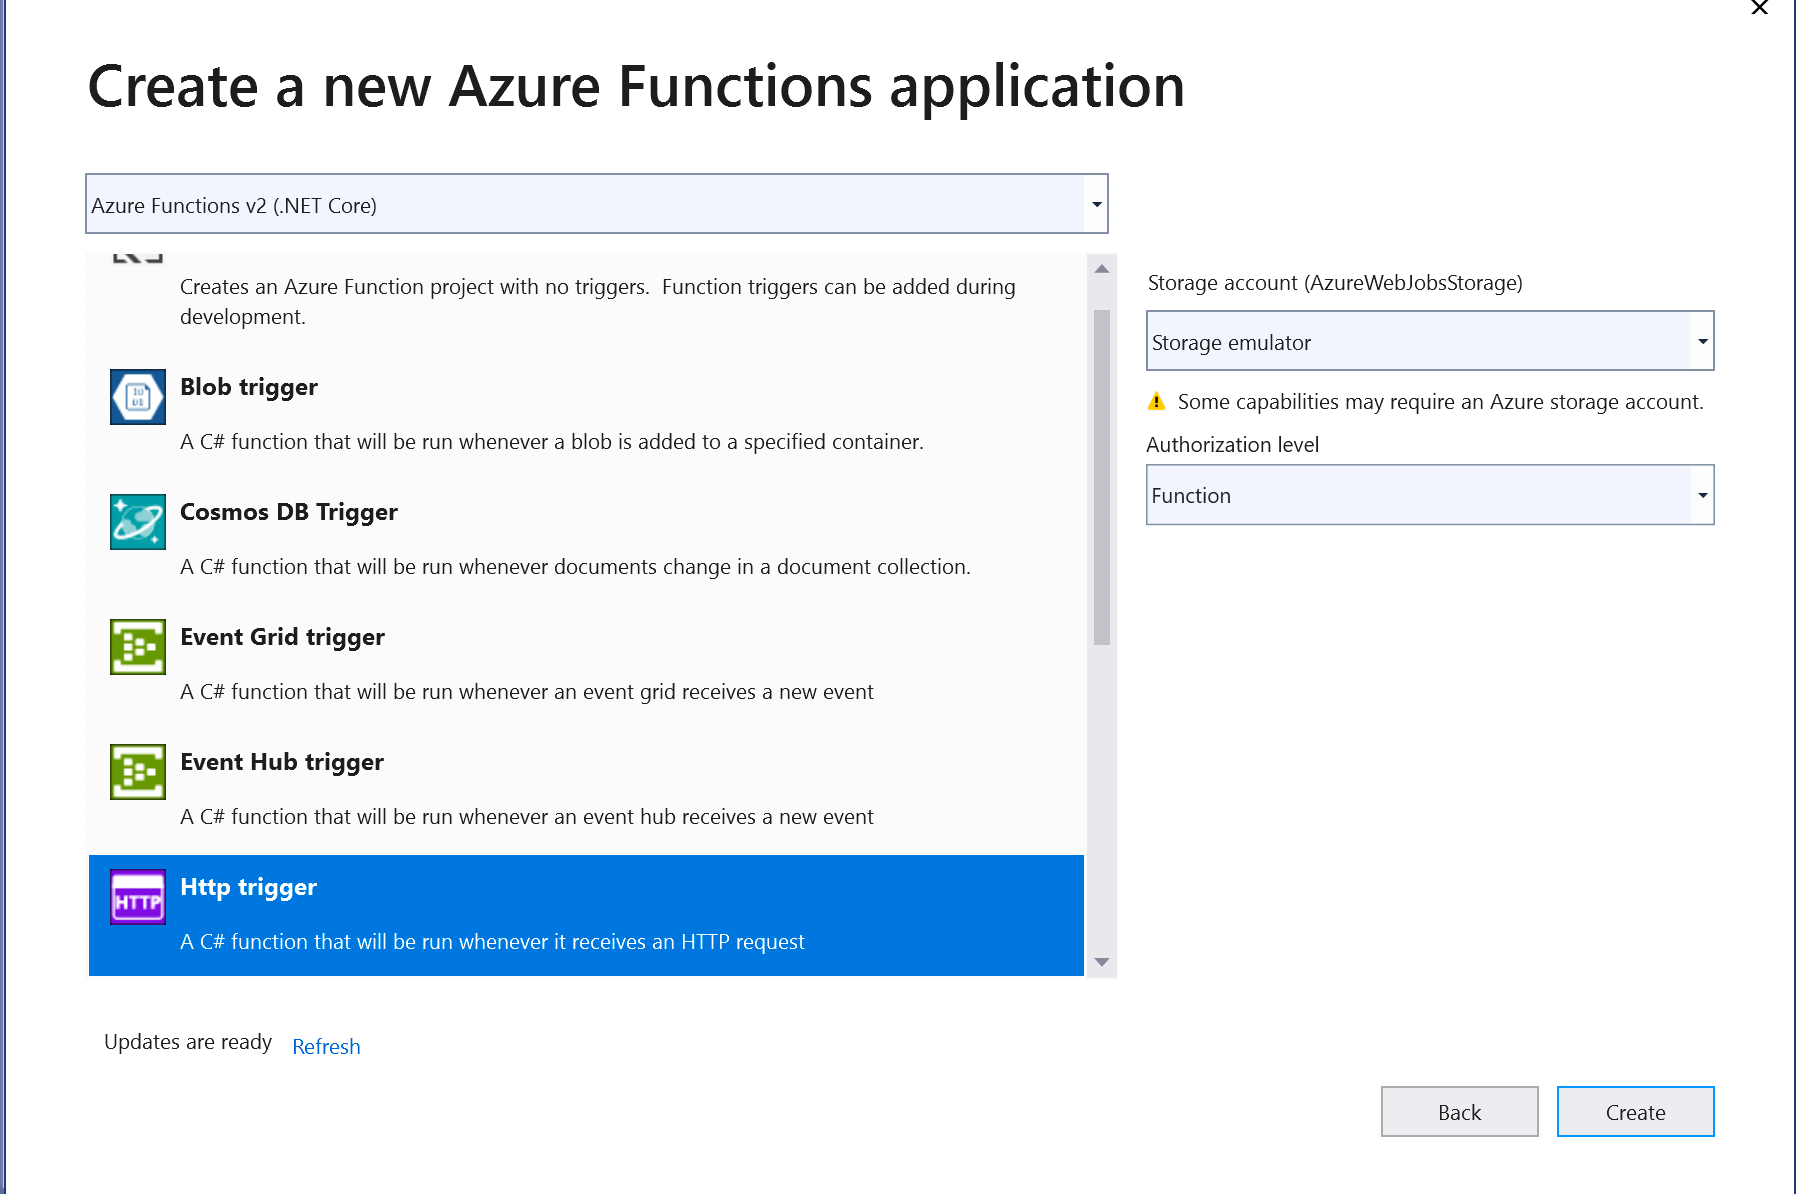
This sets up the project scaffolding with the default function set up there for use
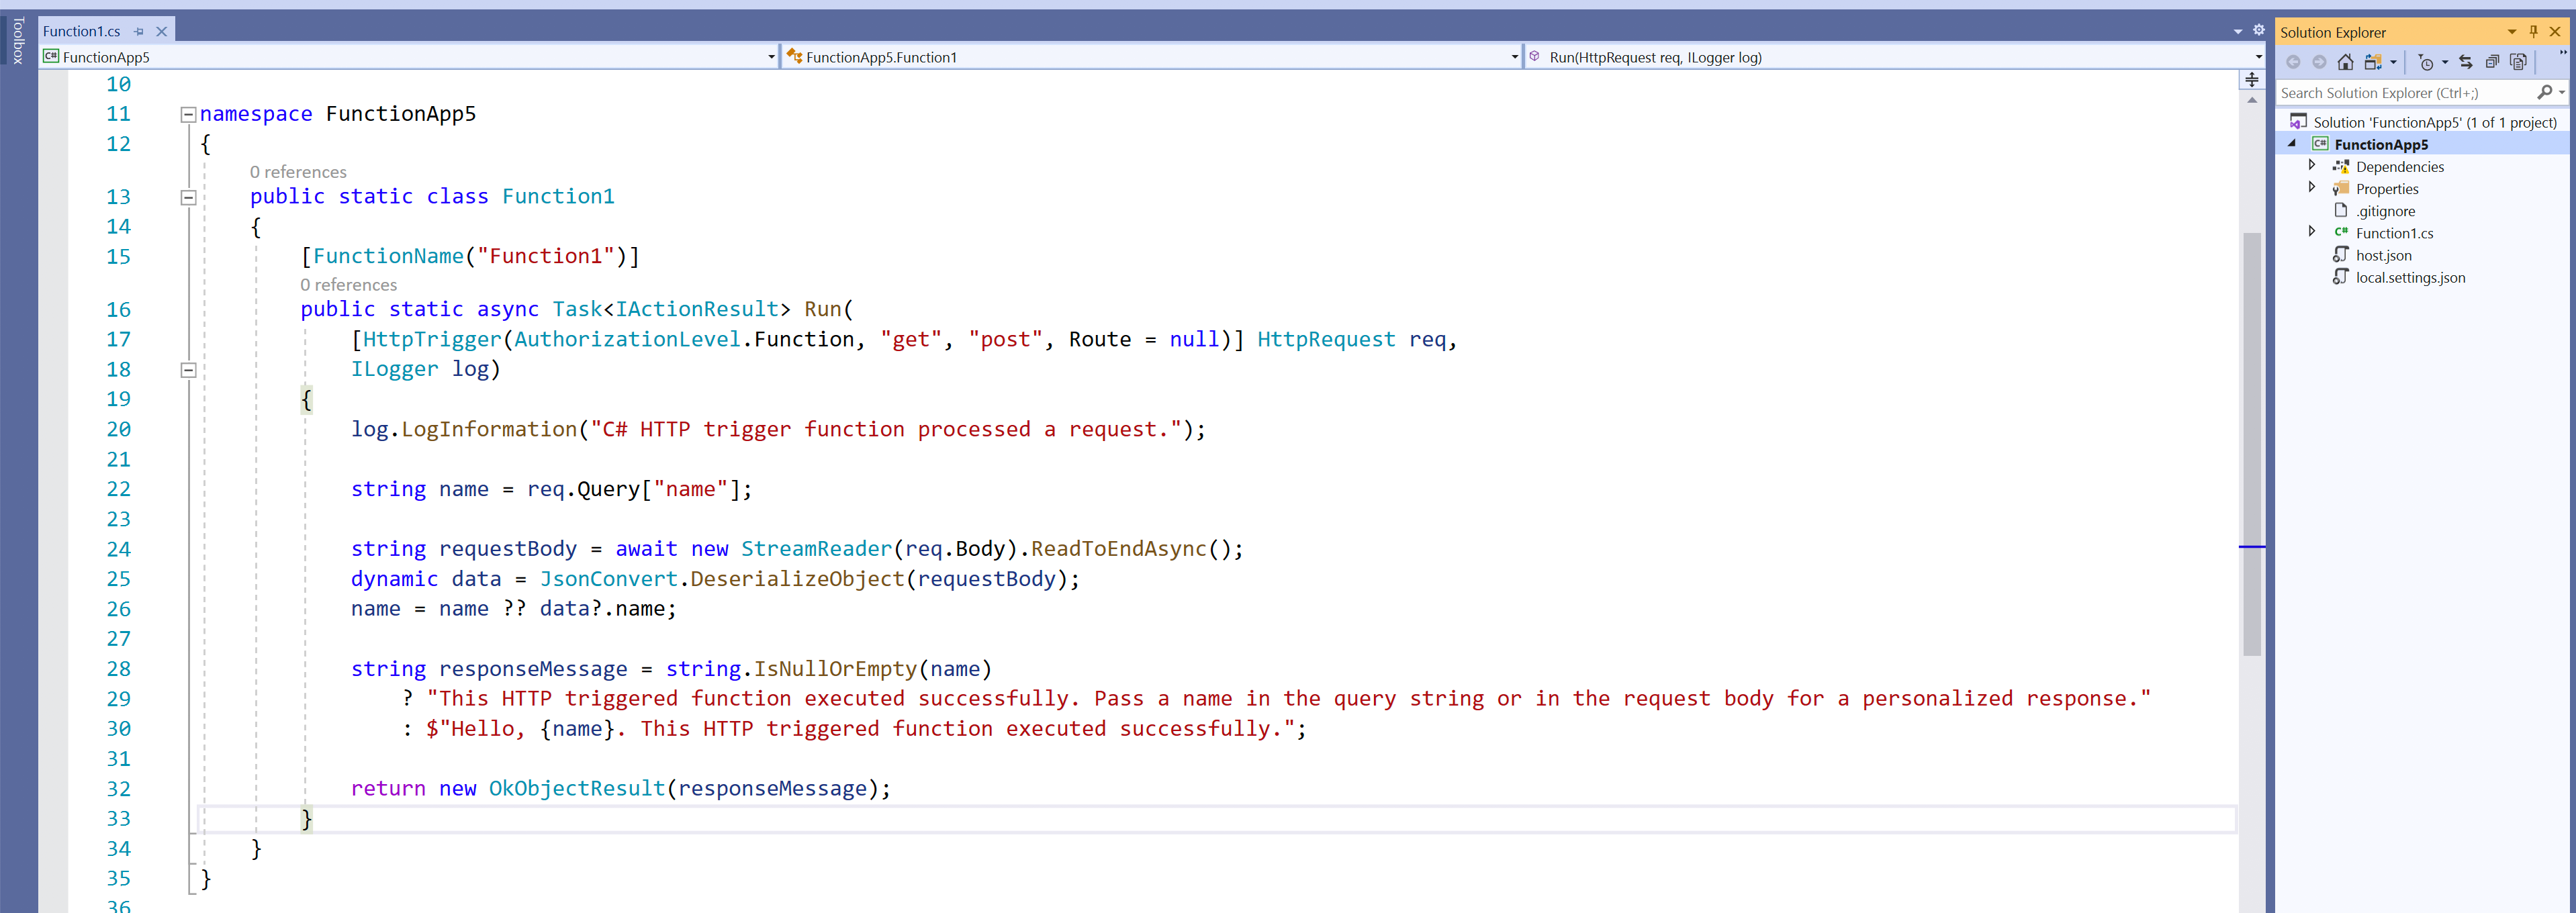
Believe it or not – with just this default code, you are actually ready to go! You have a functioning Azure function once deployed to Azure.
We will add additional code here.
Say we are accepting a Tax code as a parameter and will return the Tax Rate. We will read this from CDS entities using the .NET Core SDK currently in alpha.
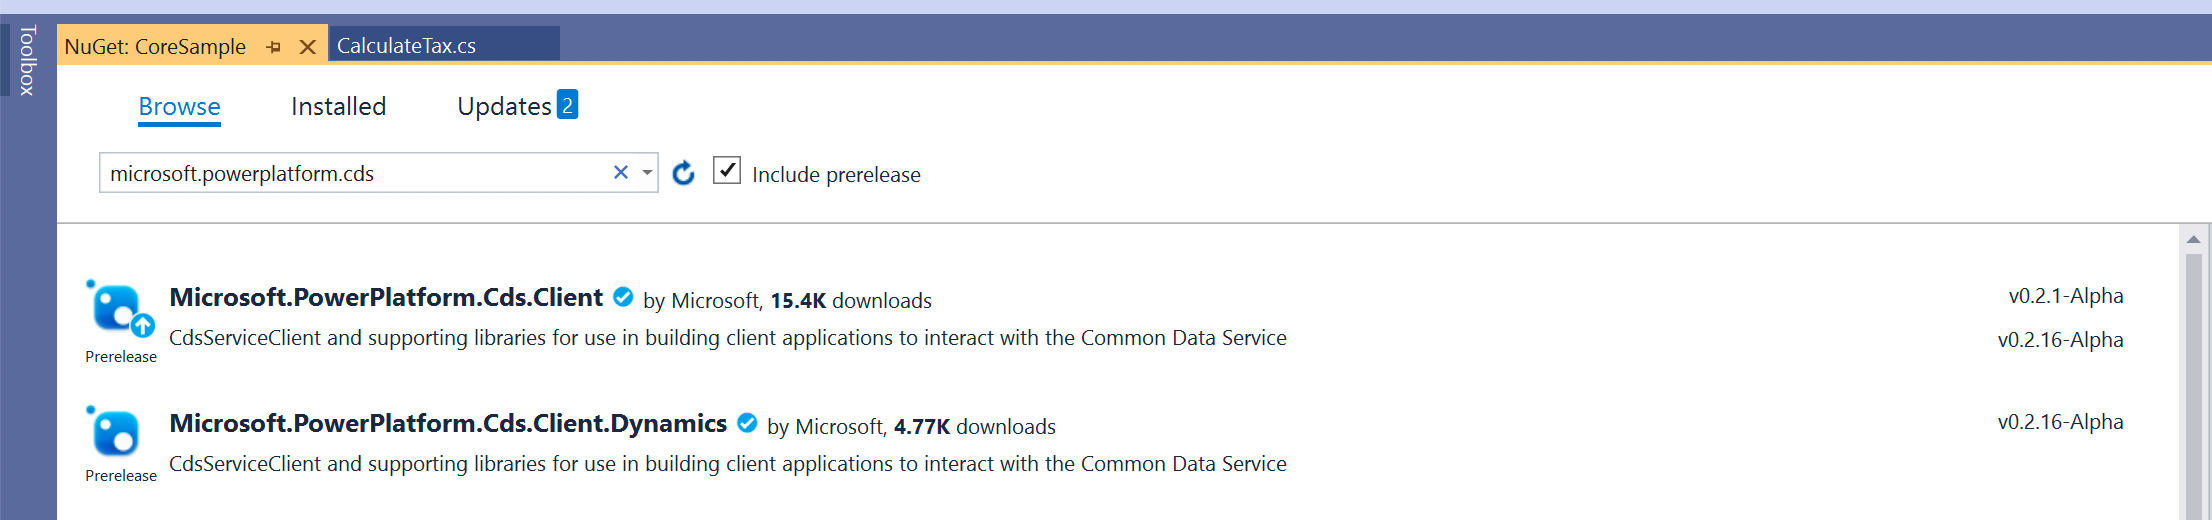
To begin with, we add reference to the .NET Core SDK assemblies, we will need that to connect to CDS and read the tax rate.
Details on the .NET core assemblies can be found at https://www.nuget.org/packages/Microsoft.Powerplatform.Cds.Client
While using the Nuget Package Manager make sure to check the pre-release checkbox as this is in alpha at the time of writing this blog
Now lets talk about connecting to CRM environment. Unlike plugin and workflow assemblies where you had access to the execution context, Azure functions as stand-alone functions and therefore you need to explicitly establish connection with CRM to perform read/write operations.
We will use the Service Principle Name or Application User for connecting. This requires you register an application in Azure and get the Client Id and Secret required for connection.
The following article provides a walkthrough for this
Once you have completed the app registration, you are ready to proceed with the connection
We will use the ClientSecret authentication type explained in the article below
//set the connection string
connectionString = @” AuthType = ClientSecret; url = ”
+ url + “; ” + //https://xxx.crm8.dynamics.com;
” ClientId = ” + clientId + “; ”
” ClientSecret = ” + clientSecret;
//establish connection with CDS
CdsServiceClient client = new CdsServiceClient(connectionString);
The .NET Core assemblies follow the same syntax and functions as the sdk assemblies except the change in the namespace this ensure no additional learning curve to make use of these assemblies.
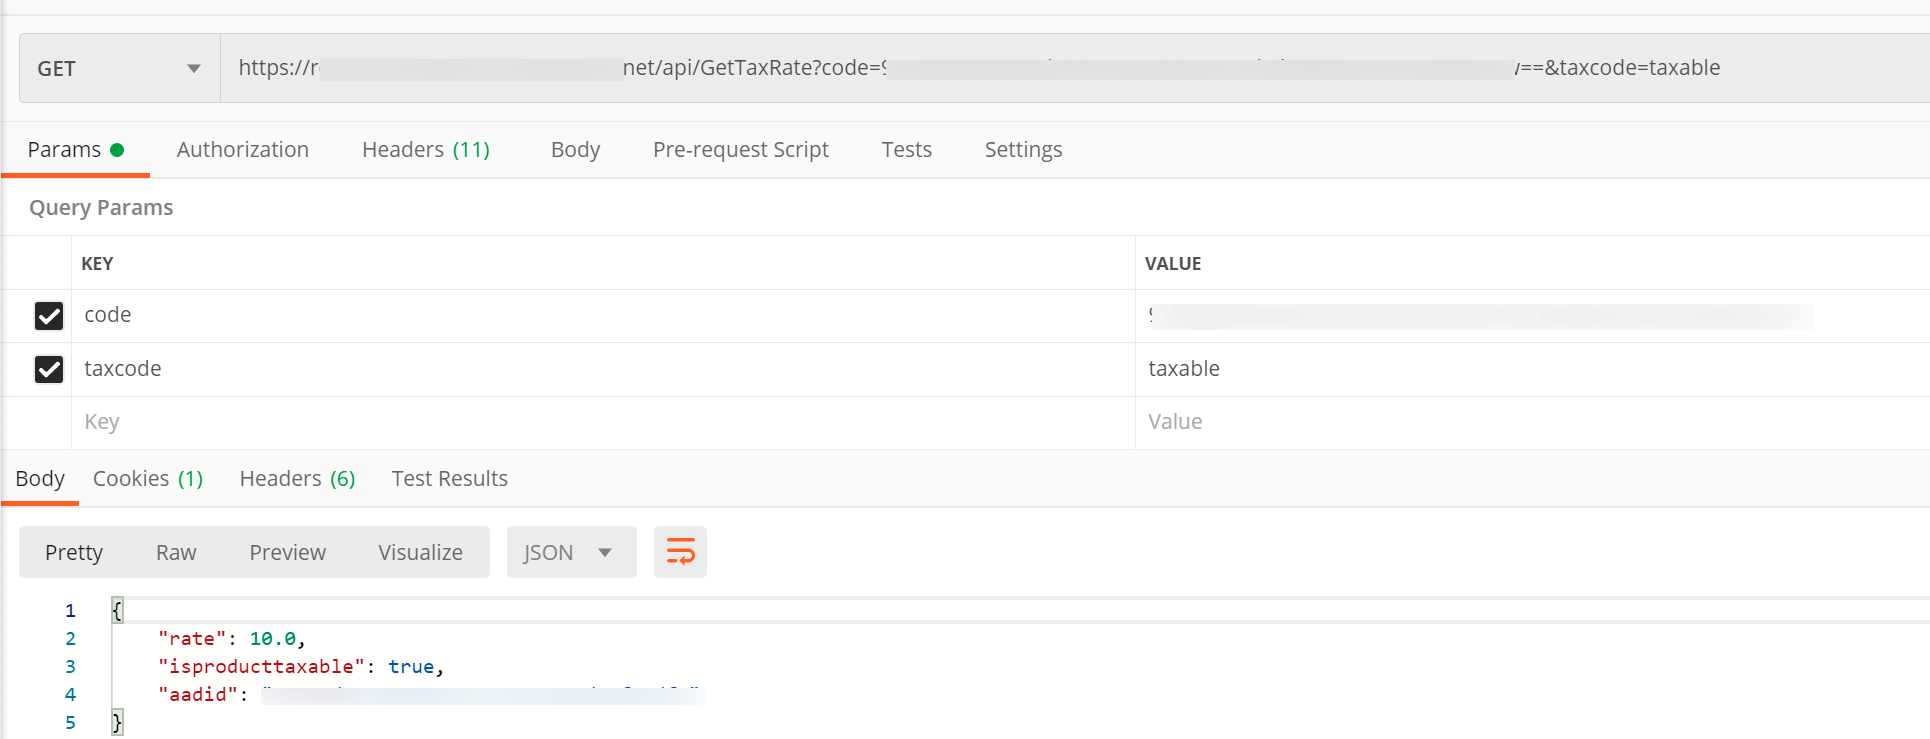
Now go ahead read the tax and return this as a JSON object
//check if result found
if (coll != null && coll.Entities.Count > 0)
{
rate = (double) coll.Entities[0][“msdyn_taxrate”];
dynamic resultobj = new {
rate = (double)coll.Entities[0][“msdyn_taxrate”],
isproducttaxable = (bool)coll.Entities[0][“msdyn_productstaxable”],
aadid = resp.UserId.ToString()
};
result = JsonConvert.SerializeObject(resultobj);
}
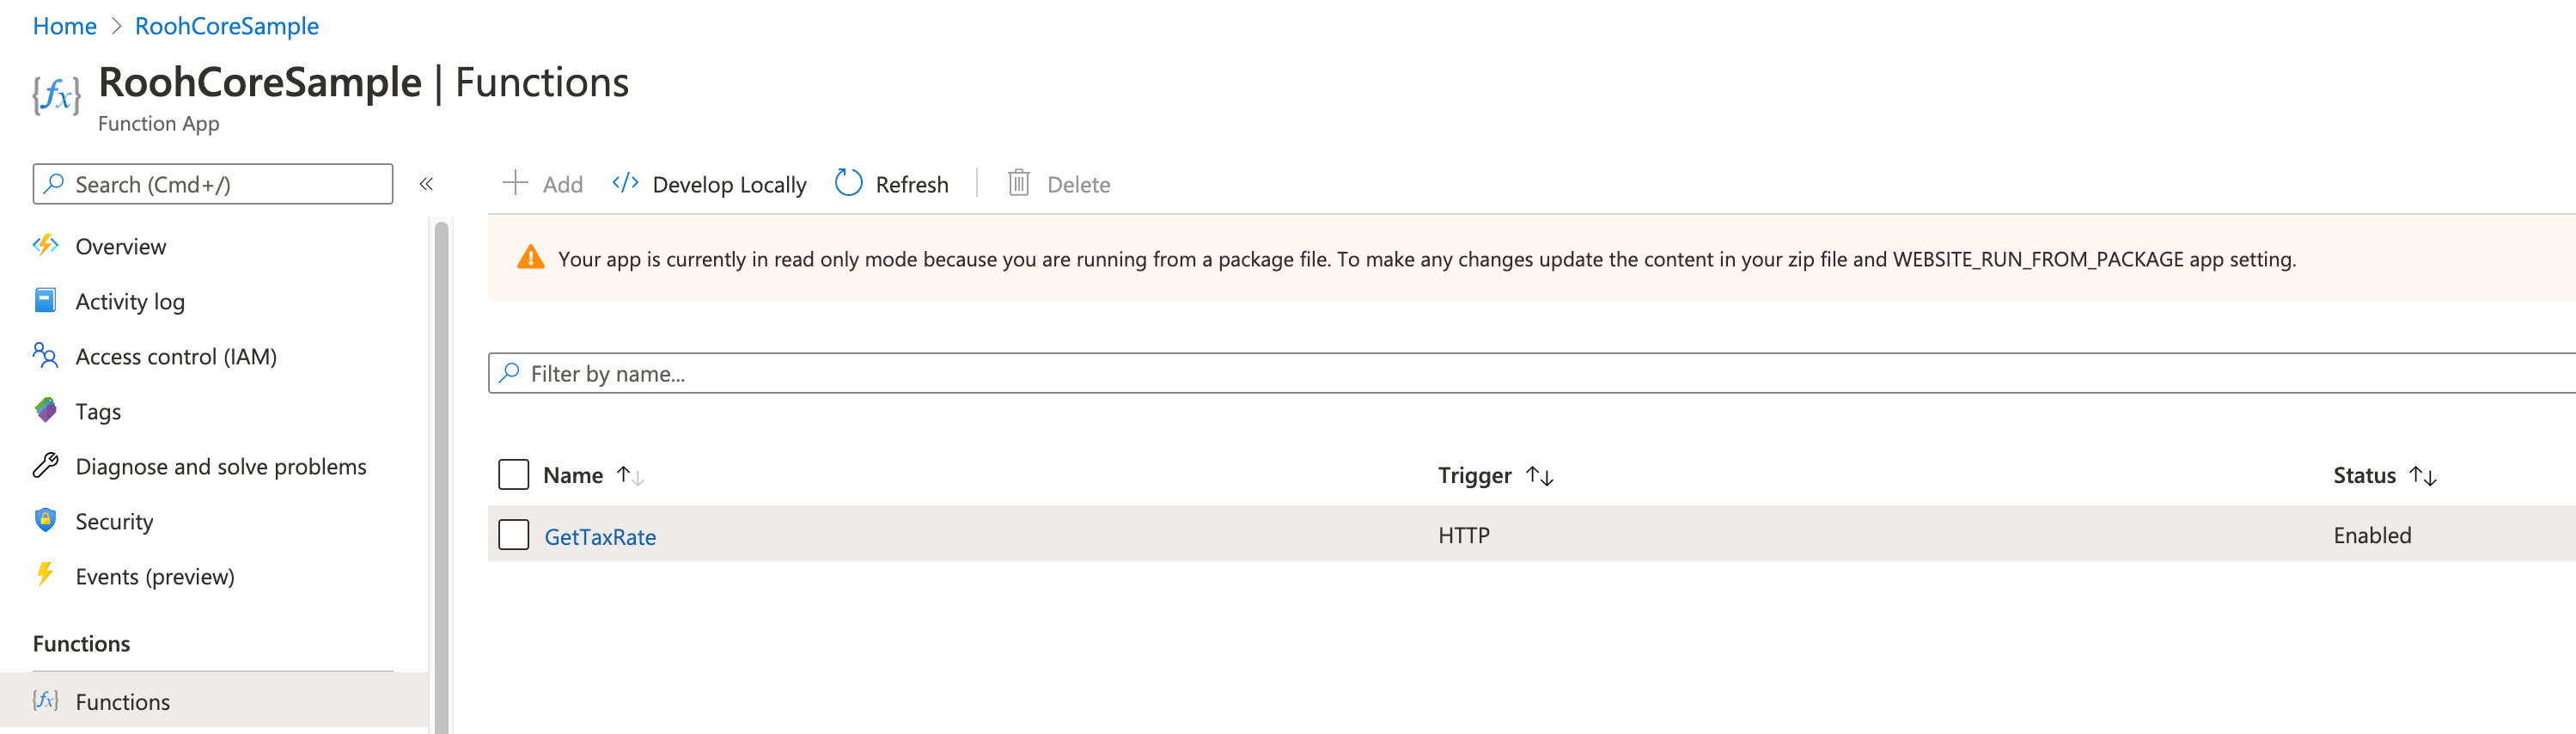
Publish this function to Azure, you could do this from right within Visual Studio. Choose Publish and provide all the connection details to the azure environment.
Once published, you should see a function app and the function listed in there, similar to the screenshot below
This function once published is now ready to be called. But before that, lets ensure that not just about anybody can call function. This can be done at the simplest level by enabling function keys
Function keys could be created that would need to be passed with every call to the function to authenticate itself. If the key is missing or does not match the keys defined in Function keys, the request is not executed.
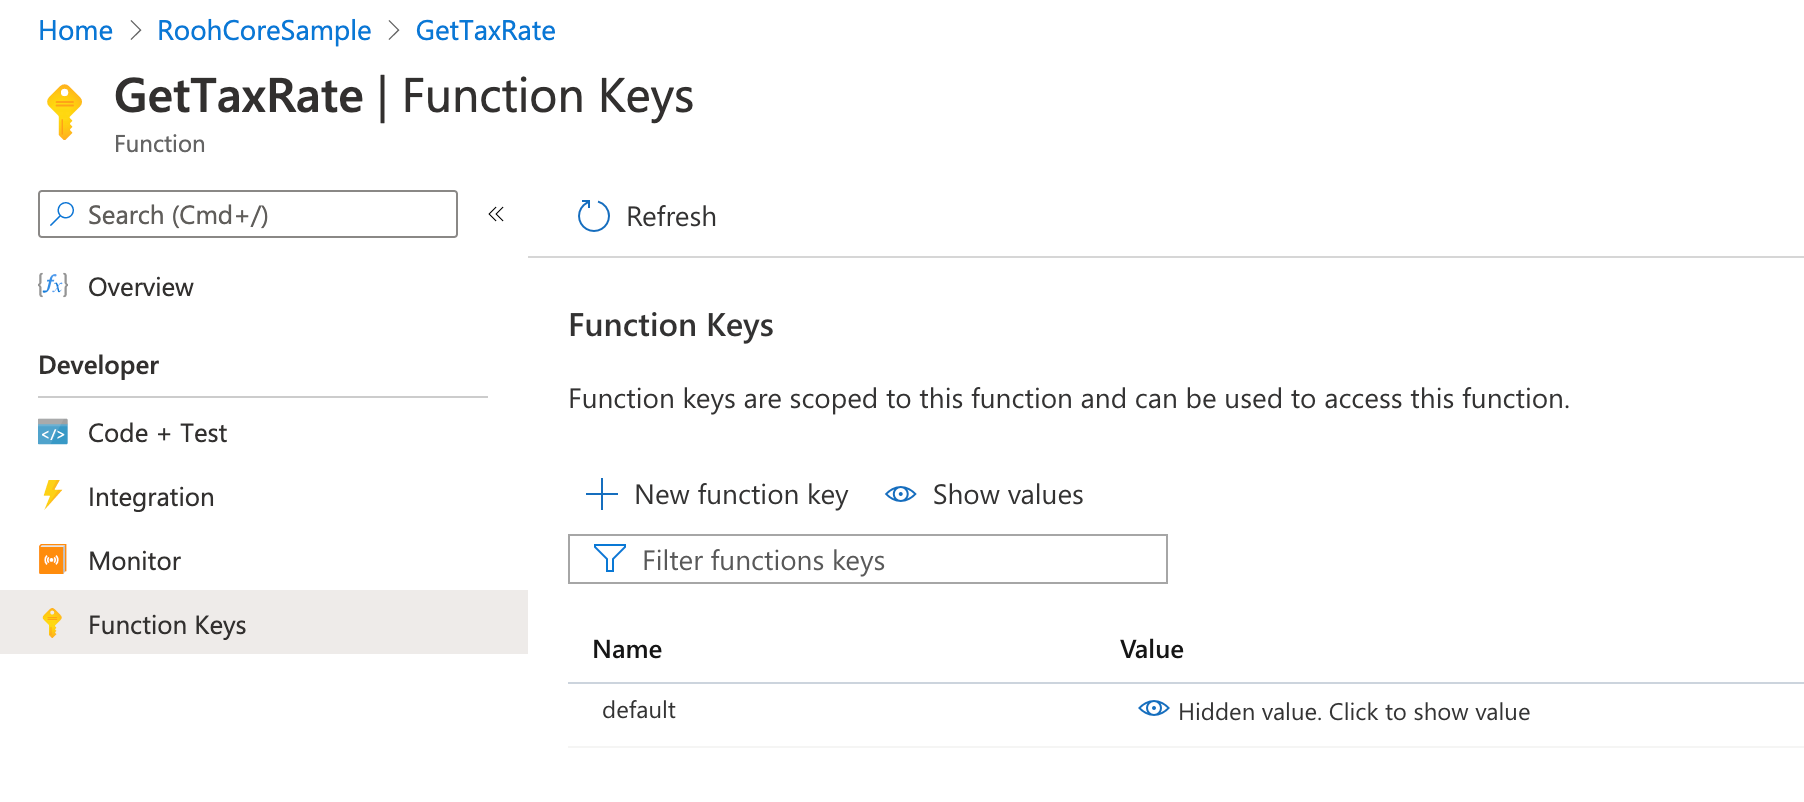
To get the url to the request for testing, use the Get Function URL button
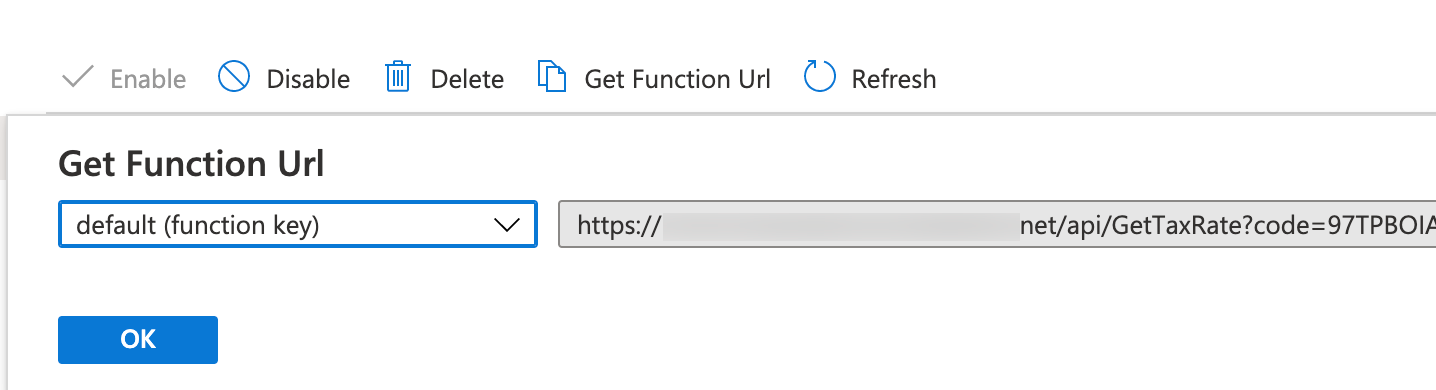
Copy and paste this URL in Postman to test the function.
Now for our connector, we would like to provide the ability for the user to login to their AAD account, similar to the experience that we have when using the CDS connector.
Secure the Azure Function
For this let us start with setting up the authentication for the Azure function.
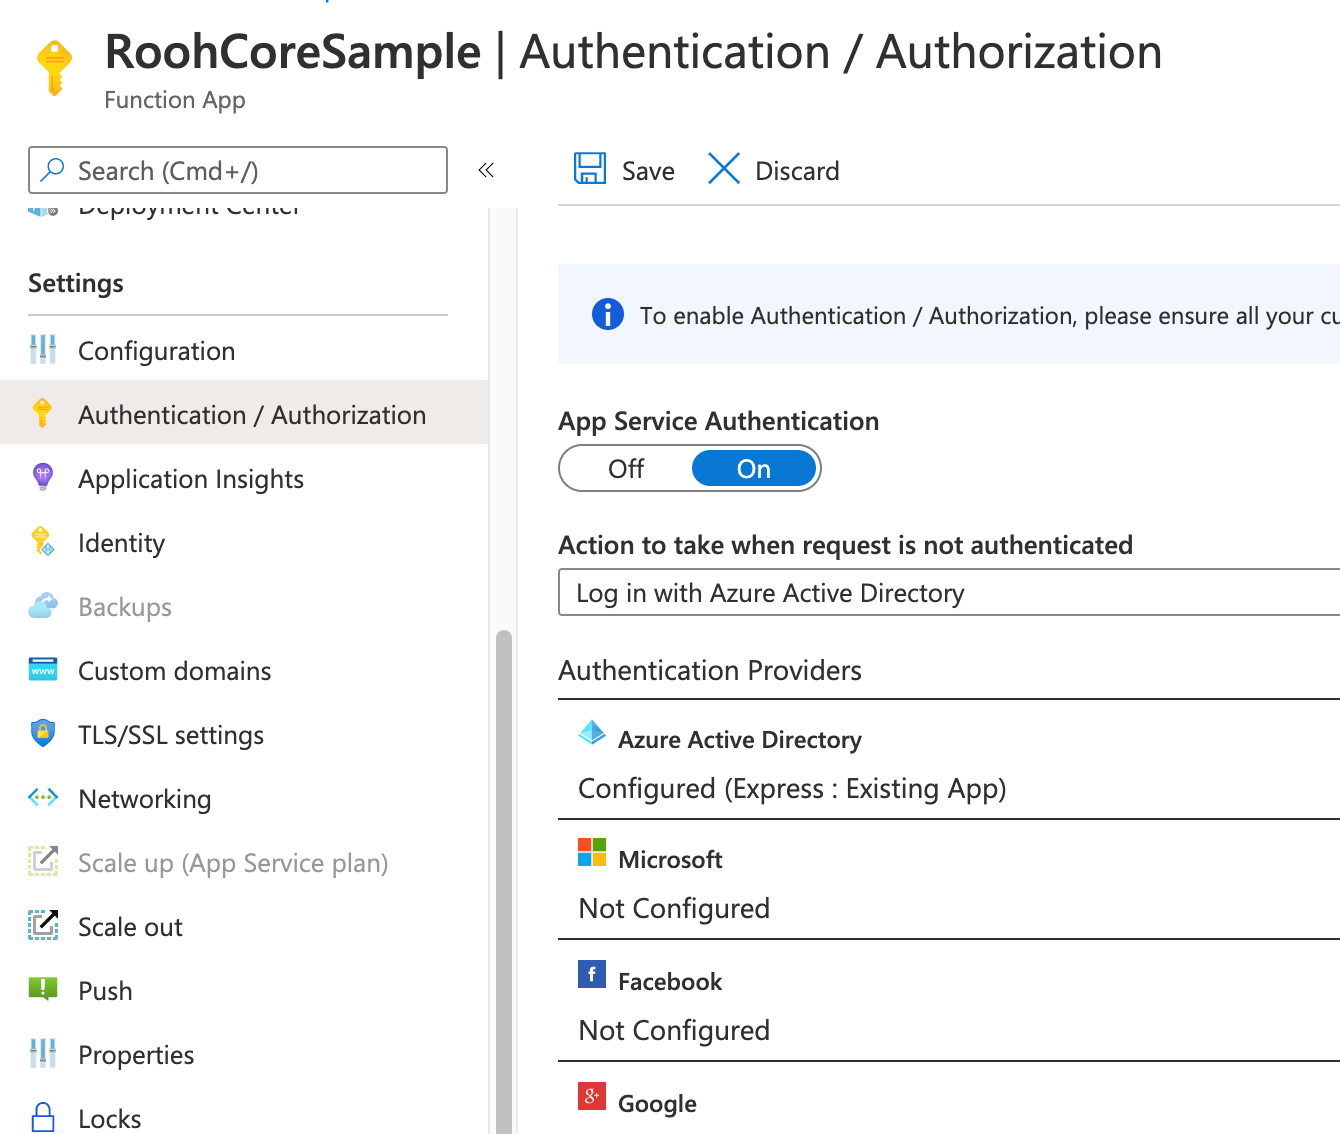
Navigate to the Authentication / Authorization found under settings in the function app and enable App Service authentication and set it to Login with Azure AAD
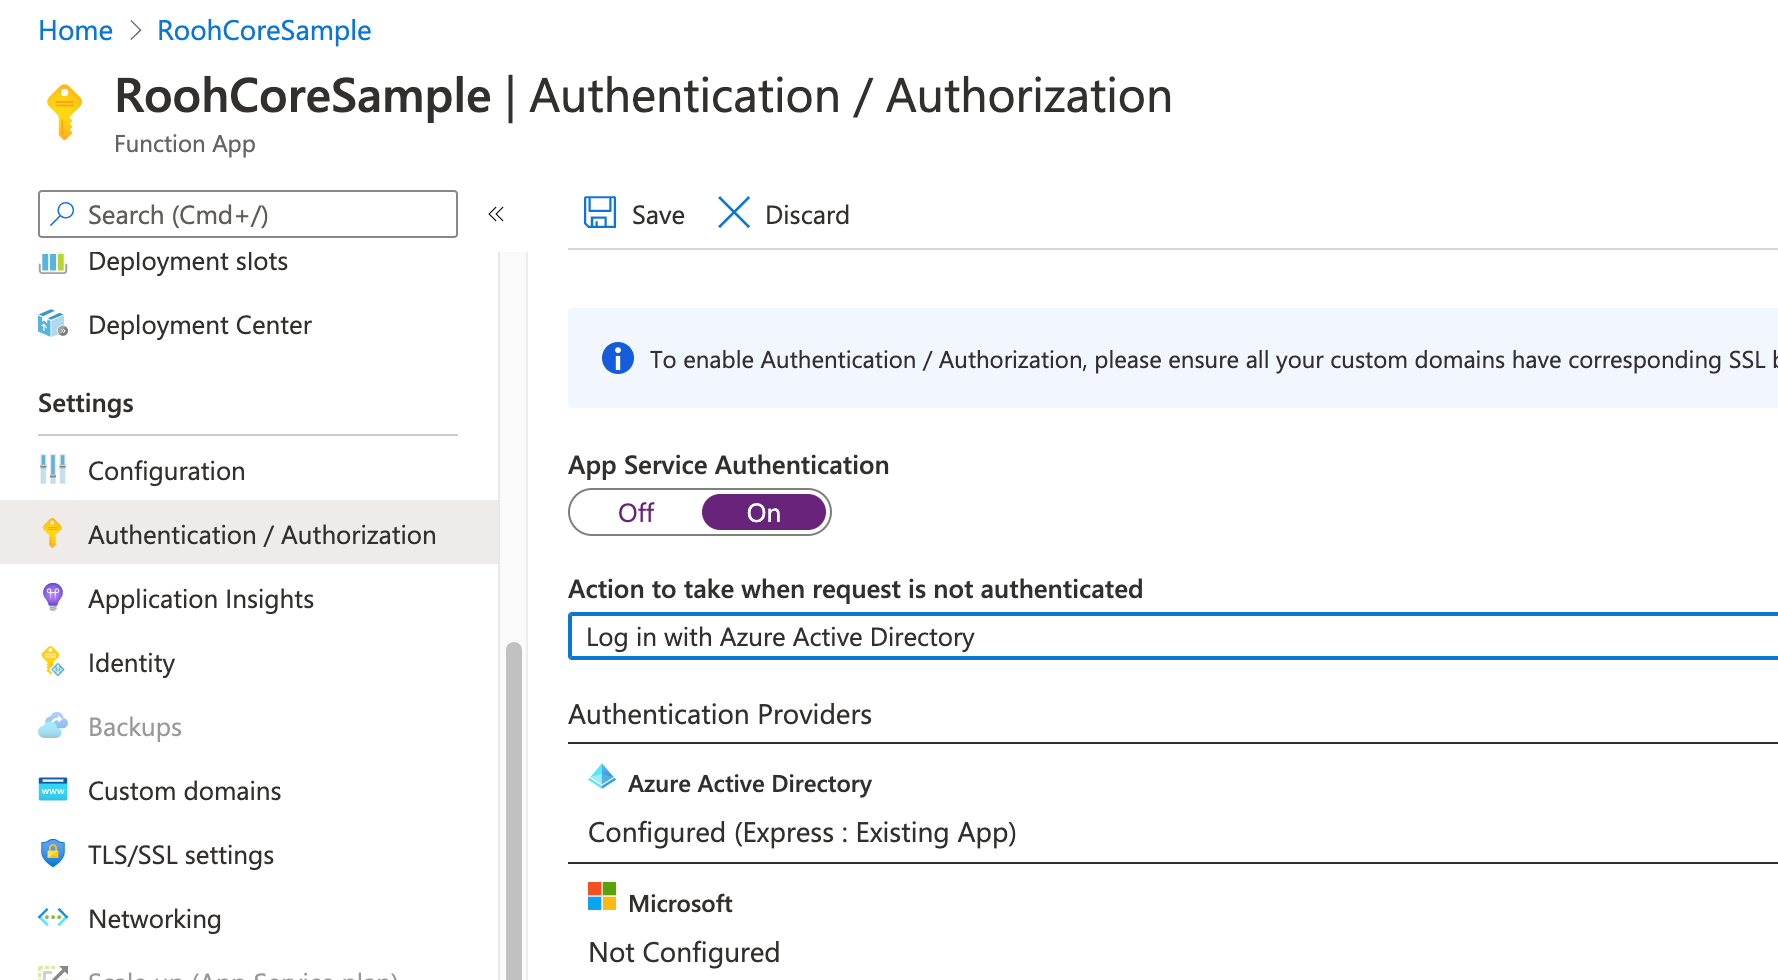
Choose Azure Active Directory from the list of Authentication Providers.
You are navigated to the next screen where we need to choose an App Registration
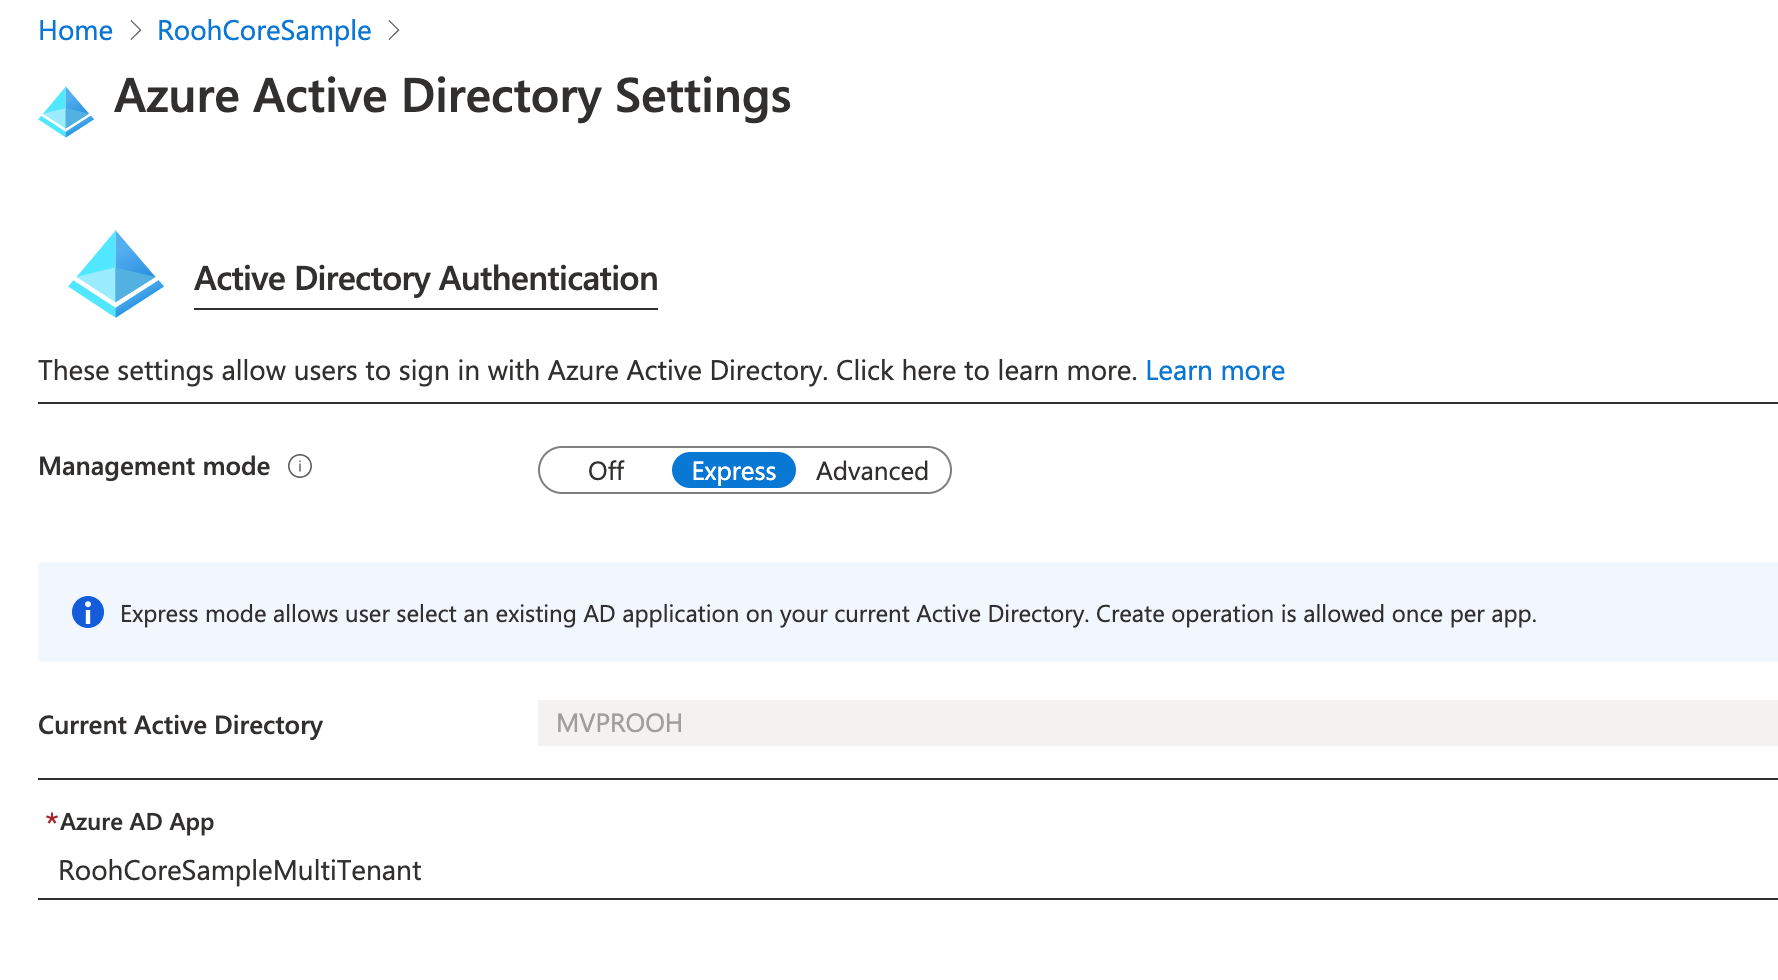
Register a new APP for Azure function AAD authentication. Steps are similar to the app registration done before for CRM connection. Except you do not have to create a user in CRM and we do not need to provide API permissions to CRM.
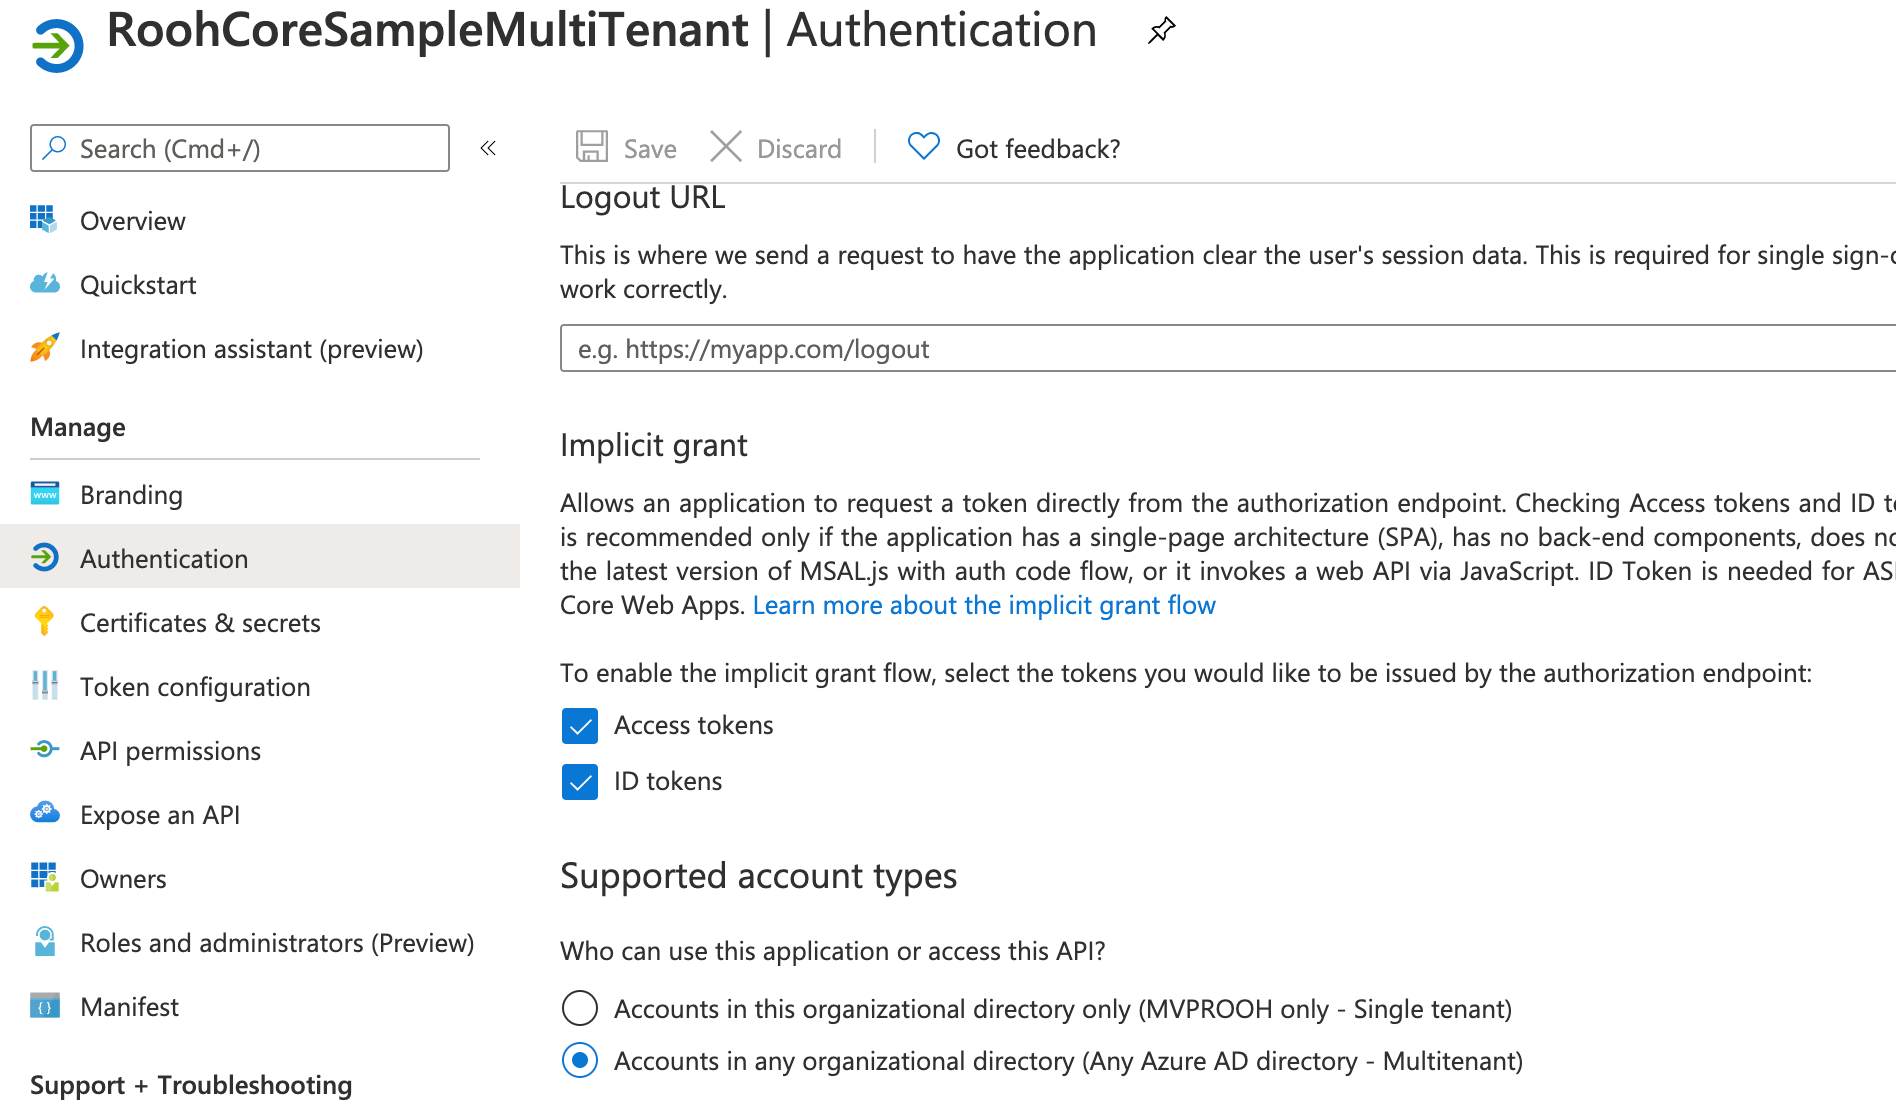
In the Authentication option while creating the APP registration choose Multi-tenant option. as shown below
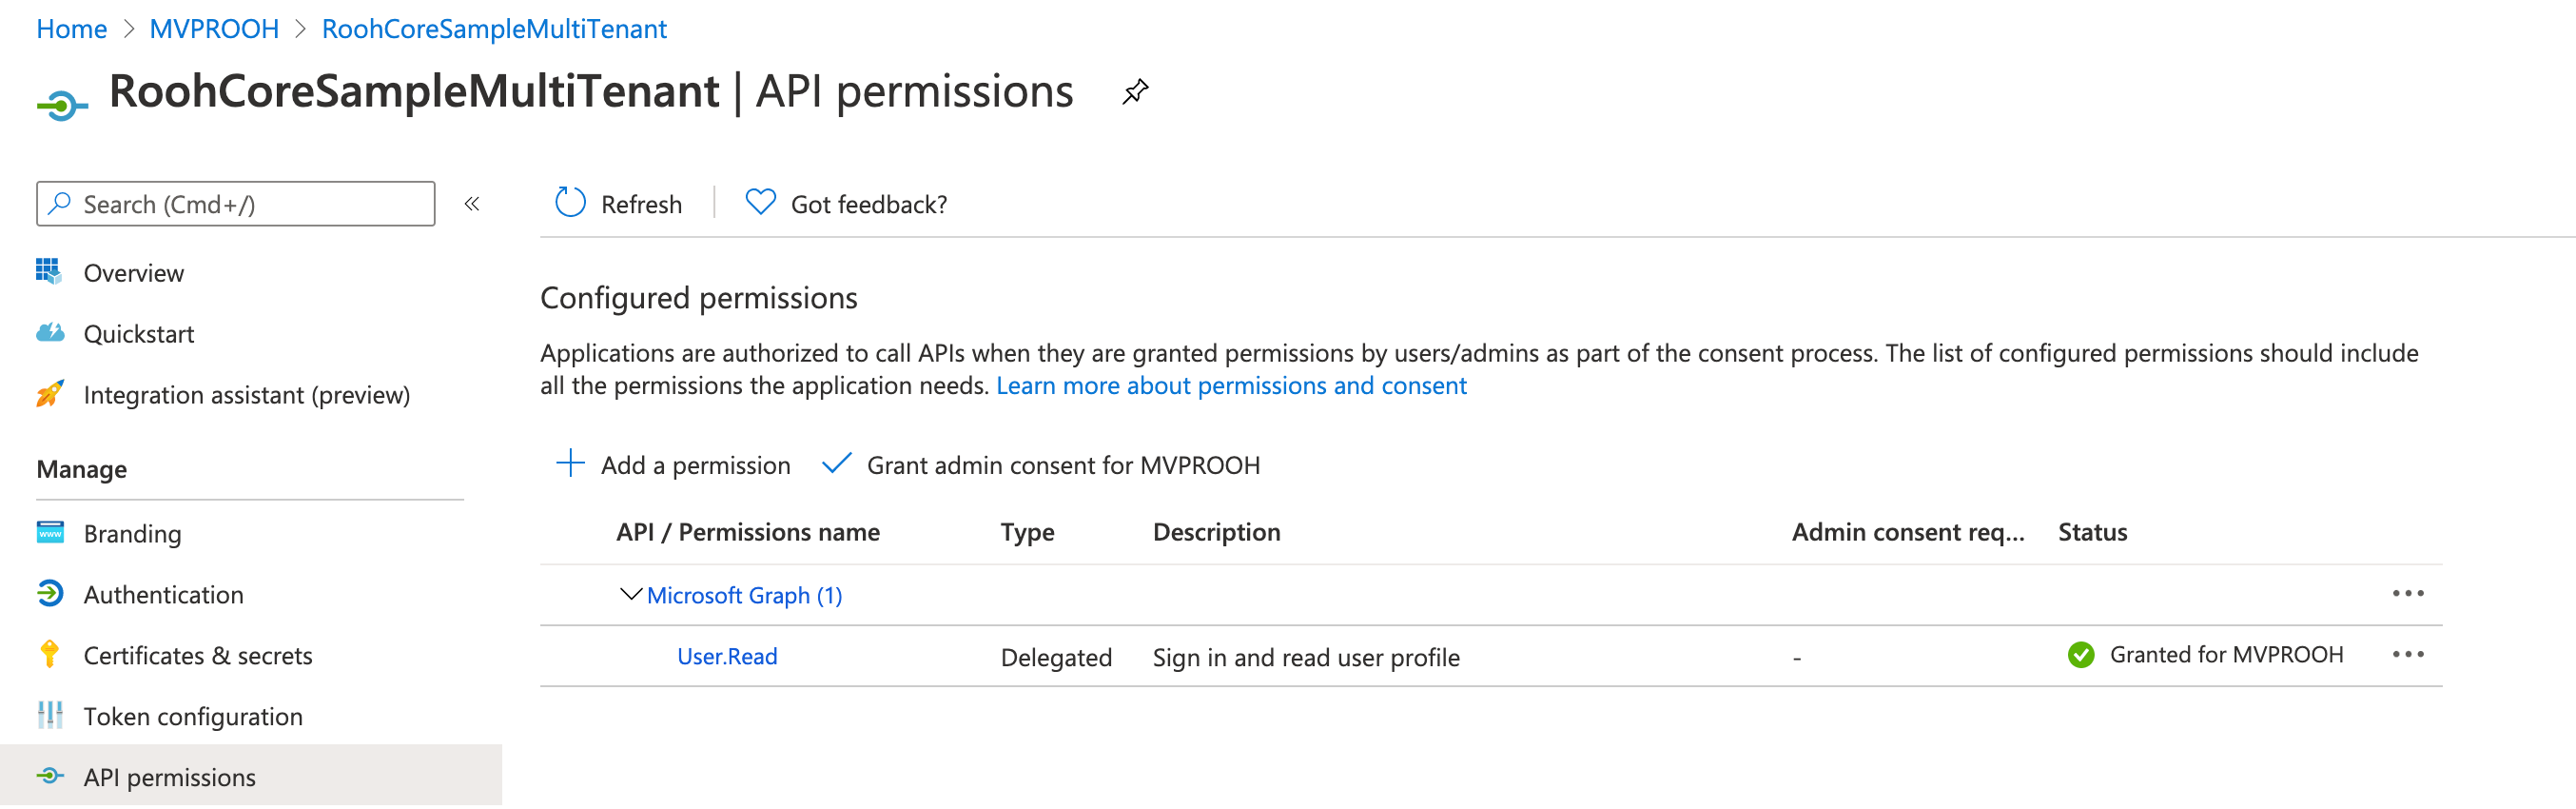
The API permissions screen should appear similar to the following
Choose this APP in the Azure Active Directory Authentication screen above.
Since we need to make sure our Azure function available from different tenants, make this change
Navigate back to Azure function à Authentication / Authorization
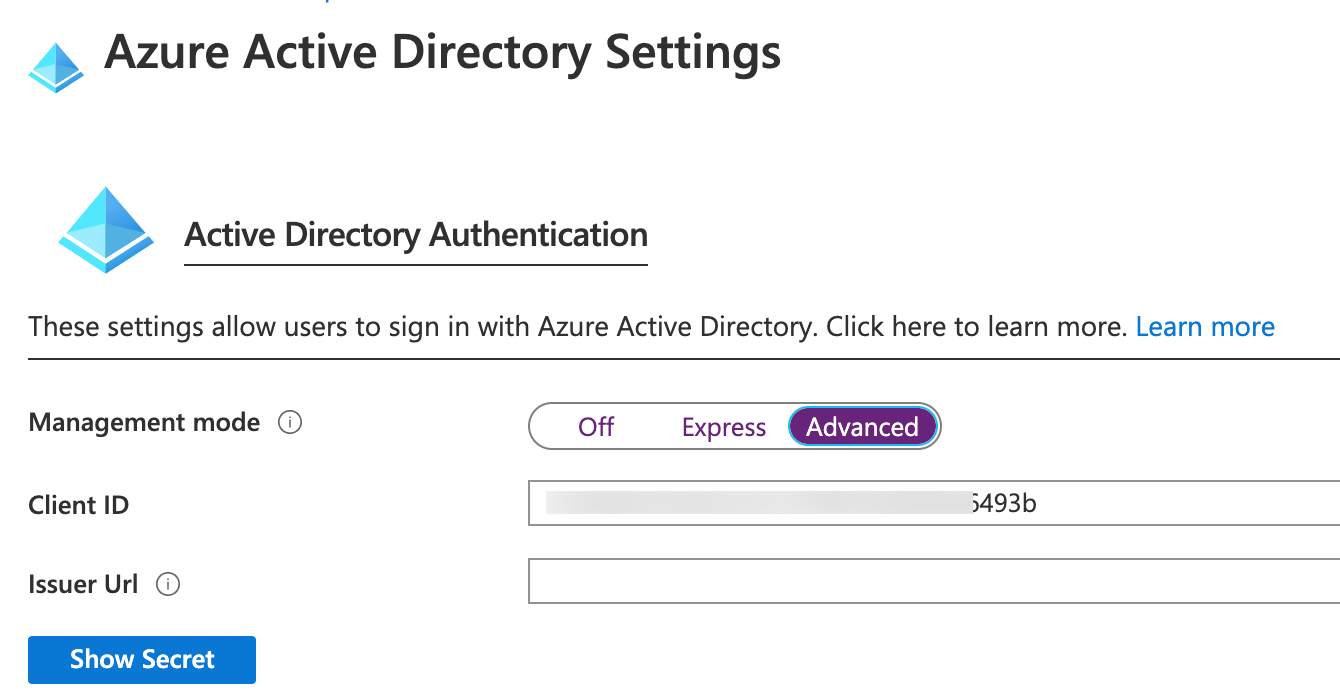
Click on the Azure Active Directory and switch from Express to Advanced
This should bring up the below screen with the Client Id of your selected app already pre-set along with the issuer url.
To make this multi-tenant – CLEAR the Issuer URL and save.
Ref: https://docs.microsoft.com/en-us/sharepoint/dev/spfx/use-aadhttpclient-enterpriseapi-multitenant
Now if you try to execute the function through Postman you will receive an authentication error. You will need to provide authentication token to be able to execute this.
The next step is to create the wrapper around this function. We will check the steps to create a custom connector in the next part.
One Pic = 1000 words! Analyze data 90% faster with visualization apps!
Get optimum visualization of Dynamics 365 CRM data with –
Kanban Board – Visualize Dynamics 365 CRM data in Kanban view by categorizing entity records in lanes and rows as per their status, priority, etc.
Map My Relationships – Map My Relationships – Visualize connections and relationships between Dynamics 365 CRM entities or related records in a Mind Map view.
Wonderful resource on Power Automate
I have bookmarked the resource for future learning
Please keep up sharing valuable knowledge