Introduction:
Dynamics 365 Portals helps people to access CRM data outside CRM environment and that too at times with people accessing portal may not have login privileges to CRM. So there can be scenarios where in CRM, admin level users can create contacts in CRM and give those contacts just access to portal. So it’s understandable that admin users may not have many details of contacts like for example Bank Details, to whom portal access needs to be given, at the time of creation of contacts. But in such situation, we can configure portal in such a way that when a contact log in to the portal, he/she can be prompted to fill the details like Bank details which may be required further for business.
Recently we had such a client requirement, where the client wanted to create contacts, to let those created contacts access their portals, with minimum information available to admin users. But the client wanted the contacts (portal users) to fill in their bank details as a required process from portal. i.e In CRM, admin users won’t fill Bank details at time of portal contacts creation. But once those contacts sign into portal, they were explicitly made to fill Bank details as a mandatory business process.
i.e In technical terms, CRM Admin users must be able to create portal contacts in CRM without filling bank details (as those fields will be optional in CRM) and portal users must be made to fill in all the bank details when they visit the page containing bank information on portal which can be achieved by making those optional bank related fields of CRM as mandatory fields in portal. So by doing some portal configurations explained below we were able to achieve the same.
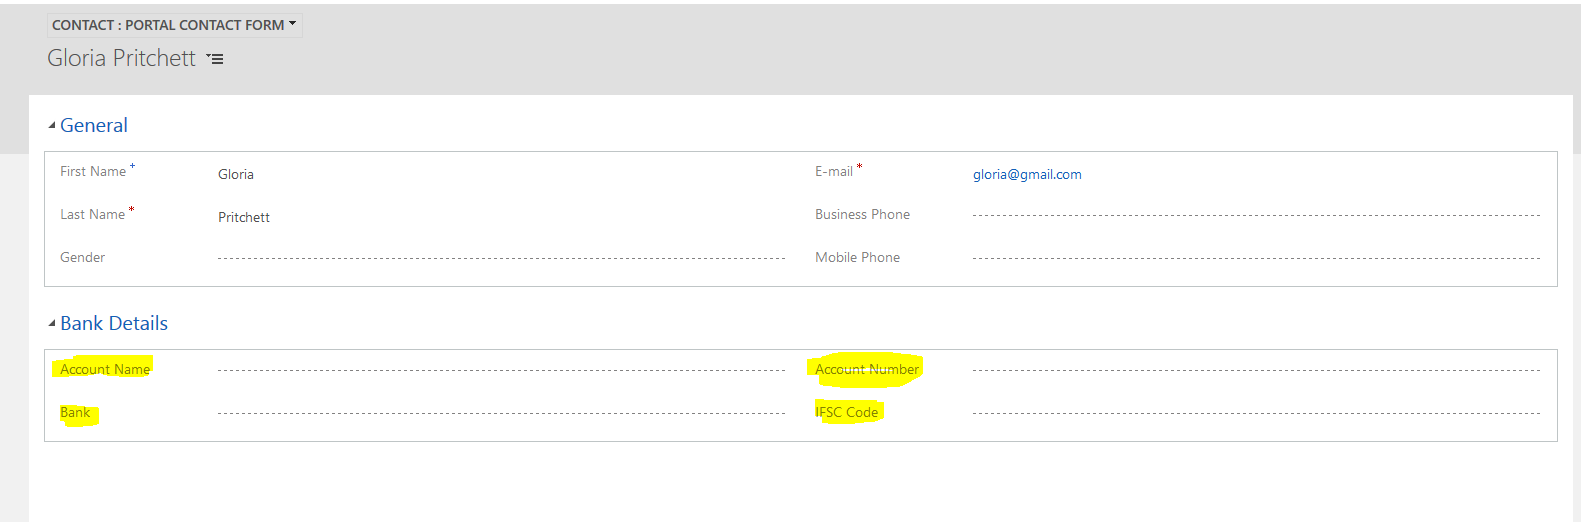
So as an example we have a created sample contact form in our trial environment. Below screenshot is the sample contact form visible in CRM which we will be using in the entity form used in the sample web page say “Bank Details” to be displayed on our sample portal. As seen in the screenshot below, the highlighted fields are optional fields in CRM.
Now we will create an entity form “Bank Details” where we will display the tab “Bank Details” of the above sample contact form. This entity form will be displayed on portal on the sample web page “Bank Details” as seen below.
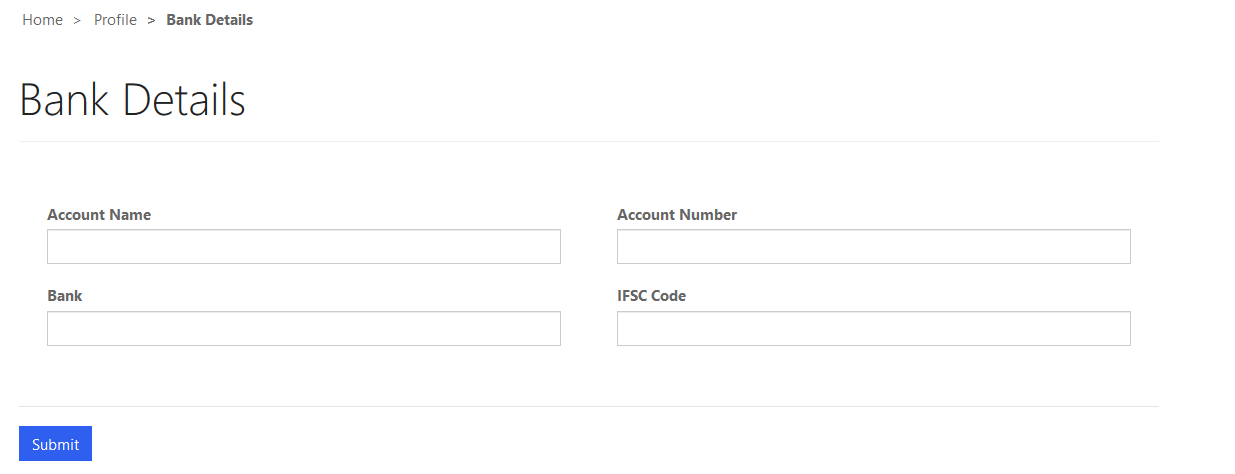
Currently in the portal too, the fields in bank details are optional as seen in the contact form in CRM.
Now do the following steps on entity form for each field you want to make mandatory for portal.
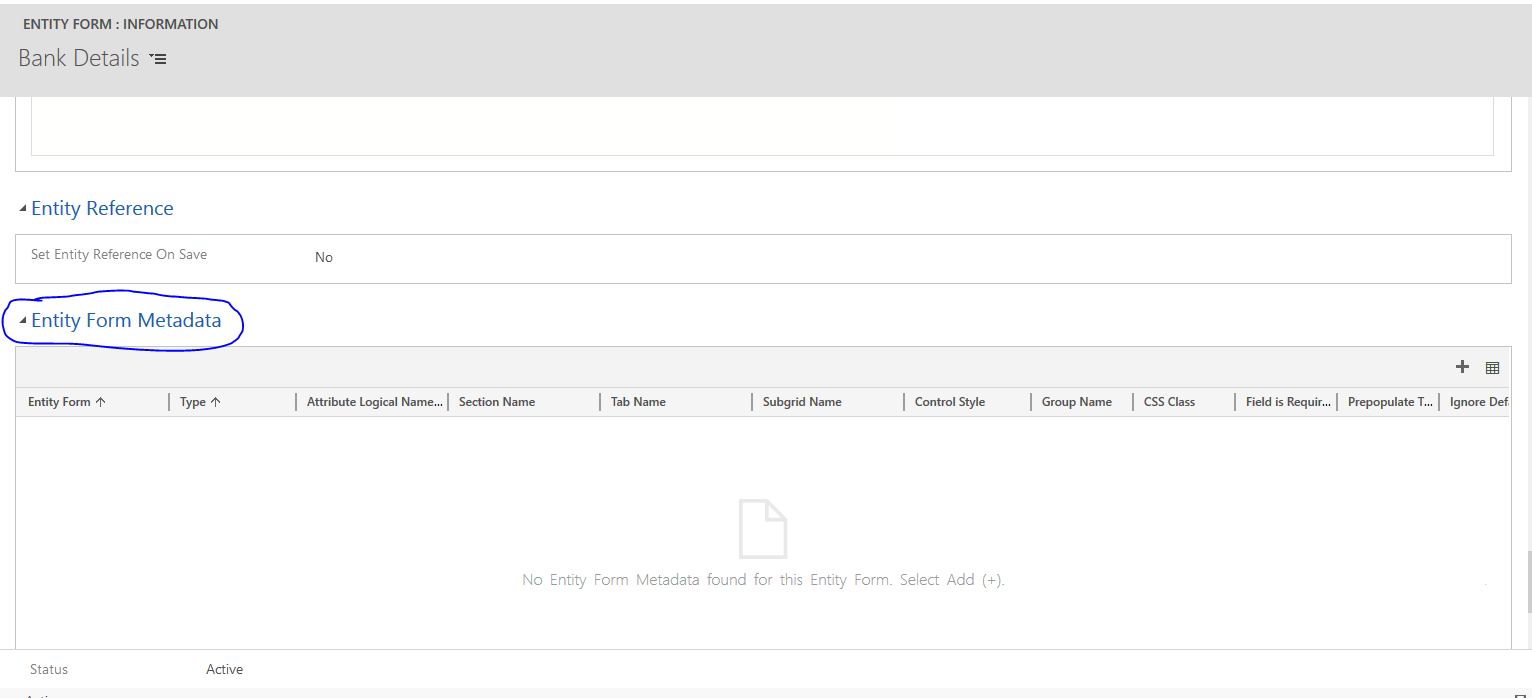
- Go to the section “Entity Form Metadata” as seen in the screenshot below of an entity form and click on “+” sign of the entity form metadata subgrid to create a record of entity form metadata to do configuration of each field which is to be made mandatory on portal
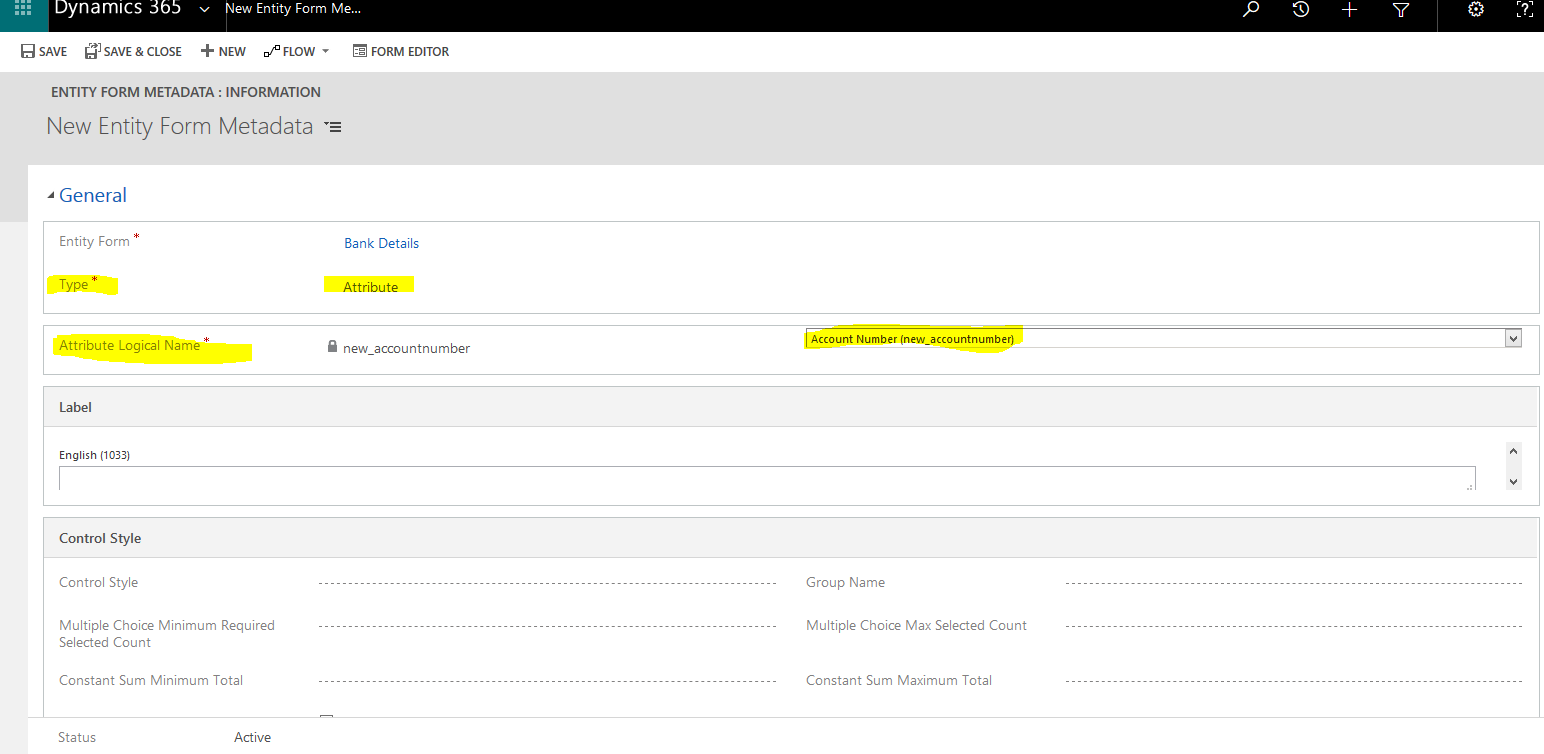
- So on the create page of entity form metadata record, select the option “Attribute” for the field “Type” and select the field to be made mandatory on portal(in our example Account number) for the field “Attribute Logical Name” as highlighted in the screenshot below.
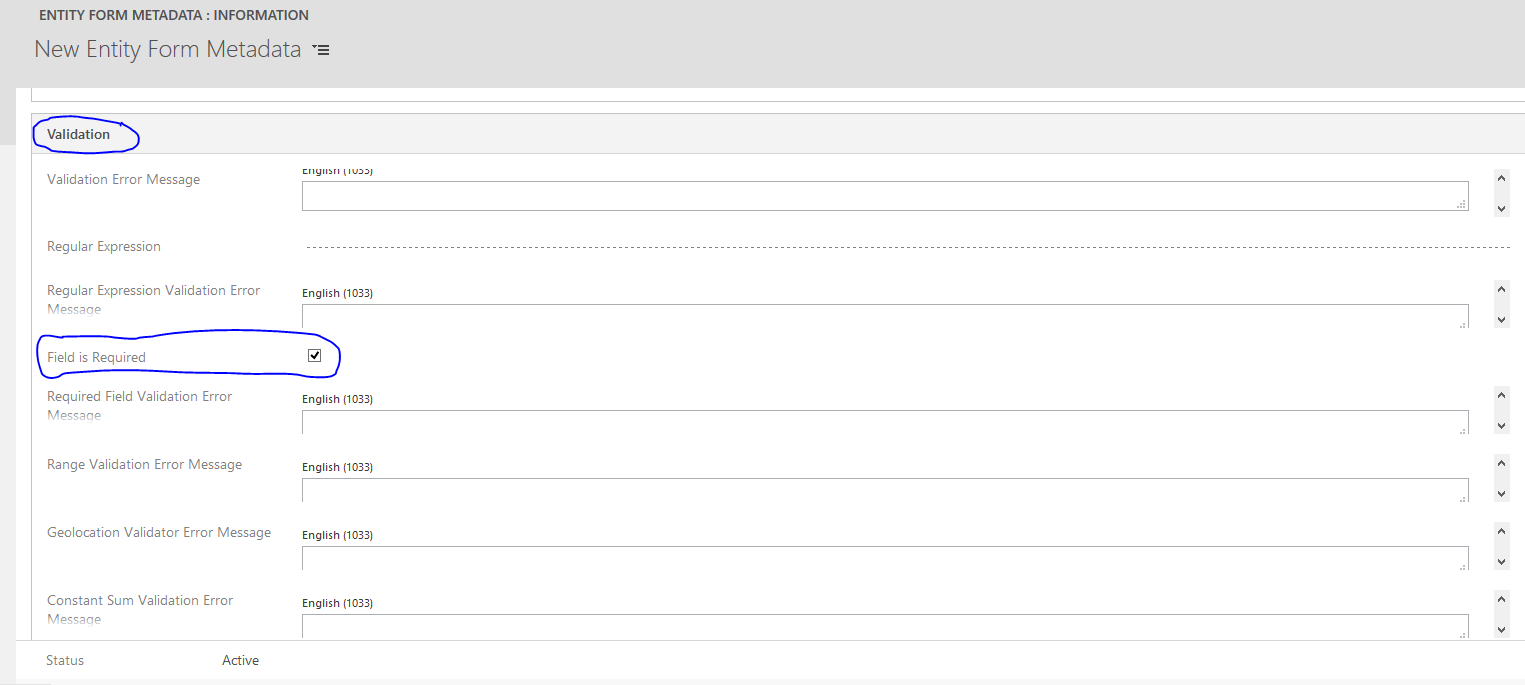
- Now scroll down to the section titled “Validation” in the entity form metadata record and there’s an empty checkbox option titled “Field Required” as seen & highlighted in the screenshot below. Tick that option to make the field mentioned in entity form metadata record as mandatory on portal.
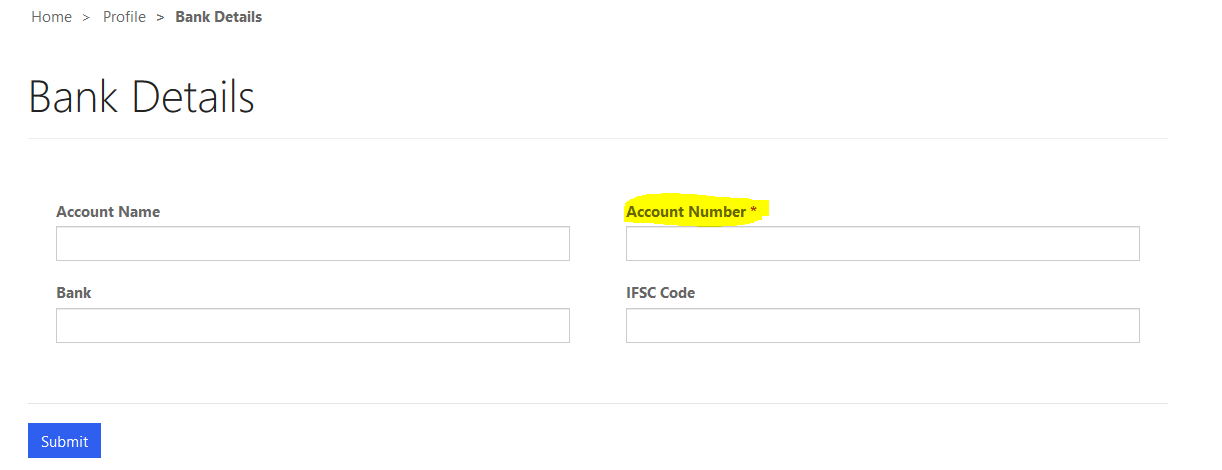
- Save this record of entity form metadata and refresh the bank details page on portal. You can see now account number field (which is still an optional field in CRM) is now mandatory field on portal as seen in the screenshot below.
Conclusion:
So in this way user can do the portal configurations to make optional fields of CRM as business required fields on portal.
Cut short 90% of your manual work and repetitive data entry!
Get 1 Click apps and say goodbye to all repetitive data entry in CRM –
Click2Clone – Clone/Copy Dynamics 365 CRM records in 1 Click
Click2Export – Export Dynamics 365 CRM Report/CRM Views/Word/Excel template in 1 Click
Click2Undo – Undo & Restore Dynamics 365 CRM data in 1 Click
Thanks – this is great news.
But is it possible to do the same exercise on the portal profile page?
(I ask since there is no “entity form” record for the Contact Portal Profile page)
BR,
Henrik
This process of making an optional field in CRM as mandatory field in portal(as per this blog) is not possible on Profile page due to like you have said. i.e Entity form not available for that page.
But if you want to add/remove fields you see on the profile page, you can customize the contact entity form titled Profile Web Form for that purpose. For a field to be mandatory in profile page in portal, it has to be mandatory in CRM as well.
Hope this helps.
Thanks!