Microsoft Dynamics 365 CRM allows users to send an Email to any recipient through Power Automate Flow. Recently we received a requirement to send a follow-up email that should be trailing mail for the previous email after 2 days of New Opportunity.
So, to fulfill this requirement, we have used Power Automate Flow to create an email to be sent as a Follow up trailing email in Microsoft Dynamics 365 CRM.
In this blog, we will walk through the steps for sending a trailing follow-up email after 2 days of Opportunity Creation to the respective Customer.
Step 1: When Opportunity is created we will be sending an initial Email to the Customer and after 2 days there will be a trailing follow-up email sent to them. Let us start with developing a Power Automate flow in Microsoft Dynamics 365 CRM.
Now navigate to https://make.powerapps.com environment and Create a solution for Power Automate Flow.
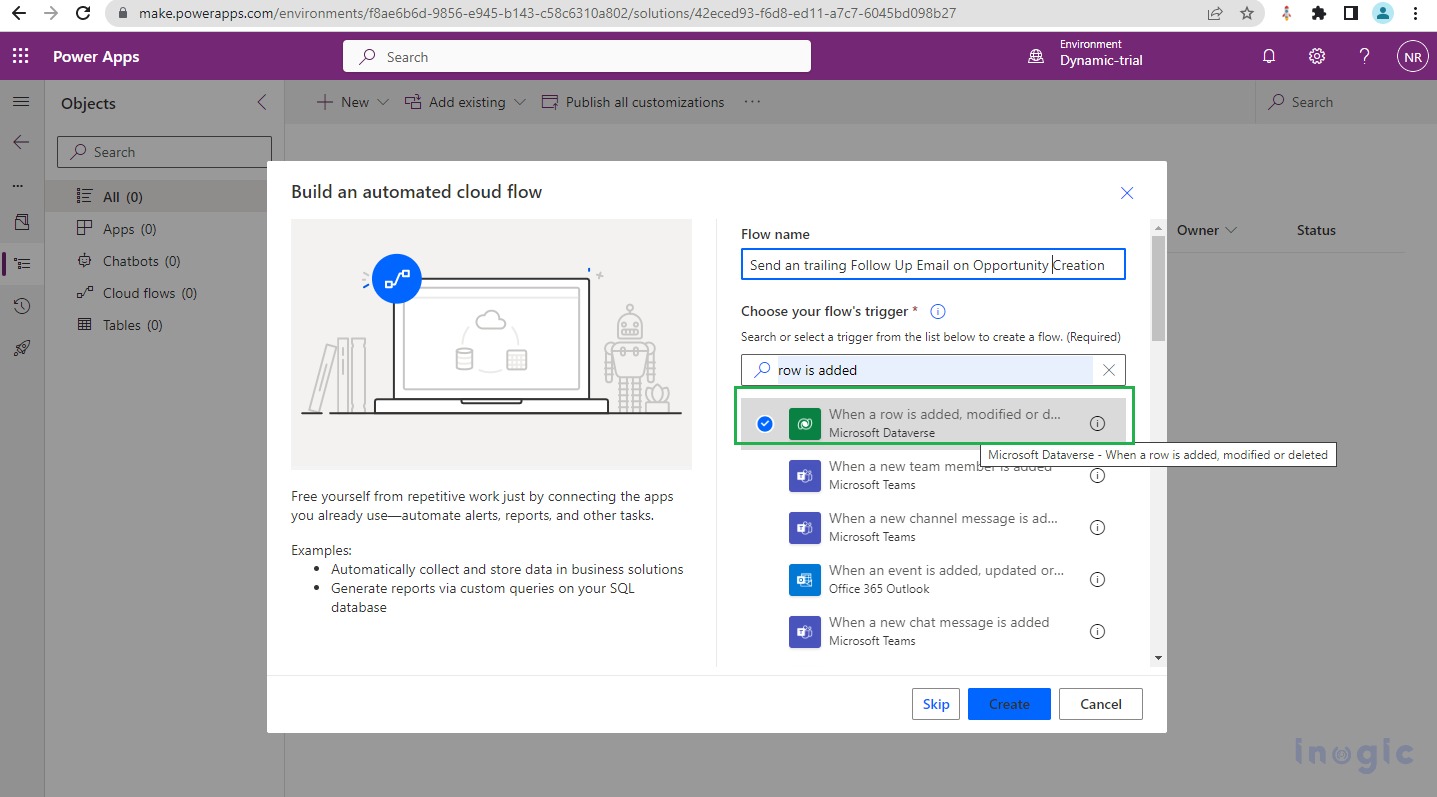
Step 2: Create a new Automated Flow with triggering action as “Row is Added, Modified or Deleted” as shown in the below screenshot.
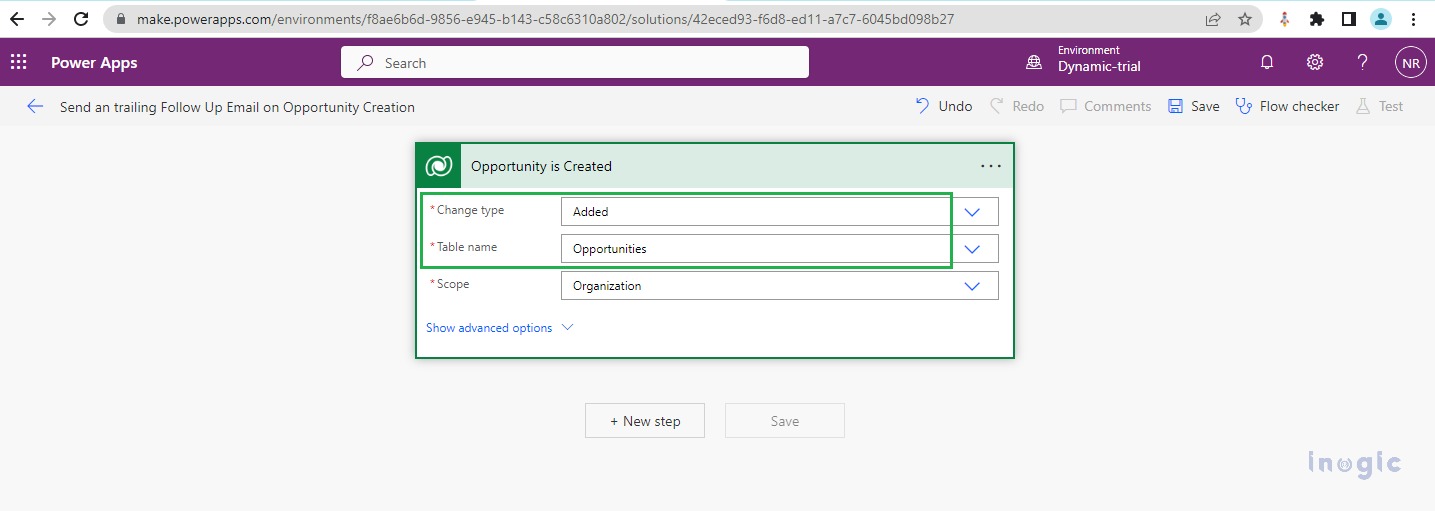
We will select Change Type as Added and Table Name as Opportunities for our requirement. Check in the screenshot below.
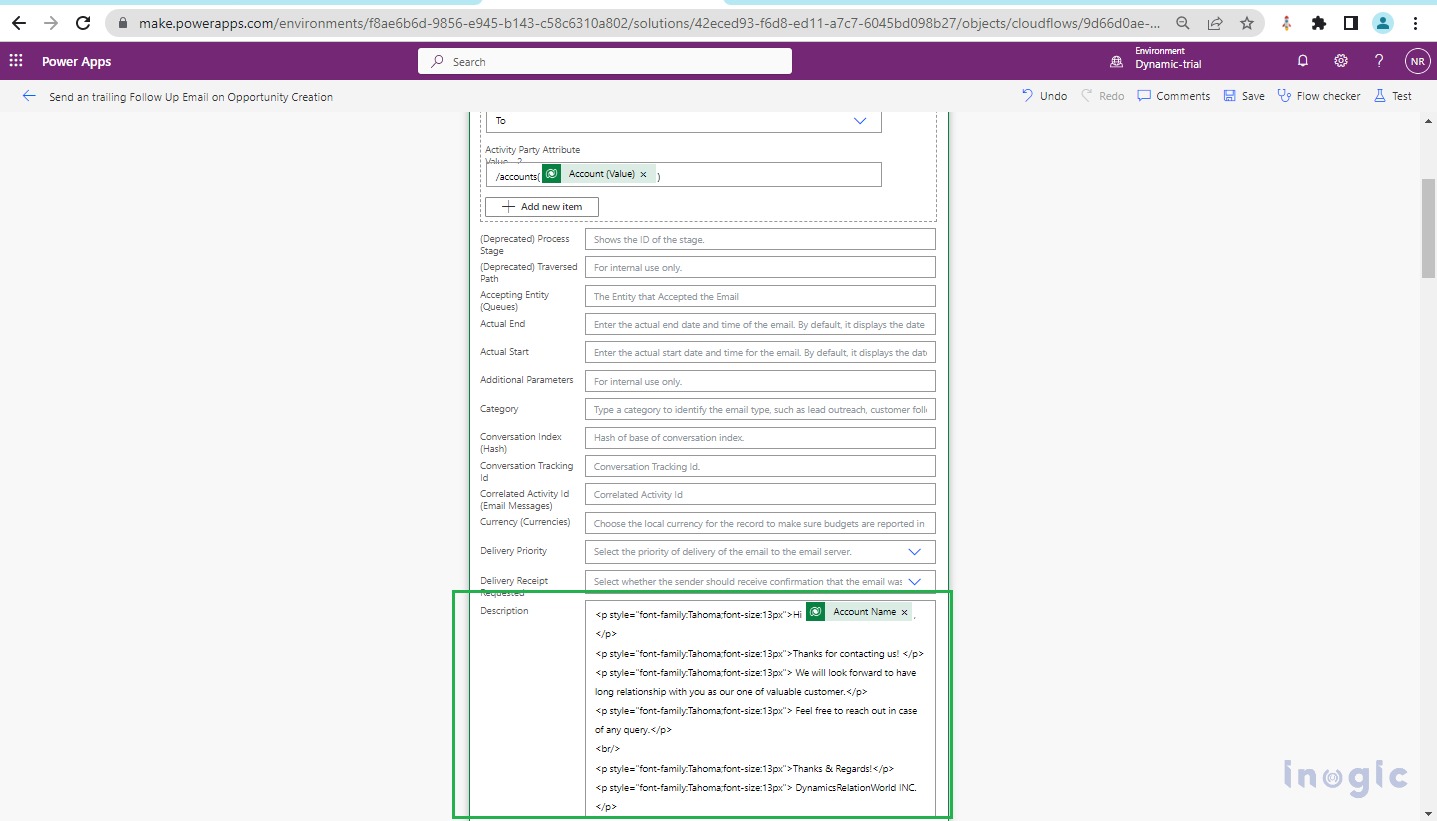
Step 3: On creation of Opportunity will first send an initial mail to the customer (i.e. Account) of the Opportunity, so add a step to create an Email Message by selecting Add a row step and selecting Email Messages entity with the below details of the email.

- From: Created By of the Opportunity
- To: Account of the Opportunity
- Subject: Add a subject based on your requirement
- Description: Add an email content message
- Regarding: Set Opportunity reference so that the email conversation will be respected to Opportunity and available in the Timeline of Opportunity record in Microsoft Dynamics 365 CRM
Please refer the screenshot below for reference emails created in the power automate flow step.
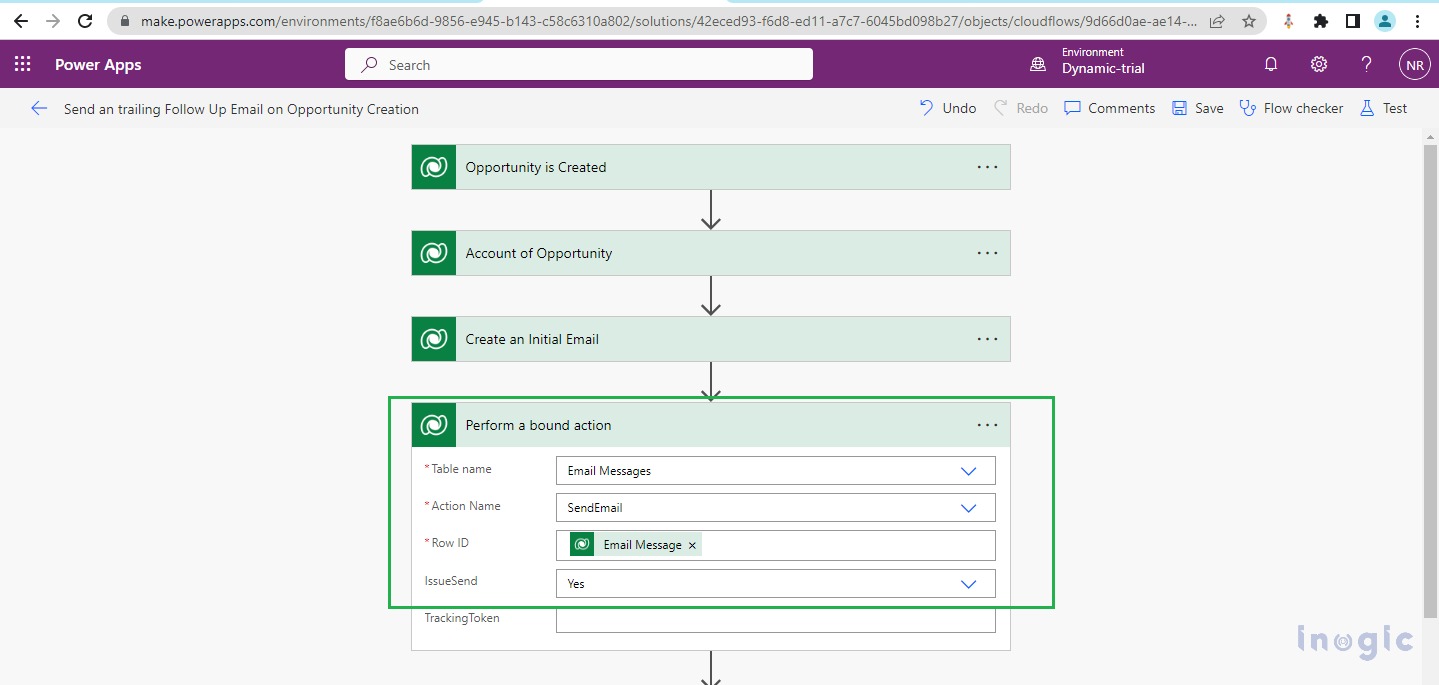
Step 4: Once the email is created will add a “Send Email” bound action step in Power Automate flow which will send an email message to Account.
Add a Perform a Bound Action step and select the below details within this step.
Table Name = Email Message
Action Name = “SendEmail”
Row ID = Unique Identifier of Email Message created in the previous step
IssueSend = Yes
Find screenshot below
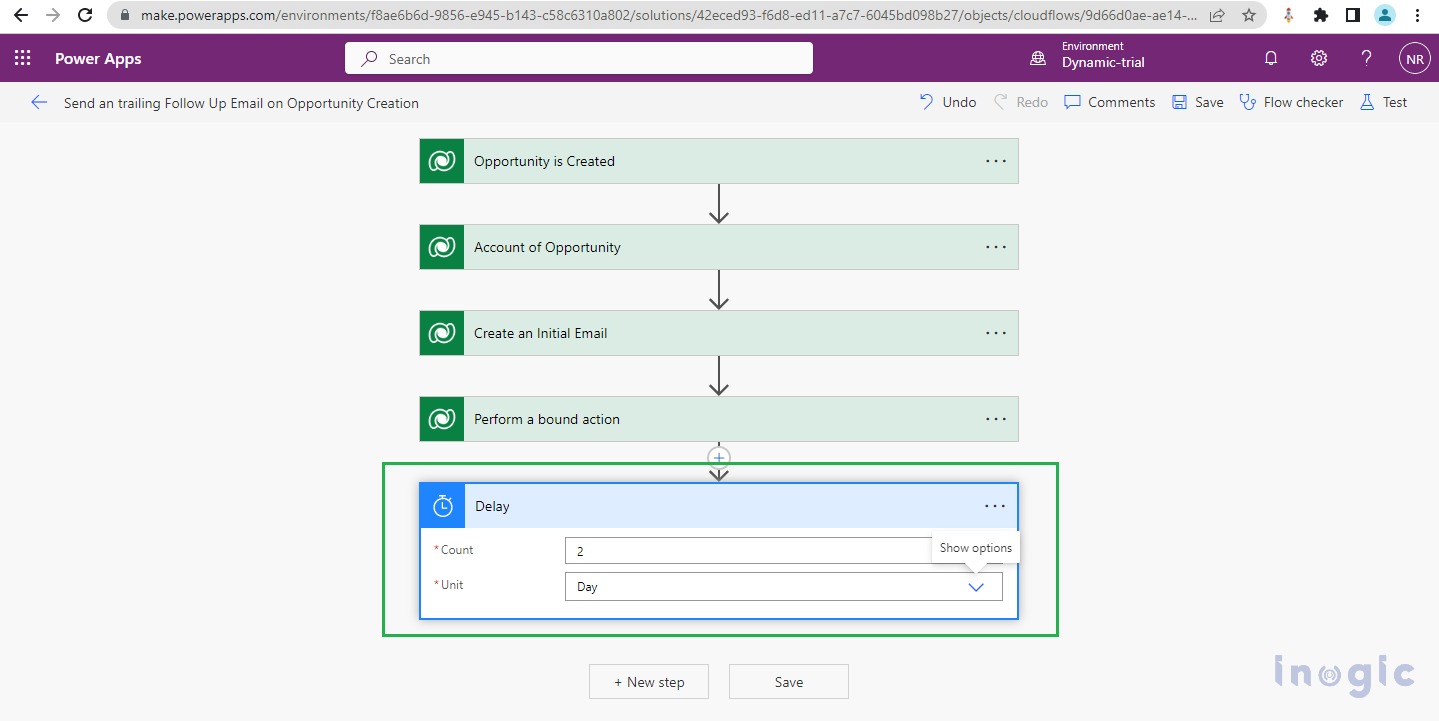
Step 5: We have sent an initial mail so will wait for 2 days and send a follow-up email to the Customer.
Add a Delay Step in power Automate with Count as 2 and Unit as Day as seen in the screenshot.
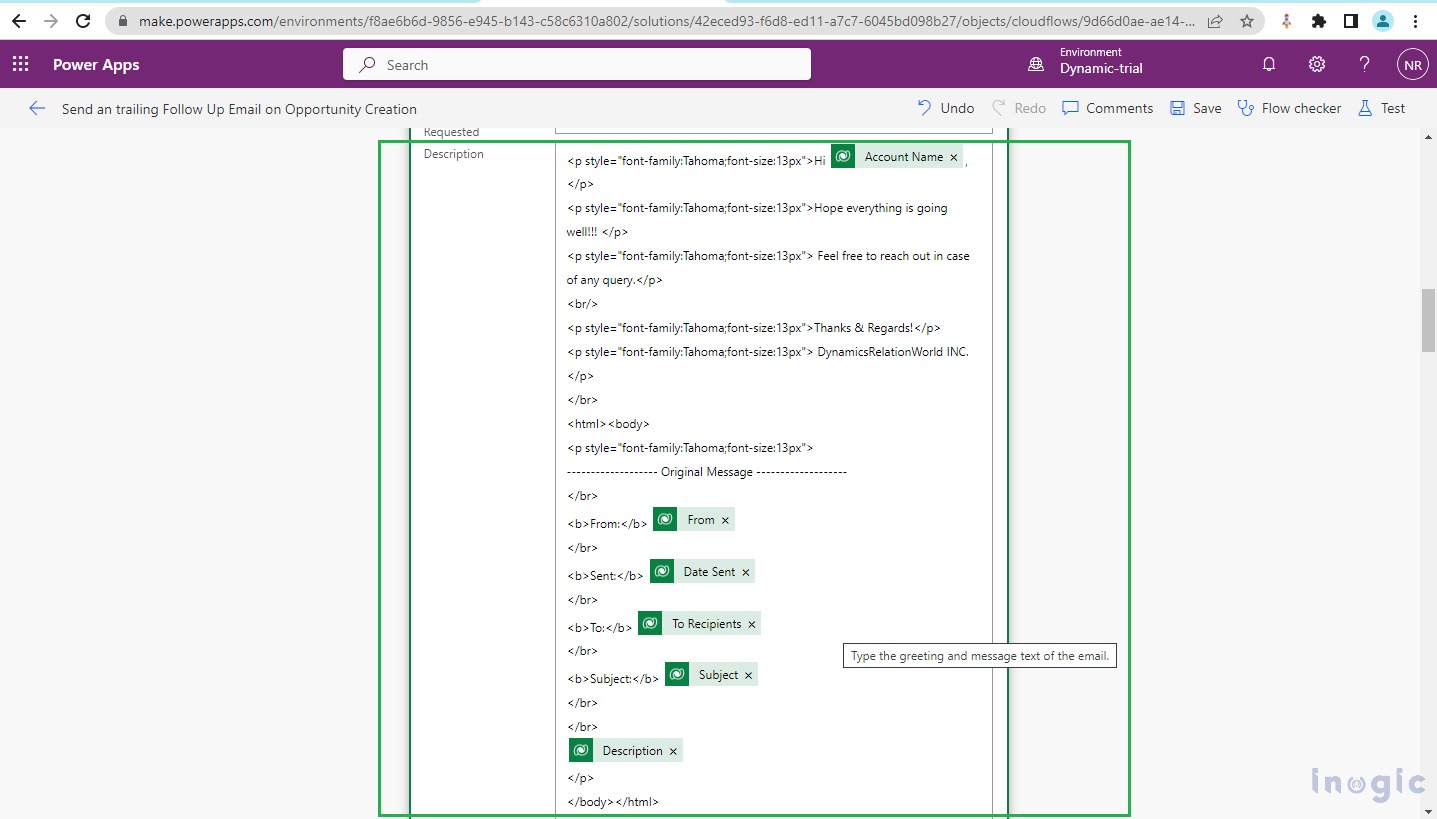
Step 6: Now to create a new email, add a step “Add a new Row” and select Email Message Table Name with the below-listed details in the email message:
- From: Created By of the Opportunity
- To: Account of the Opportunity
- Subject: Add a subject based on your requirement
- Description:
Email content of current follow-up Email
——————- Original Message ——————-
From: Sender’s Email
Sent: Sent On of the previous email
To: ‘torecipients’ of the previous email
Subject: subject of the previous email
Description of the previous email
- Regarding: Set Opportunity reference so that the email conversation will be respected to Opportunity and available iTimelinene of Opportunity record in Microsoft Dynamics 365 CRM
- Following: Yes
- Parent Activity: /emails(<Guid of Previous Email Message>)
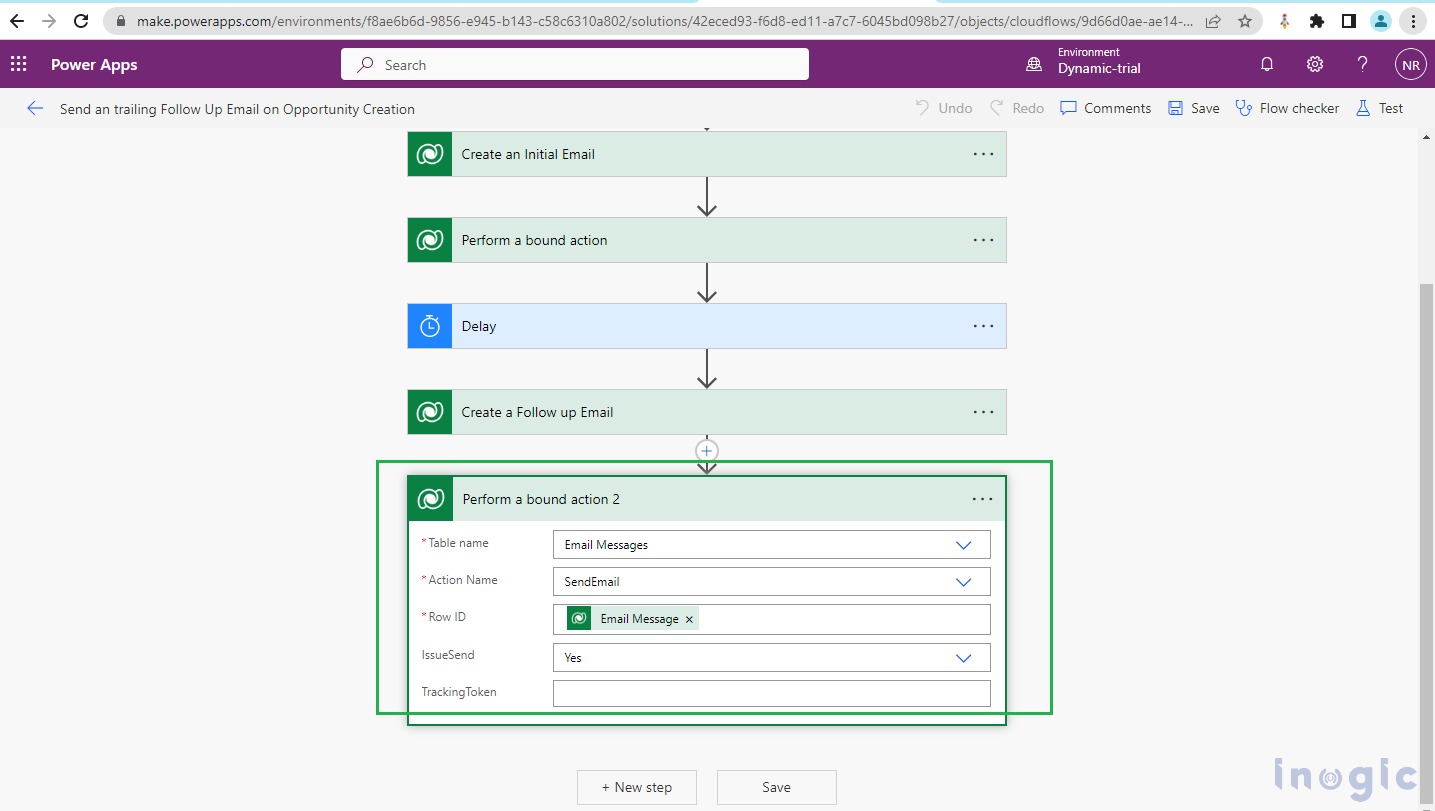
Step 7: Add a Perform a bound Action step for sending the Follow-up Email to the Account of the Opportunity.
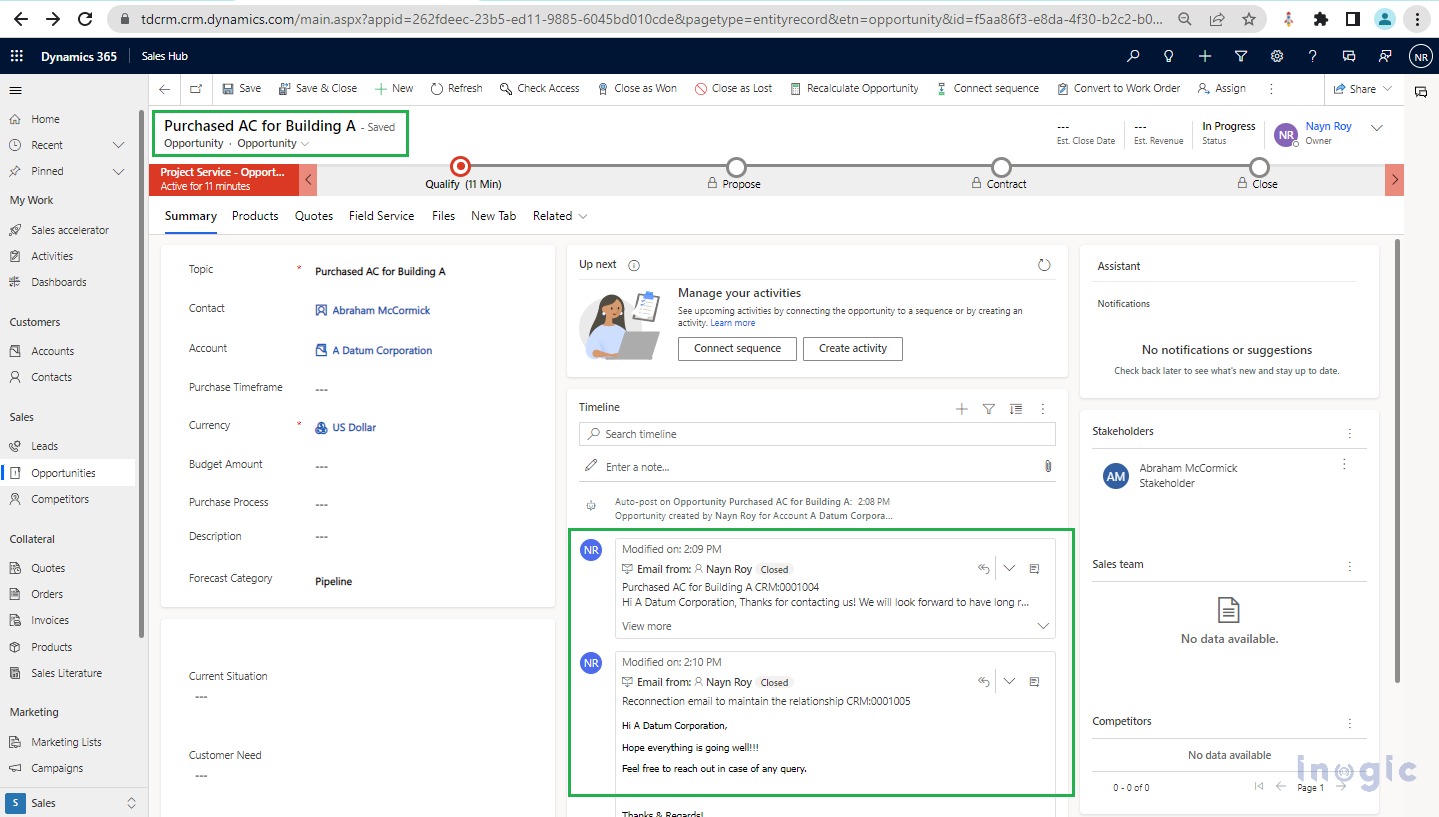
We have completed developing the power automate flow now save the flow and test the functionality by creating a new Opportunity in CRM.
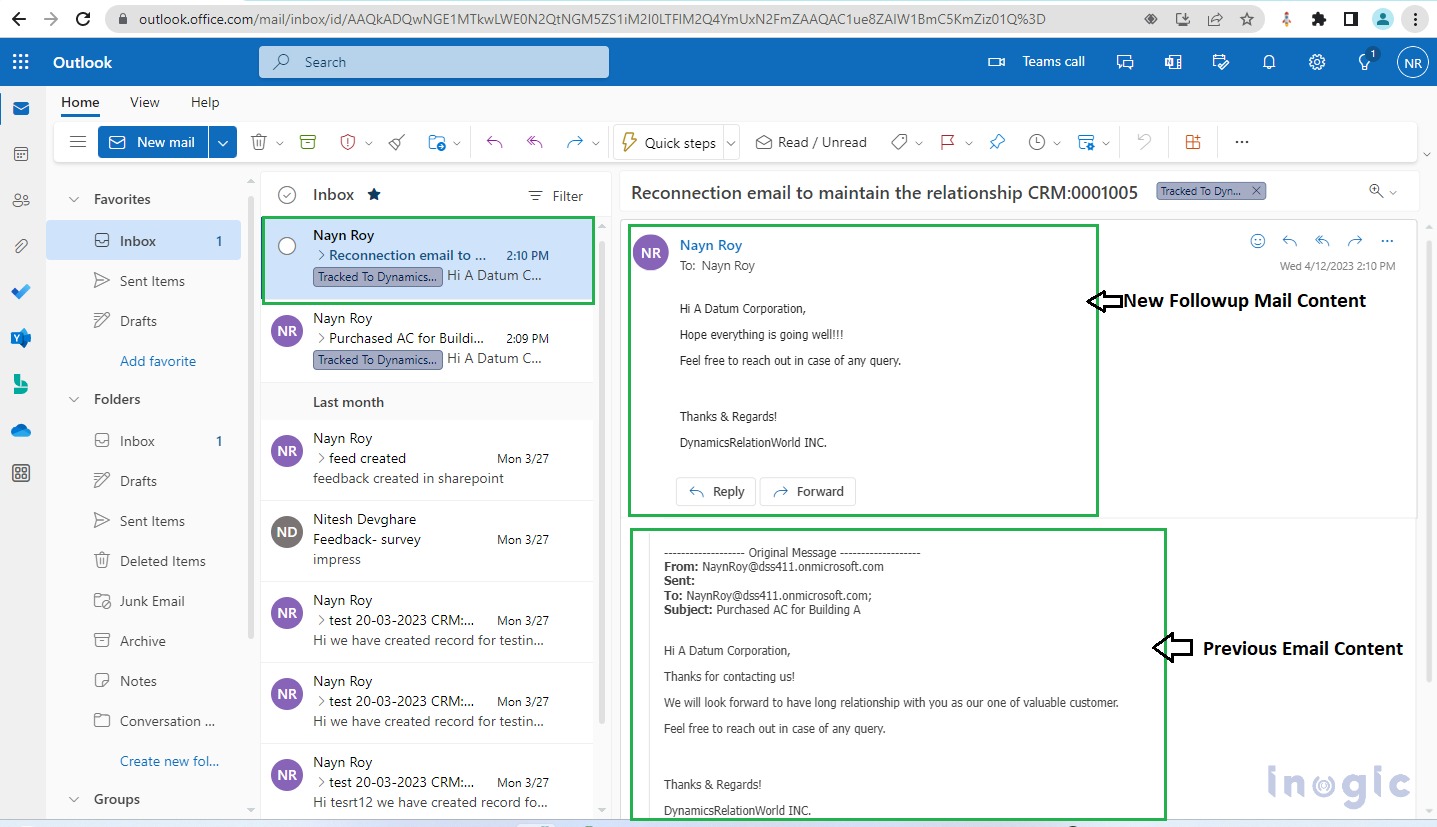
You can check in Outlook the email will be received as shown below screenshot,
Conclusion
In this way, we can customize the process of sending a follow-up email as a trail mail to the previous email using Power Automate Flow.