Introduction
In this blog, we will focus on the enhancements for creating an Email Template. With the help of Email Templates, users can send repetitive and recurring emails to multiple customers which saves time. This feature provides an advanced Design canvas and layouts which are responsive and can get adapted to any screen size to create a Customized Email Template.
To have access to this feature, it is necessary to enable it in your organization. Follow the steps given below for the same.
- Log in to make.powerapps.com
- Select the Environment that contains your solution.
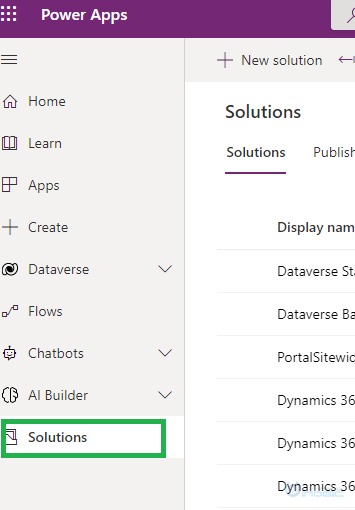
- Click on Solutions -> Select the solution in which you want to enable an enhanced template editing experience.
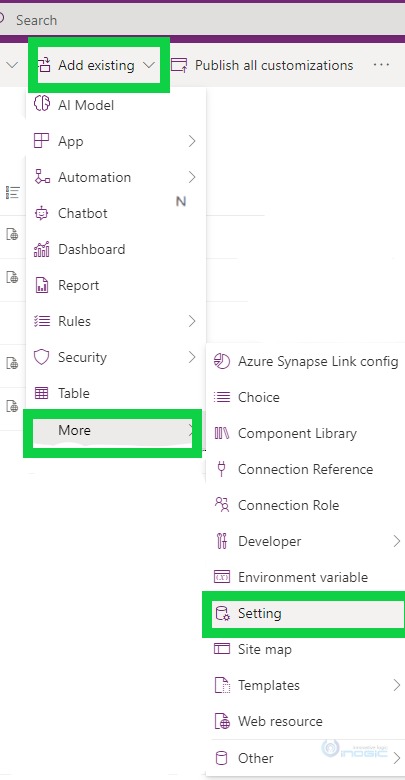
4. Once you select the solution, click on ‘Add existing’ -> More -> Settings.
Note: ‘Add existing’ button is not available for the Default solution and Managed solution because we cannot directly edit objects within a managed solution.
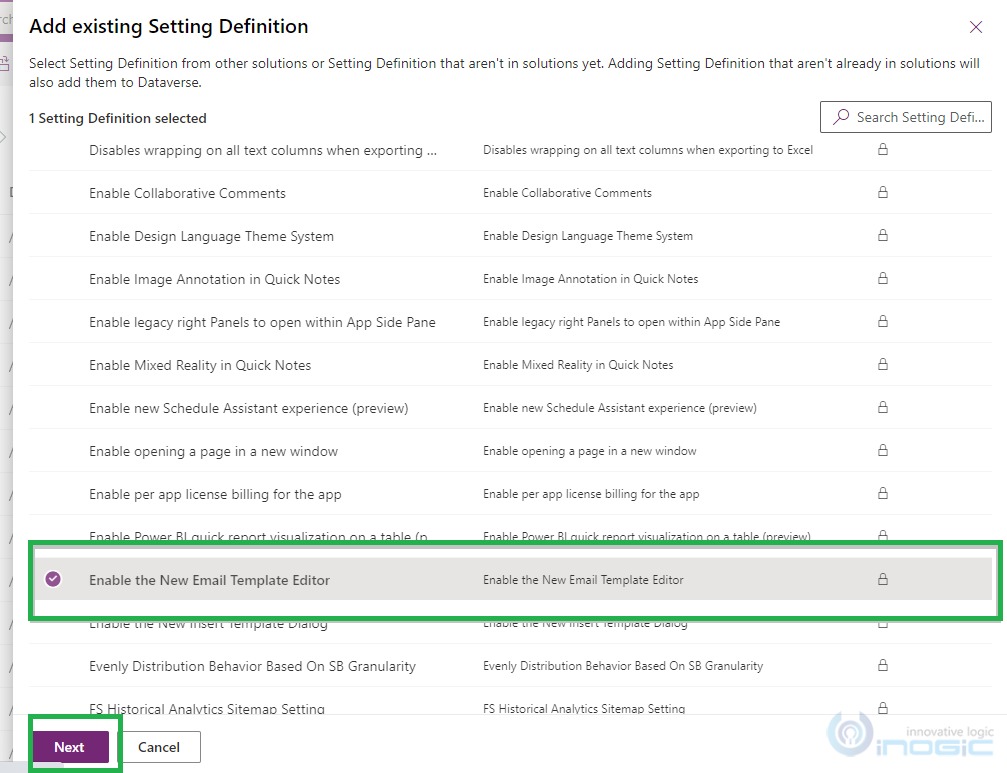
5. On ‘Add existing Setting Definition’ page, select ‘Enable the New Email Template Editor’ and then click on the Next button.
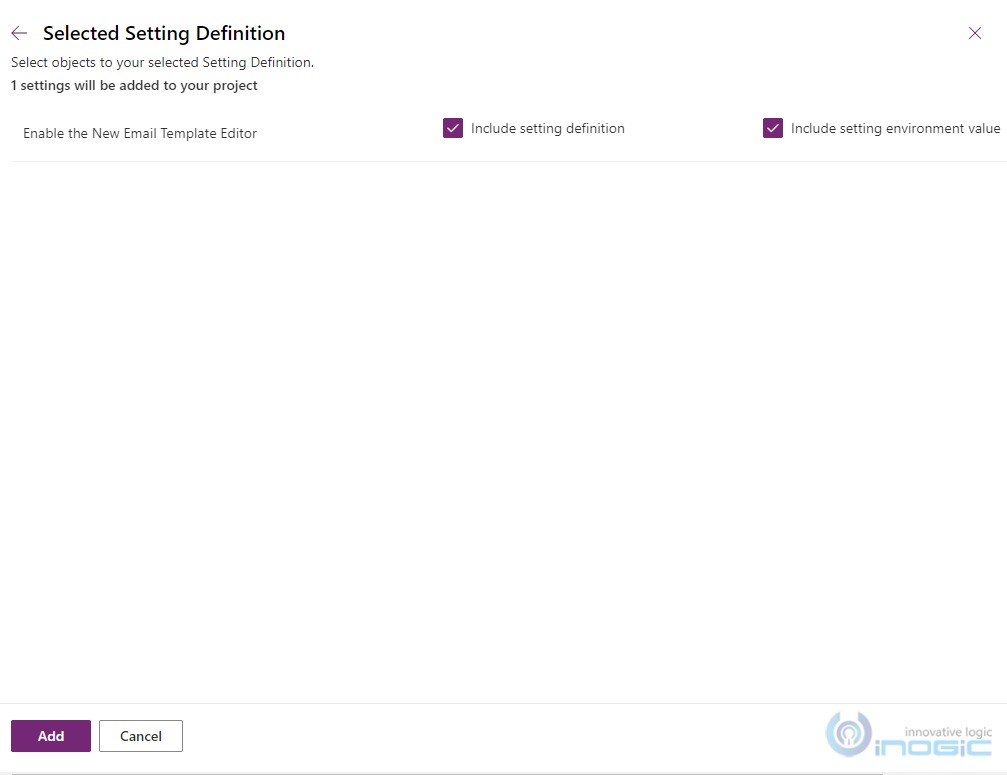
6. Click on Add button.
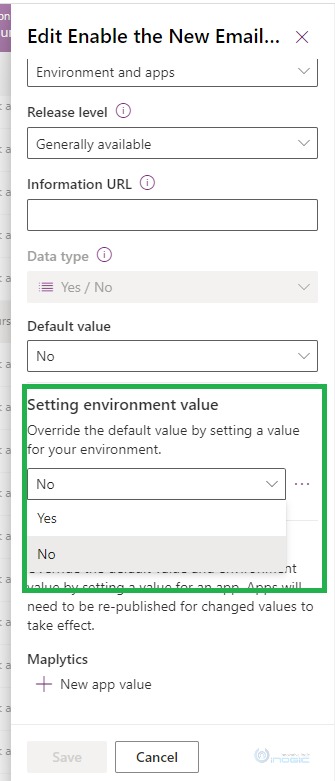
7. Now select the ‘Enable the New Email Template Editor’ option -> Click on the ellipse button -> Click on the edit button.

8. In ‘Edit Enable New template Editor’ Pane, set the setting environment value to Yes and click on the Save button.
9. Select ‘Publish all customization’.
Now, the Enhanced Email Template editor is enabled in our organization.
To create Email template, follow the steps given below:
- Gto the customer service hub app -> Select Service area -> Select Email template.
- Click on the new button in the ribbon bar -> Set the template name -> Click on Create button.
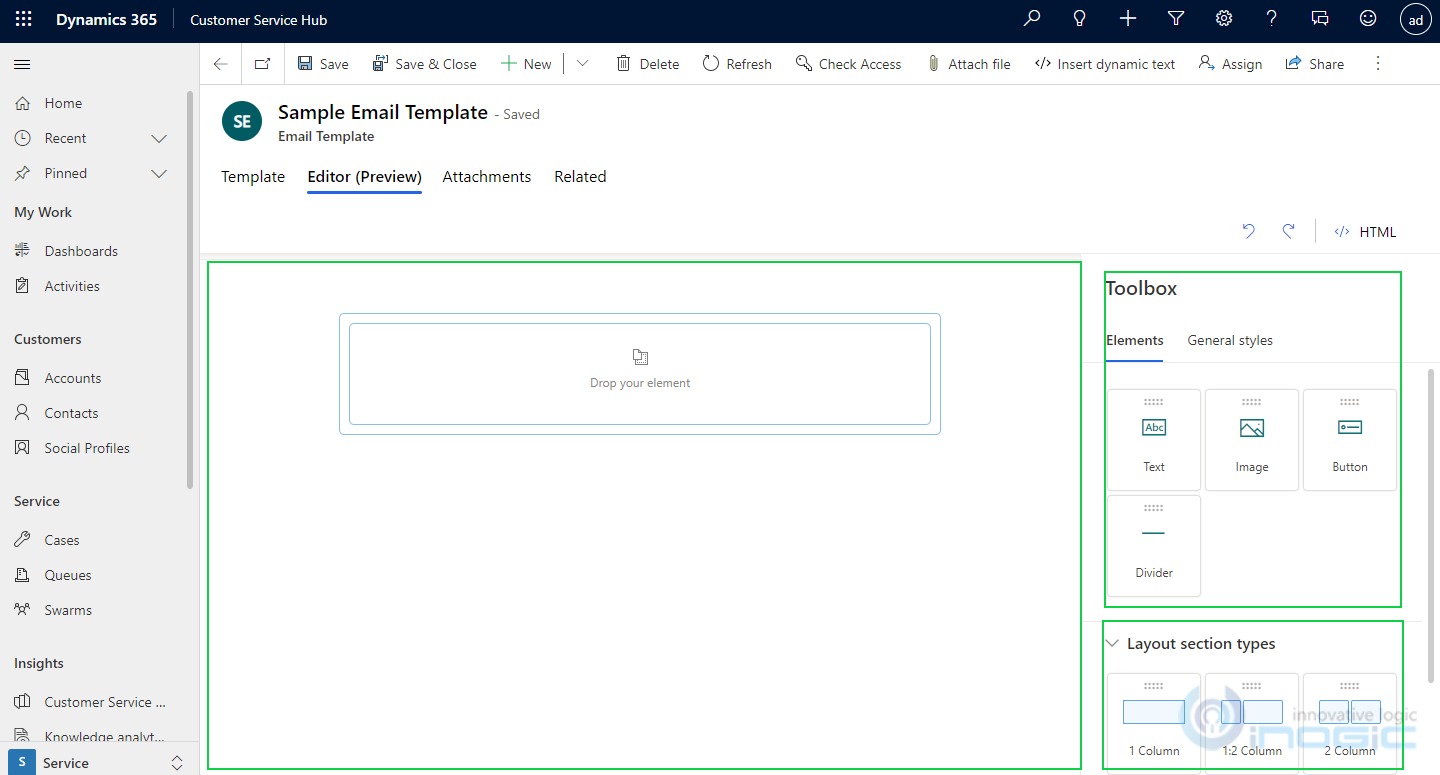
Once the template is created, you can create a customized Email template. The Editor Tab has three sections:-
- Design Canvas
- Toolbox
- Layout section types
Note: This enhanced Email template editor tab is available only when you create a new template. For pre-existing templates, it will load old designs.
1. Design Canvas: By default, Design Canvas has only one column section. Here you can enter, drag, delete or arrange content.
Here, you can add items in the template in two different ways:-
1. You can drag Element from the toolbox and place it on canvas.
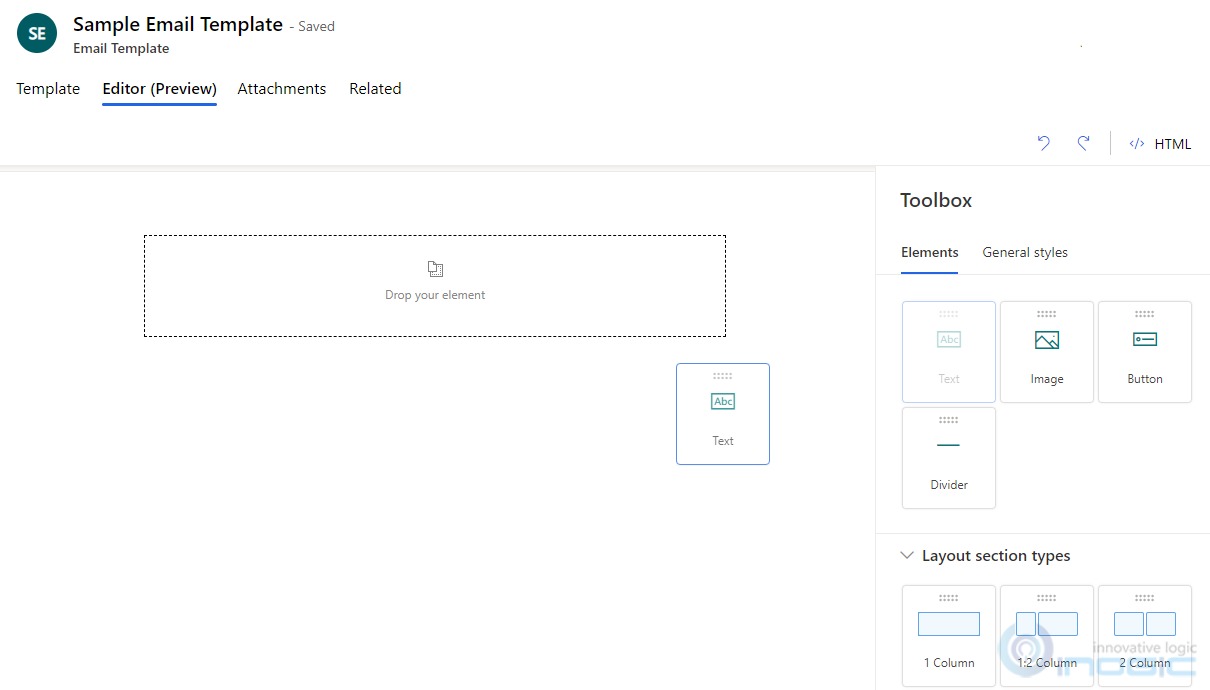
2. Select an element from Toolbox or Layout section types and click on “ + ” icon on Design Canvas.
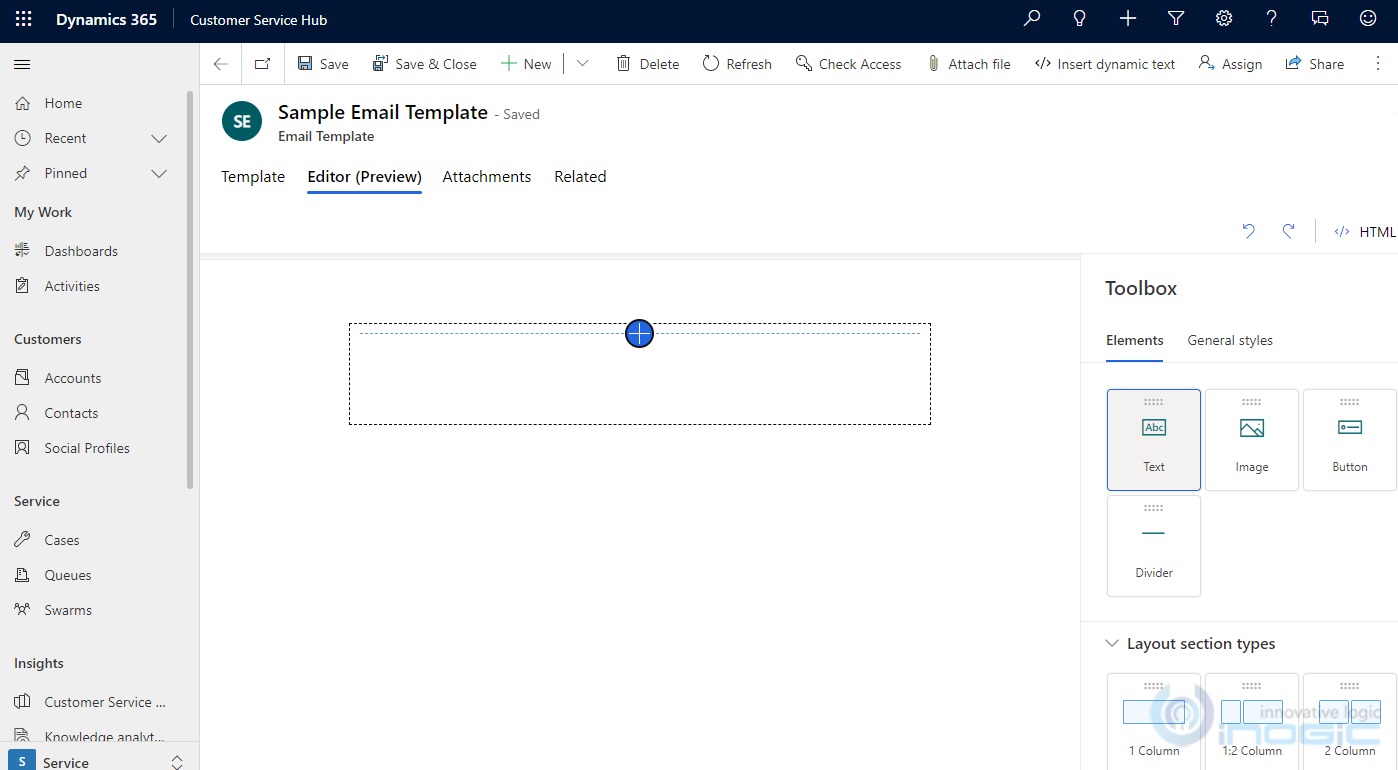
You can select ‘Go to Parent’ button to identify the section or column in which the element is embedded.
2.Toolbox: Toolbox section contains 4 Elements.
- Text – Through this element, you can add text to your Template. You can also format the context with the help of the Floating toolbar.
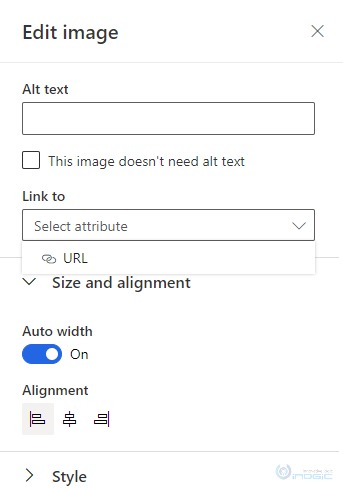
- Image – Through this element, you can add an image to your Template. You can browse an image from the library or also can specify a URL. You can also change image size and width.
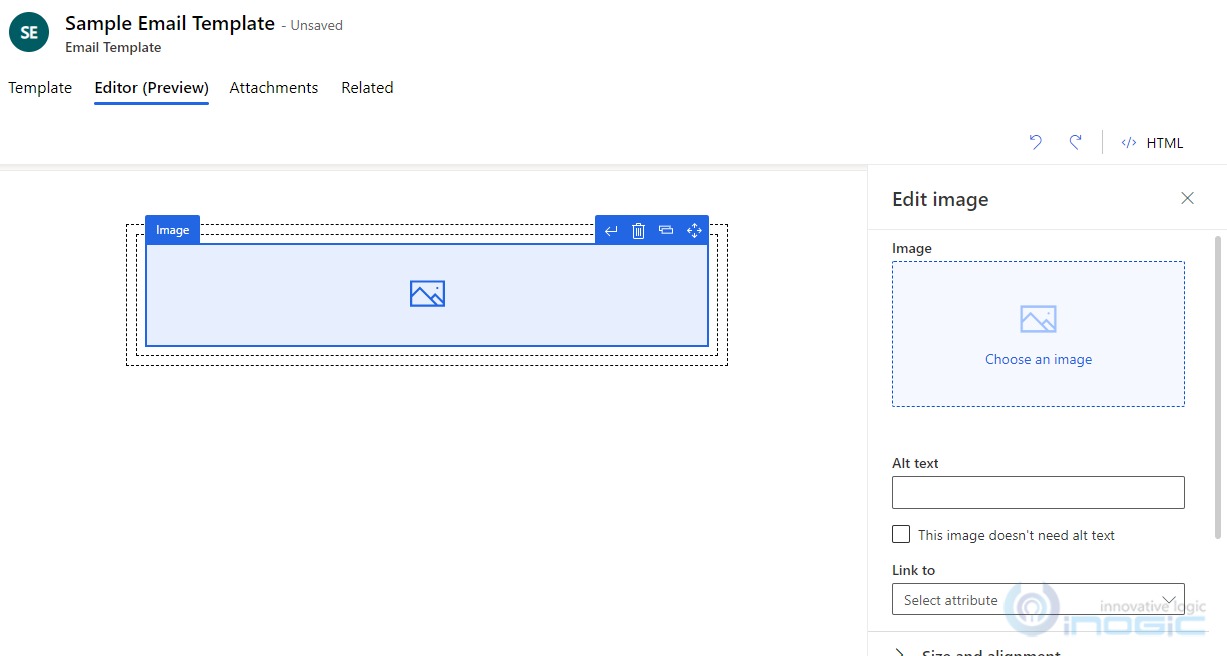
In the ‘Alt text’ field, you can add text, or else if you can select ‘This image doesn’t need an alt text’ checkbox. In the ‘Link to’ field you can specify a URL.
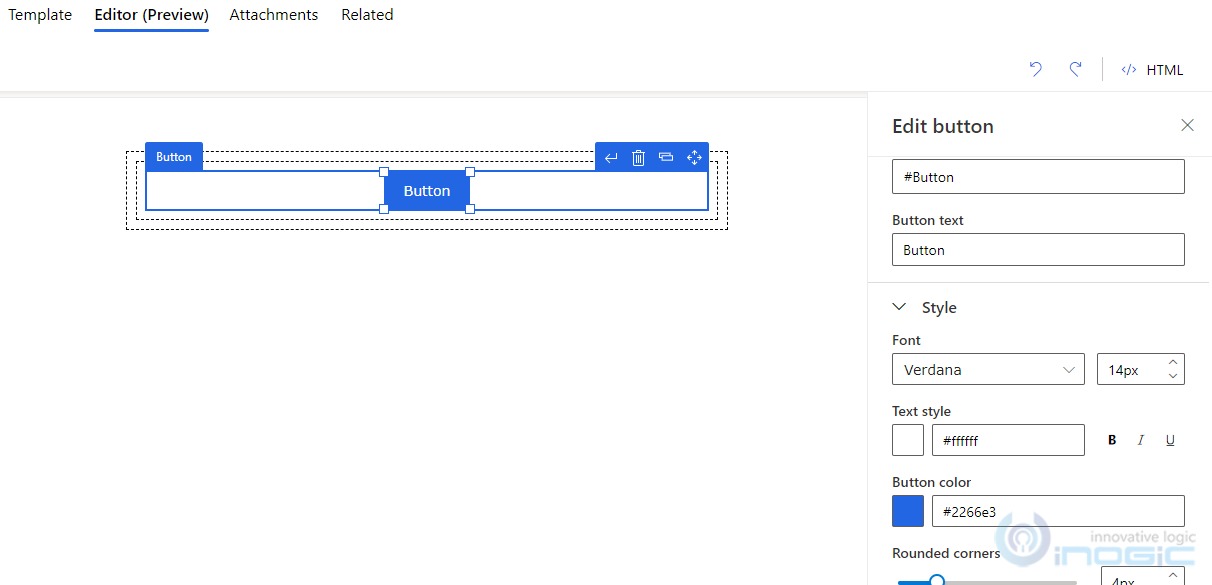
- Button – Through this element, you can add a button to your template. Once you drag the button element then in Edit Button you can enter a URL which will open when a user selects the button. In the Edit button section, you can change the button text, font style, text style, and button color.
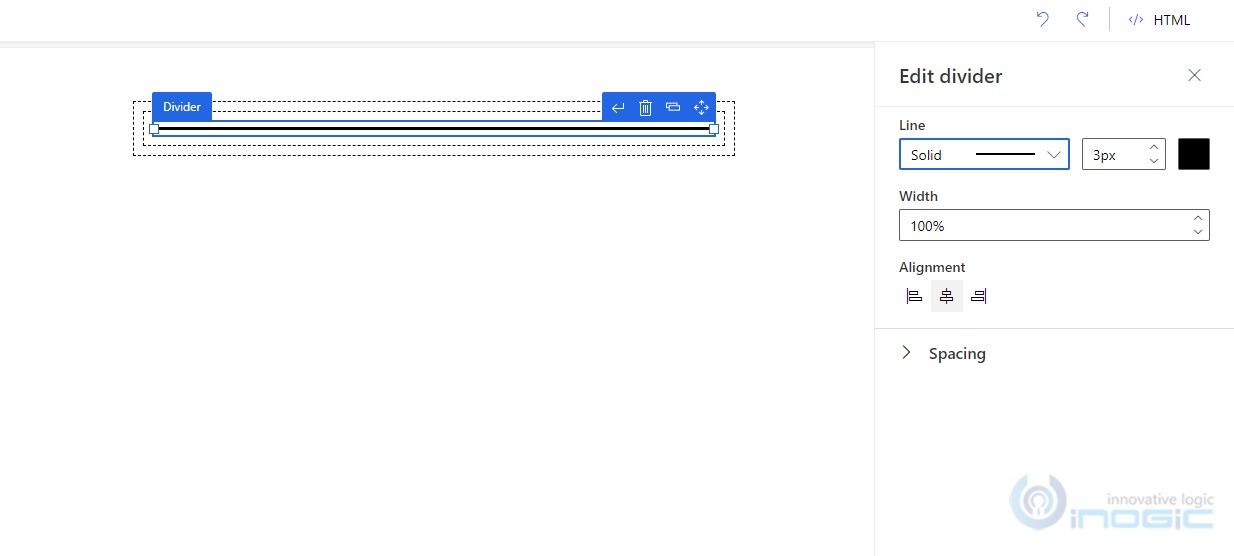
4. Divider – Through this element, you can divide the template into bordered sections. In the Edit divider section, you can change the divider’s appearance, color, width, alignment, and spacing.
3.Layout Section types:
You can modify the layout by selecting the layout and selecting Edit Layout. You can change the layout’s spacing, style, color, and image. You can also modify the number of columns.
To modify columns, select the column and then select the edit column and change style, color, and image.
In the General styles tab section, you can change layout width, font, background, and text color.
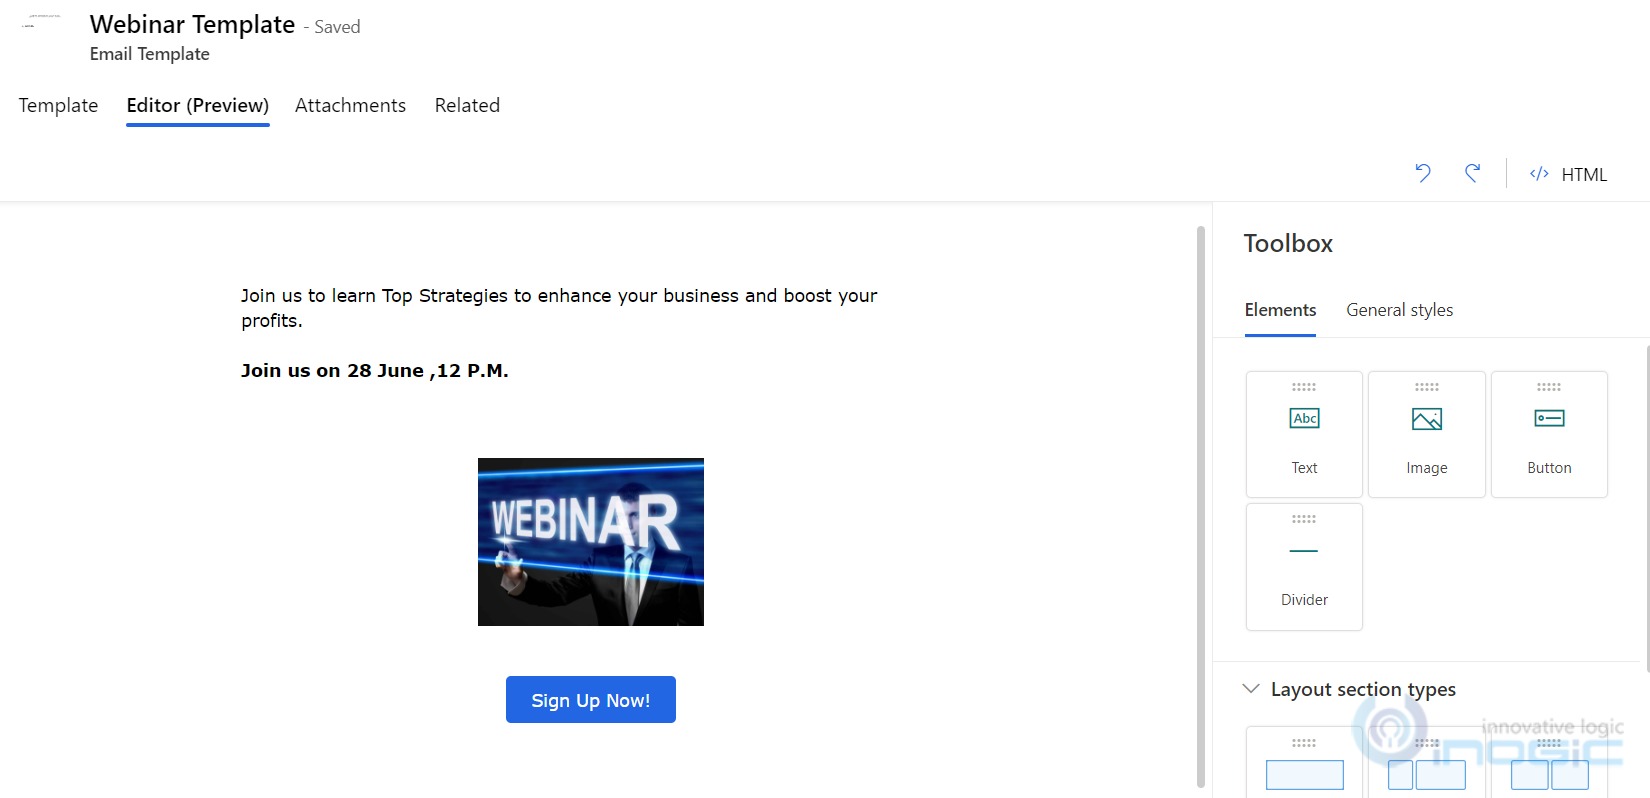
Below is the Customized Email template using advanced Design content and layouts.
You can also disable the enhanced email template for an app by following the steps given below:
- Log in to Powerapps. (make.powerapps.com).
- Select the solution from the left-hand side, then select the solution in which you have enabled the Enhanced email template.
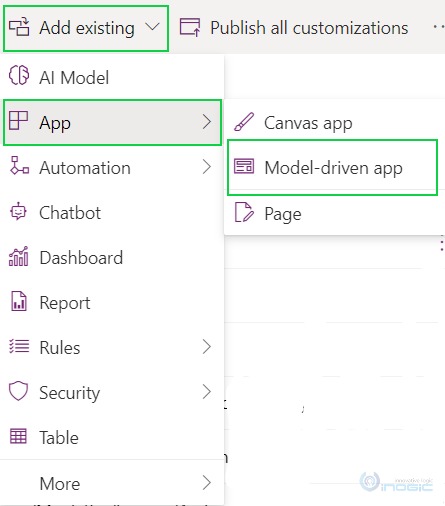
- Click on ‘Add existing’ on Ribbon bar -> Select apps -> Model-driven app.
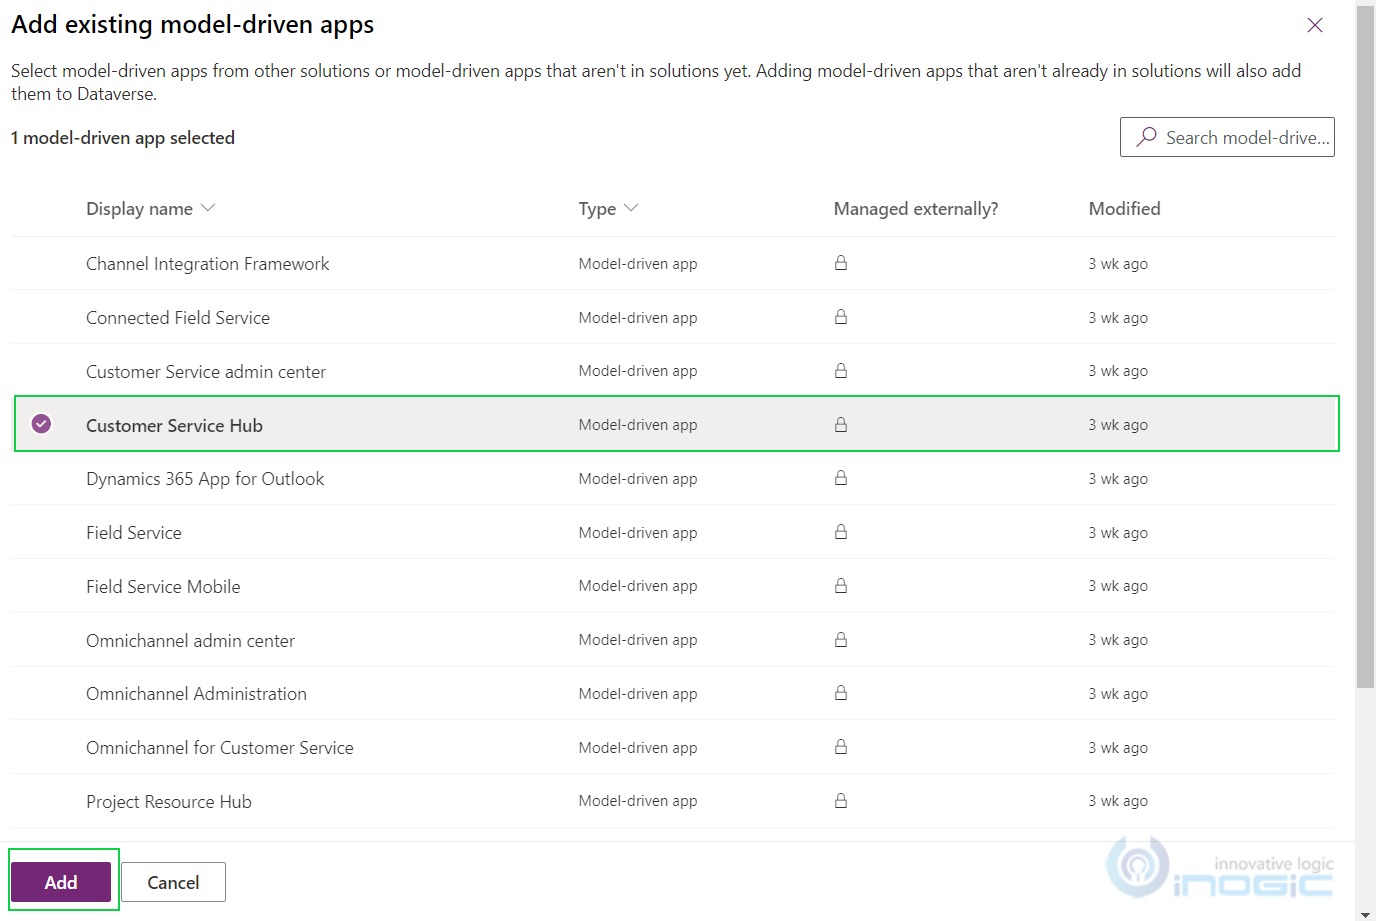
4. Now, ‘Add existing Model-driven apps’ pane will open. Select the app for which you want to disable the Enhanced Email template and click on Add button.
5. Now select ‘Enable the New Email Template Editor’ -> Click on the Edit button.

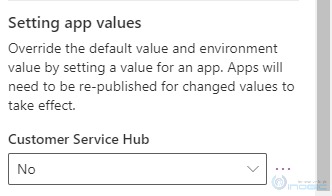
6. The ‘Edit Enable the New Email template editor’ pane will open. Here, in the ‘Setting app values’ section, the selected app will be displayed.

7. Click on ‘New app value’ and select ‘No’ in the ‘Setting pp values’ section and save.
8. Select Publish All Customization.
Once you disable the Enhanced Email Template, you will get an old version of the Email Template.
Conclusion
In this way, you can give a personal touch to your email template by using an advanced layout and toolbox.