Introduction:
There are many methods in PowerApps Component Framework (PCF) that allows you to create more productive and less dependent components. In PCF, you may have created many components to pick something like Color, Date etc. from a third party UI framework.
However, what if I tell you that you can now pick files in your PCF component without using any third party component.
Yes, you heard it right! PCF has come up with an in-built method for picking up files. The method is named as pickFile() and on trigger of this method; it opens a dialog box to select the files that you want to upload.
Syntax:
context.device.pickFile(options)
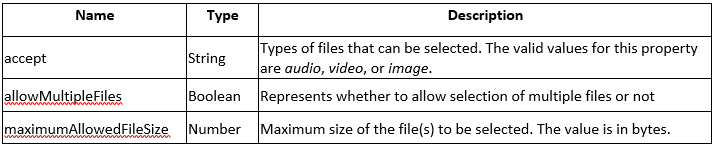
Parameter:

The options have the following properties.
Return Value: Promise<FileObject[]>
It returns an array of file objects, which includes the data of the file.
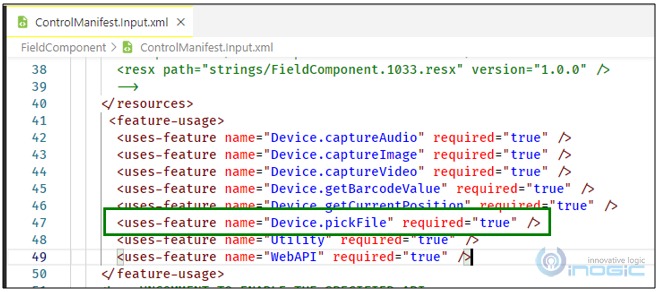
To use this method, you will need to add this in the <feature-usage> tag as <uses-feature> in the ControlManifest.Input.xml file.
Now, let us understand the working of this method with the below scenario.
Scenario:
Let’s say we want to make an Image Viewer in PowerApps Component Framework. For this we will require a file picker where the file will be picked and read. Also, an Image component to view the selected image.
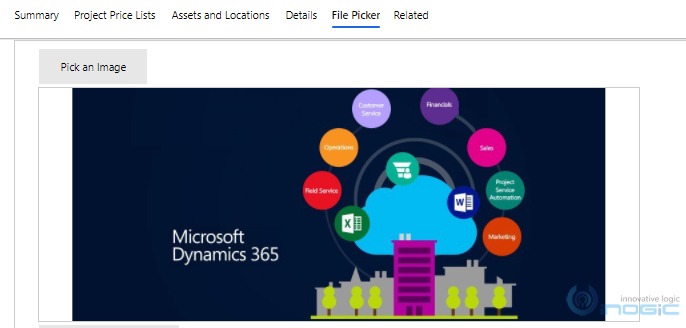
Here, I have created a field component, which includes a Text component that says Pick an Image and an Image component, where the image will appear.
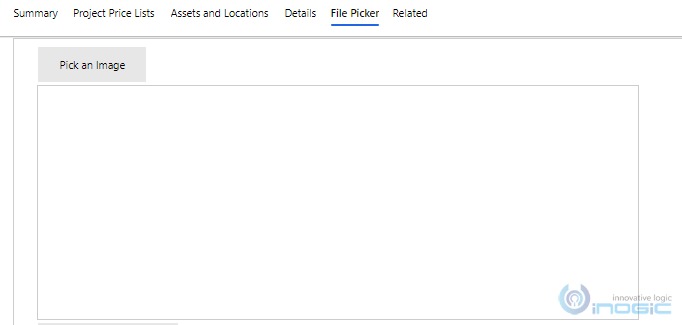
Now when I click on the Pick an Image text, a window will open to choose the file/s. After choosing the file/s those image/s will be shown in the image component.
Not only a single file, but also multiple files can be picked at once. As we know there is a parameter for this method and in that parameter we have a property named as allowMultipleFiles, which accepts Boolean value. True means accept multiple files and False means accept only a single file. In addition, we can set the maximum size of the file, as we have set it to 900000 bytes i.e. approximately 900 kb.
fileOptions = {

accept: "image",

allowMultipleFiles: true,

maximumAllowedFileSize: 900000

}
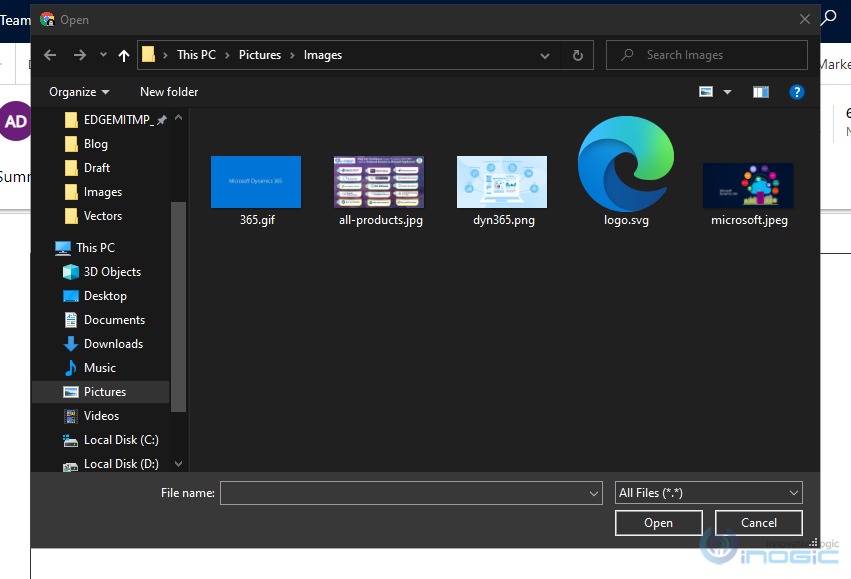
Below is the example for multiple files.
In this example, we are selecting two images, so that user can view both the images at once.
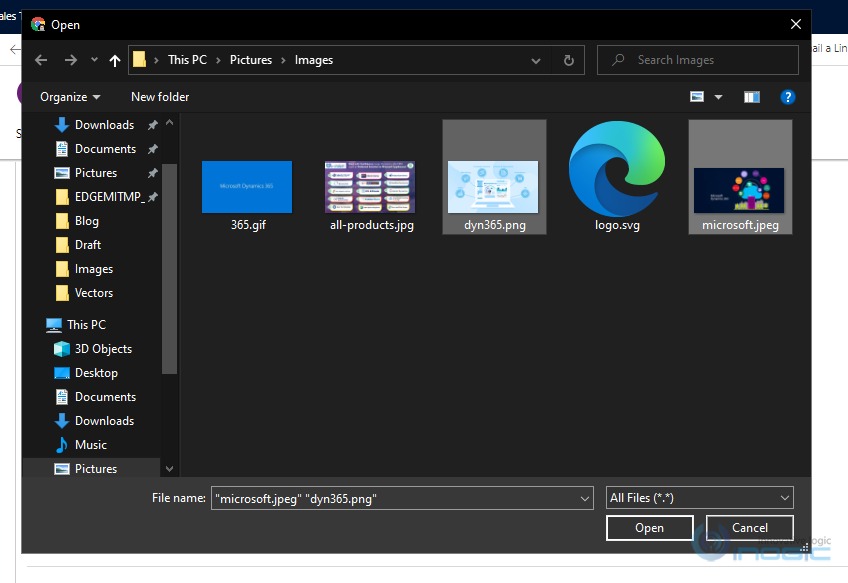
After selecting these images, they will appear as shown in the below screenshot:

Till now, you have seen how this handy and effective method works. Next, let’s have look into the coding part and see the code for the above scenario.
Code:
In the render method of App.tsx, we are calling the Text and Image component, which will be our UI.
render() {

return (

<>

{/* For Single Image */}

<Text onClick={this.pickAFile} className="filepicker">Pick an Image</Text>

<Image

{...imageProps}

src={this.state.src}

/>

{/* For Multiple Images */}

<Text onClick={this.getMultipleImages} className="filepicker">Pick Multiple Images</Text>

<Stack className="stack-container">

{this.setImages(this.state.srcArray)}

</Stack>

</>

)

}
Here, first Text and Image component is for the single file, and the next Text and Image component is for the multiple files.
First, let us see the code for single item. When clicked on the text, pickAFile function is triggered.
/**

* This method pick a file, read and set the state.

*/

private pickAFile = () => {

try {

let fileOptions = {

accept: "image", //only image file

allowMultipleFiles: false, //only single item

maximumAllowedFileSize: 900000 //900 kb

};

// Call the file picker method

this.props.context.device.pickFile(fileOptions).then((file: ComponentFramework.FileObject[]) => {

//get and set the data in state

this.setState({

src: this.getConvertedFile(file[0])

})

}).catch((error: any) => { console.log(error.message) });

} catch (error: any) {

console.log("pickFile " + error.message);

}

}
In this function, we are calling the pickFile method, which will accept only single image file whose max size is up to 900 kb.
After picking the file and getting the file data in the success callback function we will call the getConvertedFile function to decrypt the encrypted file content. We will pass the file[0] in it as there will be only one item in the File Object array.
The result we get is a File Object whose properties are shared below.

To decrypt the file content, we are using base64 and decrypting jpeg, jpg, png, gif, and svg.
/**

* It decrypts the file content based on the file type

* @param file FileObject

* @returns decrypt src

*/

private getConvertedFile = (file: ComponentFramework.FileObject) => {

let convertedData: string = "";

try {

switch (file.mimeType) {

case "image/png":

convertedData = "data:image/" + "image+png" + ";base64, " + file.fileContent;

break;

case "image/jpg":

convertedData = "data:image/" + "image+jpg" + ";base64, " + file.fileContent;

break;

case "image/jpeg":

convertedData = "data:image/" + "image+jpeg" + ";base64, " + file.fileContent;

break;

case "image/gif":

convertedData = "data:image/" + "image+gif" + ";base64, " + file.fileContent;

break;

case "image/svg+xml":

convertedData = "data:image/" + "svg+xml" + ";base64, " + file.fileContent;

break;

}

} catch (error: any) {

console.log("getConvertedFile" + ": " + error.message);

}

return convertedData;

}
Then, the convertedData is stored in state, which is used as a src for the image.
For multiple files, we do the same thing just iterate the array of objects that we get in the success callback function.
/**

* This methods picks multiple image files and set their src in state

*/

private getMultipleImages = () => {

let imageArray: string[] = [];

try {

let fileOptions = {

accept: "image", //select only image files

allowMultipleFiles: true, //multiple items can be selected

maximumAllowedFileSize: 10000000 //1 MB size limit

}

// Call the file picker method

this.props.context.device.pickFile(fileOptions).then((file: ComponentFramework.FileObject[]) => {

//get the decrypted data for all the images

for (let i = 0; i < file.length; i++) {

imageArray.push(this.getConvertedFile(file[i]));

}

//set the image array with src in the state

this.setState({

srcArray: imageArray

});

}).catch((error: any) => { console.log(error.message) });

} catch (error: any) {

console.log("getMultipleImages " + error.message);

}

}
After the setState is called, the component get re-rendered and the below function is called.
/**

* It creates Multiple Image Viewer

* @param srcArray image src array

* @returns JSX.Element[]

*/

private setImages = (srcArray: string[]): JSX.Element[] => {

let images: JSX.Element[] = [];

for (let i = 0; i < srcArray.length; i++) {

images.push(

<Image

{...multipleImageProps}

src={srcArray[i]}

/>

)

}

return images;

}
One more potential scenario we can have is to change the record image with our PCF component. Let us see how we can achieve this using the pickFile method.
Let us take the above Pick an Image component and by clicking it, we will trigger the below function.
private pickRecordImage = () => {

try {

let fileOptions = {

accept: "image", //only image file

allowMultipleFiles: false, //only single item

maximumAllowedFileSize: 900000 //900 kb

};

// Call the file picker method

this.props.context.device.pickFile(fileOptions).then((file: ComponentFramework.FileObject[]) => {

this.updateRecordImage(file[0].fileContent);

}).catch((error: any) => { console.log(error.message) });

} catch (error: any) {

console.log("pickFile " + error.message);

}

}
Here, the file will be picked, which will be a single image file that we want to update in the record image.
To update the record image we are calling the updateRecordImage function, which is as shown below.
/**

* Updating record image

* @param src image source

*/

private updateRecordImage = async (src: string) => {

//get entity name and record id

let entityName = this.props.context.mode.contextInfo.entityTypeName;

let recordId = this.props.context.mode.contextInfo.entityId;

try {

let recordUpdate: any = {};

recordUpdate["entityimage"] = src;

//update the entity image of the record

let updateRecord = await this.props.context.webAPI.updateRecord(entityName, recordId, recordUpdate);

} catch (error: any) {

console.log("updateRecordImage" + ": " + error.message);

}

}
After you select the image and update it, refresh the record and you will find the selected image as your record image.
Conclusion:
Thus, we learnt the usage of pickFile method in PowerApps Component Framework.
Save 1-2 hours or $800 monthly on scheduling and managing business travel with a geo-mapping App!
Maplytics – Integrate Map with Dynamics 365 CRM and visualize data on the map, manage sales territories, auto-schedule appointments, get optimized travel routes, track field reps in real-time, and more