Introduction
In our previous blog, we illustrated how we can use Dynamics 365 Virtual Agent to create Chatbot for the customers. In this blog, we will see how we can use Dynamics 365 Virtual Agent for employees of the organization or the CRM users.
We can allow the CRM users to use Chatbot to perform operations quickly like Qualify Lead, won opportunity, get the count of some entity records, etc. Now let’s configure Dynamics 365 Virtual Agent Chatbot to qualify a lead. Once the user asks the bot to qualify a lead, the bot will in return ask for email id to find the corresponding lead. If the bot finds the email then it will qualify that lead or else will display a message like – lead not found in the system.
Create Bot using Dynamics 365 Virtual Agent:
Read our previous blog to understand how to create Chatbot using Dynamics 365 Virtual agent.
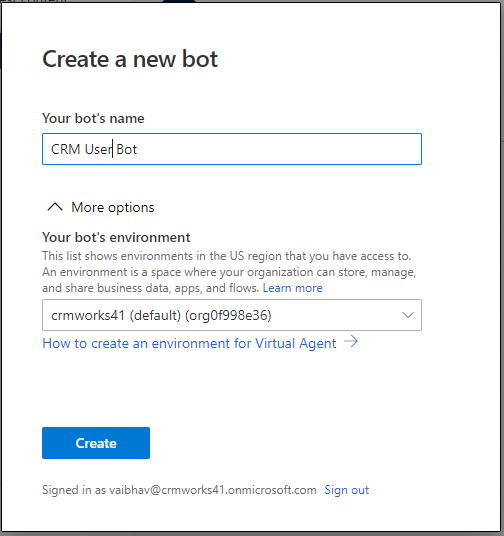
1. Login to https://va.ai.dynamics.com and create a new bot. Give an appropriate name to it and also make sure that you have selected the correct environment.
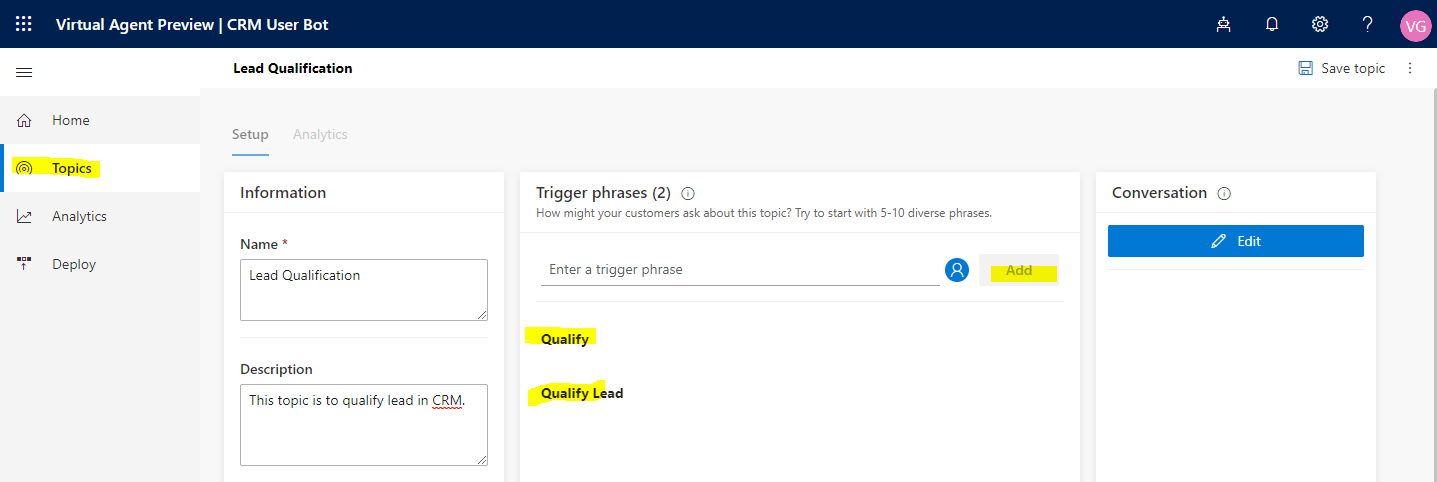
2. Go to the Topic and create a new Topic. After that add trigger phrases. Here we have added the following trigger phrases as shown in the below screen shot:
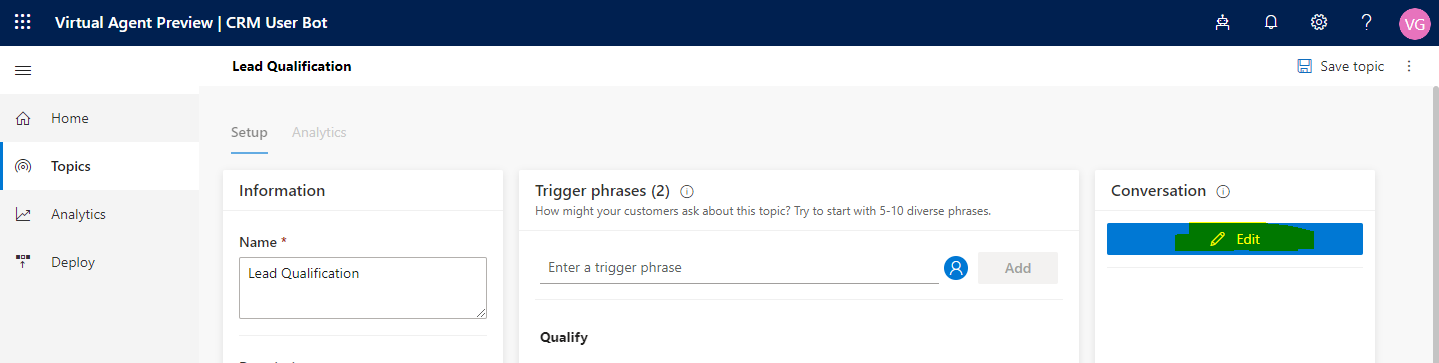
3. Now next step is to configure the bot to add conversation. Click on Edit to edit the conversation.
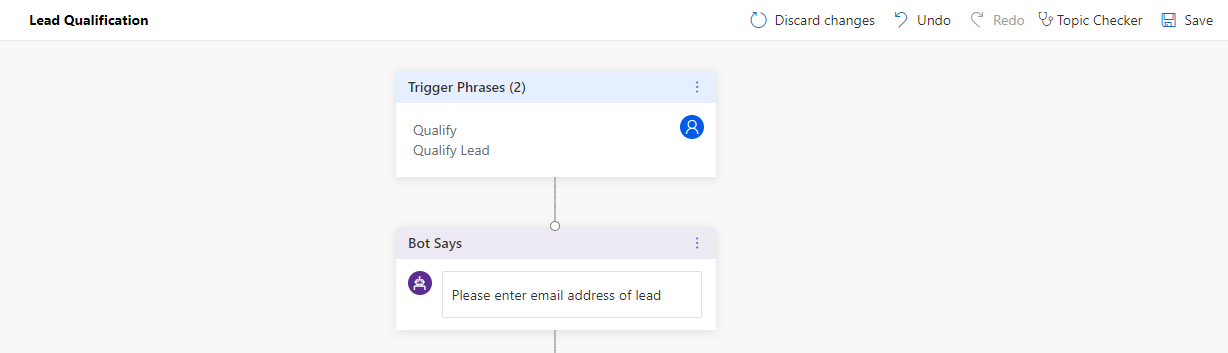
4. After trigger phrases step, add ‘Bot Says’ step and add message like “Please enter email address of lead”.
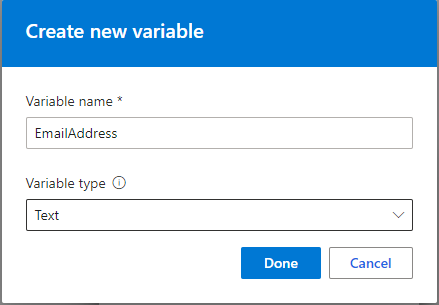
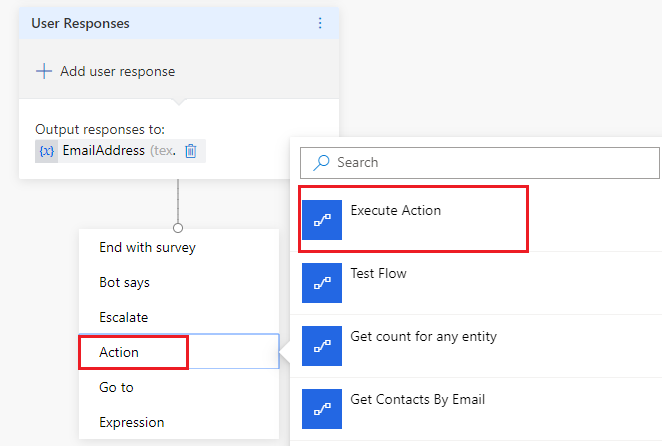
5. Next add ‘User Says’ step and then create a variable to capture the user’s response.

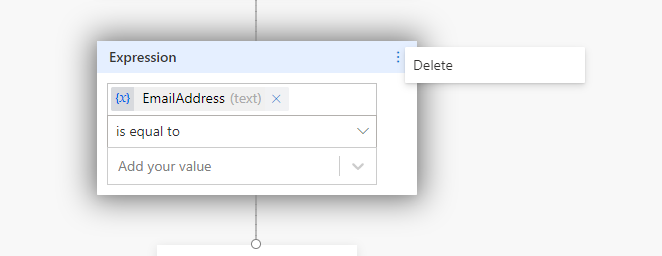
Delete the newly added expression that was created after adding a new variable.
6. At this stage we have captured the user’s response i.e. email address. Now we have to search for matching lead in the CRM system and need to qualify that. We can achieve this by using Microsoft Flow. So let’s first create Microsoft Flow.
7. To avail Microsoft Flow in Dynamics 365 Virtual Agent you have to create Microsoft Flow in Dynamics 365 Virtual Agent environment. The Microsoft flow should be in the environment which has created while singing up to Dynamics 365 Virtual Agent.
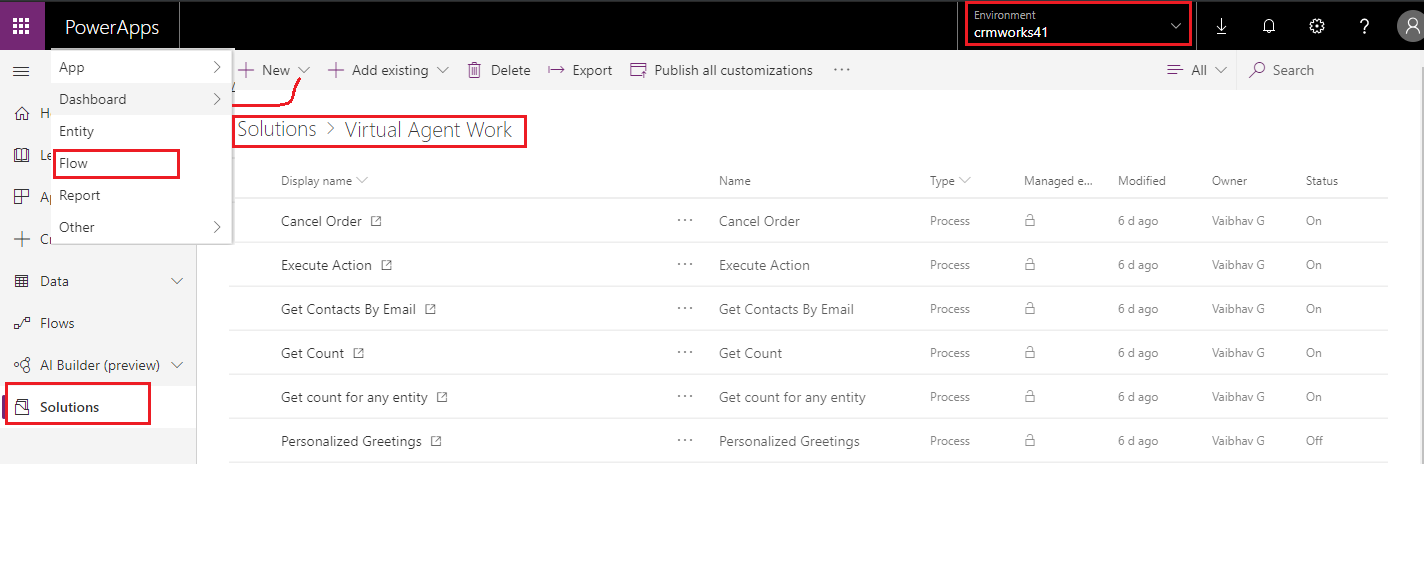
8. So here we have created a new solution in Power Apps (https://web.powerapps.com) under the Dynamics 365 Virtual Agent environment and added a new Microsoft Flow.
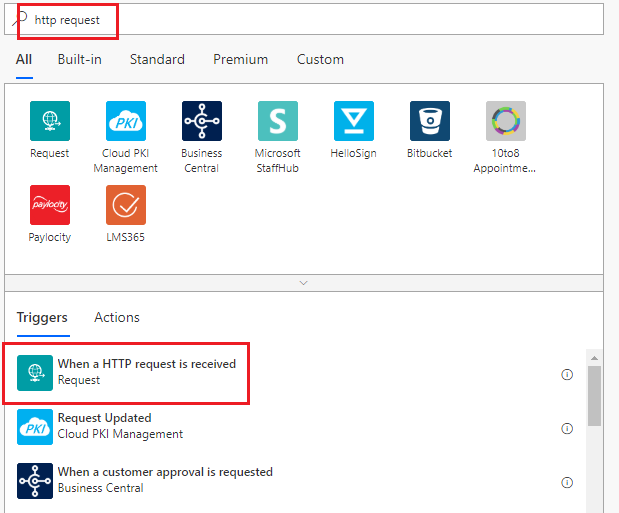
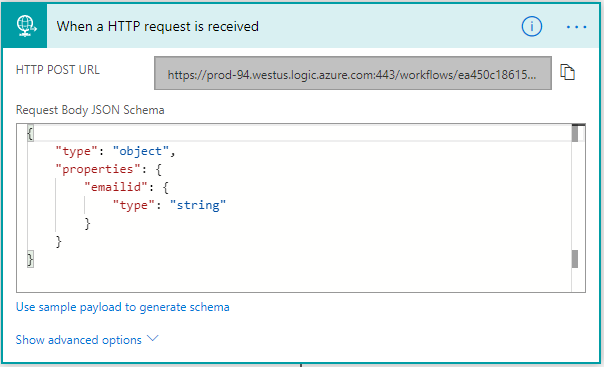
9. Next create a new Microsoft Flow of type ‘http request’ and select below highlighted trigger.
10. Add JSON schema to read the parameter (EmailAddress) pass to the Microsoft Flow by Virtual Agent. (For more details refer previous blog)
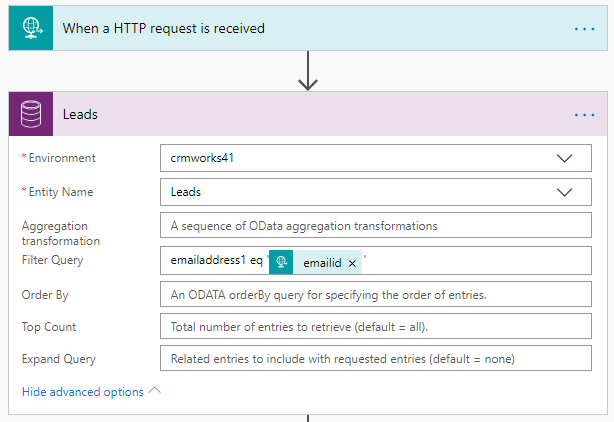
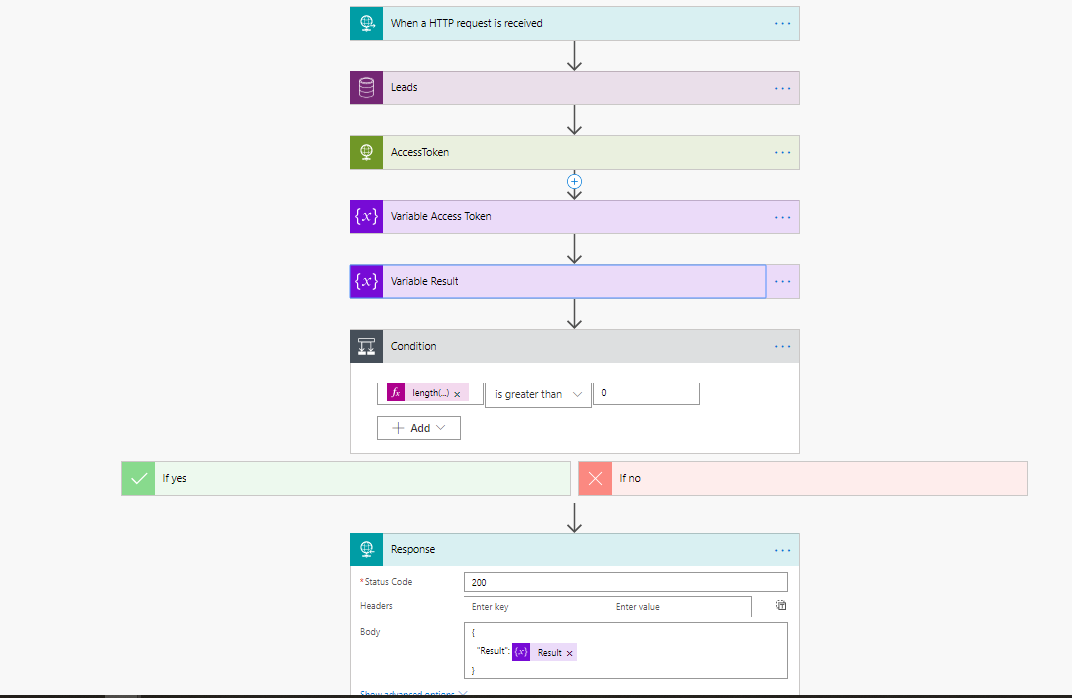
11. Now we have to search for lead by email address in CRM. So add Common Data Service ‘List Records’ step in MS Flow and search for lead based on email address.
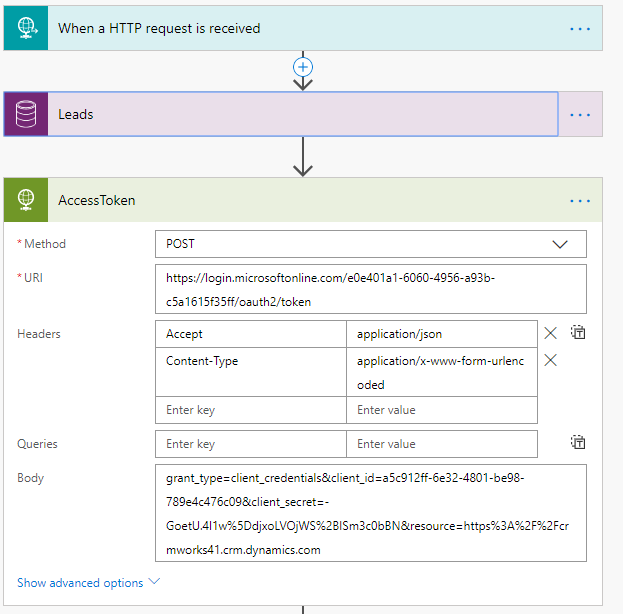
12. The next step is to qualify the lead. To qualify lead we can execute Web API request i.e. QualifyLead through MS Flow. This involves two steps, first get the access token and then execute QualifyLead request using Http Trigger action.
13. First – Get the access token;
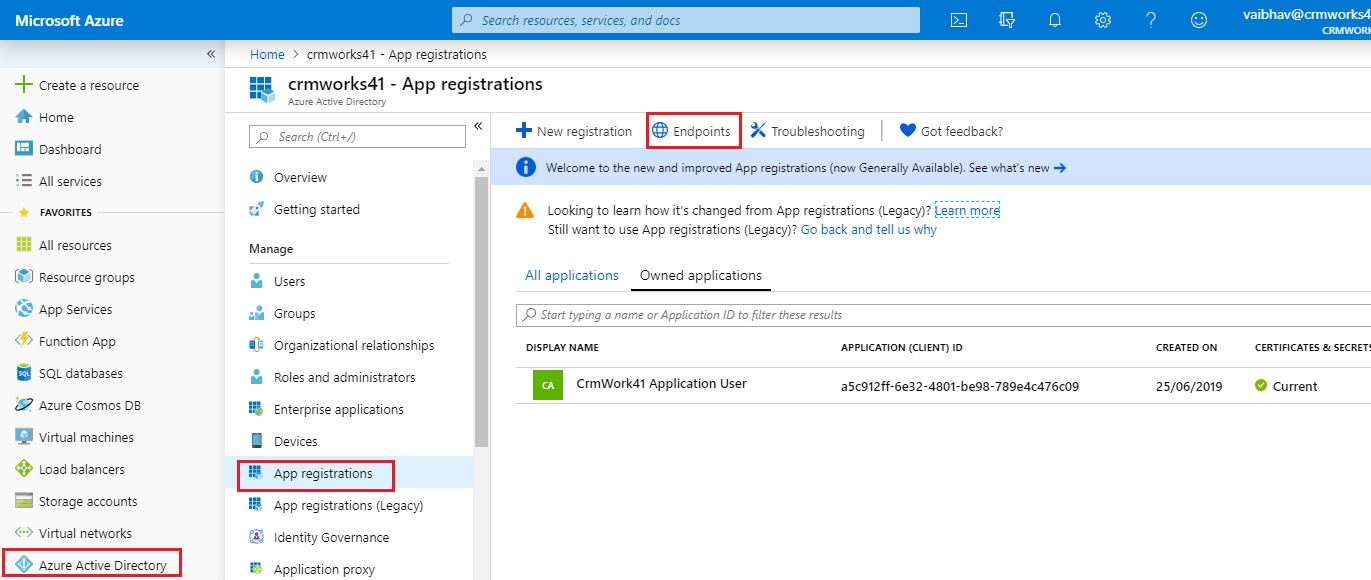
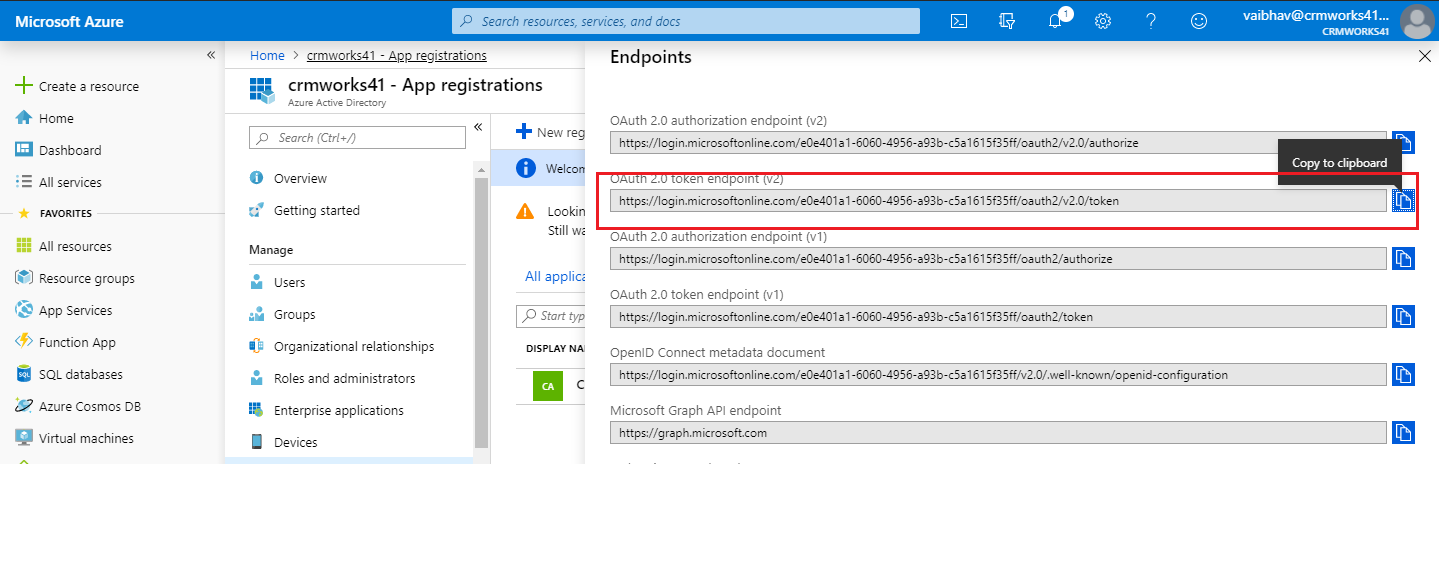
To get URI, login to https://portal.azure.com. Navigate to Azure Active Directory -> App Registration – > Endpoints. Copy ‘OAuth 2.0 token endpoint’ URL.
Pass following parameters in the body of request,
grant_type=client_credentials
client_id=<application id>//add id of application registered in Azure Active Directory
client_secret=<secret key of application>
resource=<crm url>
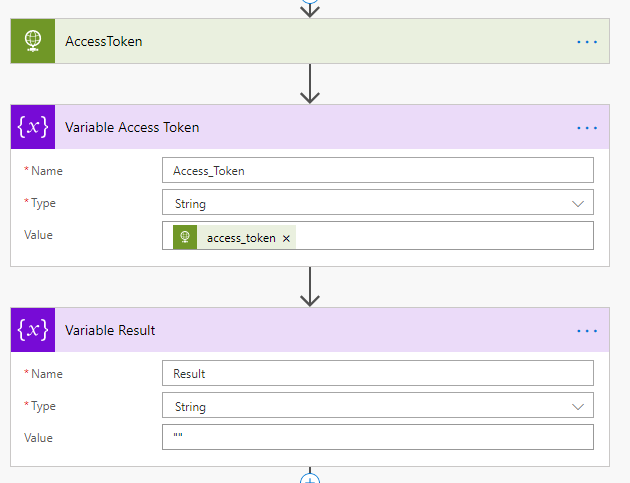
14. Once we are ready with access token, store it in Variable (add ‘Initialize variable’ step) and then check if the ‘list records’ step of Common Data service has returned any lead. If yes then call HTTP trigger action and call Web API QualifyLead method otherwise return ‘Lead not found’ result in HTTP request Response action.
Next initialize Flow variable to store Access Token and initialize another Flow variable to store the result that needs to be send as response to the calling platform i.e. Dynamics 365 virtual agent.
15. Check if matching lead is found or not. If found then call HTTP trigger action to execute Web API request or else set result as ‘Lead not found’.
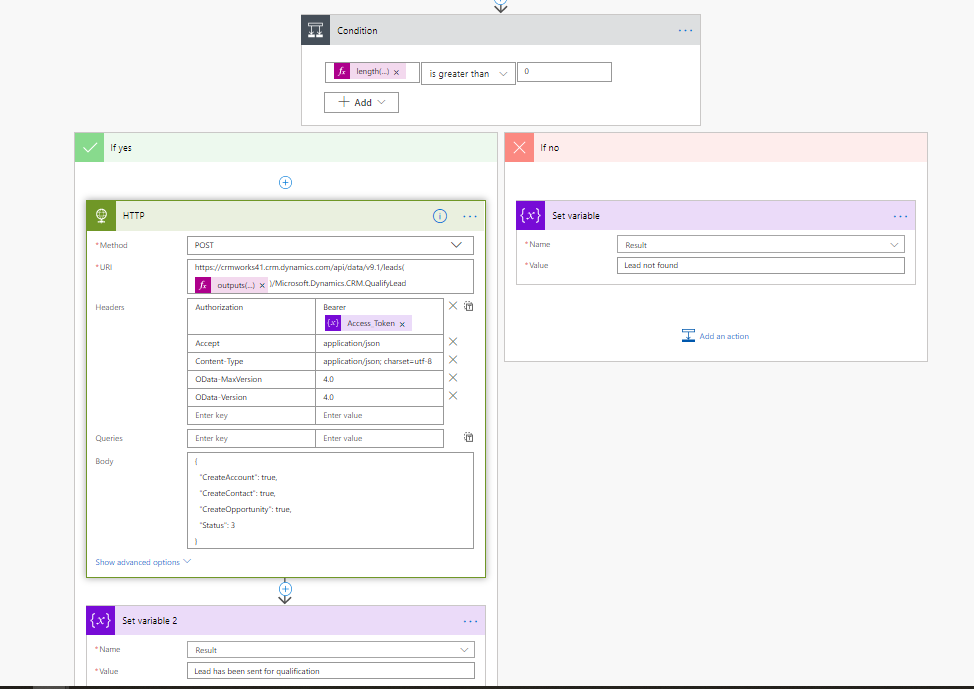
16. Finally, call ‘Request Response’ action and pass the Result variable as response.
17. Save the flow and activate it by clicking on ‘Turn On’ button.
18. Now call this MS Flow in our bot and pass ‘EmailAddress’ variable.
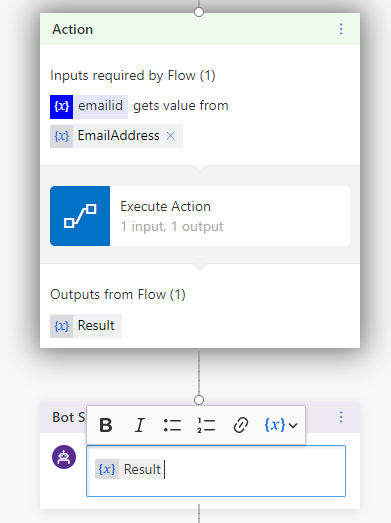
Add final ‘Bot says’ step and add output from Flow.
19. Save the topic and test it. If bot is working as expected then publish it. (Refer our previous blog for more details.)
Add Chatbot in Dynamics CRM
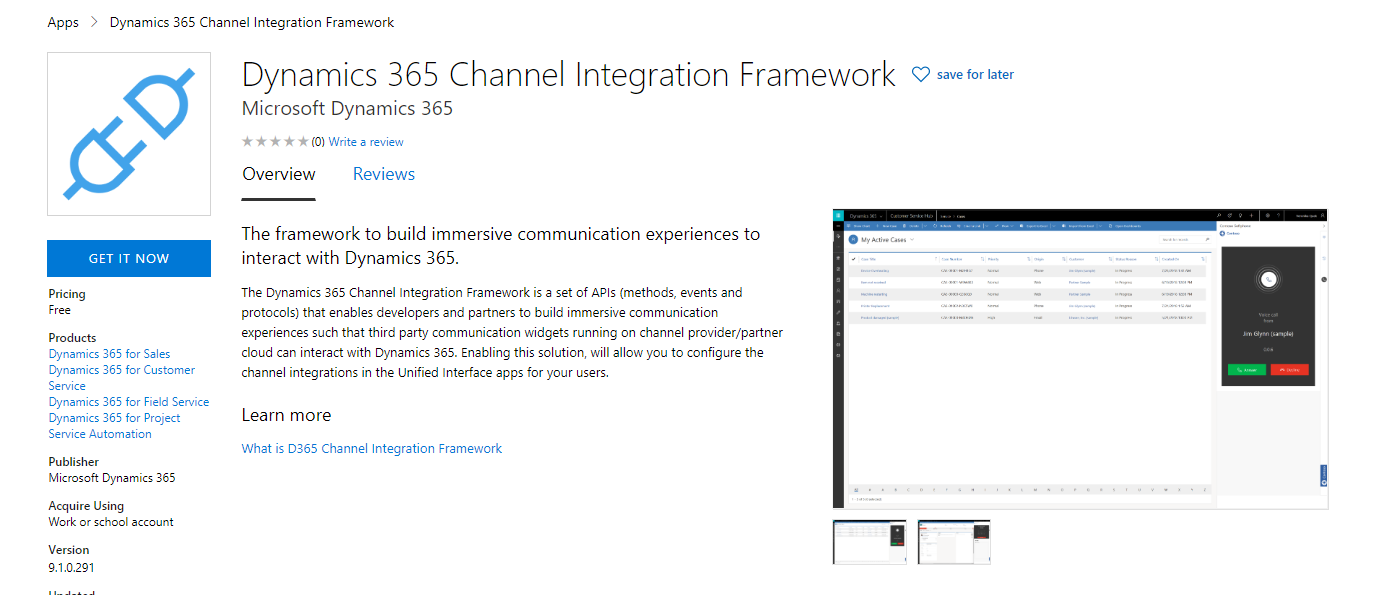
We are ready with our bot. Now we need to embed it somewhere in Dynamics CRM so that CRM users can use it. In April 2019 release, Microsoft has introduced Channel Integration Framework solution. Refer following article to know more about CIF. (https://docs.microsoft.com/en-us/dynamics365/customer-engagement/developer/channel-integration-framework/channel-integration-framework)
- Install CIF from App Source.
- This will add CIF solution in Dynamics CRM.
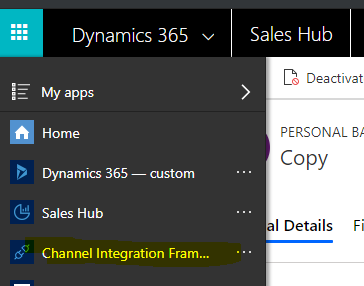
- Open ‘Channel Integration Framework’ app and create a new record of ‘Channel Provider’ entity.
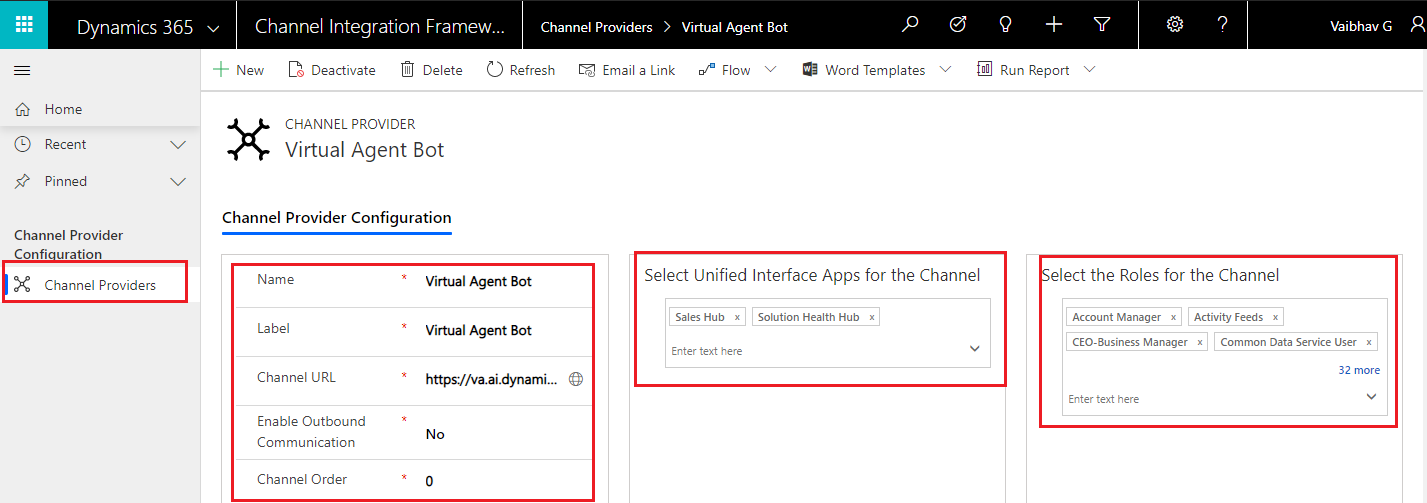
- Here, the important thing is ‘Channel URL’. Copy the virtual agent bot URL and past it here.

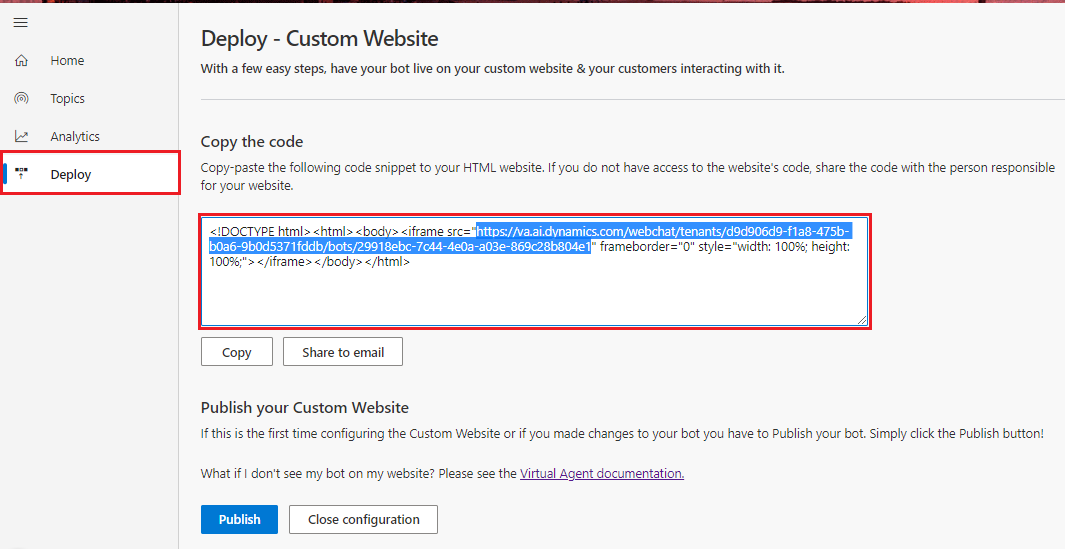
You will get the bot URL from Deploy section of the Virtual Agent bot.
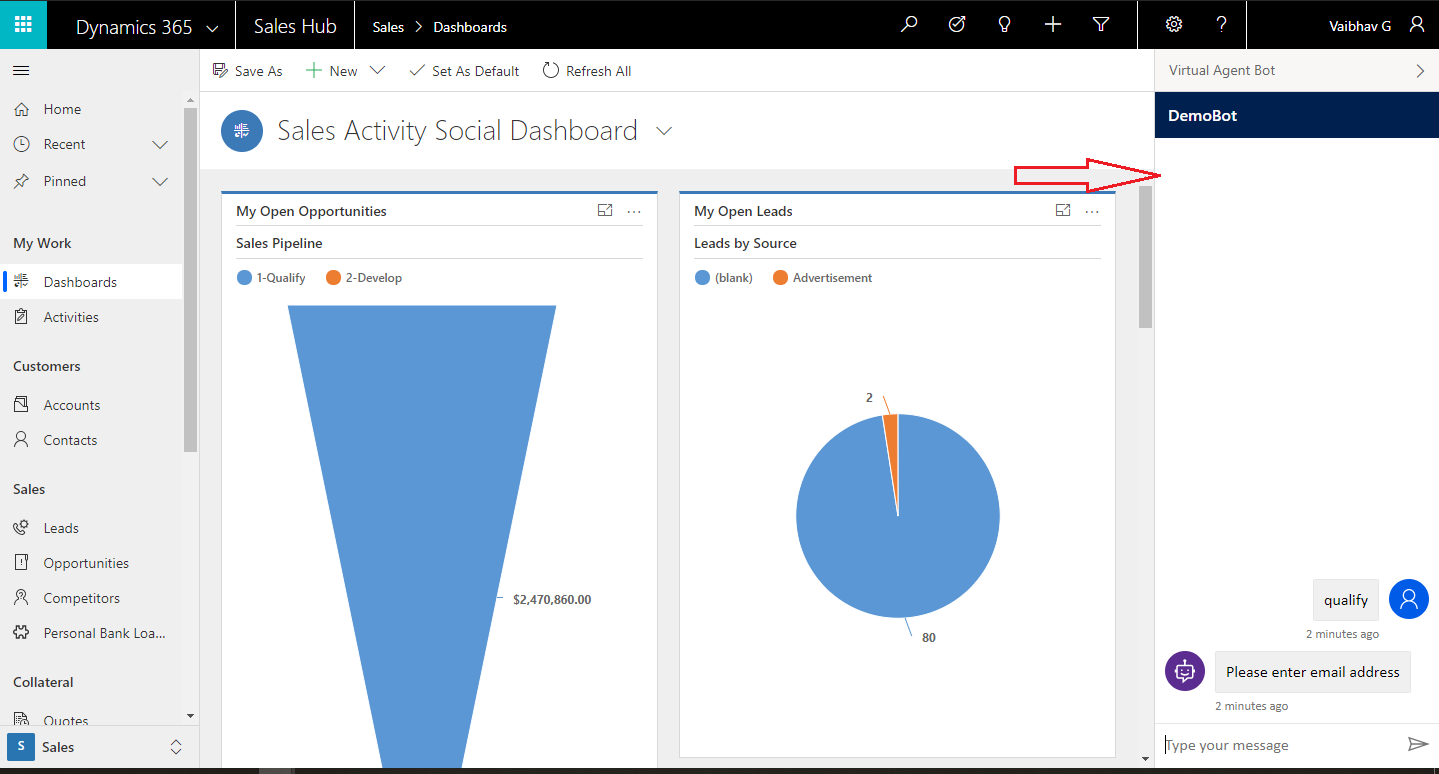
- So this step will add a Virtual Agent Bot in CIF panel in CRM as shown in the below screenshot.
Here is the video of the working bot;
Conclusion
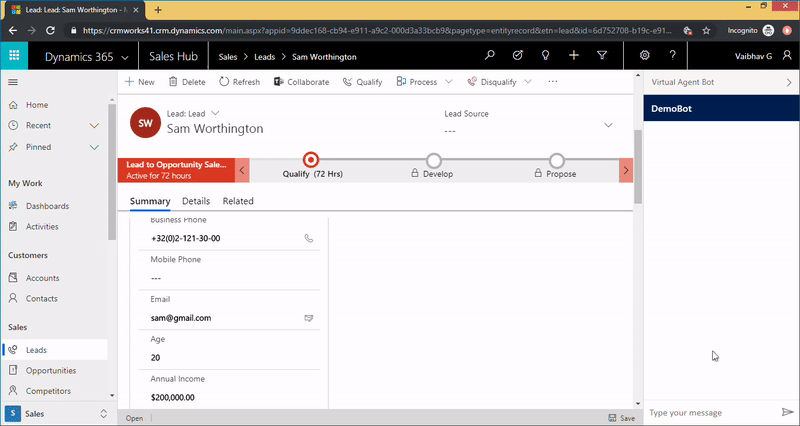
In this way the Dynamics 365 users can now directly talk with bot while being in CRM and perform operations.