Introduction
In our last two blogs we saw how to create CDS environment and steps for creating Model Driven App for CDS Environment.
In this blog we will see how to create entity, fields & view for CDS App.
After Creating CDS environment, open that environment in PowerApps as shown in below screen:

Or, you can directly open it from https://web.powerapps.com
After clicking on PowerApps, below screen will be displayed where you can select your created environment shown in top right corner.
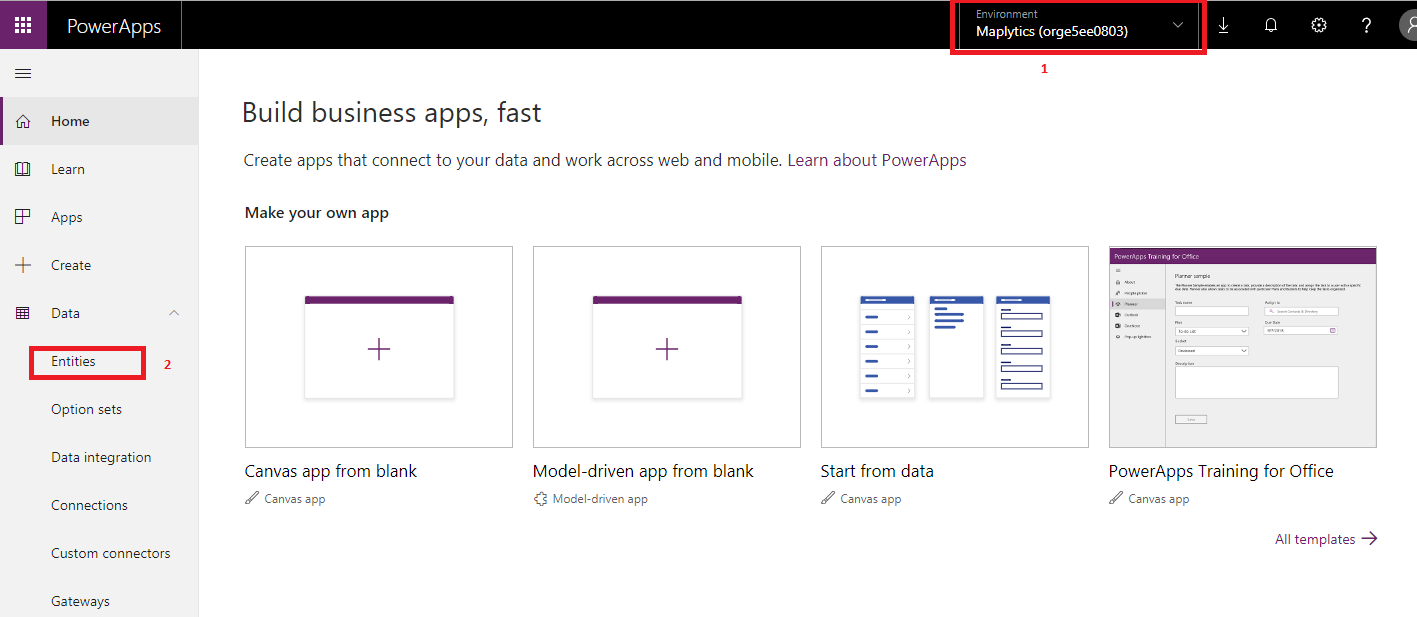
After selecting your environment, you can create new custom entity by clicking on “Entities” tab shown in left navigation bar under “Data”.
After clicking on Entities in above screen, you will be able to see all entities in this environment as shown in below screen.
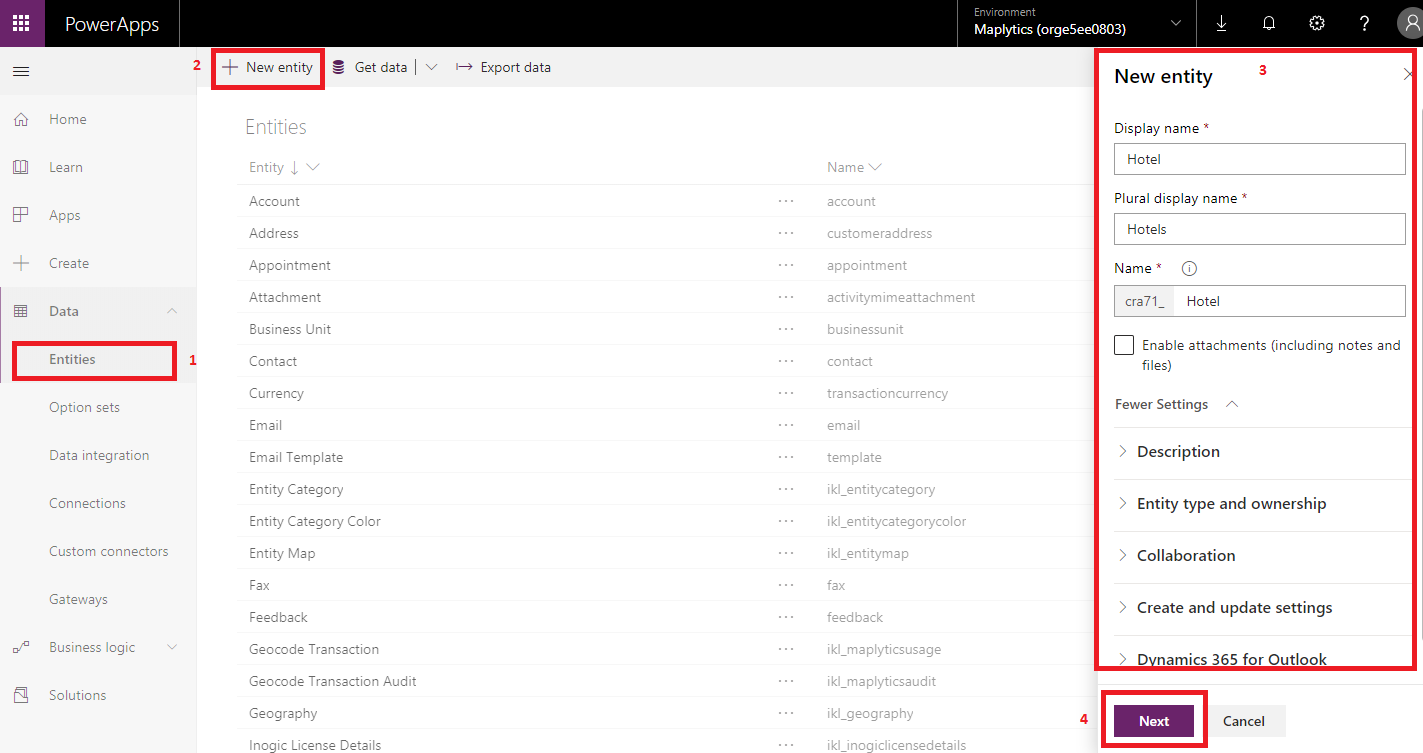
From above screen, for creating new entity click on “New entity”. This will show screen in right as in above image where you can enter details and click on “Next” button which will show below screen to add fields, views, forms, etc.
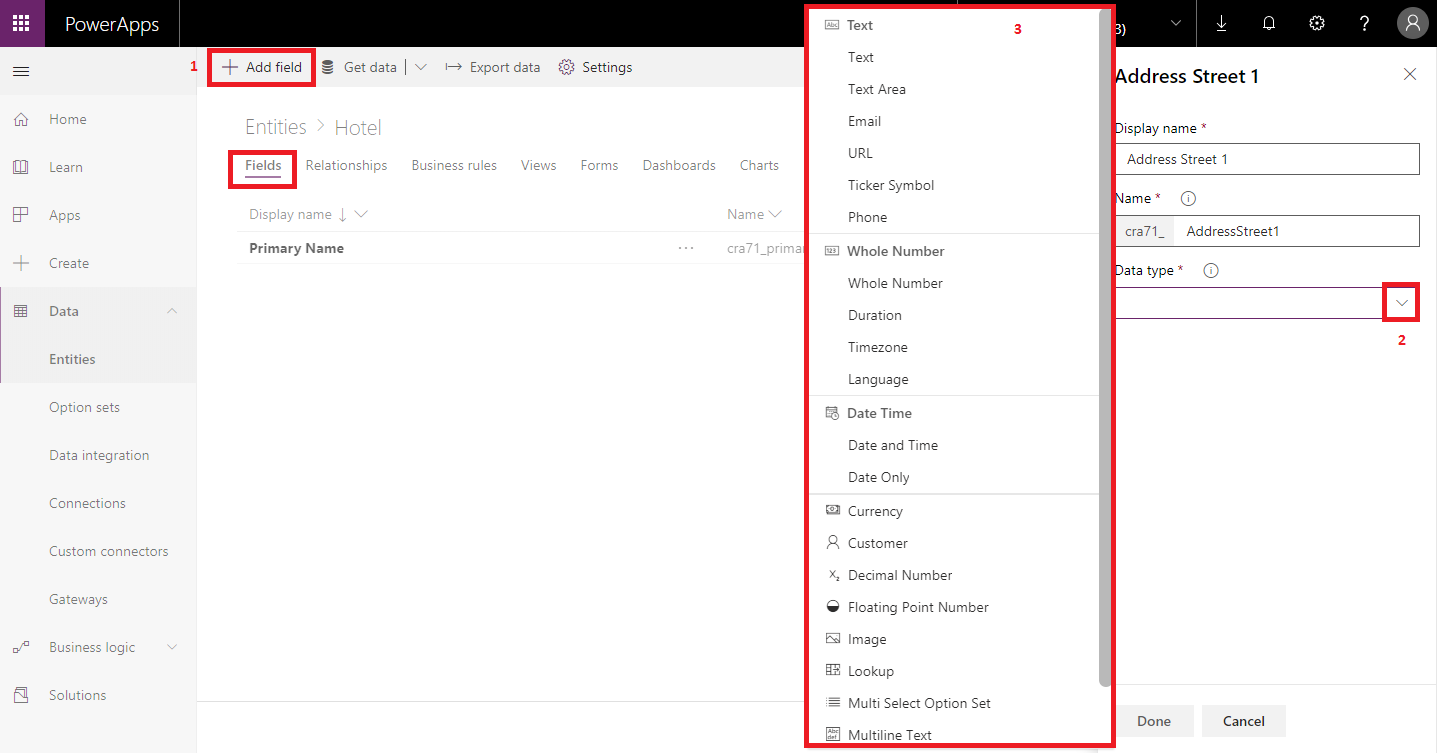
Now, for adding fields for entity click on “Add field” which will open a window from right side where you will enter details of the field and for selecting data type click on arrow in “Data type” field which will open list of all data types available for field as shown above.
After selecting data type you will get option to make field as required or not and other details as shown below.
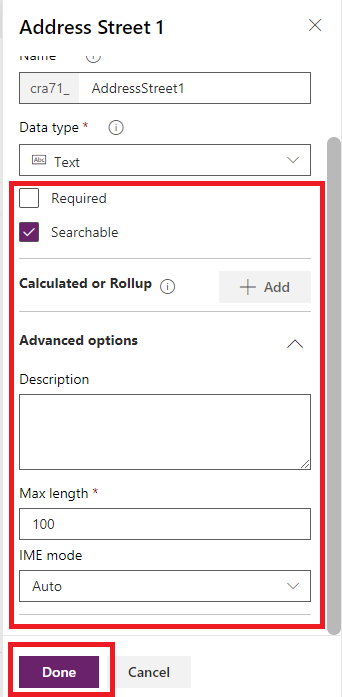
After clicking on “Done” button in above screen you will see your field in field section as shown below and then click on “Save Entity” button which will save your entity and fields.
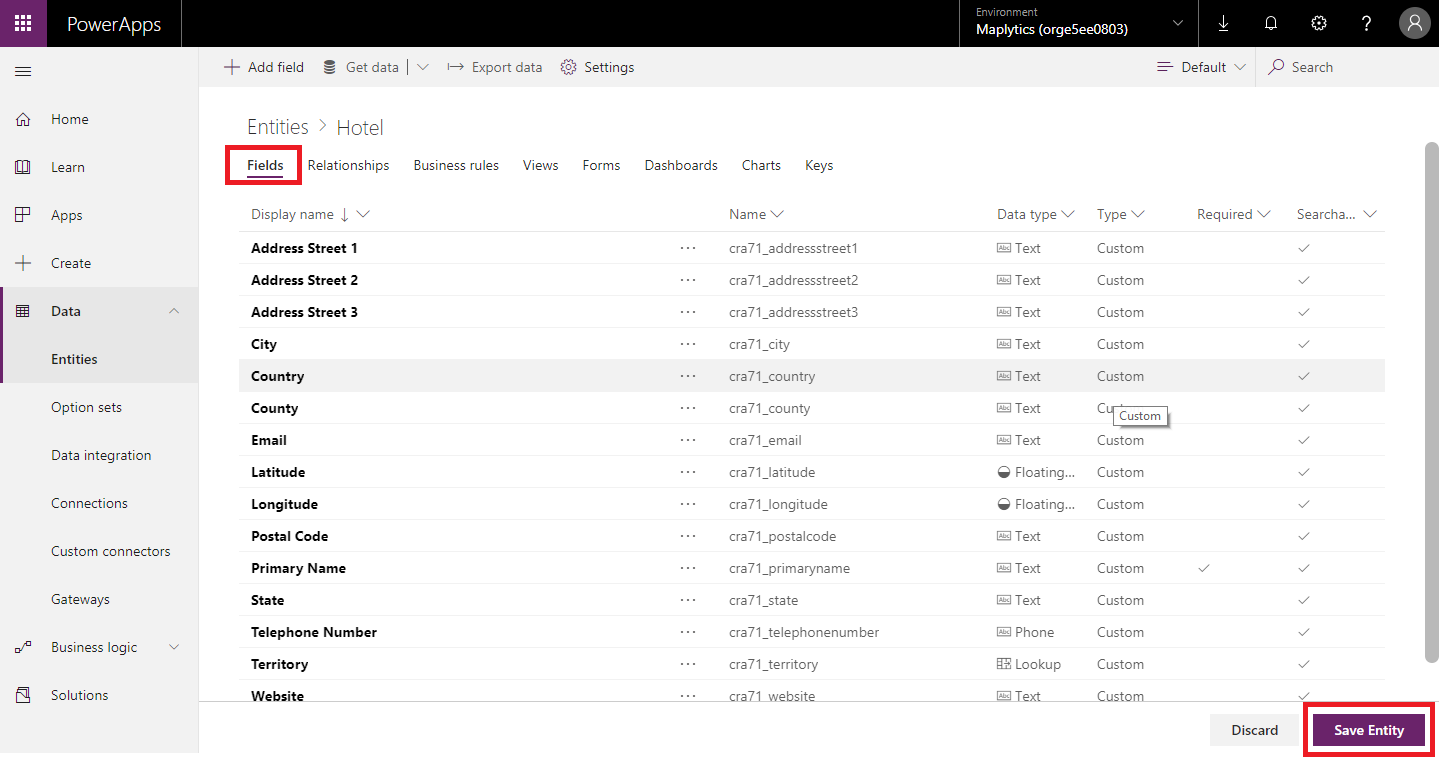
As you can see from screen all fields is shown in the fields section as I have created few more of them.
NOTE: Make sure to click on “Save Entity” button which will save you entity else your fields and entity will not be saved.
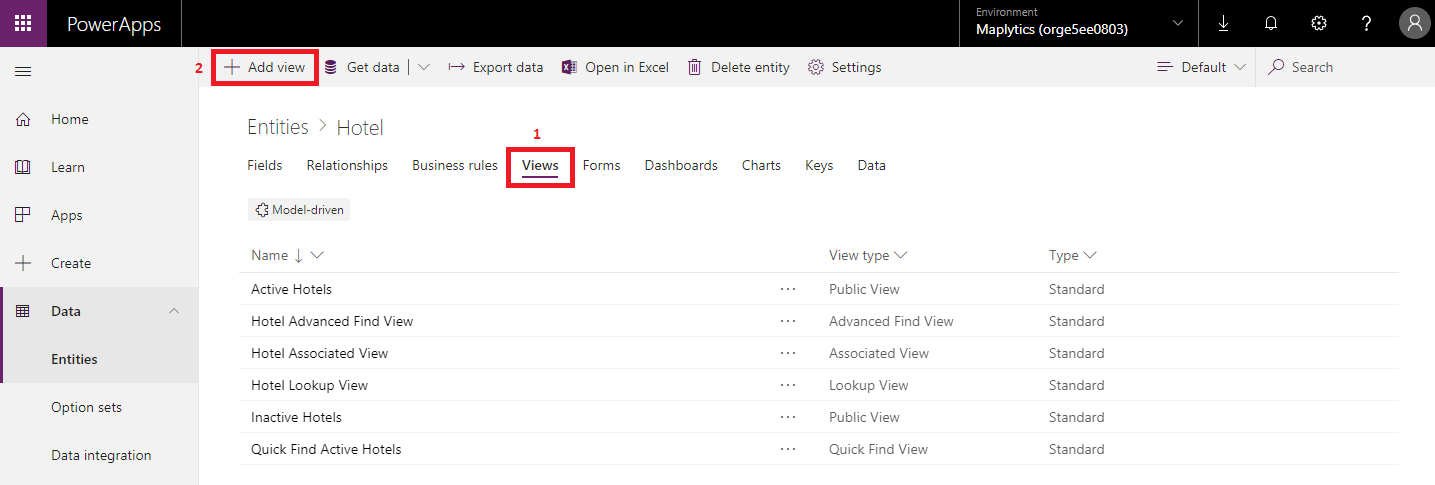
Now for creating views for entity click on “Views” tab and click on “Add view” from ribbon button as shown in below screen.
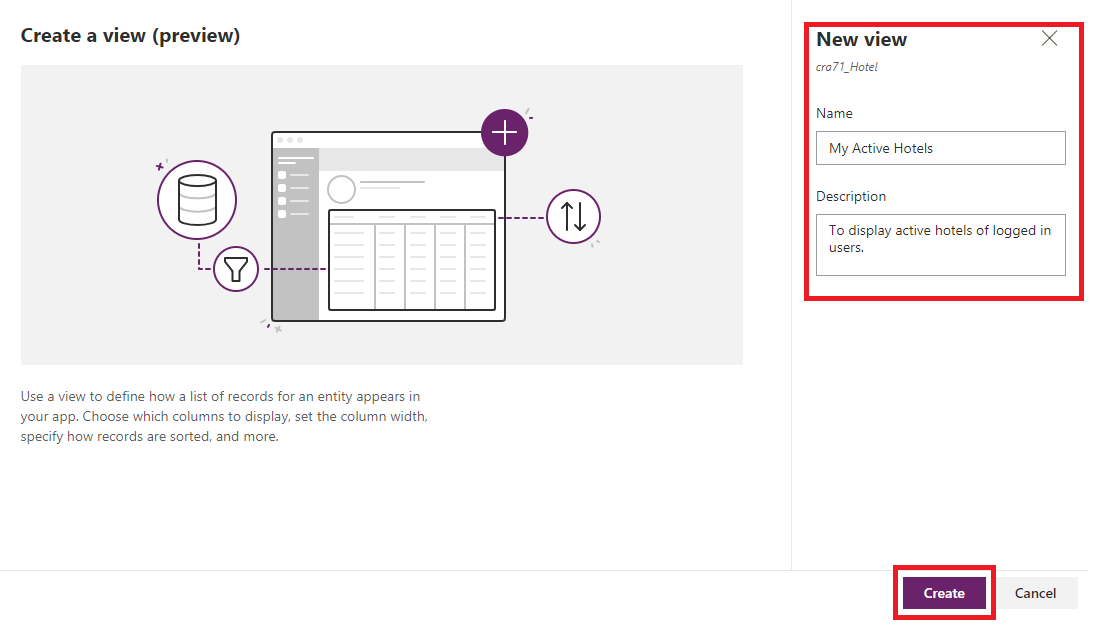
This will open a screen where you need to add “Name” of the view and “Description” if required. And then click on “Create.”
After clicking on “Create,” you will get below screen where you can add fields for the view:
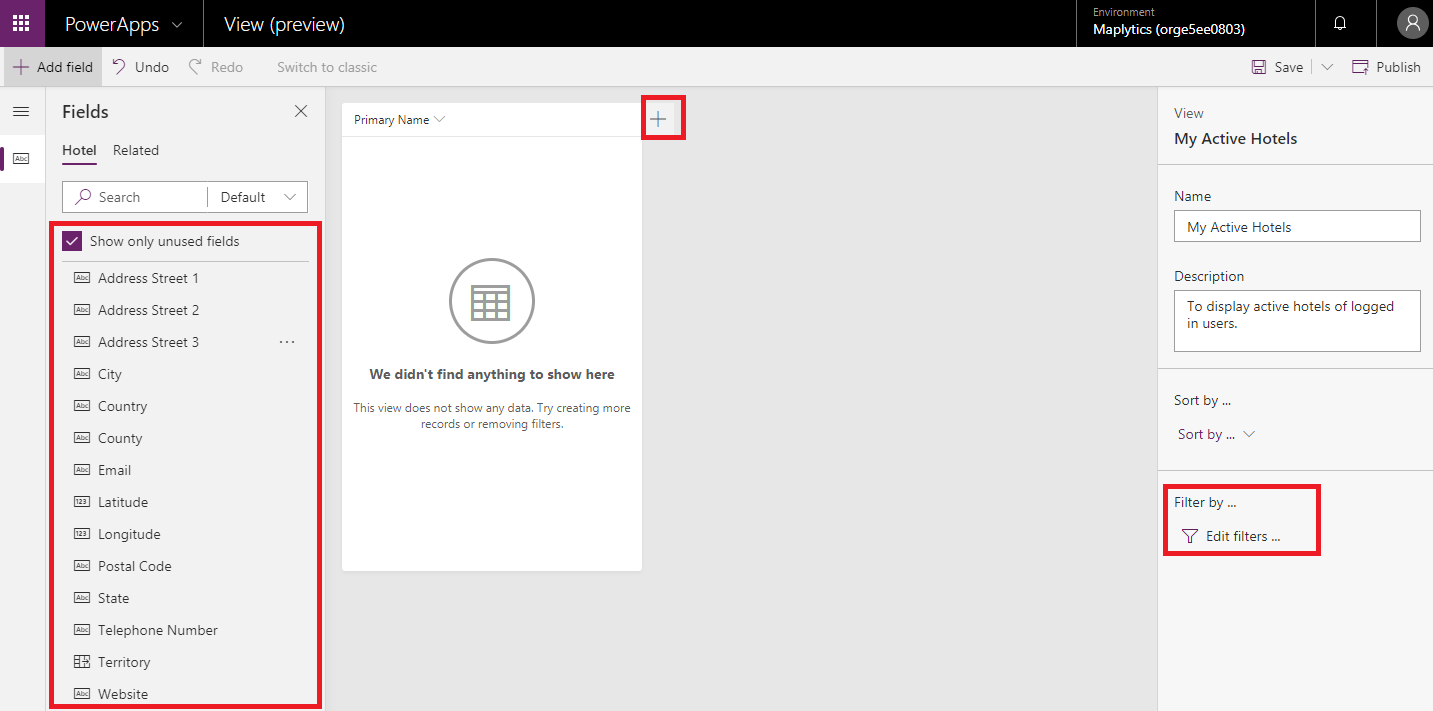
In above screen you can add fields to view from “Fields” section and another option is by clicking on that “+” sign in middle of screen. There is also a filter section where you can add filters to view. Below screen shows adding fields from “fields” and “+” button.
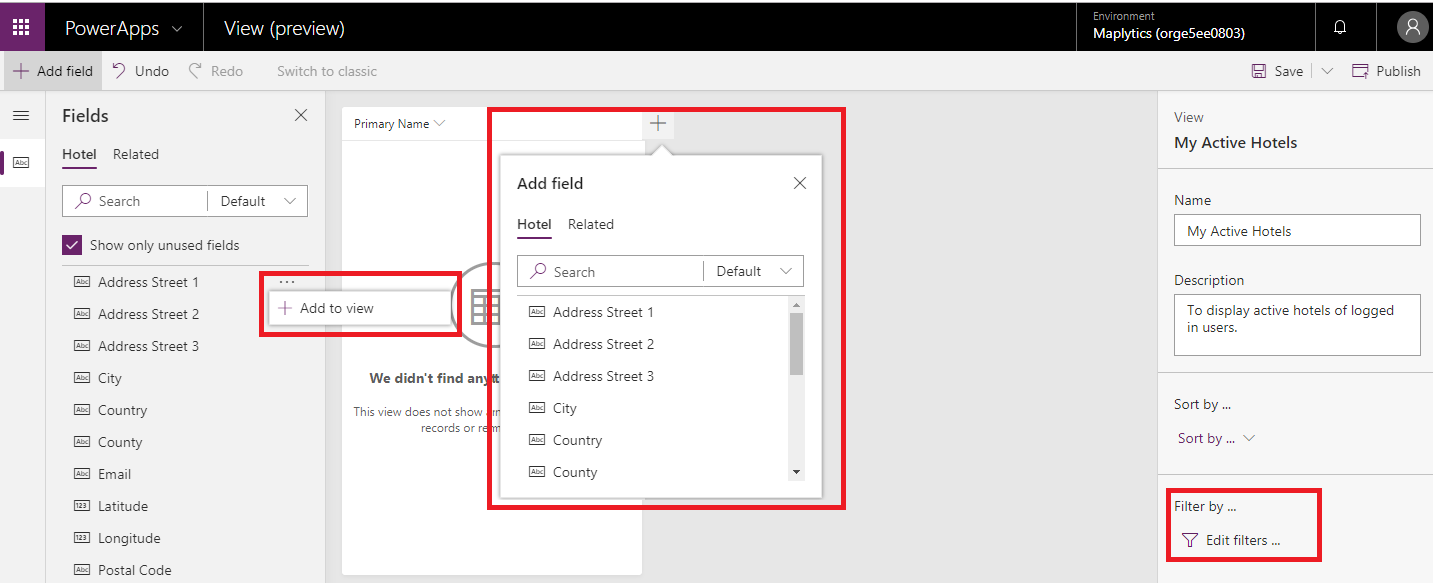
This will add fields in views. For applying filters to this view you can click on “Edit filters” on right side of the page, which will allow you to add filters for the view as shown in below screen.
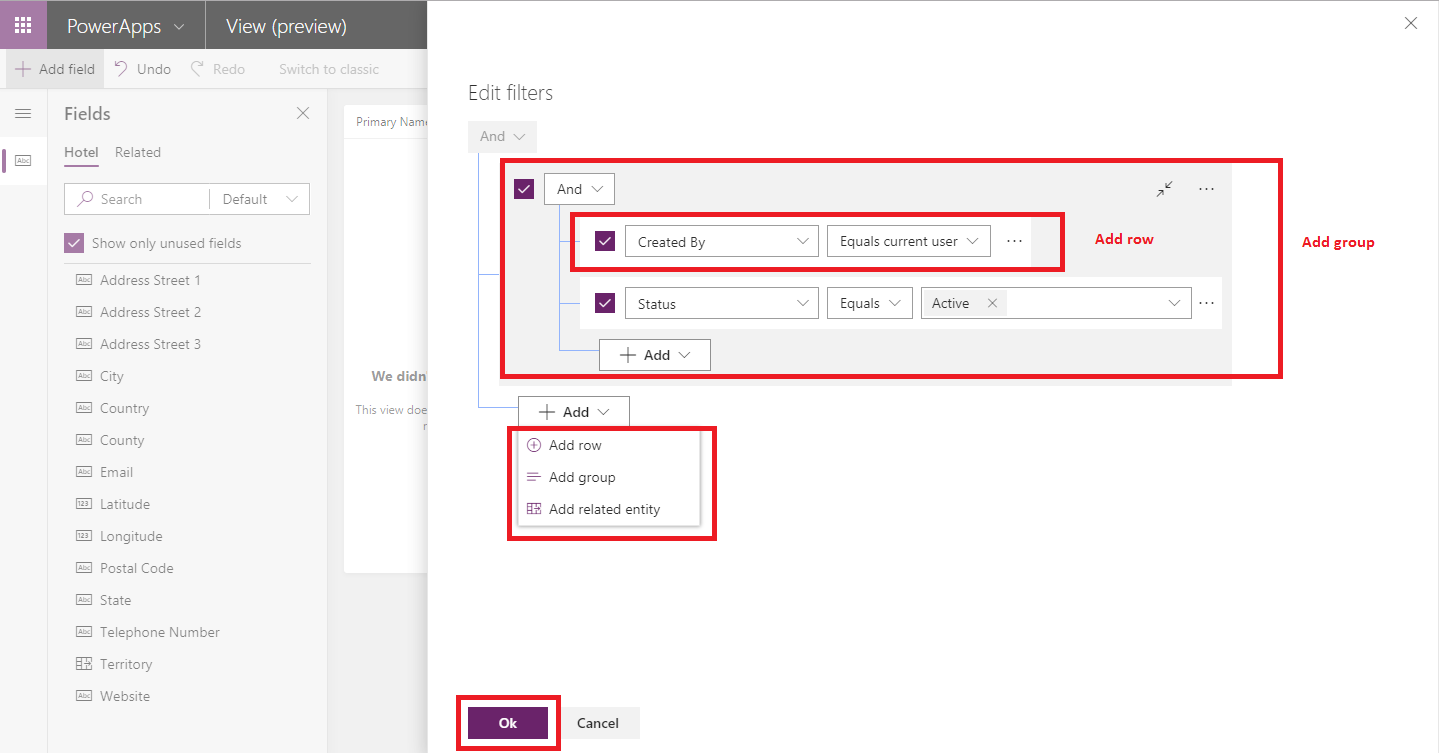
From above option you can add filters by clicking on “+ Add” button which will show option to create single field filter or grouping filters with “And” or “Or” option and Adding related entity.
After that click on “Ok” button and all details will be displayed as shown in below screen.
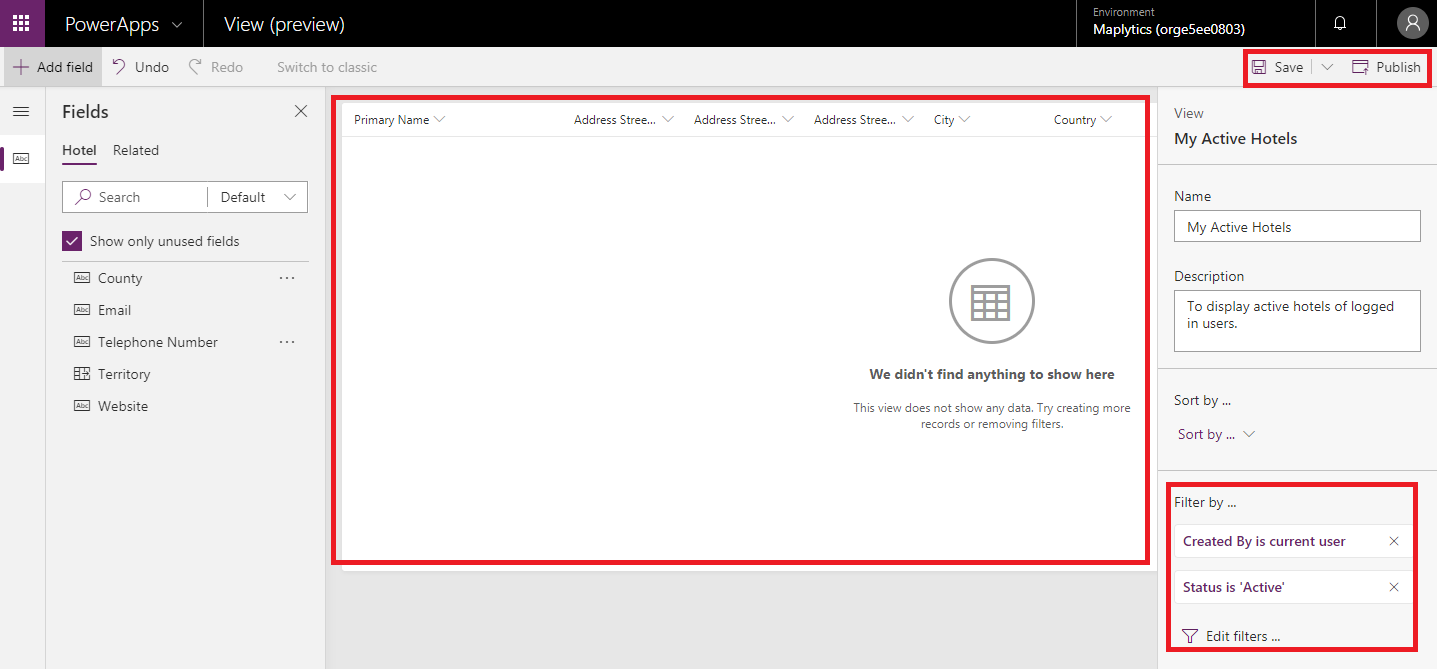
In above screen all fields are added. Now click on “Save” button and then “Publish” button which is in top right corner. This view will now be available for your entity.
You can add this entity in your app and use it.
Conclusion
Using CDS users can easily build apps in PowerApps. This blog gives steps to create entity, fields and views for Common Data Service for Apps.
70% of global 2000 companies apply gamification to improve productivity and returns!
Gamifics365 – Spin the magic of games within Microsoft Dynamics 365 CRM to improve user adoption, enhance productivity, and achieve company goals!