Introduction:
Until Dynamics 365, editing of the Site Map usually required the use of the popular Site Map Editor Plugin from XRM Toolbox. The plugin provided a visual editor with an easy way to modify the sitemap.
The traditional way of editing Site Map required editing the XML tags that was error prone, and therefore Site Map Editor Plugin from XRM Toolbox was the go-to tool.
With Dynamics 365, Microsoft now has a visual Site Map Designer within the CRM Application.
In this blog, we will cover adding a custom web resource to the Site Map.
Note: Make sure to export the Site Map as a backup before you modify it. It will help with the restore in case the Site Map is broken, and you are locked out of CRM. You can directly navigate to the Customizations area through this URL
https://CRMURL/ tools/systemcustomization/systemcustomization.aspx
If you have Field Service installed, you will notice the following error when saving the changes made.
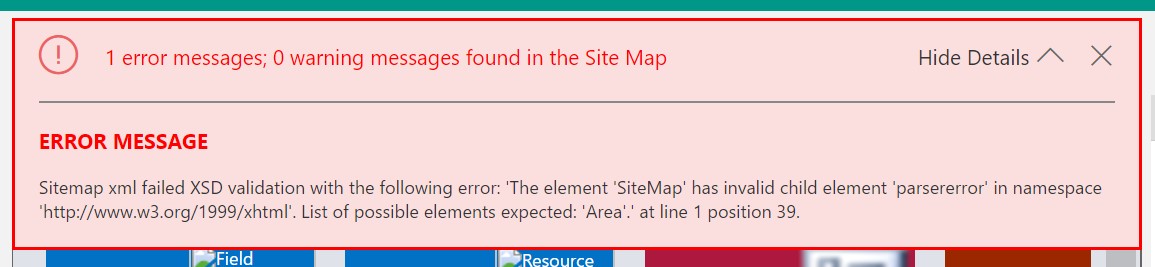
We have not figured out a way yet to edit and save the site map changes for Field Service
Walkthrough:
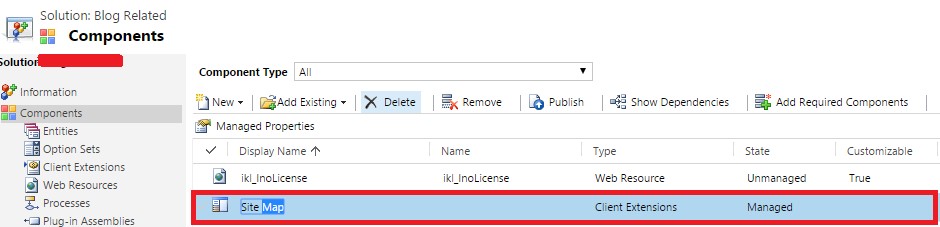
1. Create a solution and include the Site Map as one of the components along with the webresource that we need to add to the sitemap.
Note: when you try to include Site Map, you will be presented with the pop-up window to select the sitemap to edit.
With the modules now being shipped as Apps, each of the modules/apps like Sales, Project Service, Customer Service, and Field Service, come with their own Site Map for navigation.
Selecting Site Map – will modify the sitemap that is available when you choose the Dynamics 365 – custom app
2. Double click on the Site Map or click the Edit button on the ribbon bar to open the Site Map designer.
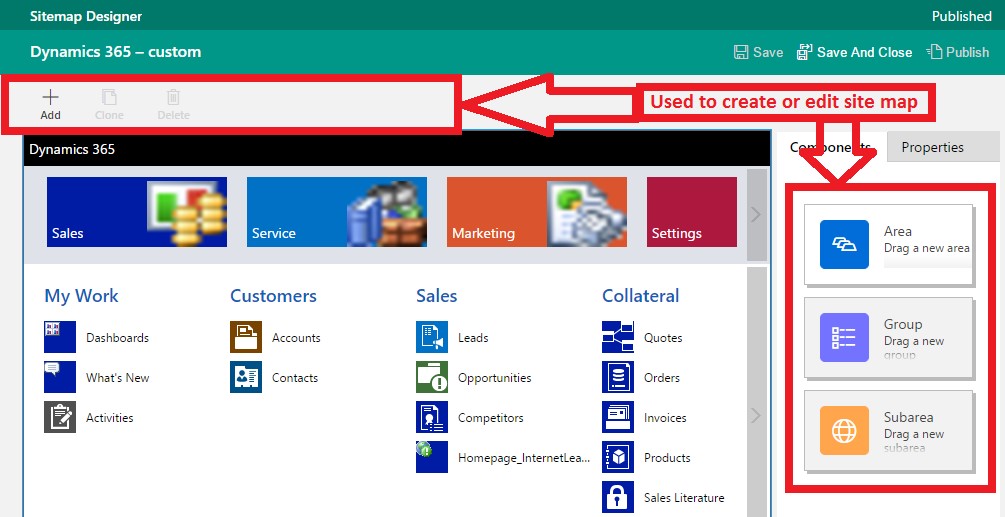
You can add Custom Area, Group, and Subarea using the highlighted areas as shown in the above screenshot.
3. Using the Area, you can add a new module to the sitemap like Sales, Service, We have added ‘User Gamification’ as an area.
The Group option is to add sections under the main navigation area, like My Work, Customers groups that you find in the OOB Sales Area.
We have added a Group ‘Inogic License’ under ‘User Gamification’ area.
4. We will now see how to add the License Details Subarea under Inogic License. This will point to a custom webresource when clicked.
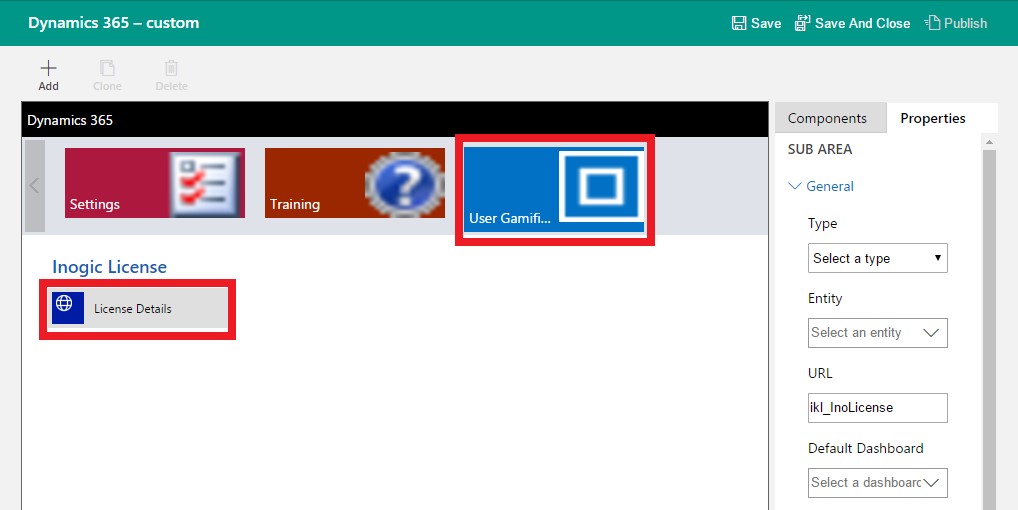
5.First, select the Inogic License Group under which we would like to add the subarea.
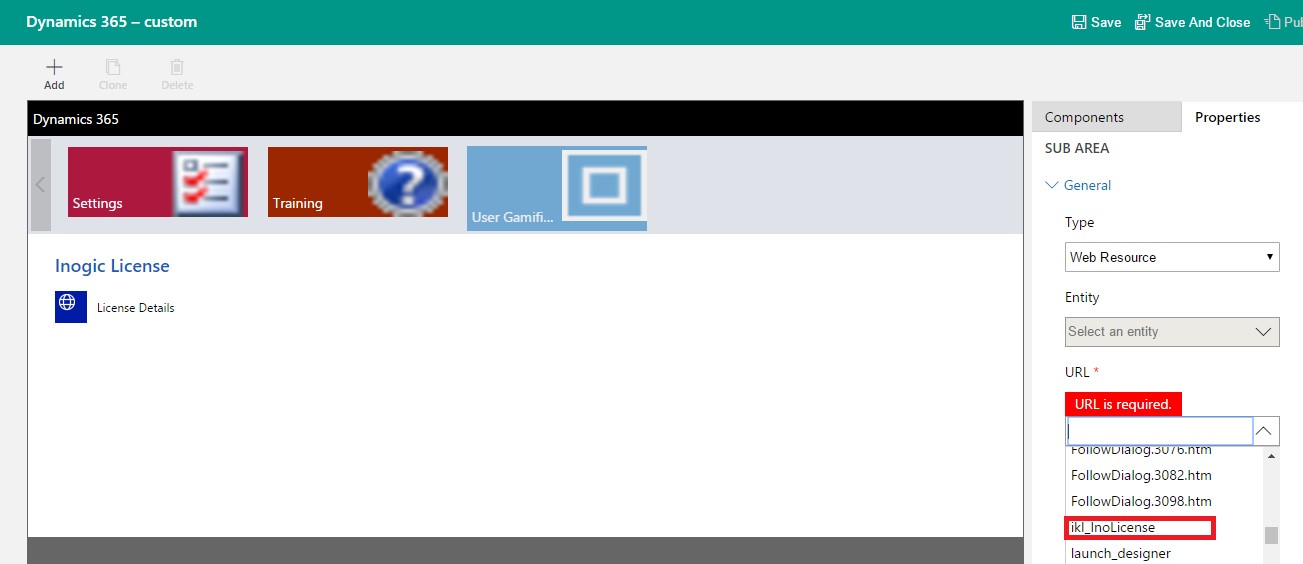
6. From the right design bar, drag the Subarea to the Inogic License group.
Change the properties of the subarea to the following
A. Set the Type of subarea as ‘Web Resource’.
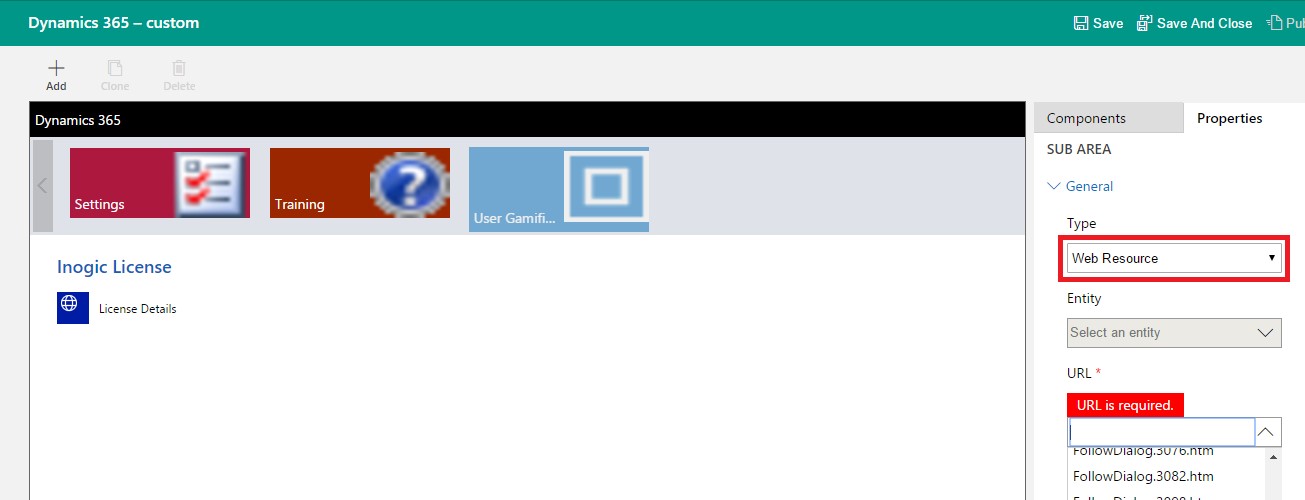
B. Select the html web resource by its name as it can be seen in the dropdown
C. Finally set the Title you want to be displayed in the navigation bar.
You can also expand the Advanced Option and set the Title and Description for other languages to support multi-language deployment.
Note: Subarea supports setting of one of the following
a. Dashboard
b. Entity
c. Web Resource
d. URL
D. Save and publish the customizations to see the updates in the Site Map.
Conclusion:
The built-in sitemap editor now makes it easy using point and click, drag and drop options to modify the sitemap quickly. However, as of the date of publishing this article, it did not work with editing the Field Service Site Map or default Site Map with Field Service installed.