Introduction:
Microsoft Portals can be used to surface data from Microsoft Dynamics 365 Customer Engagement for an external audience.
Microsoft Portal provide various pre-configured templates for Customer Portal, Partner Portal, and Employee portal amongst others.
Recently the portals were extended to provide Multi-language support, and here we cover the steps to enable multiple languages for the portal.
Steps to enable multiple languages on Microsoft Dynamics 365 Portal:
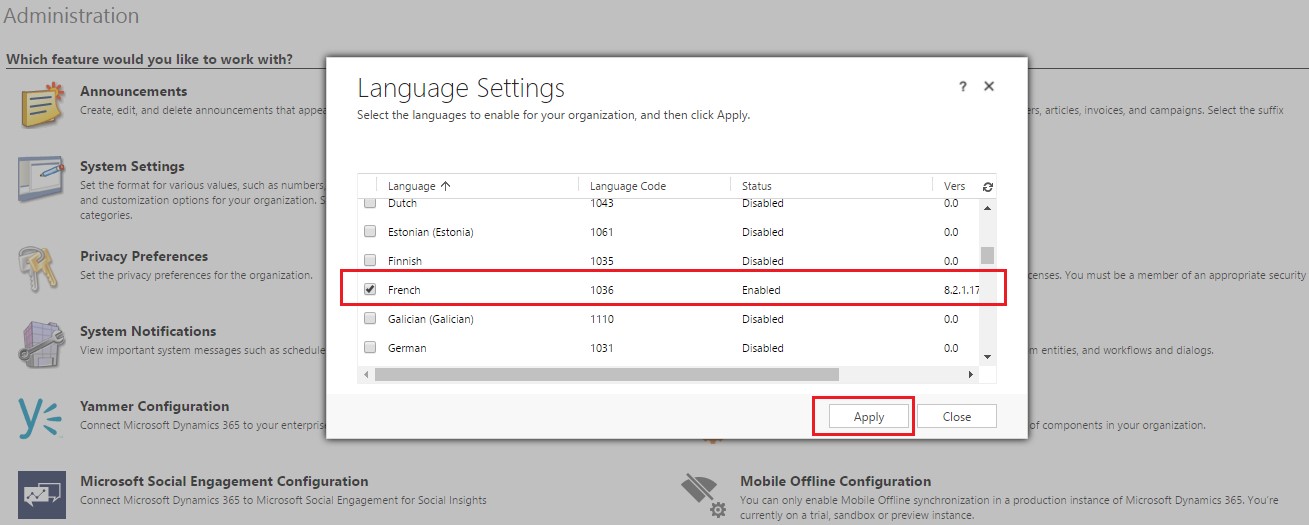
1. You first need to ensure the language has been enabled for your CRM application. To enable a language, go to the Setting>Administration>Languages, select the language and click on ‘Apply’ as shown in the screenshot below;
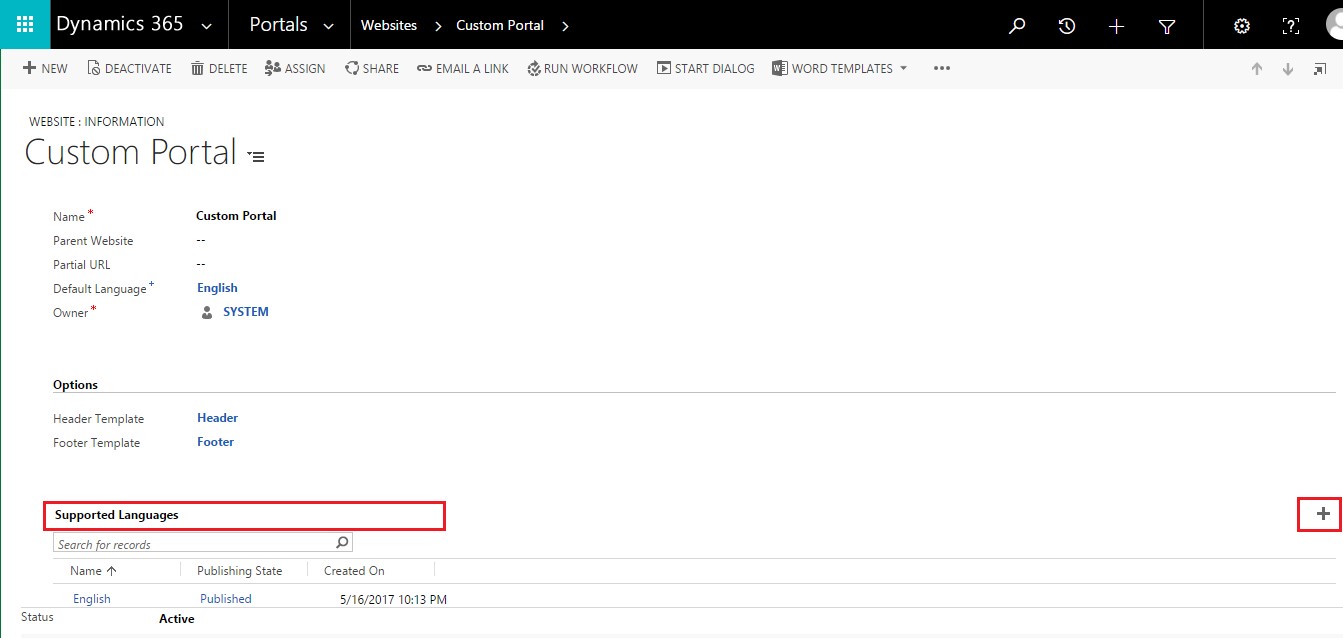
2. Next, we will enable the languages for the Portal. Navigate to Portals>Website>Websites. Under the General tab, in the ‘Supported Languages’ section, click the ‘+’ button as shown in the screenshot below;
3. Fill the fields as shown in the screenshot below;
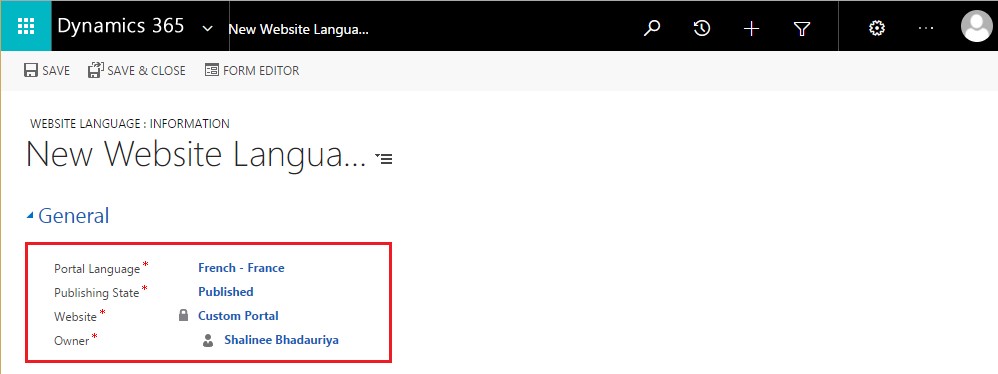
Portal Language: Select the language that you want to include support for.
Note: Currently 43 languages are supported out of the box. To know more about languages supported in Dynamics 365, go to Portals>Content>Portal Languages.
Make sure the Publishing state is “Published”
4. You can see the list of ‘Supported Language’ for the Website as shown in the screenshot below;

5. With the language support added, you will notice that it has automatically created Web Link Sets for the navigation records for each of the enabled languages.
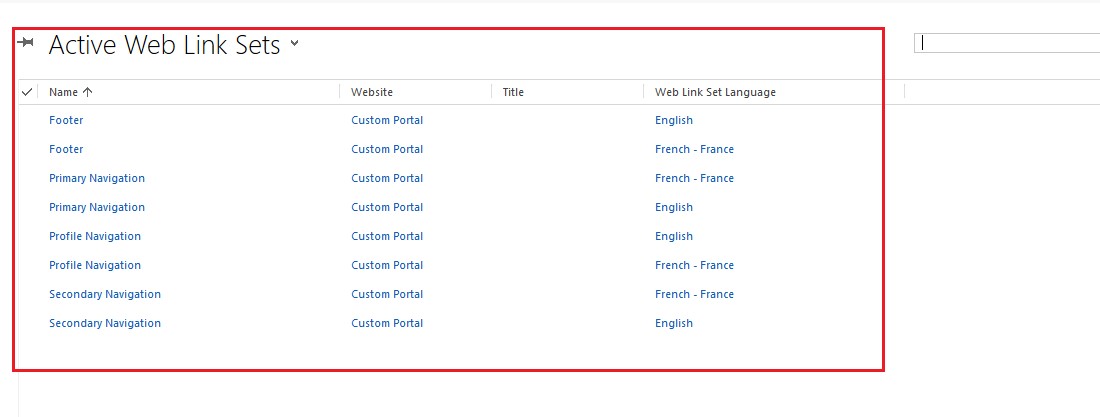
Open each of the Link Sets and update the text as required for the specified language.

6. Next is to update the content of the pages for this navigate to Portals>Web Pages. Here for each web page, there will be a Parent Page. Create localization for each language activated for the portal (Currently we have enabled the English and French language for the portal).
To add a new localization on the page for activated language, open the page and scroll down to ‘Localized Content’. Click on the ‘+’ button on the right side as shown in the screenshot below;
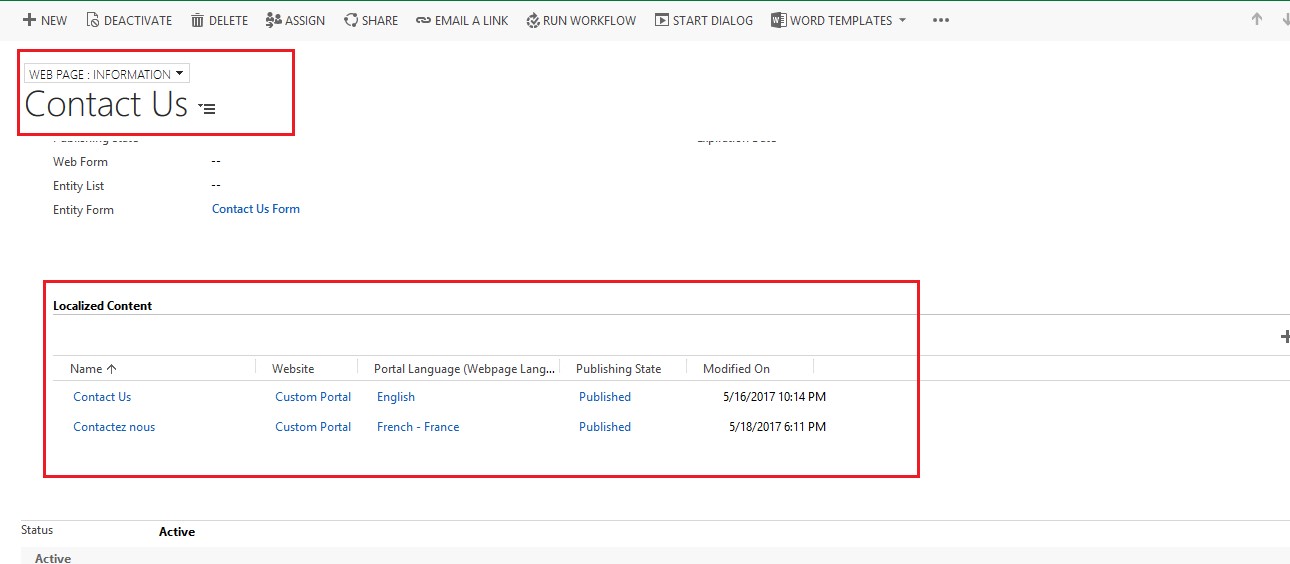
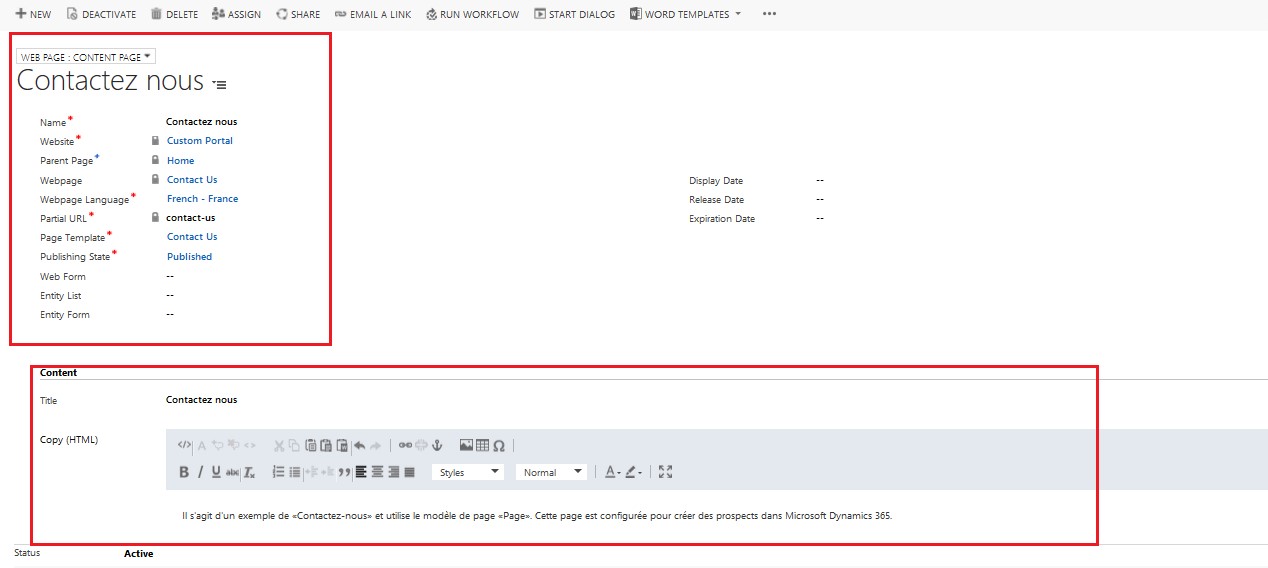
You need to modify the content for the specified language manually as shown below.
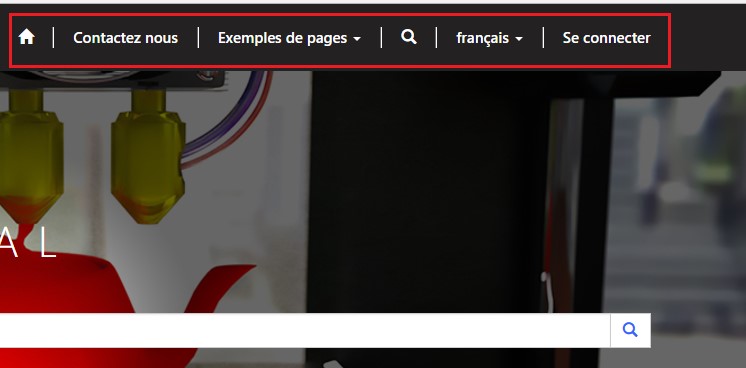
 7. With these changes, your portal is now multi-language compatible. Navigating to the website will automatically display a drop-down for language selection as shown below
 8. When the user selects ‘French’, then the content will be displayed in the French language as provided in the Web Links and Web Pages;
Conclusion:
You now have an easily configurable multi-language supportive Portal that is managed completely from within Dynamics CRM without requiring to write any line of code.
To learn more about the roadmap for Dynamics 365 Portals click here

This is great, but or Event Website portal came pre-configured with way more languages than we need. What are the steps to REMOVE languages that we do not want to support?
Hi Jim,
When you Enable a language in CRM only then the language is available to be selected as Portal Language, as shown in the blog.
Pre-configured languages in Portal which are not required can be deactivated/deleted.
Below is the screen-clip for reference:

Hope this helps!