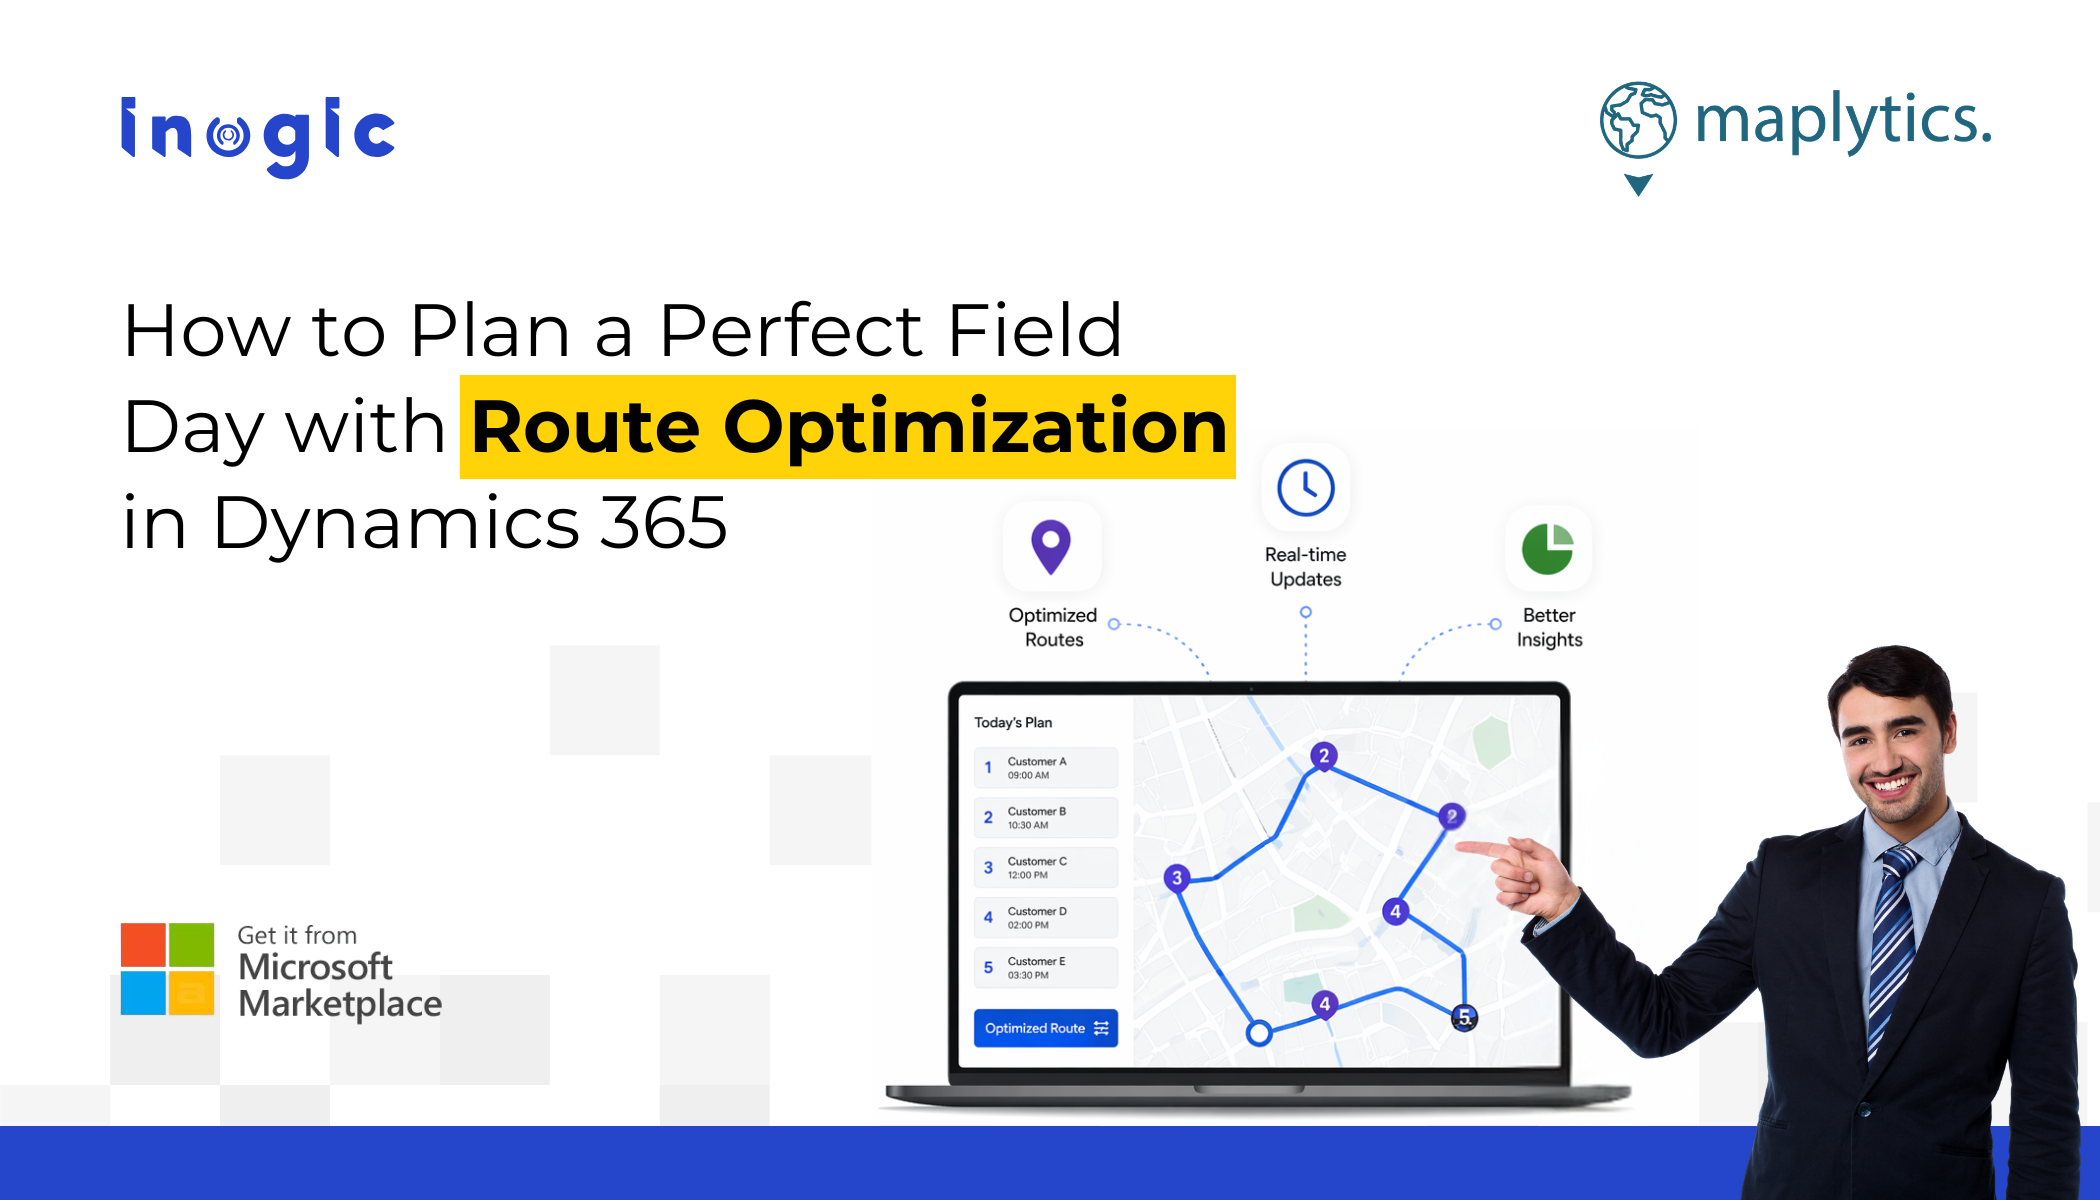
 Hi, I’m Sharon, and here is a practical walkthrough from someone who uses Route Optimization in Maplytics every day!
Alright, let us get into it.
I know what it feels like to start the day staring at a list of ten customer visits and having absolutely no idea which order makes sense. You pick one, drive there, then realize the next one is back across town. By noon, you have burned half your fuel and visited three people. It is not a great feeling.
Route Optimization in Maplytics changed that for me entirely. Today, I am going to walk you through exactly how it works, step by step, no jargon, just the real process. By the end of this, you will know how to set up, run, and get the most out of optimized routing inside Dynamics 365.
Let us start from the beginning.
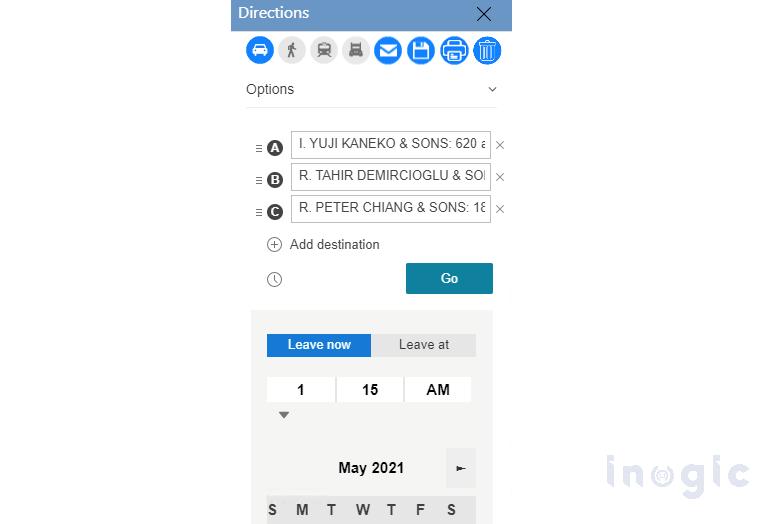
Step 1: Open the Directions Card
The first thing you need to know is where everything lives. In Maplytics, all your routing features are housed inside the Directions Card.
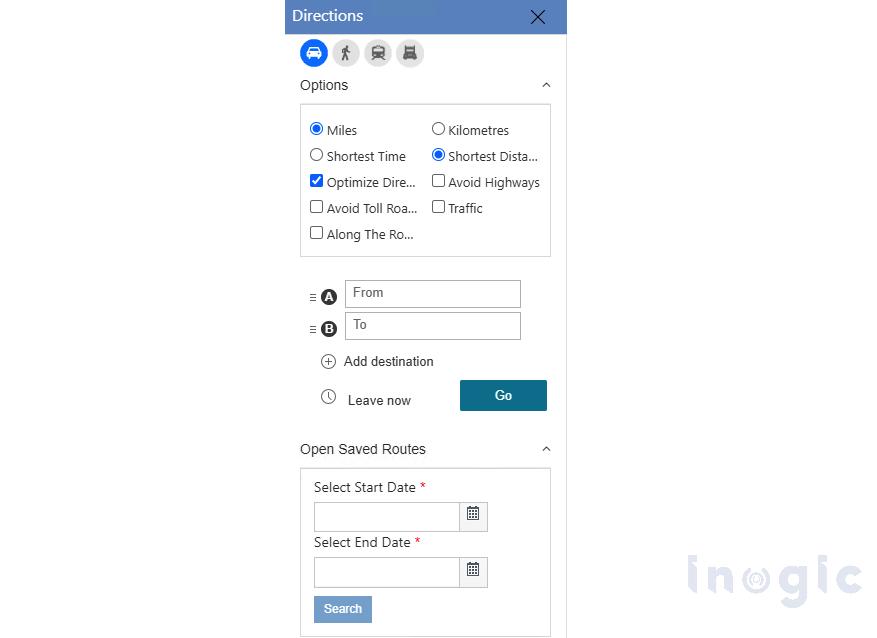
You can open it in two ways. The first is simply clicking the Directions tab directly on the map. The second, and the one I use more often, is adding a waypoint. The moment you add any location to your route, the Directions Card opens up automatically.
Think of the Directions Card as your route control panel. Everything you need is right there.
Step 2: Add Your Waypoints
Waypoints are your stops, the customers, accounts, or locations you need to visit. This is where Maplytics connects directly to your Dynamics CRM data, which is what makes it so powerful.
Here is how to add them. You have a few options depending on how you prefer to work:
- Click directly on a pin on the map and use the Contextual Menu or Tooltip Card to add it to your route.
- Use the ‘Add to Route’ mass action to select multiple records at once.

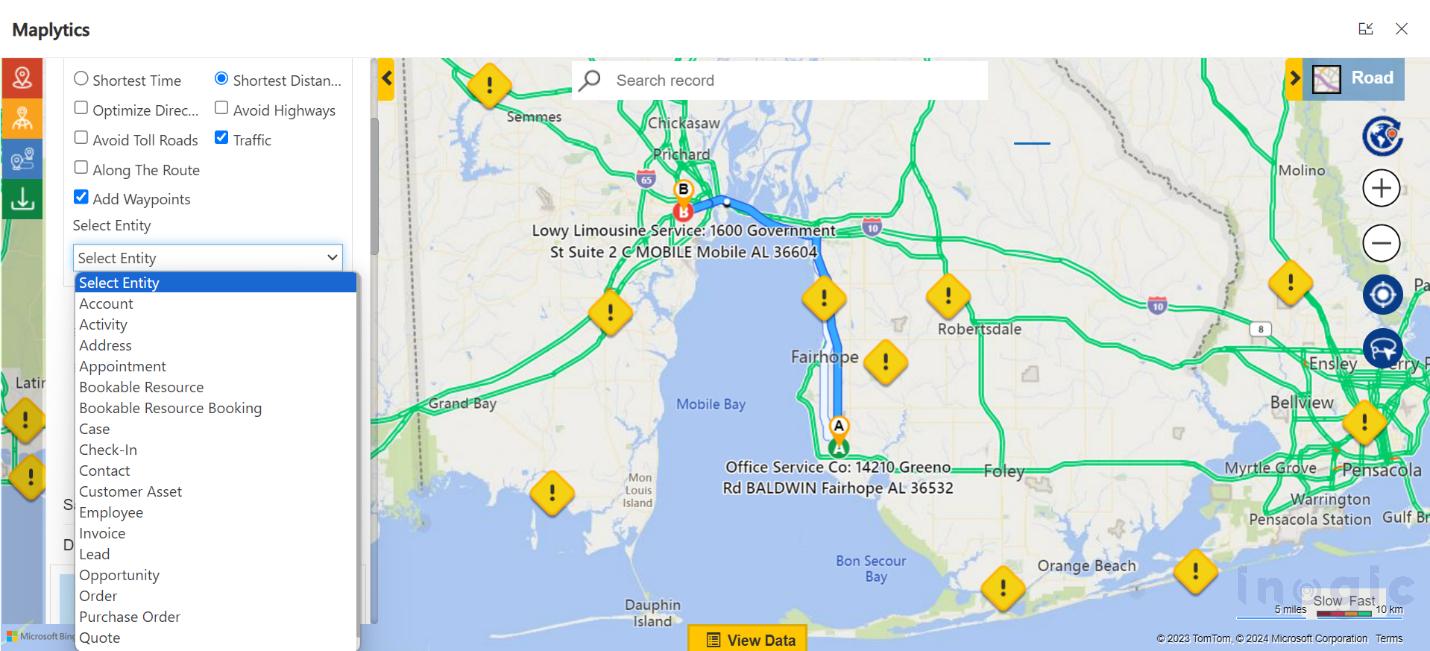
- Use the Add Waypoints option inside the Directions Card, select the entity you want (accounts, contacts, leads, whatever is relevant), and a lookup table appears. You can search by keyword or scroll through and select the ones you need.

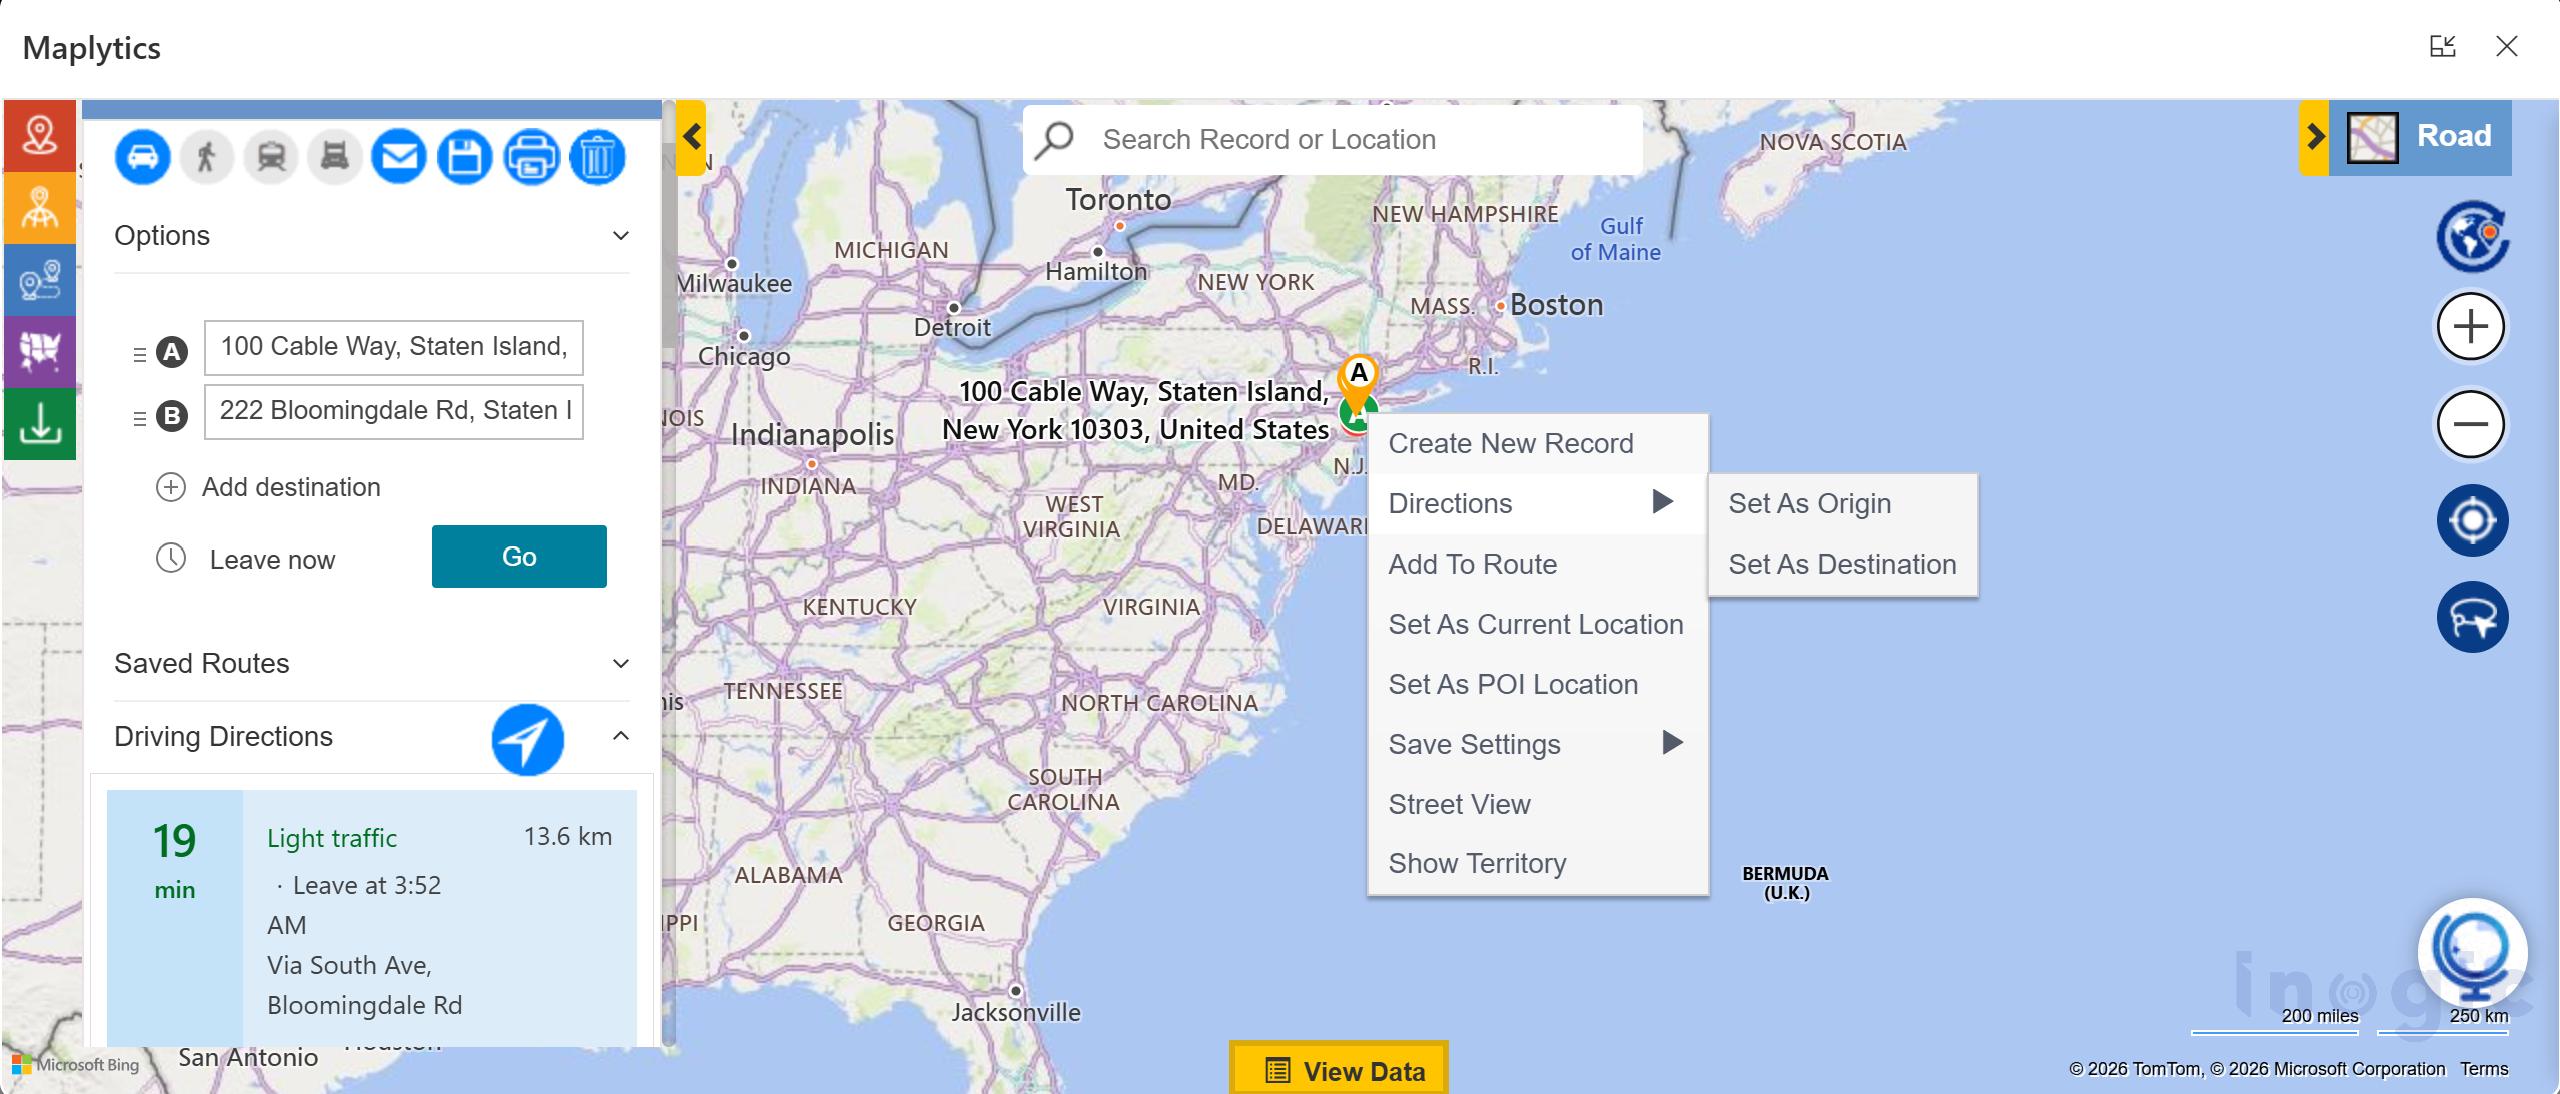
Once you add a record, it appears as a waypoint on your route. You can keep adding as many as you need. I usually plan a full day’s visits in one go. It takes about two minutes once you get the hang of it.
Pro tip: You can also drag and drop the waypoints to manually change the order if you have a specific preference for where you start or end.
Step 3: Set Your Departure or Arrival Time
Once your waypoints are in, tell the system when you are leaving or when you need to arrive. This matters more than you might think.
Traffic in most cities looks completely different at 8 am versus 10 am. By setting your departure time accurately, Maplytics factors in real traffic conditions when calculating your route, not just distance. I made the mistake of ignoring this early on and ended up sitting in rush hour traffic that the system would have routed me around if I had set the time correctly.
Step 4: Choose Your Travel Mode
 This is one of those features that not everyone thinks about, but makes a real difference depending on how your team operates.
Maplytics lets you choose from four travel modes:
- Driving is the standard choice for most field reps in a car.
- Walking is useful for dense urban areas where your visits are close together, and parking is a headache.
- Transit, for teams using public transport.
- Truck, for heavier vehicles that need specific routing around restrictions.
Select the one that matches how you are actually travelling. The route calculated for a truck is very different from that for a car, with different roads, different restrictions, and different timing.
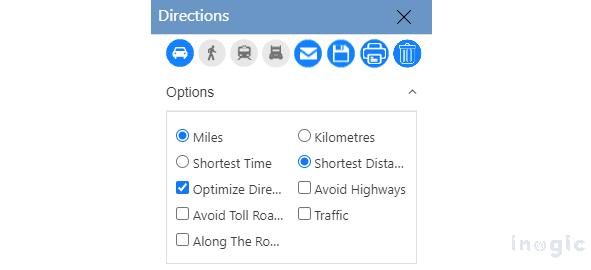
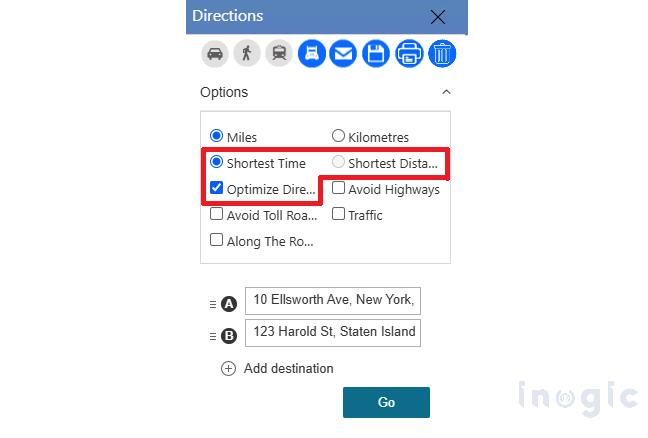
Step 5: Set Your Route Options
Now click the Options button. This is where the real customization happens, and where most of the fuel and time savings come from.
You will see several choices here. The ones I use most often are:
- Avoid Tolls, if you are covering your own travel costs or your company does not reimburse tolls, this is a no-brainer. The system reroutes you around toll roads entirely.
- Avoid Highways, useful when you are making multiple short stops in a local area, and jumping on and off a highway is actually slower.
- Optimize for Shortest Time or Shortest Distance. I will come back to this in the next step because it connects directly to the optimization feature.
A helpful detail here, some of these options can be pre-configured in your Maplytics settings, so they are automatically selected every time you plan a route. If your whole team always avoids tolls, set it once, and it is done for everyone.
| Intrigued about Route Optimization? Try it for yourself, in your environment, with a 15-day free trial! |
Step 6: Turn On Optimize Direction
This is the heart of it. This is the step that separates a route that is just directions from a genuinely intelligent route.
Inside the Options section, select Optimize Direction. Here is what this does. Instead of visiting your waypoints in the order you added them, Maplytics recalculates the most efficient sequence, keeping your starting point and ending point fixed, and rearranging everything in between to give you either the shortest total time or the shortest total distance, depending on which you selected.
Let me give you a real example of why this matters.
Say I add eight stops in the order I thought of them, which is roughly alphabetical by account name. Without optimization, that route might criss-cross the city three times. With Optimize Direction turned on, the system reorders those eight stops into a logical geographic sequence that flows from one area to the next. Same visits, dramatically less driving.
This single step is where most of the fuel saving happens. Do not skip it.
Step 7: Click Go
Once everything is set, waypoints added, time specified, travel mode chosen, options configured, and optimization turned on, click Go.
The route plots on the map immediately. Your Directions Card populates with the full sequence of stops, the travel time between each one, and the total distance and duration for the day. Everything you need to plan your time is right there in front of you.
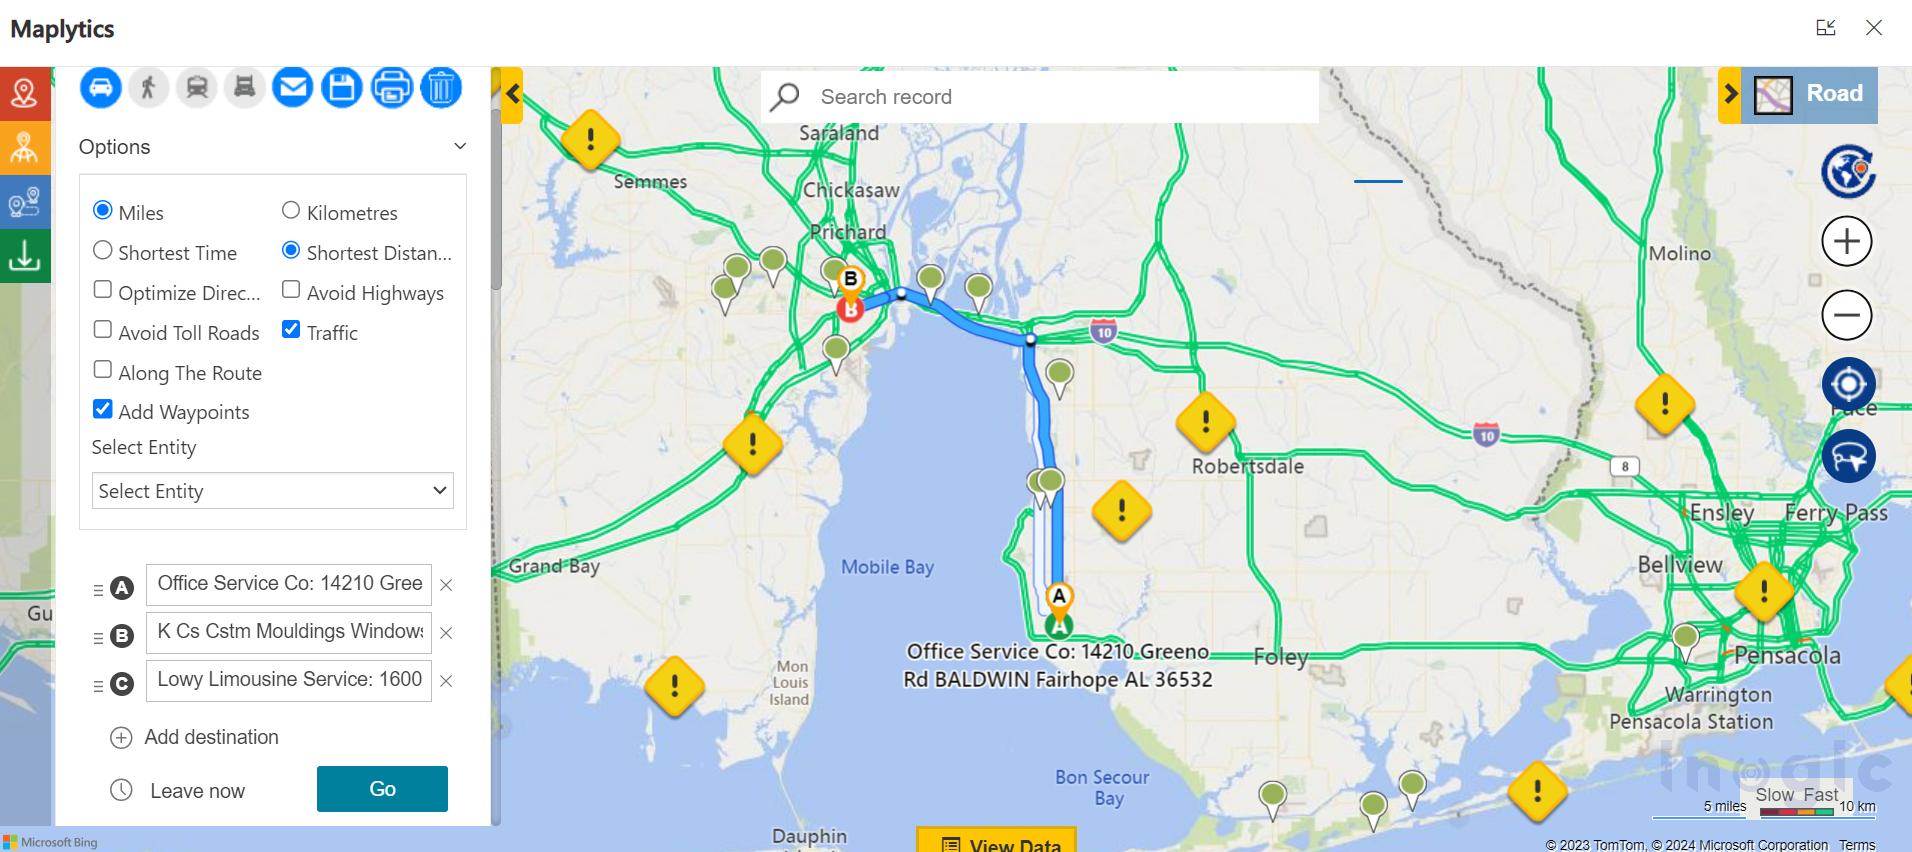
If something does not look right, a stop that seems out of order, a route that goes somewhere unexpected, you can drag and drop waypoints to adjust and click Go again. The system recalculates instantly.
Step 8: Navigate Turn by Turn
Now you are on the road. Here is how the navigation actually works in practice.
Maplytics integrates with Google Maps, Waze, and Apple Maps for turn-by-turn navigation. From the Directions Card, you can click to redirect to whichever app is set up in your configuration. The full route, all your waypoints in optimized order, transfers across, and you follow it just like any other navigation.
If you are on a phone or tablet, the experience is the same. Tap the navigation button and your preferred app opens with the full route loaded. No re-entering addresses, no copying links manually.
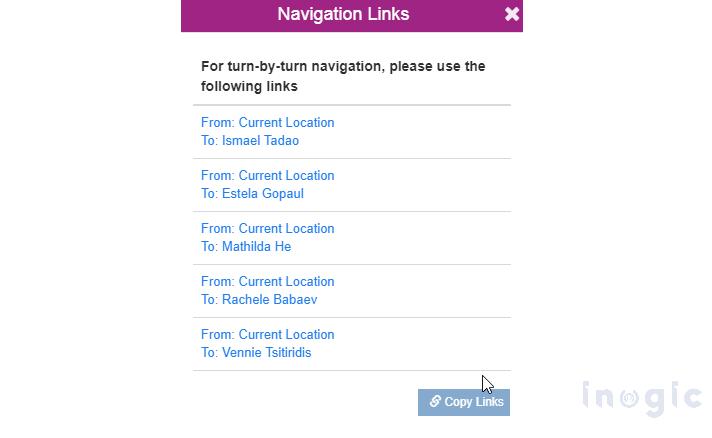
You also have a few other options directly from the Directions Card:
- Show Complete Route, see the entire day’s journey visualized on one map.
- Individual Route Links- get a specific link for the leg between any two waypoints if you only need one section.
- Copy Links- copy the navigation links to paste into an email or save in a note.
Step 9: Send the Route by Email
This one is particularly useful if you are a manager planning routes for your team rather than yourself.
Maplytics has a Send Route Email button. When you click it, the system automatically compiles all the route details, account names, waypoints, navigation links, total distance, and total time into an email that you can send directly to your rep.
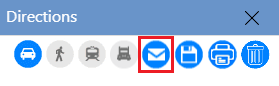
Your rep receives everything they need for the day in a single email. No calls back and forth, no sending addresses separately, no confusion about which order to visit first. It is ready to go.
Step 10: Save Your Route
If this is a route you will use again, a recurring weekly schedule, or a set of accounts you visit every month, save it.
The Save Route feature stores the route with its waypoints, total distance, and total time. You can give it a name and assign it to an owner, which means managers can save routes and assign them to specific reps directly within the system.
When you open a saved route, the information is all there. You can update it if anything changes, or simply load it and go. For field teams that work in consistent territories, this turns daily route planning from a fifteen-minute task into a thirty-second one.
Step 11: Print the Route if You Need It
Not every situation is digital. Some clients are in areas with poor connectivity. Some reps prefer a printed reference. Maplytics covers this too.
Click Print Route, and a new window opens with the full map and driving directions laid out on the page. Click the print icon, and you have a physical copy of everything- the map, the stops, and the directions between each one.
It is a small feature, but on the days you need it, you really need it.
That Is the Full Process
The first time you run through this, it takes about five minutes. After a week, it takes two. After a month, it becomes second nature, and you will not be able to imagine planning your field day any other way.
The data was always there in your CRM. Route Optimization in Maplytics just puts it to work for you, every single day, every single visit, every single mile.
What’s More?
If you wish to combine maps, routes, schedules, and real-time updates to make a difference, Maplytics with MapCopilot, its AI assistant, is available immediately for Dynamics 365, Power Apps, Power Pages, and Dataverse. Organizations interested in adoption, 15-day free trials, or personalized demos are encouraged to contact Maplytics’ sales team at crm@inogic.com
For more information, visit our website or Microsoft Marketplace. One can hop onto the detailed Blogs, Client Testimonials, Success Stories, Industry Applications, and Video Library for a quick query resolution. Technical docs for the working of Maplytics are also available for reference.
Kindly leave us a review or write about your experience on the Microsoft Marketplace or the G2 Website.