Managing a Power platform with multiple Dynamic 365 Environments can be difficult, especially for large enterprise organizations with a large number of environments. This is where “Environments Group” comes into the picture. By using this, you can categorize multiple environments into a single Group. Thus, it is easy for users and administrators to find their respective environments.
Let’s say there is an organization with a large number of CRM instances that they want to categorize based on department. So, they will need to create different environment groups based on the department.
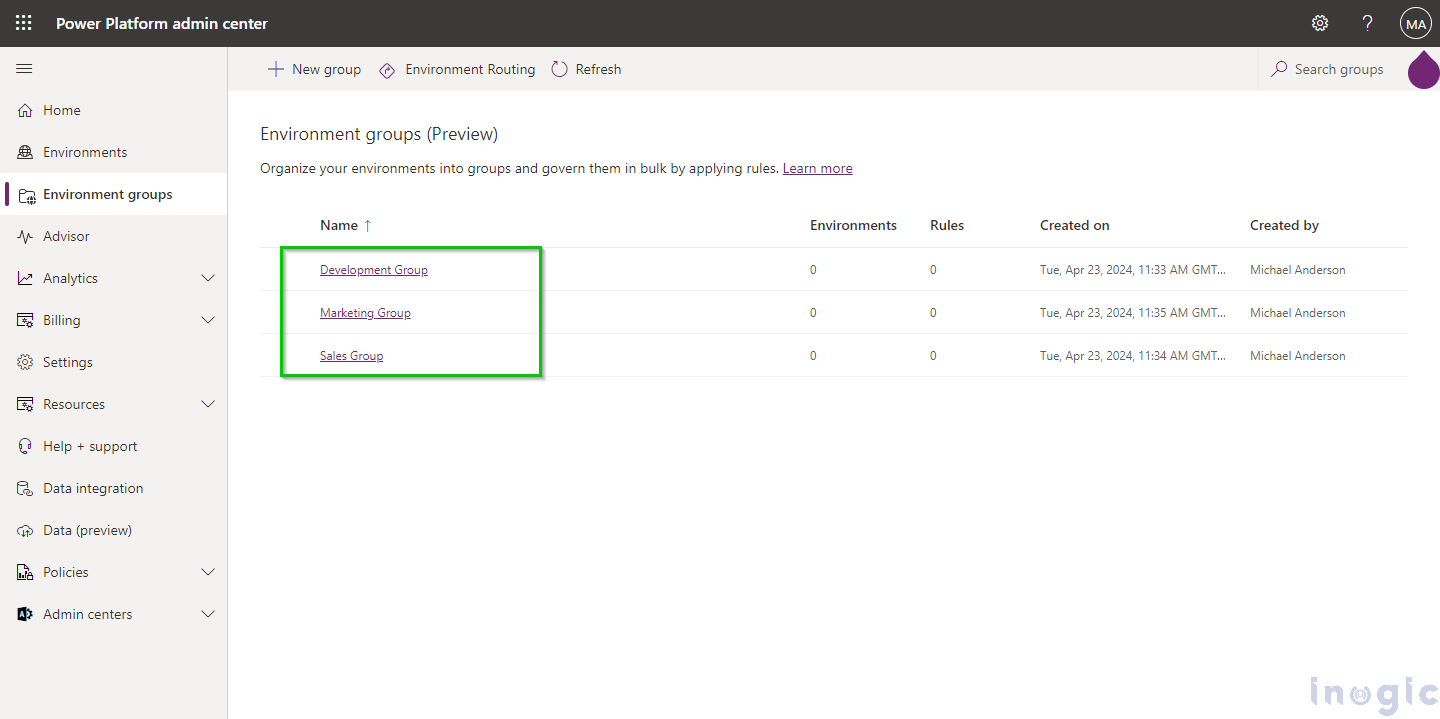
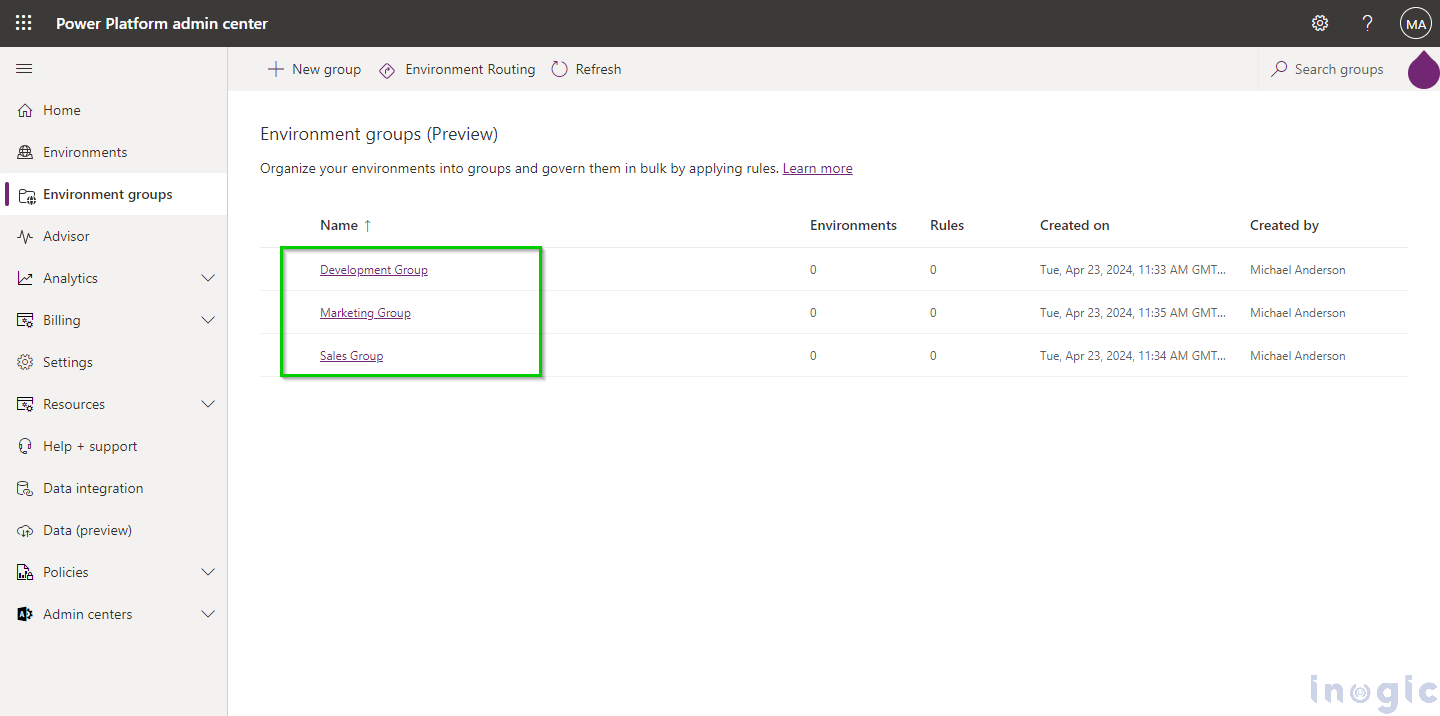
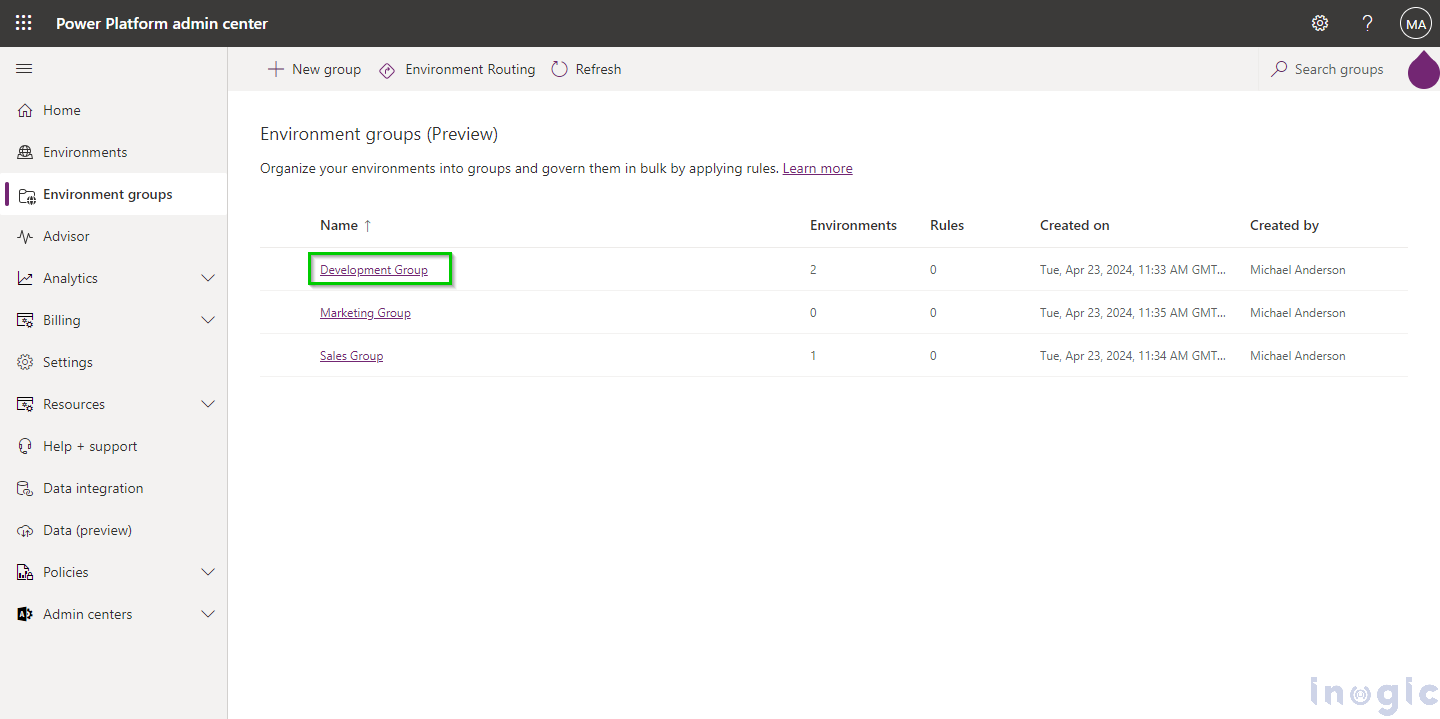
So here we have created three environment groups as follows:
- Development Group
- Marketing Group
- Sales Group
Note: Power Platform administrators can create N number of Environment Groups as necessary to meet their requirements.
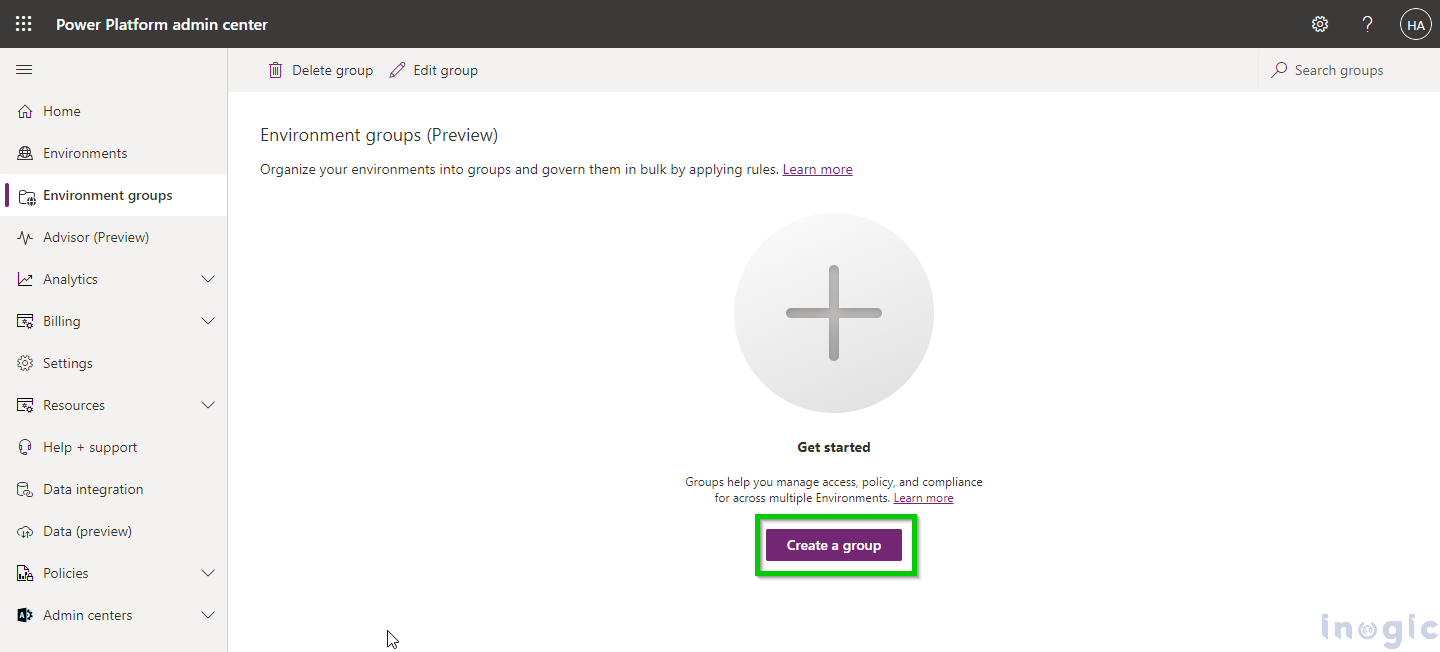
Now let’s see how we can create Environment Groups:
First, we will create Environment Groups using the following steps:
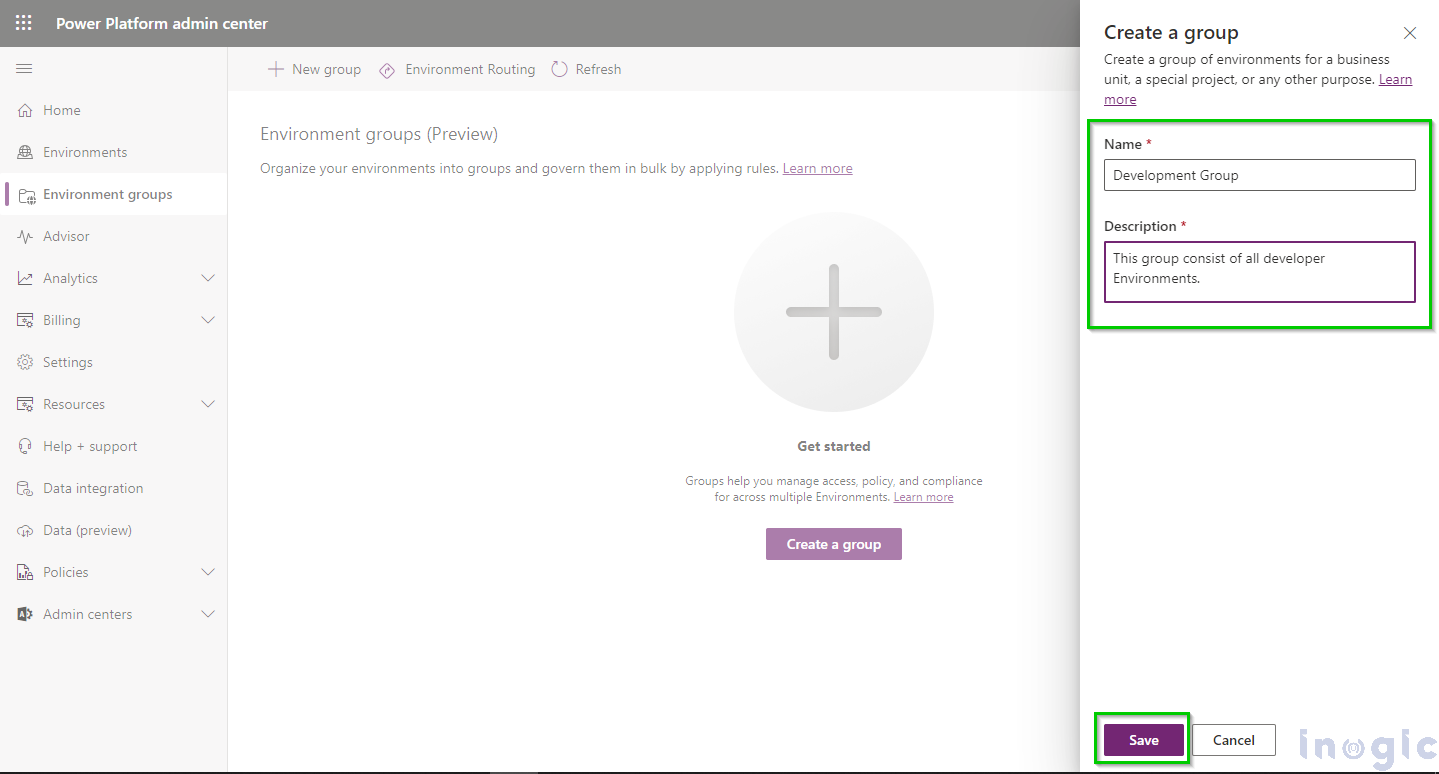
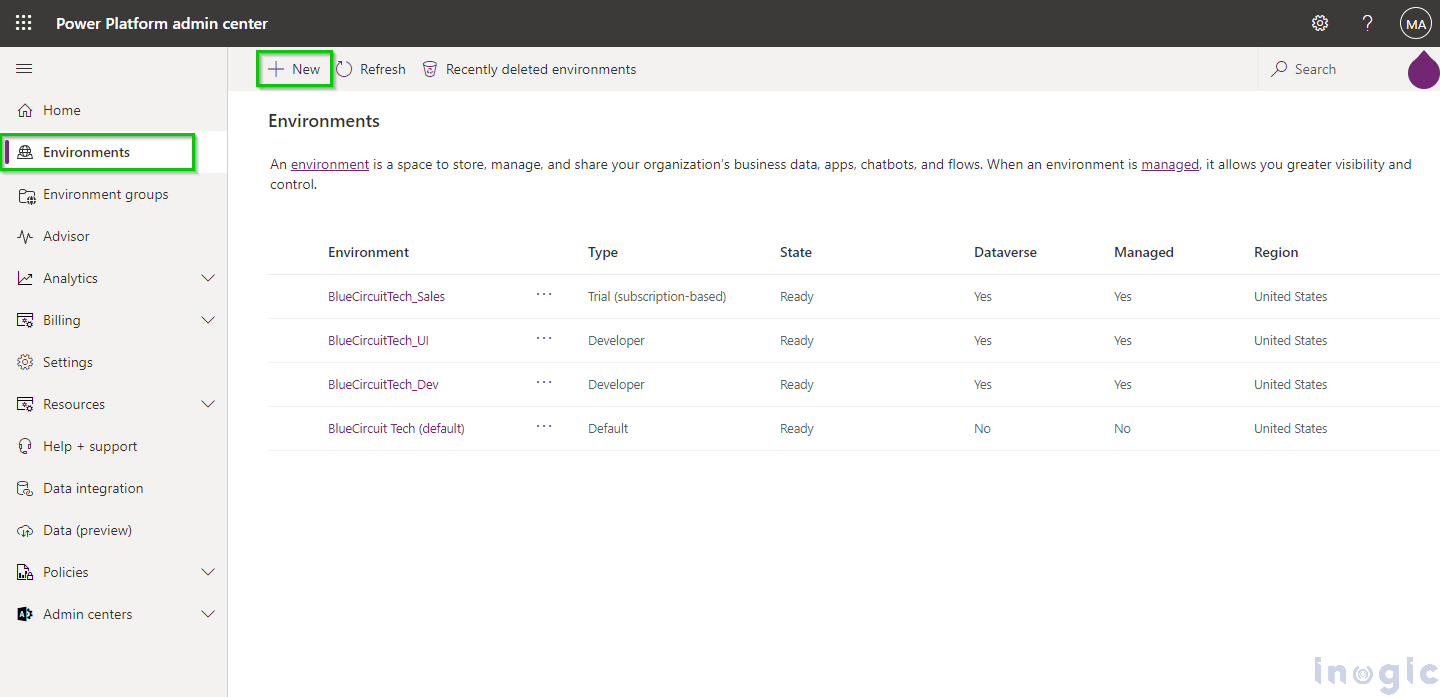
1. Sign in to the Power Platform Admin Center.
2. Select Environment Groups in the navigation pane.
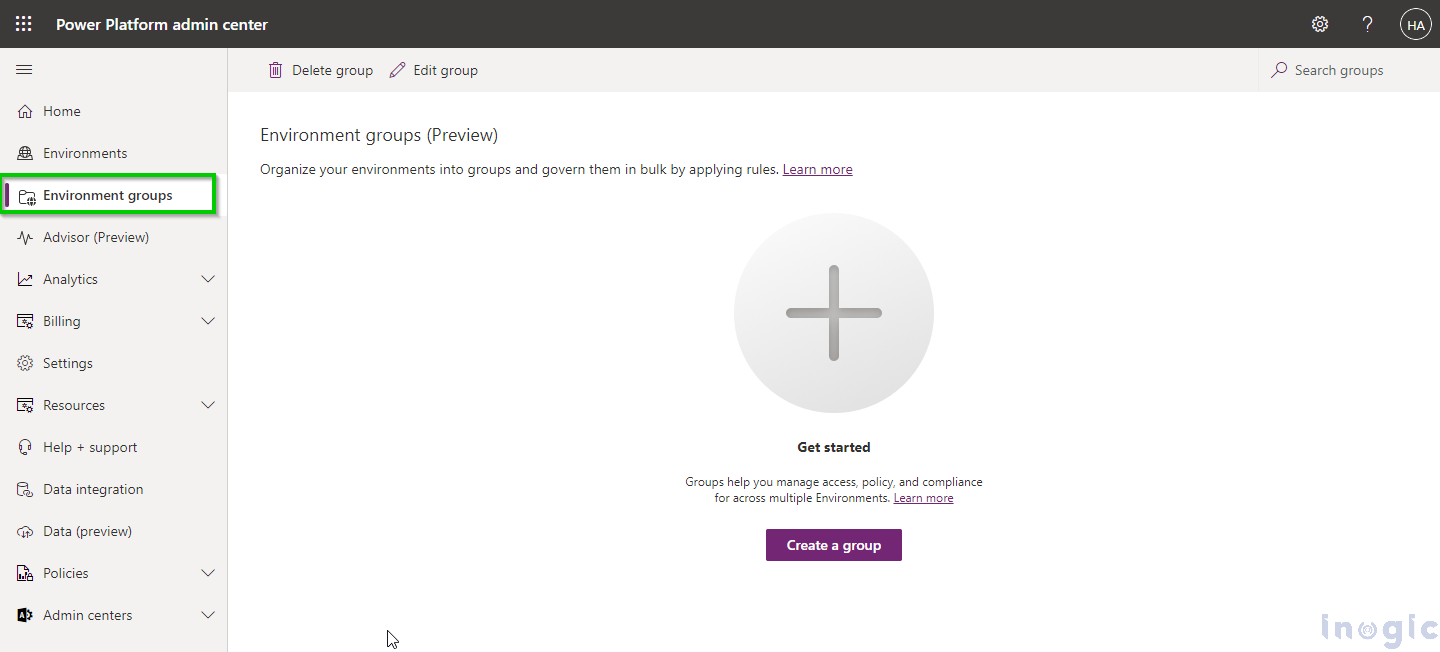
3. On the Environment groups page, select Create a group.
4. In Create a Group form, enter the Name for Group and a brief description of the Group, and click on Save.
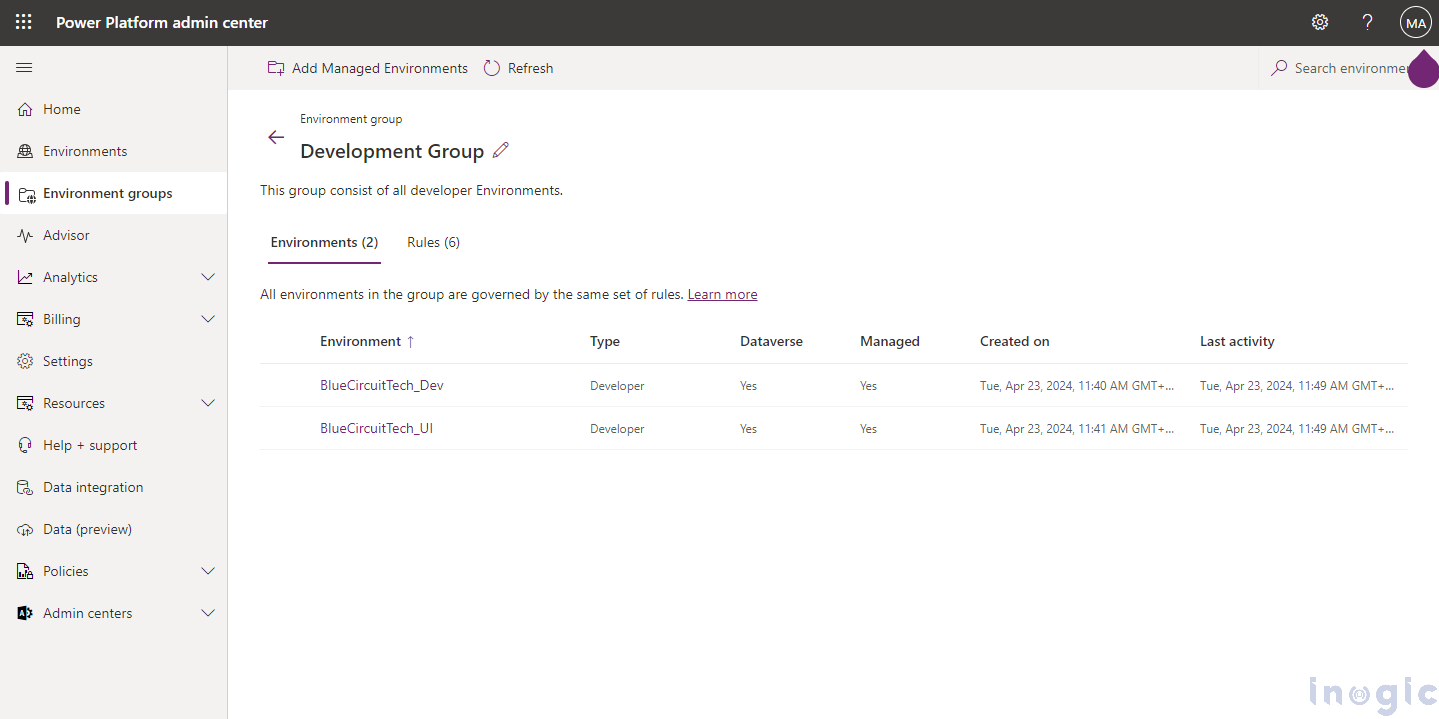
This way, we have created the first group for developer environments with the name Development Group.
And similarly, we have also created the Sales Group and Marketing Group.
Now we will add our environments to their respective groups.
To add environments to a Group, follow the below steps:
- Select the Environment Group to which you want to add Environment.
- Click on Add Managed Environments.
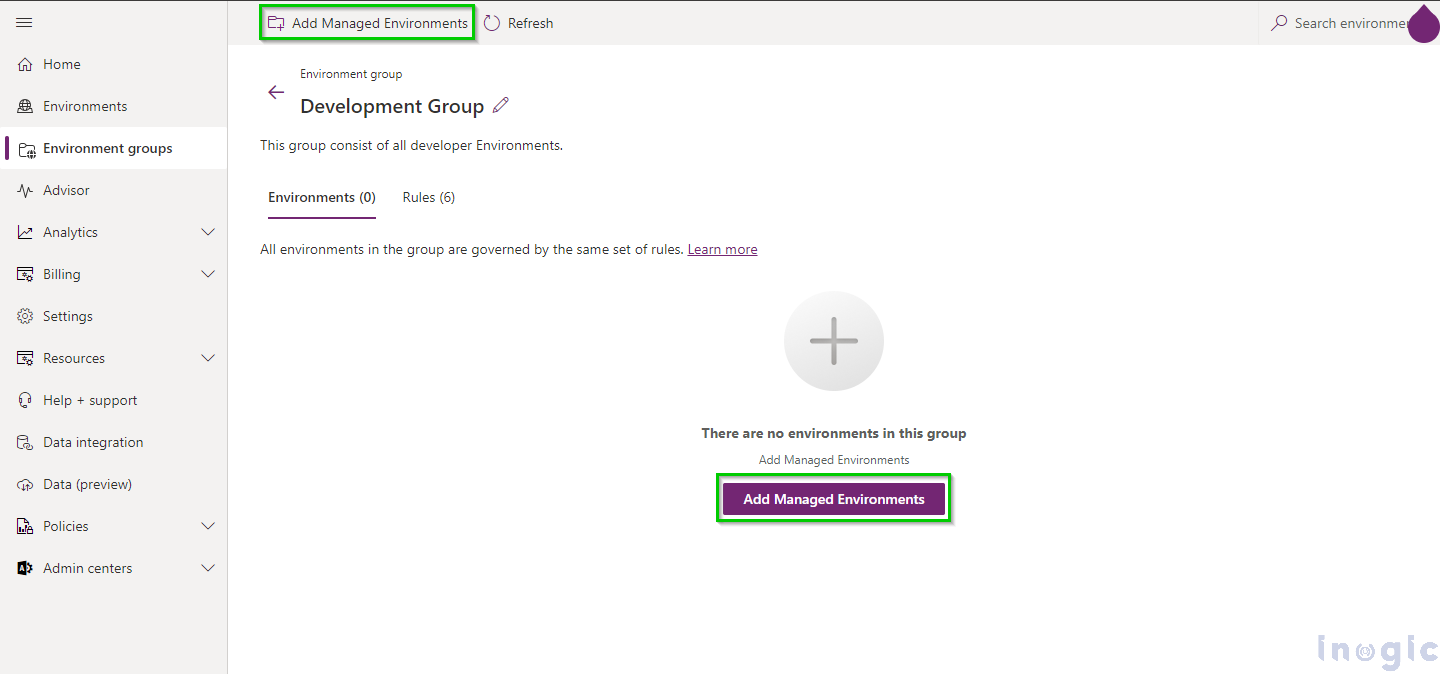
3. Select the environments to add to the Group and click on Add.
We will add our Developer Environments to the Development Group.
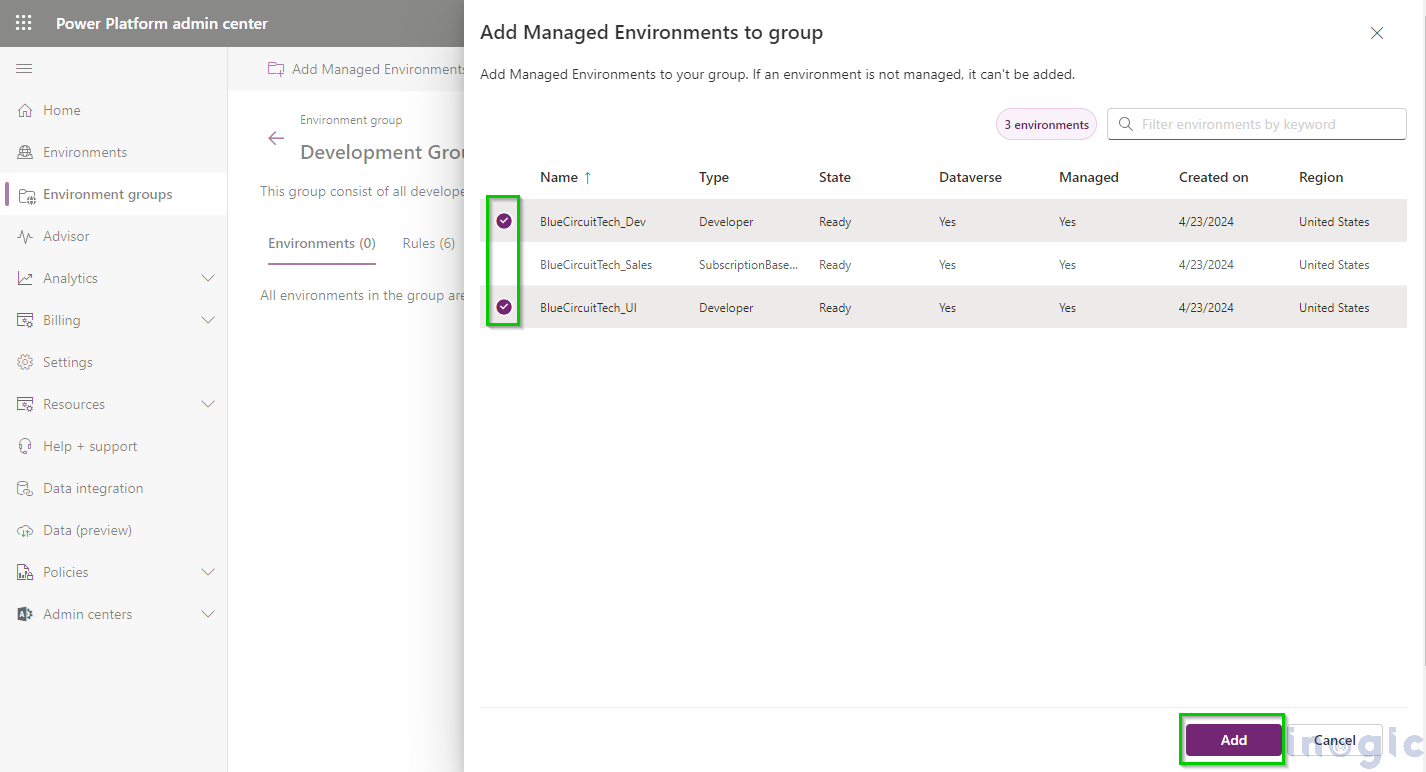
If you don’t see any environments after clicking on Add, Click on Refresh.
Using the above steps, we will add all the remaining environments to their respective groups.
Note:-
- You can only add managed Environments to groups. To learn more about managed Environments, click here.
- An Environment can belong to only one Environment Group.
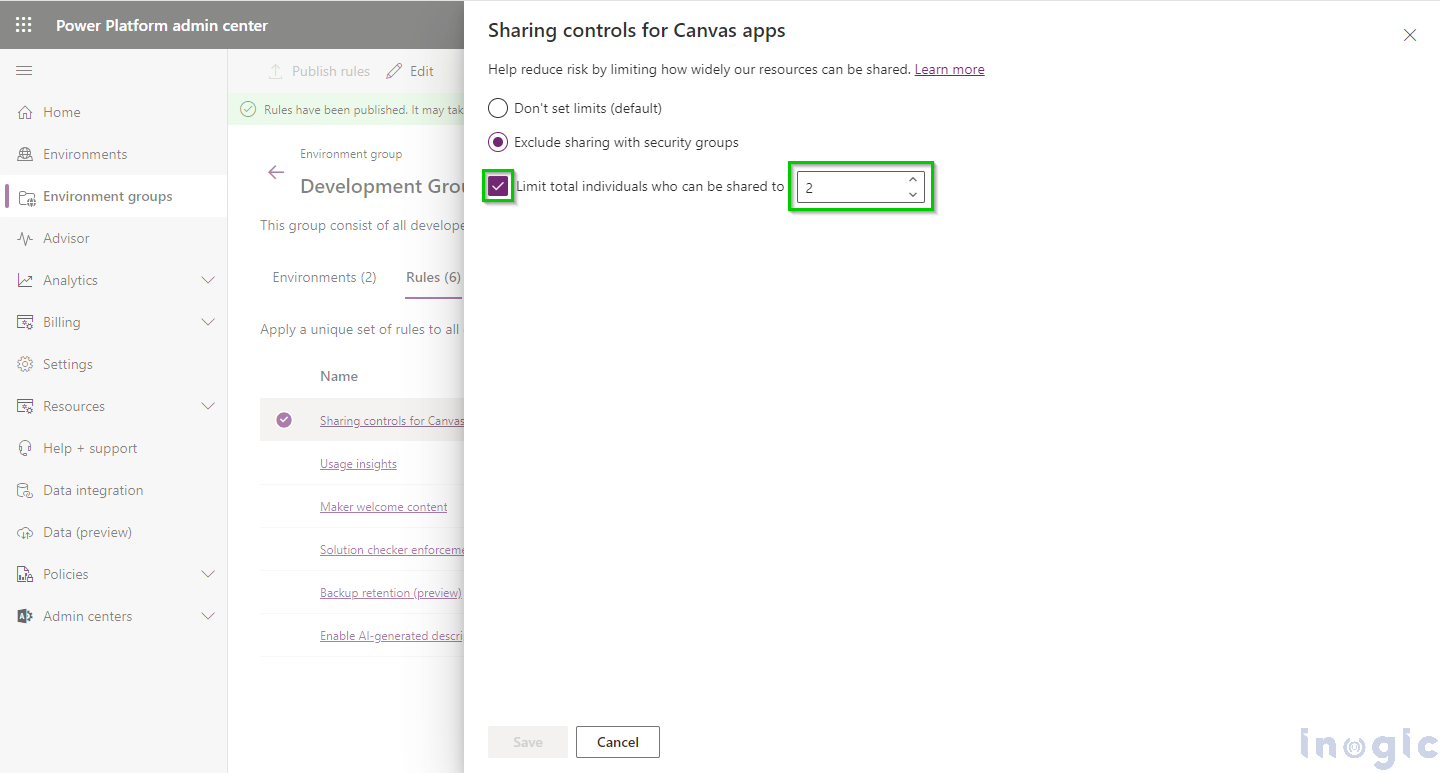
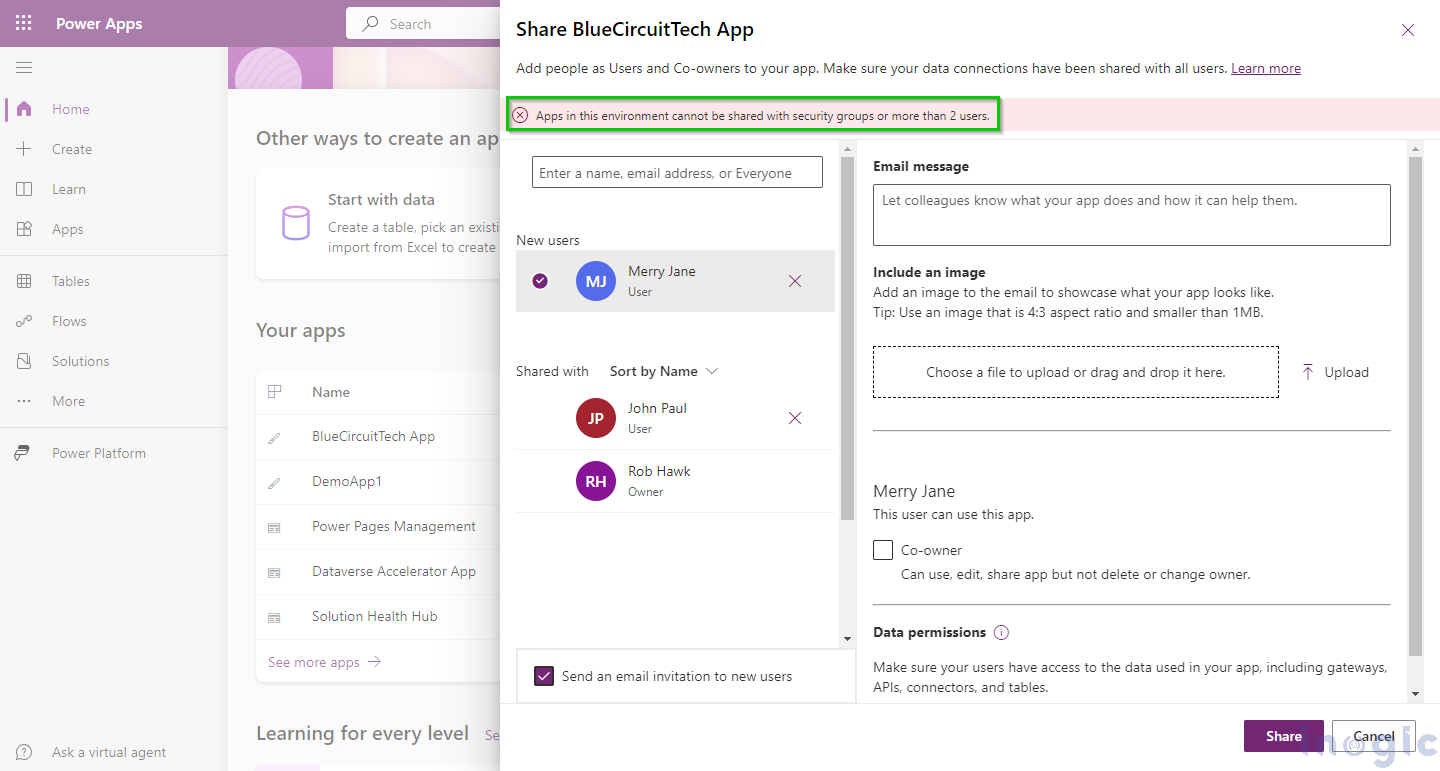
Now, let’s consider a scenario where we want to establish rules for users of Developer Environments. Our goal is to prevent them from sharing the Canvas app with security groups and restrict sharing access to no more than 2 users.
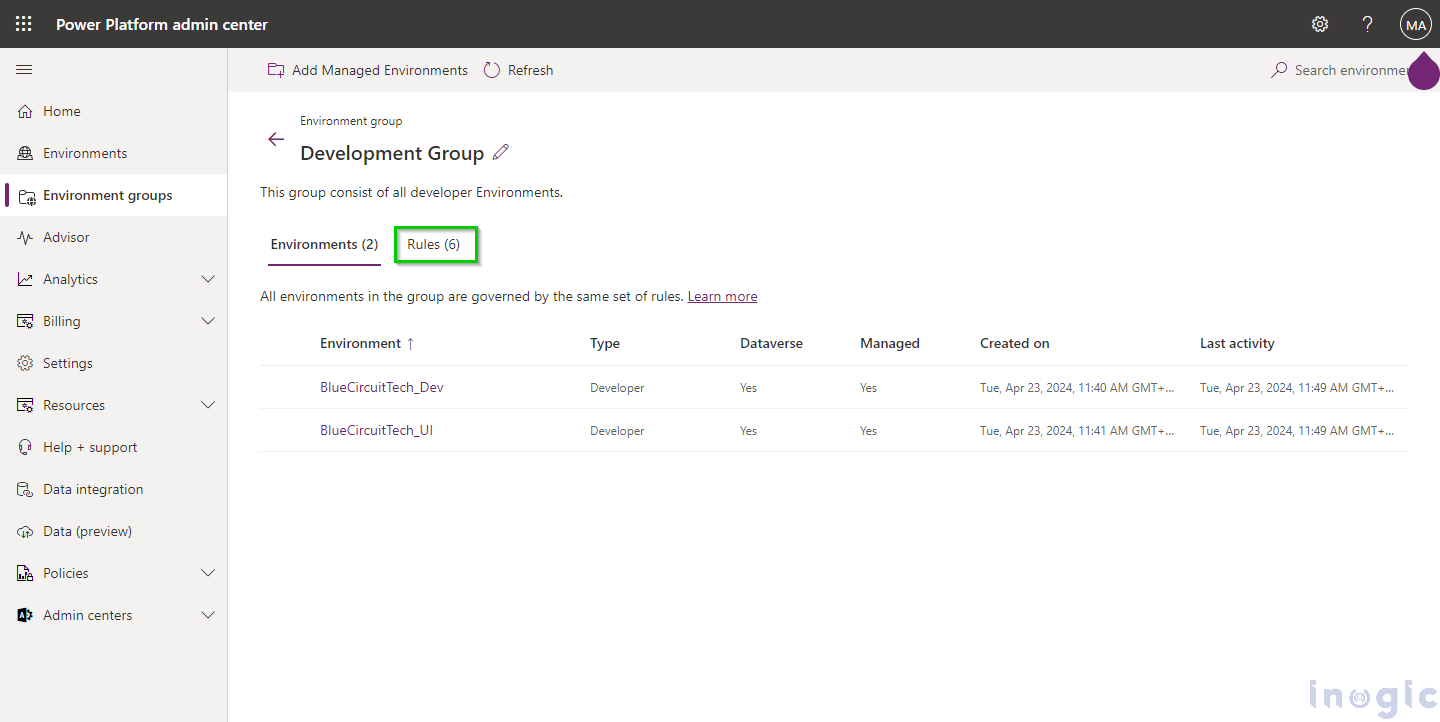
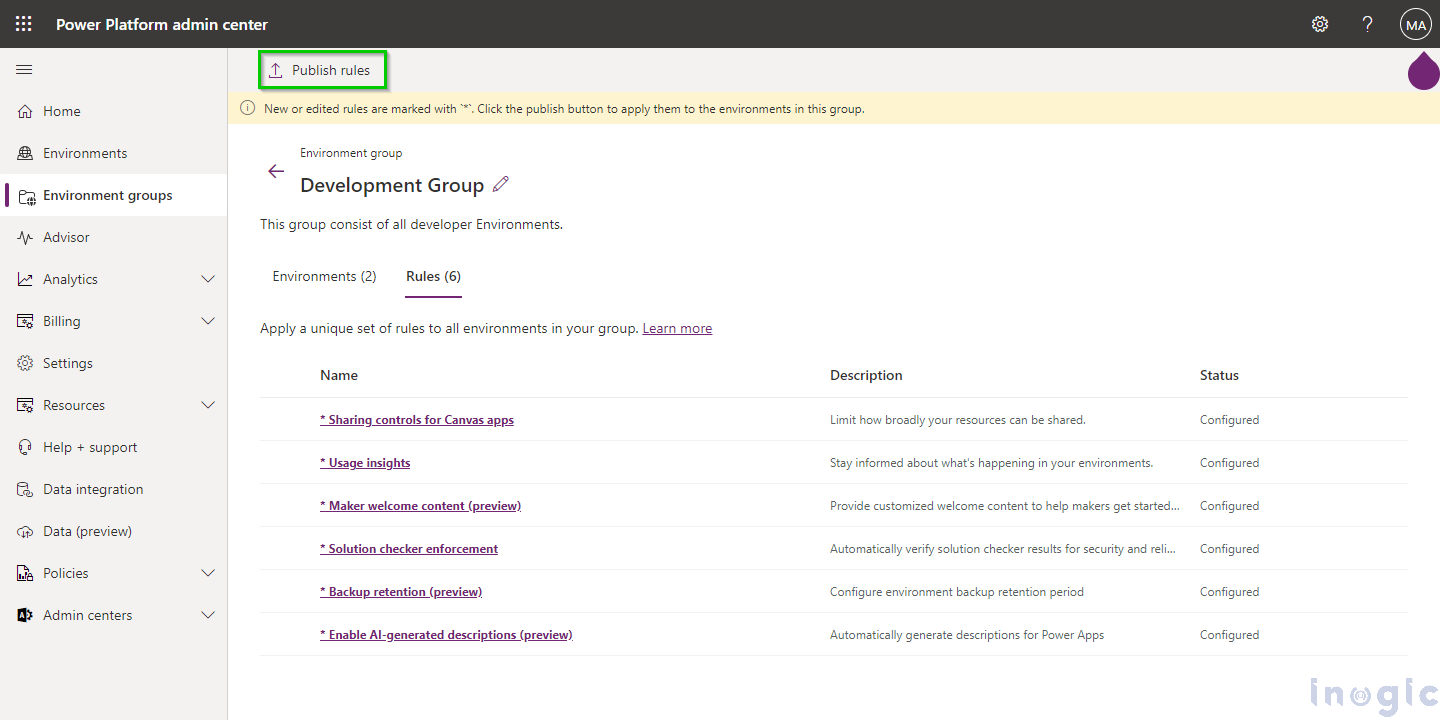
Currently, there are six rules you can apply to your environment Groups-
- Sharing controls for Canvas apps: Limit how broadly your resources can be shared.
- Usage insights: Stay informed about what’s happening in your environments.
- Maker welcome content (preview): Provide customized welcome content to help makers get started with Power Apps.
- Solution checker enforcement: Automatically verify solution checker results for security and reliability issues.
- Backup retention (preview): Configure environment backup retention period.
- Enable AI-generated descriptions (preview): Automatically generate descriptions for Power Apps.
For our scenario, we will use the first rule, which is Sharing controls for Canvas apps.
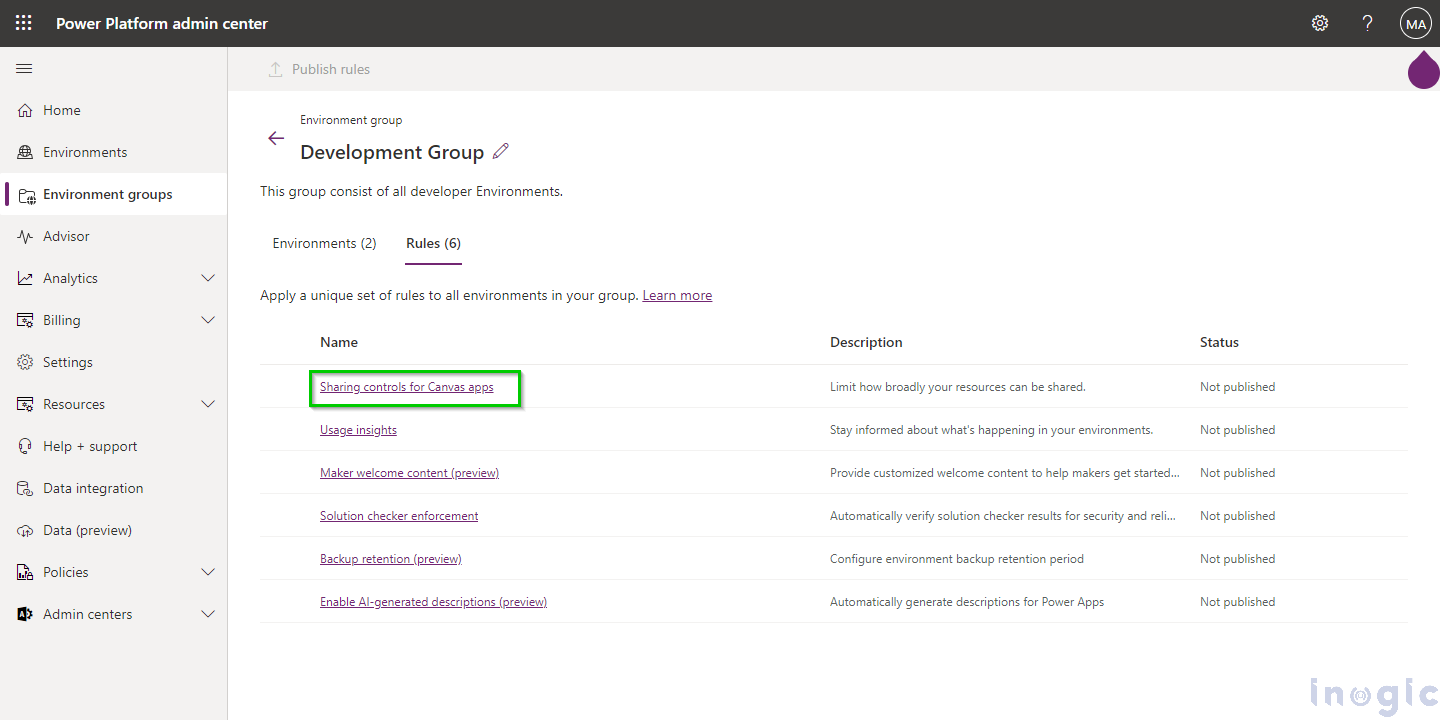
To Configure the Rules for your Environment Groups, follow the below steps:
1. Select the Environment Group if you want to Configure the rules.
2. Click on Rules.
3. Click on Sharing controls for Canvas apps.
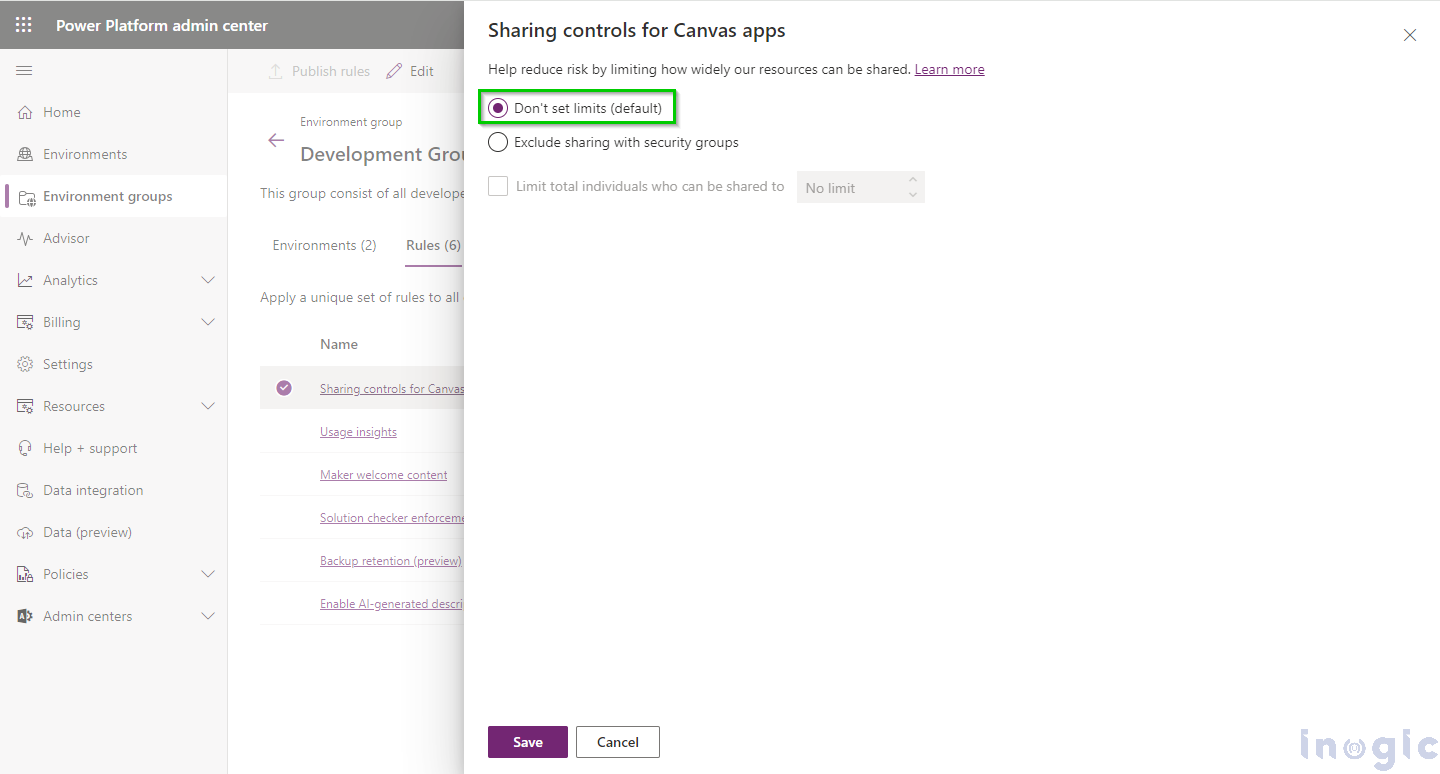
4. “Don’t set a limit” option is selected by default. This means users can share the canvas app with everyone.
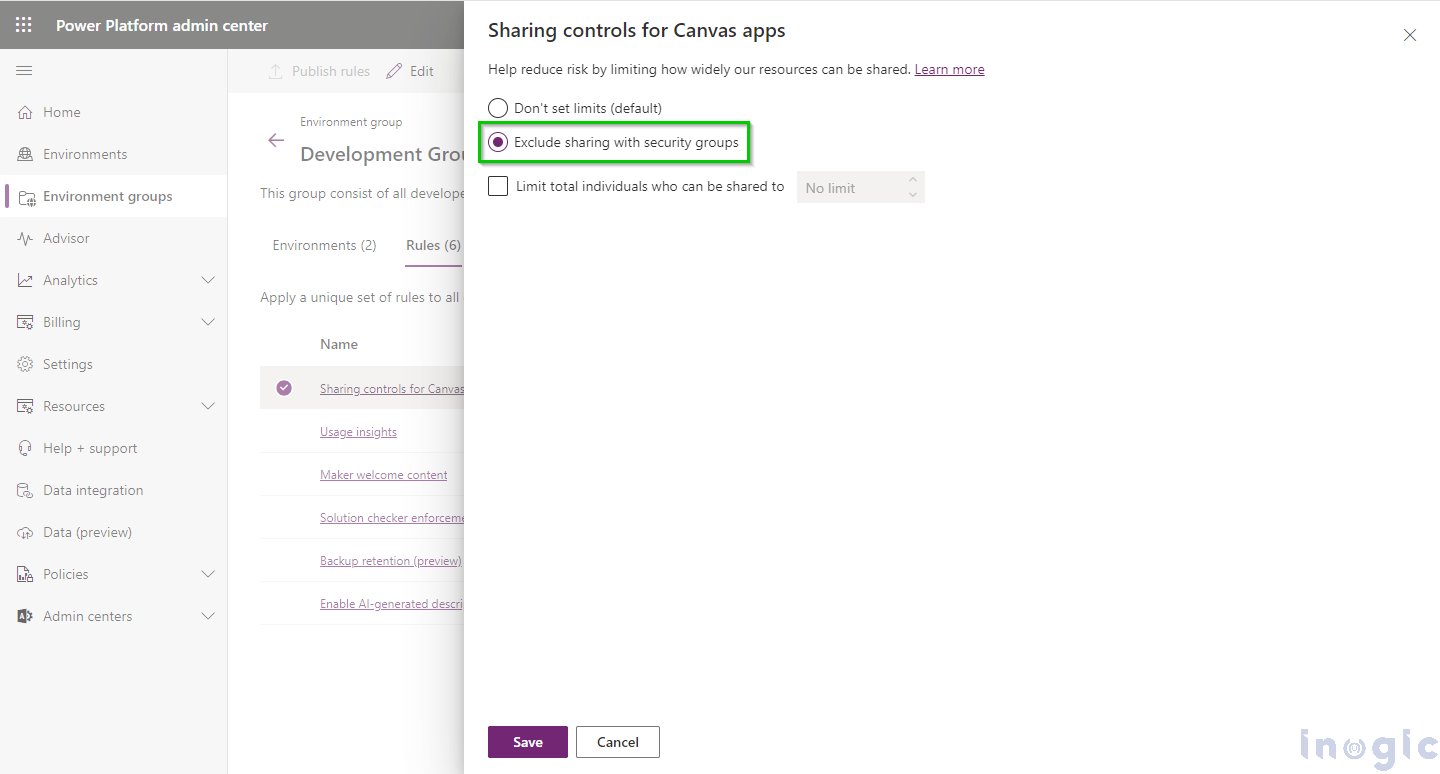
5. If you want to set a limit on sharing, select the “Exclude sharing with security groups” option. This means that the user cannot share the Canvas app with any security group.
6. If you wish to set a maximum limit on the number of users with whom the Canvas app can be shared, check the checkbox labeled “Limit total individuals who can be shared to.” Then, enter the desired number into the adjacent input box. And click on Save.
We want to restrict users from sharing the Canvas app with more than two users, so we entered “2” into the box.
7. Similarly, you can configure other rules for your Environment Group as per your requirements. After that, Click on Publish Rules.
8. After that, all the rules that you configured will be applied to the environments that are present in the Environment Group.
This eliminates the need to add rules for every environment individually. Instead, we can apply rules to the Environment group, and they will automatically apply to all environments within that group.
Now, if a user attempts to share the Canvas app with any security group or more than two users, they will receive the error message as shown in the below image:
We can also directly create a new environment within the Environment group instead of first creating an environment and then adding it to the group.
To create an Environment into an Environment Group, follow the below steps:
- Go to the Environments Page.
- Click on New.
3. Select Group from the dropdown list in which you want to add your newly created Environment.
You will see only those Environment groups in the dropdown list for which you have configured the Rules.
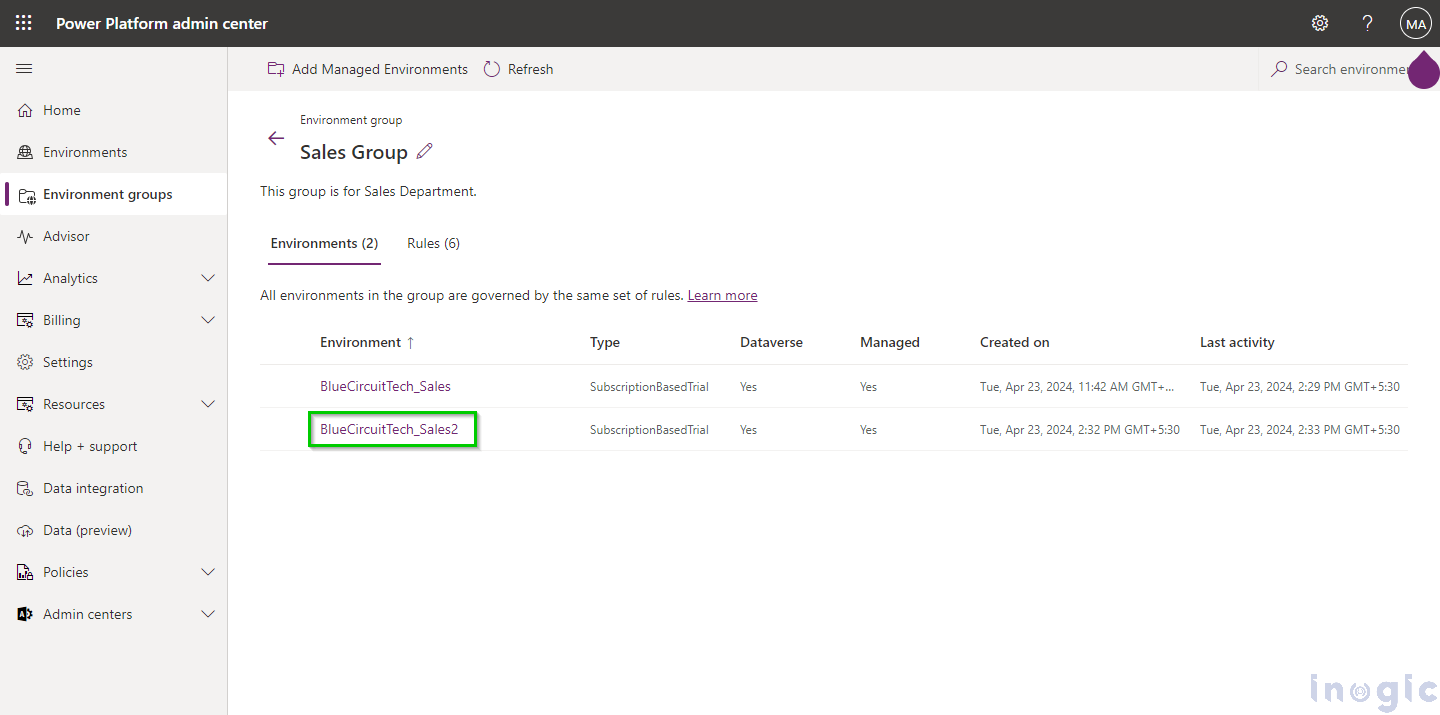
We want to create a new Sales Environment, which should be added to the Sales Group. So, we will choose the Sales group from the dropdown.
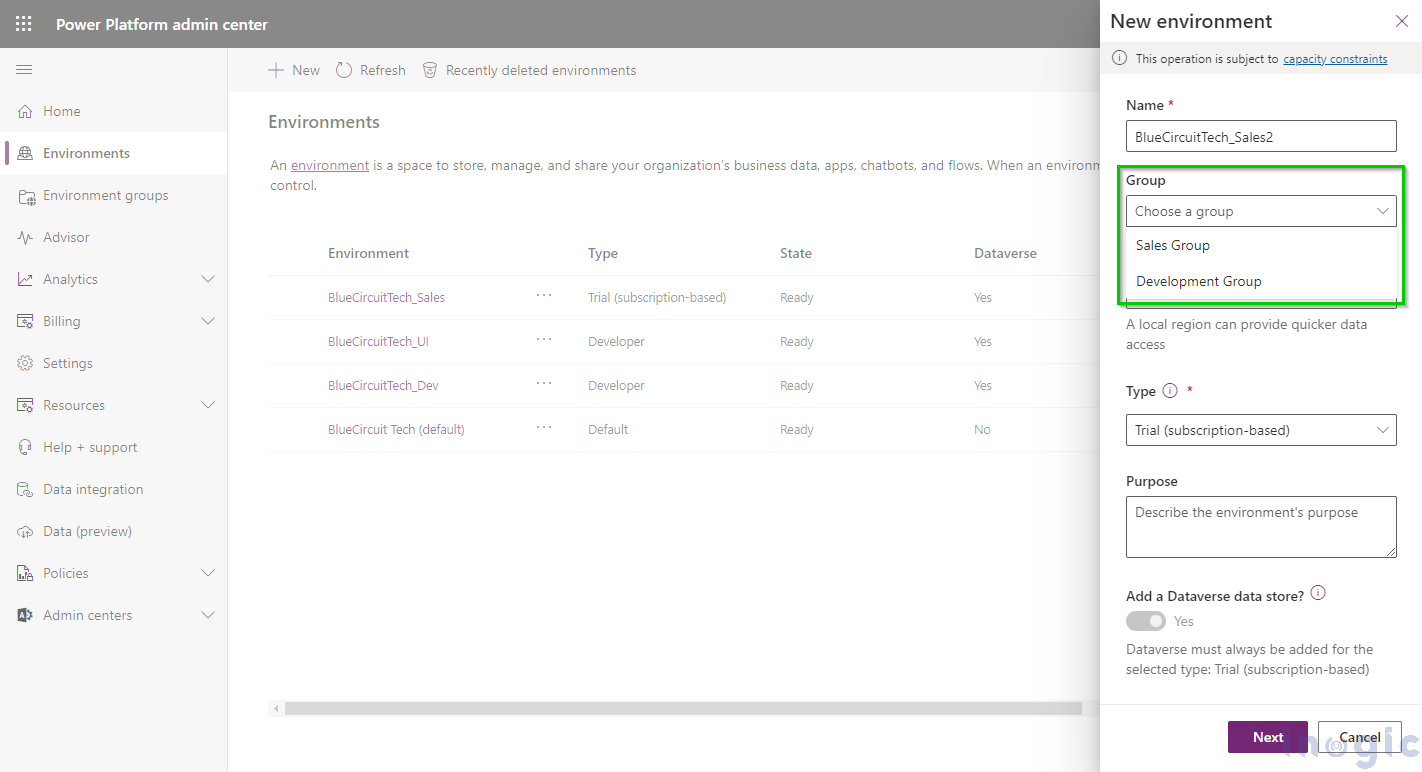
4. Enter other details and click save. This new environment will be added to the selected Environment Group.
Suppose we have mistakenly added an environment to a group, as shown in the image below:
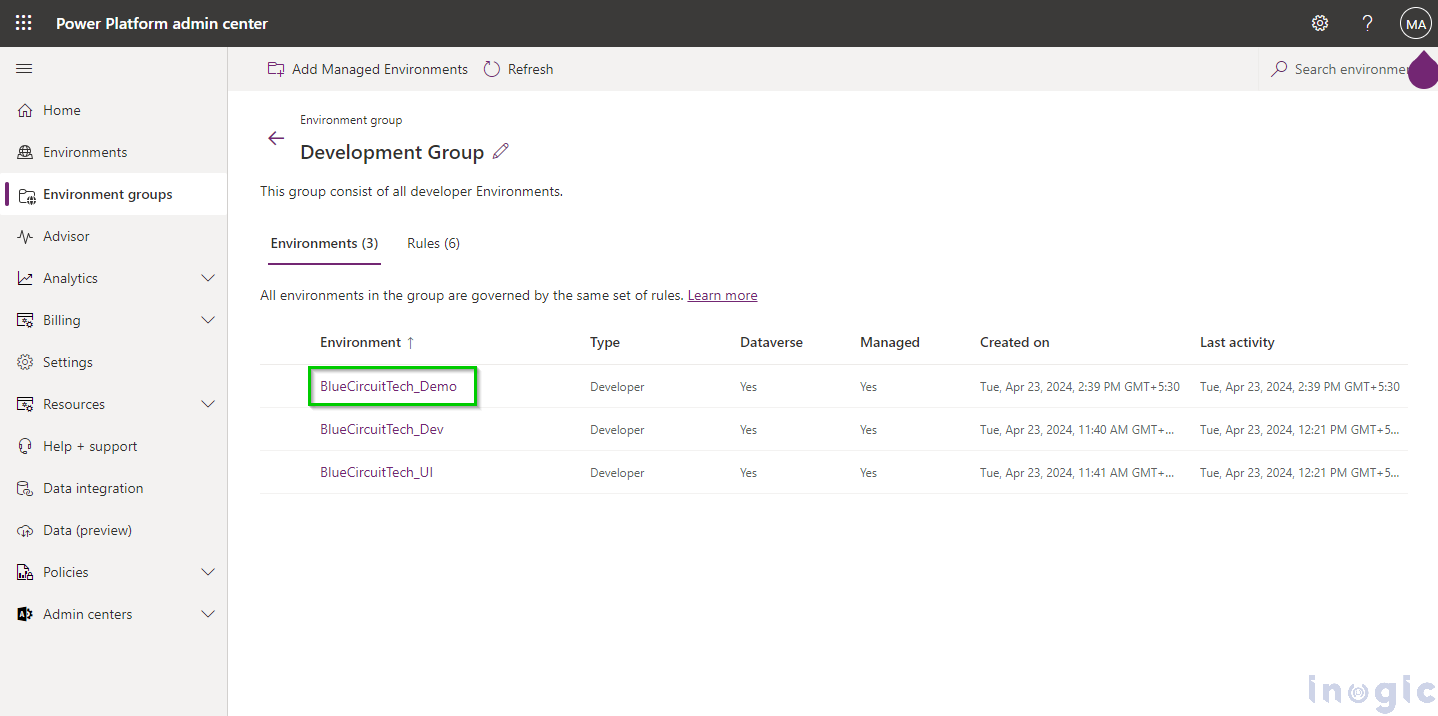
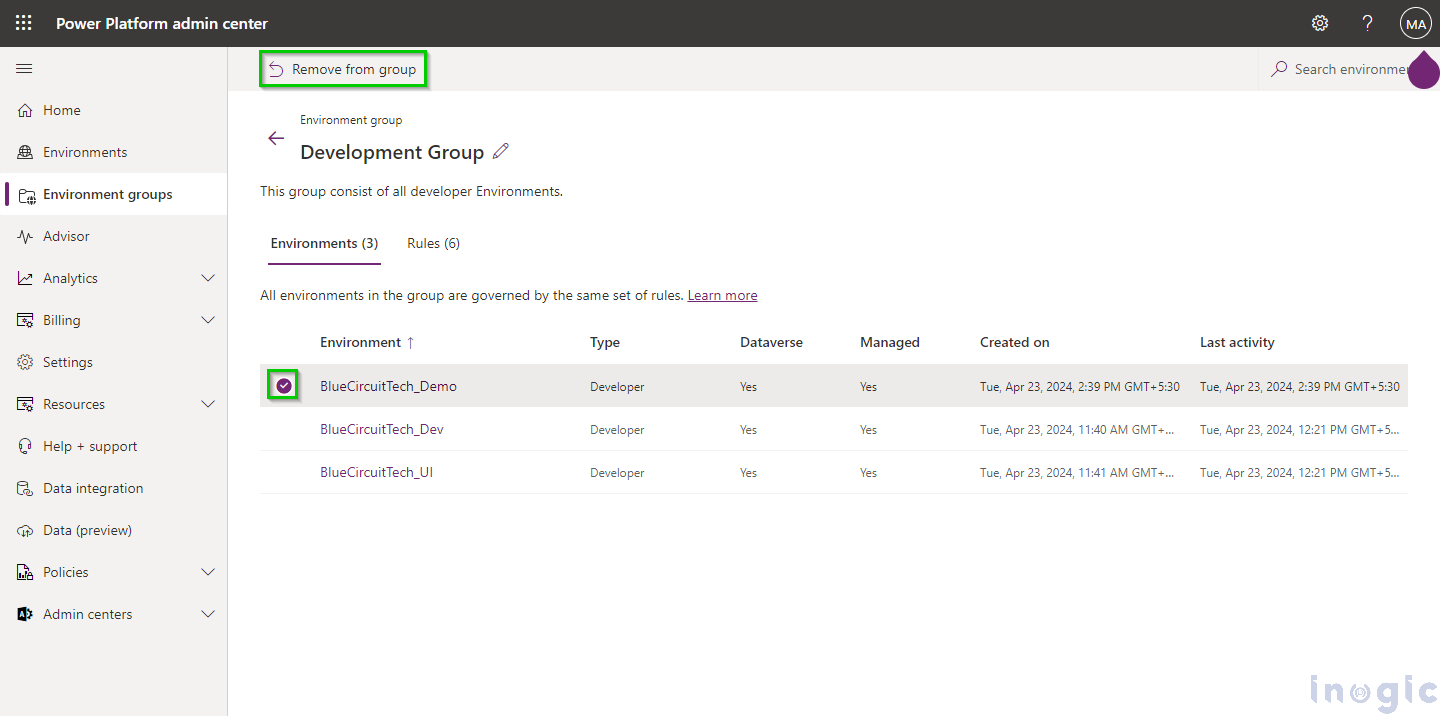
The BlueCircuitTech_Demo environment does not belong to the Development Group, so we need to remove this environment.
To remove Environment from the Environment Group, select the Environment you want to remove and click on the remove from group button.
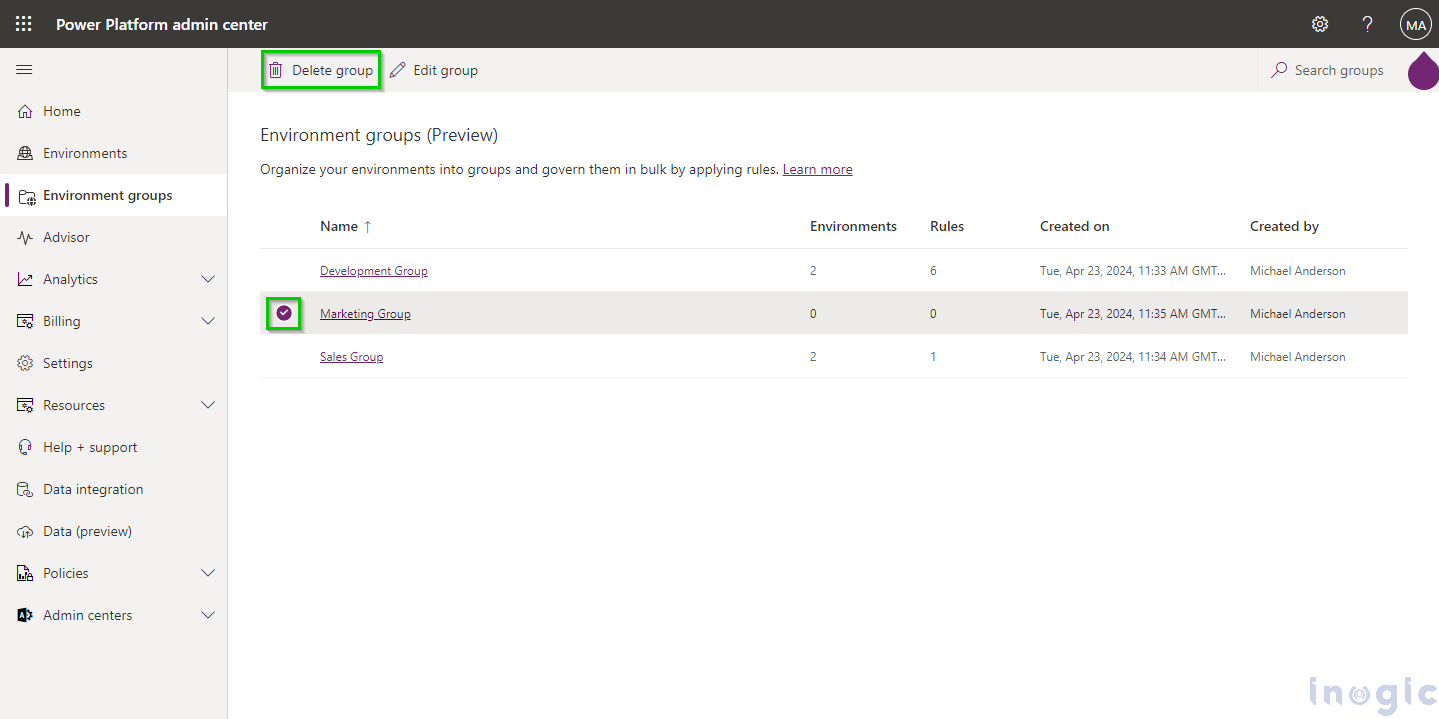
We can also delete any group from the Environment group. For instance, we created the Marketing Group, but since we don’t have any environment to add to it, we can delete this group for now.
To delete the Group from Environment Group, follow the below steps:
- Select the Group that you want to delete in the Environment Group Page.
- Click on the Delete Group button.
Note: Before deleting any group, remove all the Environments from that group and ensure no developer environments are routed to that group. To learn more about environment routing, click here.
Conclusion
In summary, Environment Groups are essential for managing multiple Dynamics 365 Environments in the Power Platform, especially for large organizations. They help categorize environments into manageable groups. For instance, an organization can categorize CRM instances based on departments. This simplifies management and allows for consistent application of rules and policies across all environments in a group.
Supercharge Your Developments with Our Industry Expertise!
Need extra hands for your Microsoft Dynamics 365 CRM or Power Platform Developments? Our dedicated Full-Time Equivalent (FTE) developers are here to streamline your development process. Reach out to us at crm@inogic.com