Microsoft Power Pages provide an ability to customize the forms with various subgrids or other controls through Web Pages. Each subgrid can have many OOB button capabilities, such as Create, Associate, Update, and so on. There can be scenarios where these OOB buttons do not fulfill the actual business requirements, and there can be a need for custom development for the same. So, Power Pages allow, users to customize the forms containing editable grids and provide extensibility to add buttons on grids (Basic form metadata) like create and associate.
Let’s walk through a simple business scenario within this blog which will help us to have a custom button with custom functionality.
Consider a business scenario as our organization gets product requirements from individual customers through the portal and we need to create a Quote for those product Requirements from Power Apps Portal.
For this scenario, we will have two entities Account and Product Requirements. The Account form has an editable subgrid of Product Requirements. Product Requirement has a field called Requirement Status,” which by default is Draft. Users can select multiple records on the editable grid and need to change the Requirement Status of selected rows to Add to Quote.
This functionality cannot be achieved by the OOB button for the Editable grid on the portal. Therefore, in this blog, we will be demonstrating how we can add custom buttons to editable grids present on the Portal form.
Please follow the below steps to configure the process as per the scenario explained above.
Initially, we have to go through the HTML structure of our page so that we can append buttons respectively.
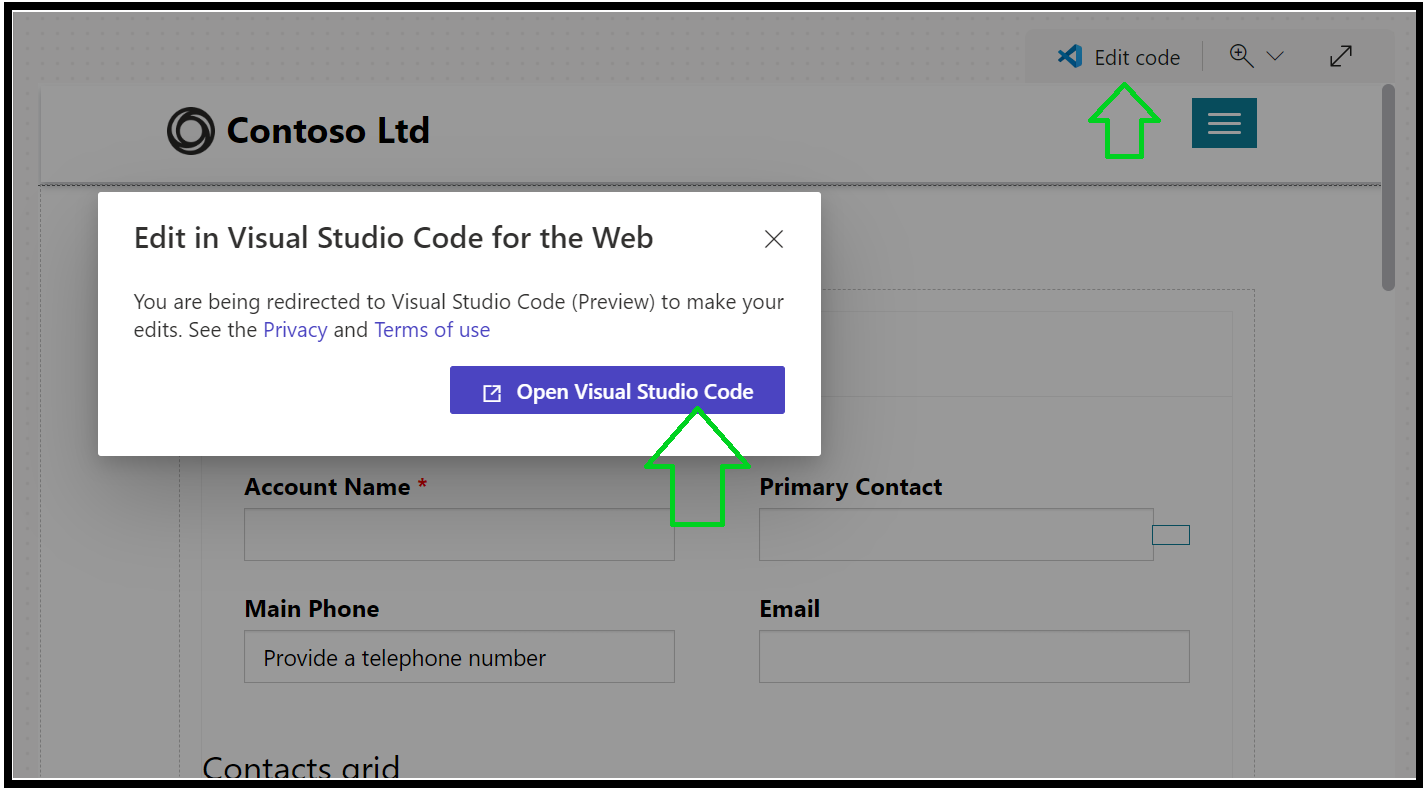
Step 1: Open Visual Studio Code from Edit Code for the respective Portal Web page, and Sync the Visual Studio code
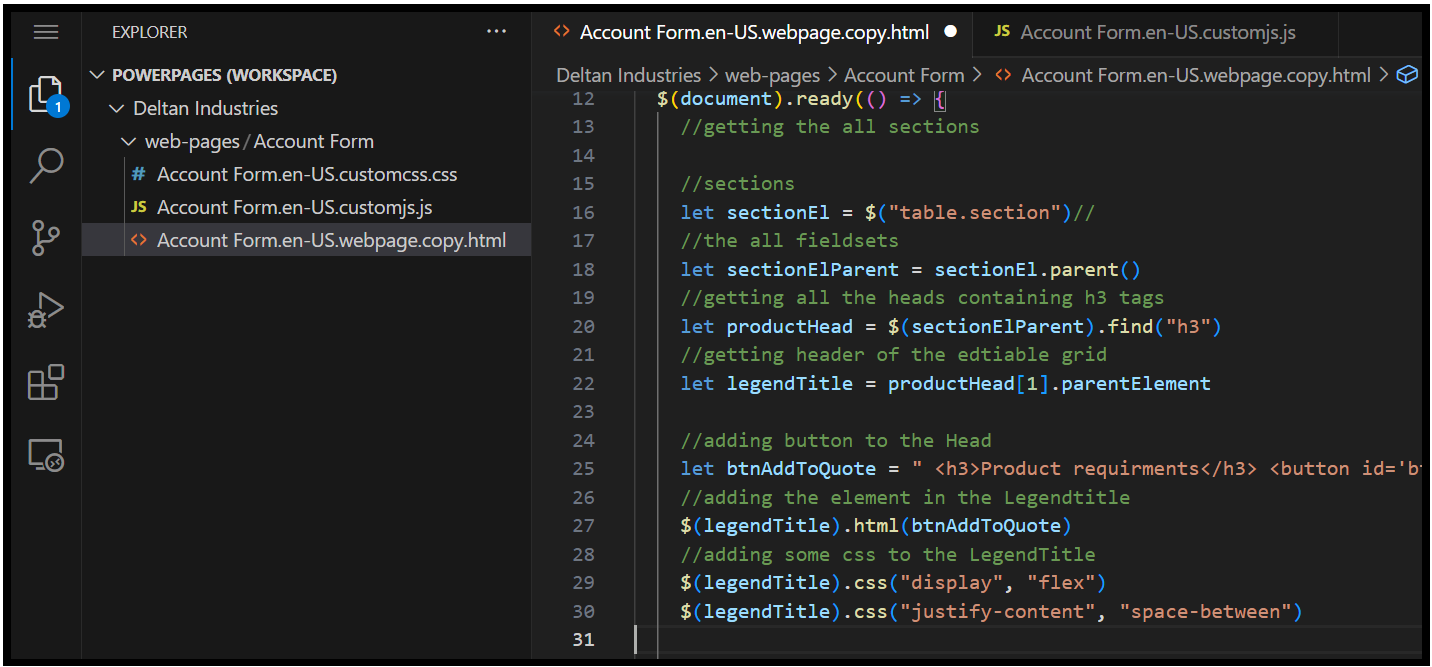
Step 2: We have to get the Element of the form of sections; for this, we have to write some codes, (please refer to the screenshot)
You can add a custom button on the Subgrid using the below Code:
//getting all sections
//sections
let sectionEl = $("table.section")//
//all fieldsets
let sectionElParent = sectionEl.parent()
//getting all the heads containing h3 tags
let productHead = $(sectionElParent).find("h3")
//getting the header of the editable grid
let legendTitle = productHead[1].parentElement
//adding a button to the Head
let btnAddToQuote = " <h3>Product requirments</h3> <button id='btnAddToQuoteId' class='btn btn-primary btnAddToQuote' type='button'>Add To Quote</button>"
//adding the element in the LegendTitle
$(legendTitle).html(btnAddToQuote)
//adding some CSS to the LegendTitle
$(legendTitle).css("display", "flex")
$(legendTitle).css("justify-content", "space-between")
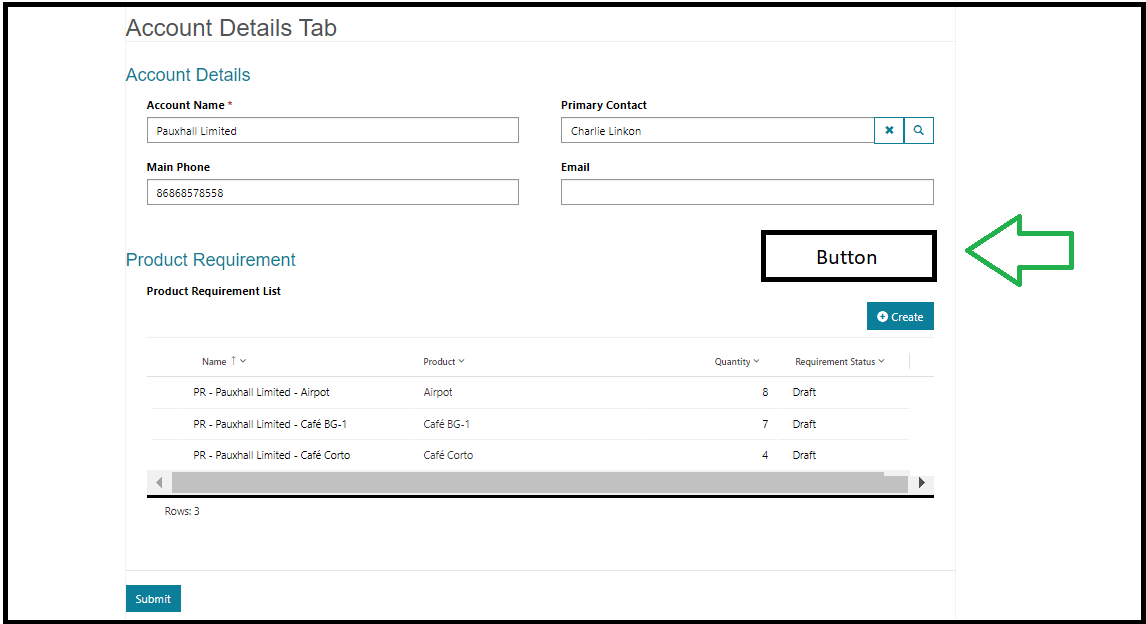
We are adding a button in the product requirement editable subgrid, please refer to the below screenshot
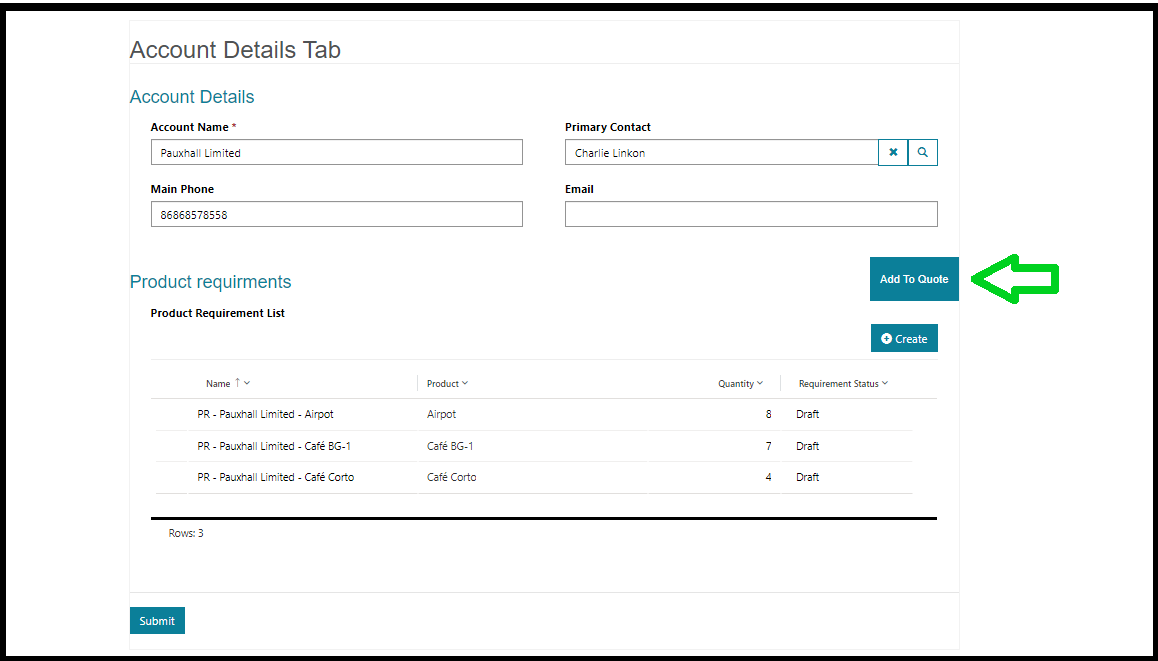
Once we add the code to the Javascript part of the Web Page for Portal, the button will be added to the portal as shown below
Step 3: Now the button has been added to the editable grid, to make this button perform a CRUD operation, we have to use WebAPI on the portal

To configure the WebAPI for the portal, you can refer to or previous blog
As per our scenario, we have to check the selected Product Requirement records and create a new Quote with Quote Products based on the record selection. So, you can refer to the below piece of code for this requirement.
$("#btnAddToQuoteId").click(() => {
//getting the section where the editable grid is added
let productRequirment = sectionEl[1]
//getting the editable grid from the section
let editableGrid = $(productRequirment).find("#Editable")
//getting the rows that have been selected by the user in an editable grid
let agRowPositionAbsolute = $(editableGrid).find(".ag-row-selected")
//looping through the grid rows
for (let i = 0; i < agRowPositionAbsolute.length; i++) {
//On each selected row we will get 2 extra rows. The childElementCount will be 0 for them
if (agRowPositionAbsolute[i].childElementCount != 0) {
//getting the record id in rowId for which we need to update the Field
let rowId = $(agRowPositionAbsolute[i]).attr("row-id")
updateProductRequirement(rowId.toString())
}
}
//after updating the selected product records and then updating the current account
updateAccount("{{accountId}}")
})
})
Step 4: We will be updating the selected Product Requirements record with the Requirement Status column value as Add to Quote from Draft along with Account’s column “Generate Quote” as Yes
So, to perform these Update Operations, you can use the below code:
function updateProductRequirement(id) {
webapi.safeAjax({
type: "PATCH",
URL: "/_api/cr9a2_productrequirementses(" + id + ")",
contentType: "application/json",
data: JSON.stringify({
"cr9a2_requirementstatus": "546640000"
}),
success: function (res) {
console.log(res)
}
})
}
function updateAccount(id) {
webapi.safeAjax({
type: "PATCH",
URL: "/_api/accounts(" + id + ")",
contentType: "application/json",
data: JSON.stringify({
"cr9a2_generatequote": true
}),
success: function (res) {
console.log(res)
}
})
}
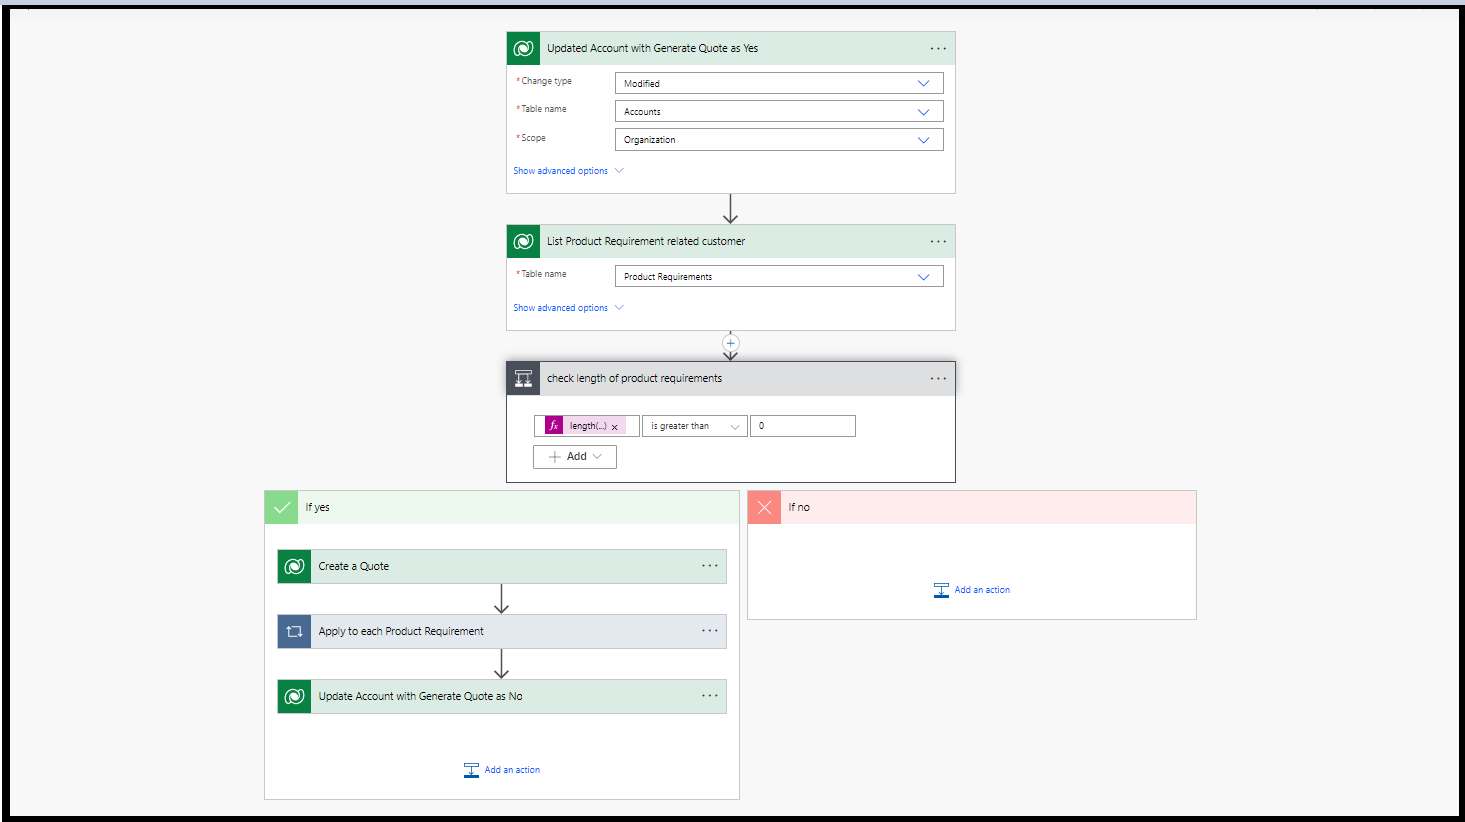
Step 5: As we have completed portal customizations to raise the flags on Account and Product Requirements using the button, we will now use the Power Automate flow that triggers on change of Generate Quote field to Yes on a particular Account
The Flow will check all the customer-related Product Requirements and create a new Quote with the required Products within the same
Please refer to the below screenshot
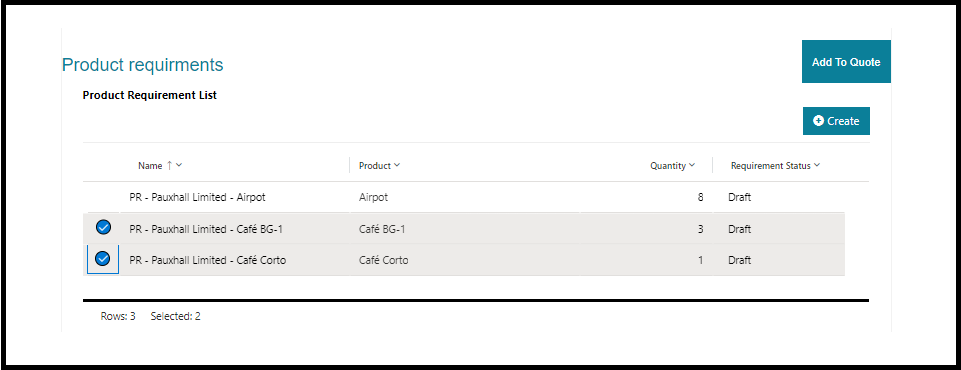
Step 6: This completes the configuration of the functionality, and to test the functionality, the user must navigate to the portal. Open the Account form, which has Product Requirements created for the same, then select the records from the grid and click on Add to Quote button
Please refer to the screenshot for the same
Step 7: After Clicking on the Add to Quote button, the functionality will be performed to create a Quote and Quote Product with selected records from the grid
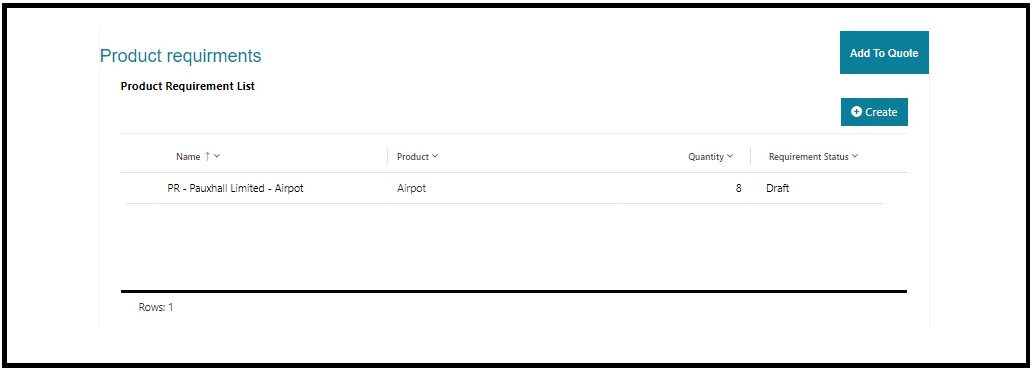
Quote records created by the Flow will be as follows-

Conclusion
In this way, this blog will help you to customize the OOB process to add a custom button on the subgrid to act on the selected data from the grid.