In our previous blog, we saw how we can create an advanced form in Real Time Marketing. This blog will be a continuation of the same. Here, we will see how we can manage a form.
Edit a Live form:
The Edit button on the top of the ribbon bar allows you to update a published form. Begin editing your live form and when you save, your changes will automatically be published.

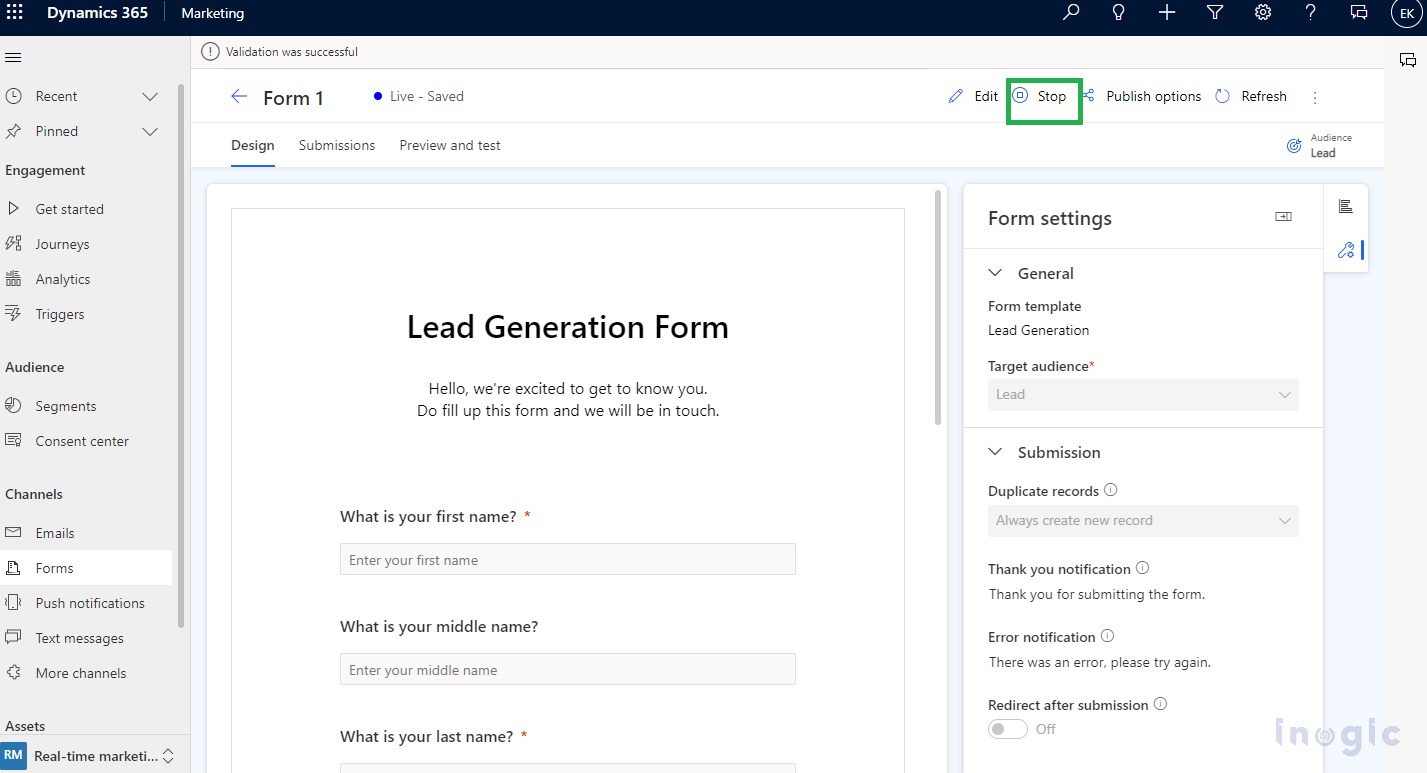
Unpublish your live form:
Choosing the stop button will unpublish your live form and remove it from Content Delivery Network (CDN), so visitors to your web page will no longer be able to see it. You will also see the status of the form change to Draft from Live.
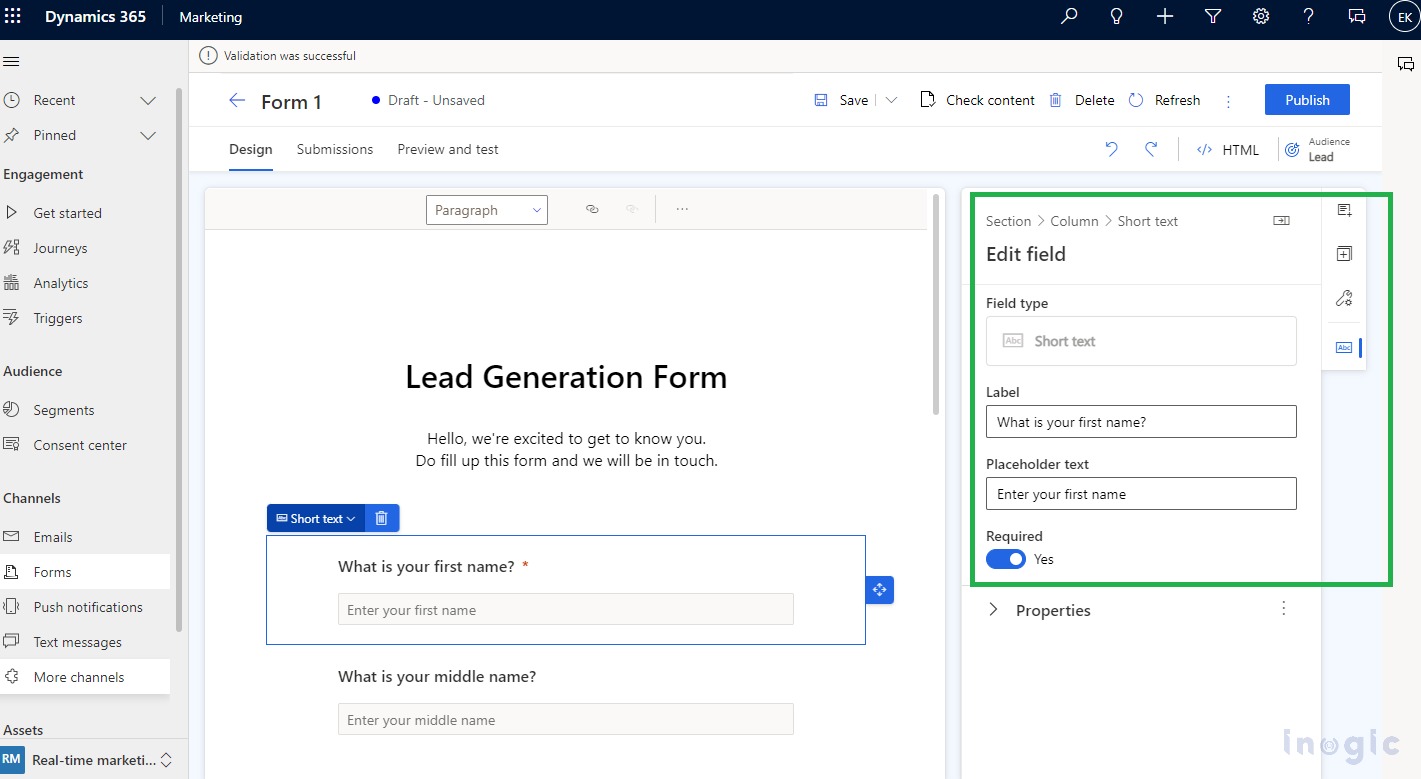
In the right pane, you can view the properties of the selected field on the canvas.
- Label: Caption of the field that is visible to the user.
- Placeholder text: In the field, a placeholder will appear and disappear automatically once the user starts typing.
- Required: This field cannot be left empty if enabled.
- Default value: If the default value is set for the field then the placeholder will not be visible.
- Error message: You can set an error message that will be displayed if the field validation fails.
- Validation: The validation rule must verify that the field content is correct. If the validation rule is not met, the form will not be submitted. Email and phone number fields should be validated correctly.
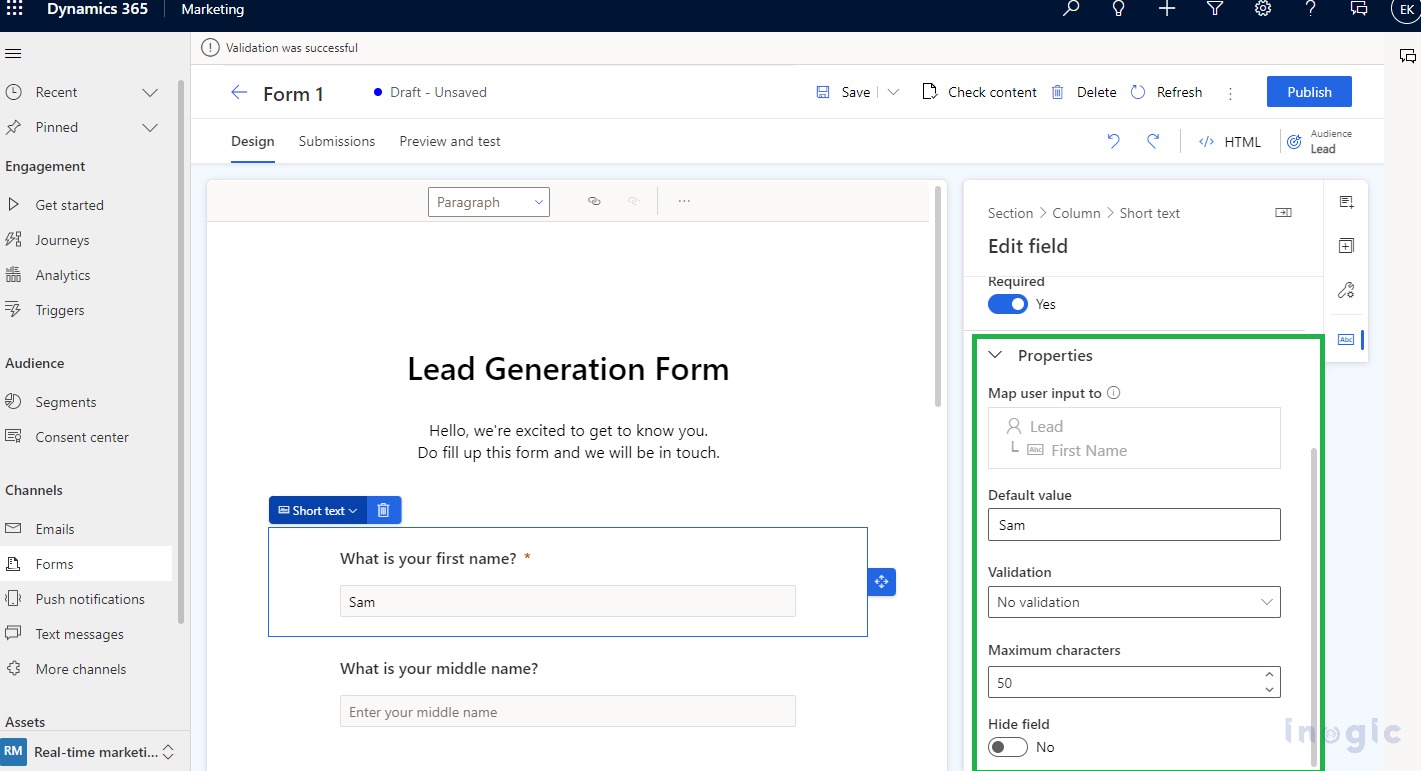
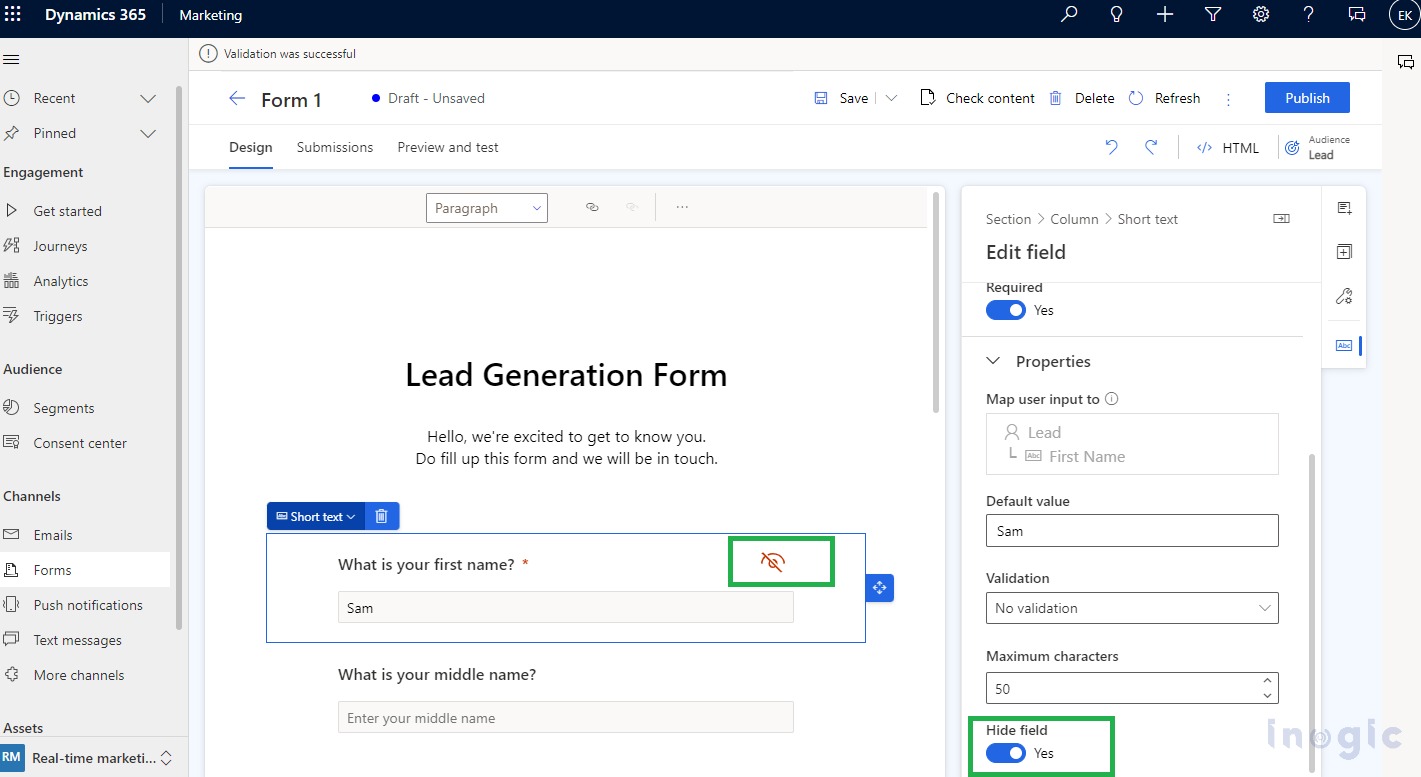
- Hide fields: Adding hidden fields to your form will prevent the field from being visible to users. It allows you to store extra metadata along with the submission of your form.
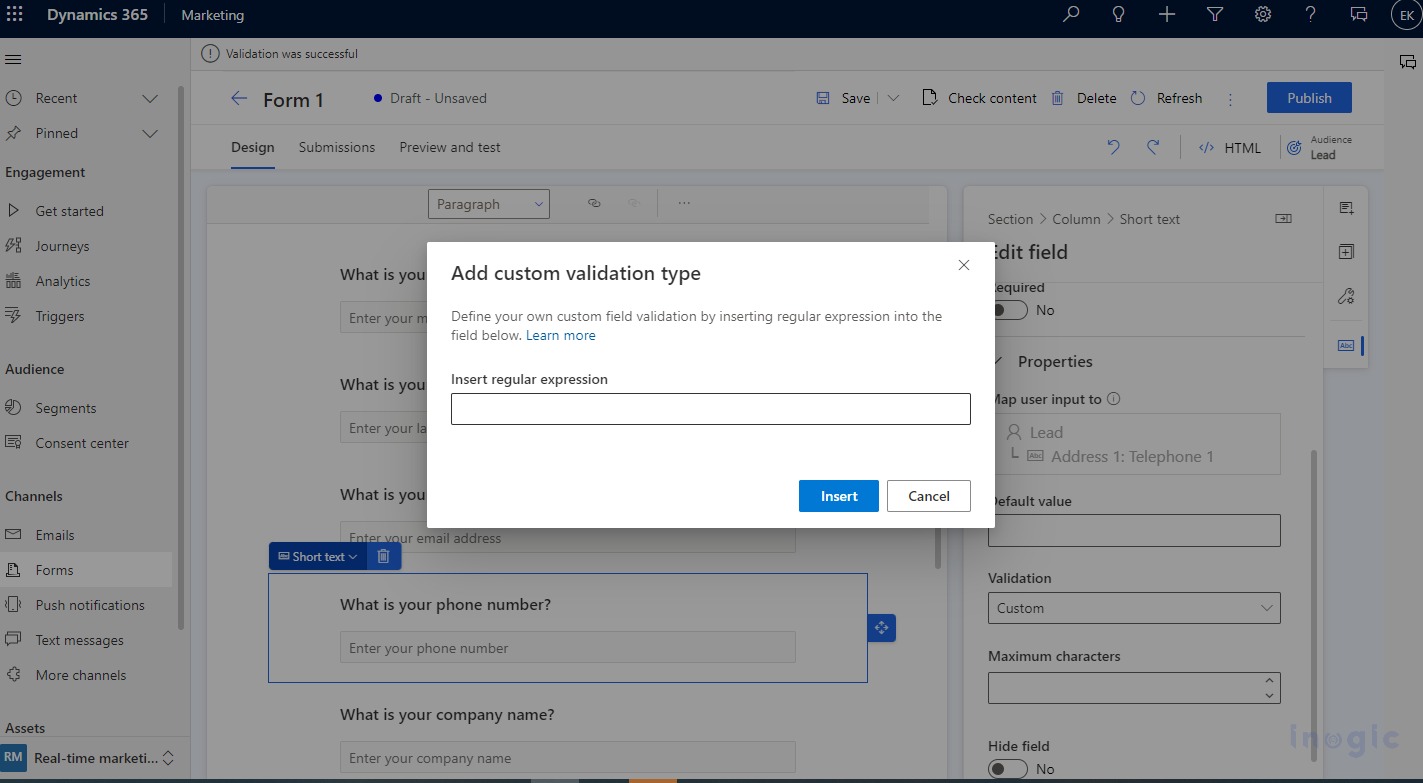
Custom Validation: Validation can be customized by enabling the Validation option, then selecting Custom, where you can enter a Regular Expression that will check the entered value for consistency with a specific format.

Form setting
With form settings, you can define how your form works after submission, as well as configure advanced properties.
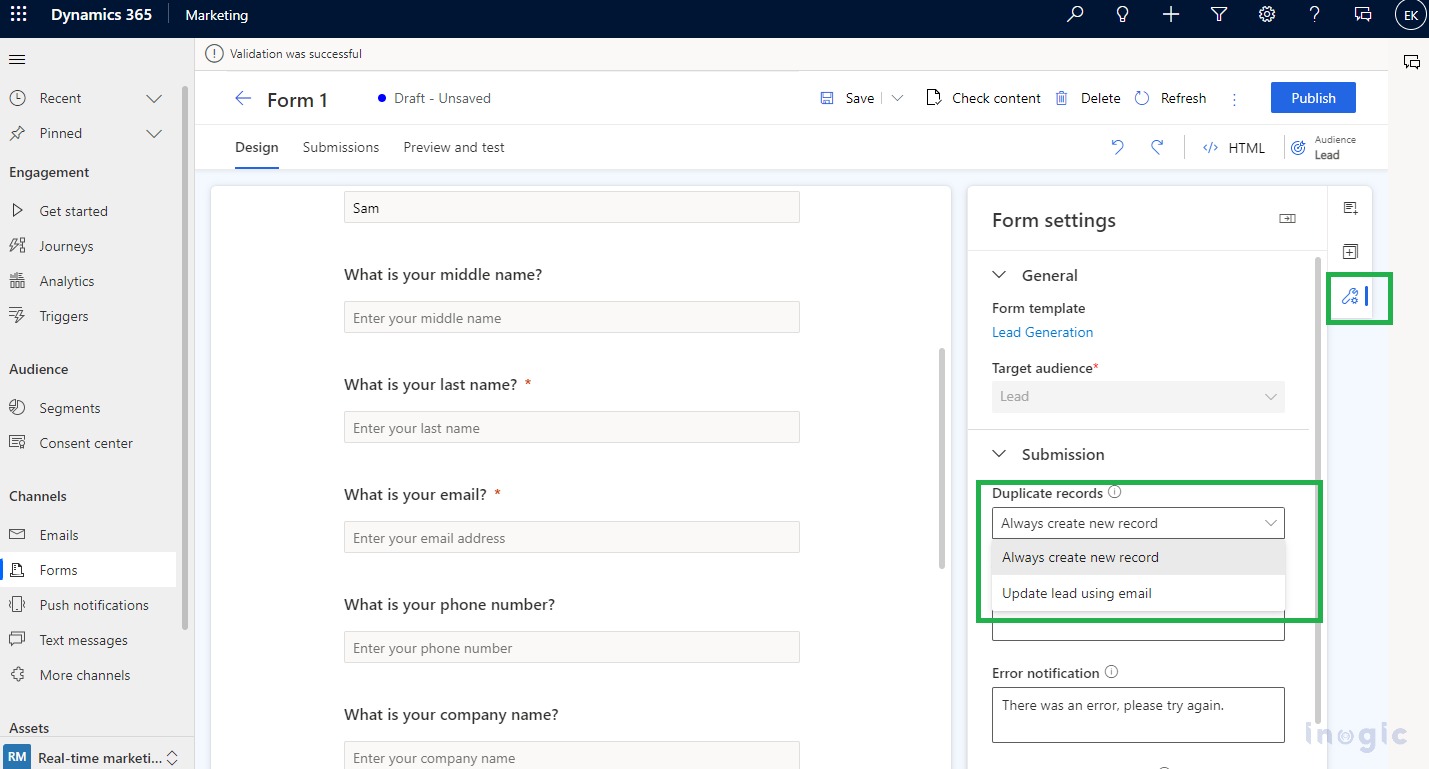
Duplicate records: Leads and contacts use different approaches to duplicate records.
- Contact:- The form submission will update the existing record if the user submits one with an existing email address. No new record will be created.
- Lead:- A new record will be created if the user submits a form with an existing email address.
Change the default match strategy in Forms settings by clicking the duplicate records dropdown.
A custom matching strategy can also be created.
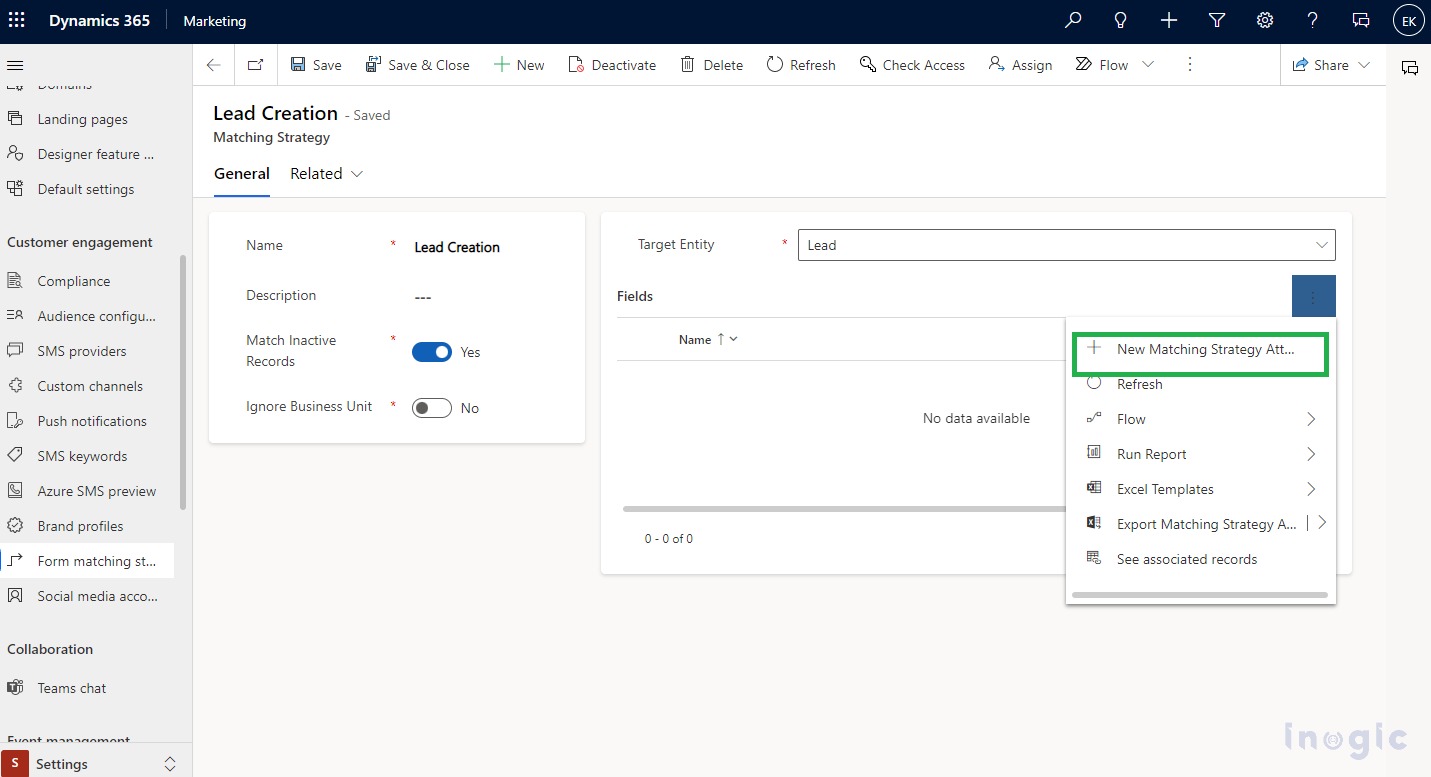
Custom matching strategy:
Create a matching strategy by selecting settings from the bottom left menu. In the customer engagement section, open the Form matching strategy.

Choose the plus icon to create a new marketing strategy. Name the strategy, Select the Target entity, and save it. (Do not select save and close since you need to remain on this record). You can see the Matching strategy on the duplicate records list in the form settings once you add the attributes(fields) that will be used to check if the records exist.
Thank You notification: If the Form is successfully submitted, this message will appear.
Error notification: In the vent of an error this message will appear.
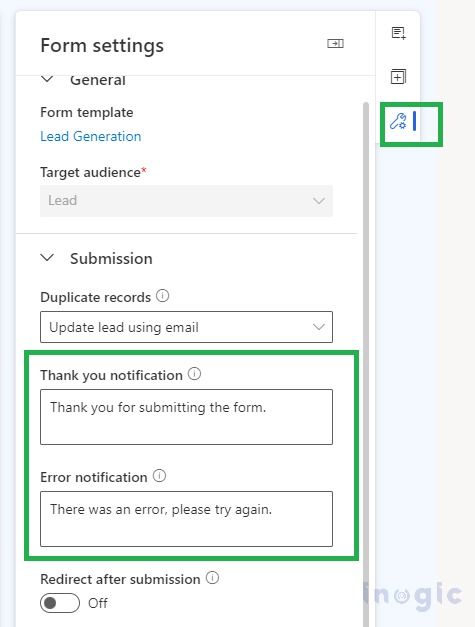
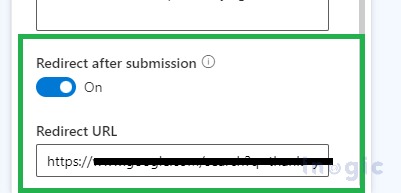
Redirect after submission: After submitting the form, the user will be redirected to the URL you enter.
Form Validation:
When a form is published, the validation process launches automatically and checks the following:
- Is the form configured with all fields required for creating or updating records associated with a selected entity?
- Is a Submit button included?
- Form fields are linked to an editable attribute?
- Does the form contain duplicates?
- Is the Target audience set?
- Is the required field marked as required on the HTML page?
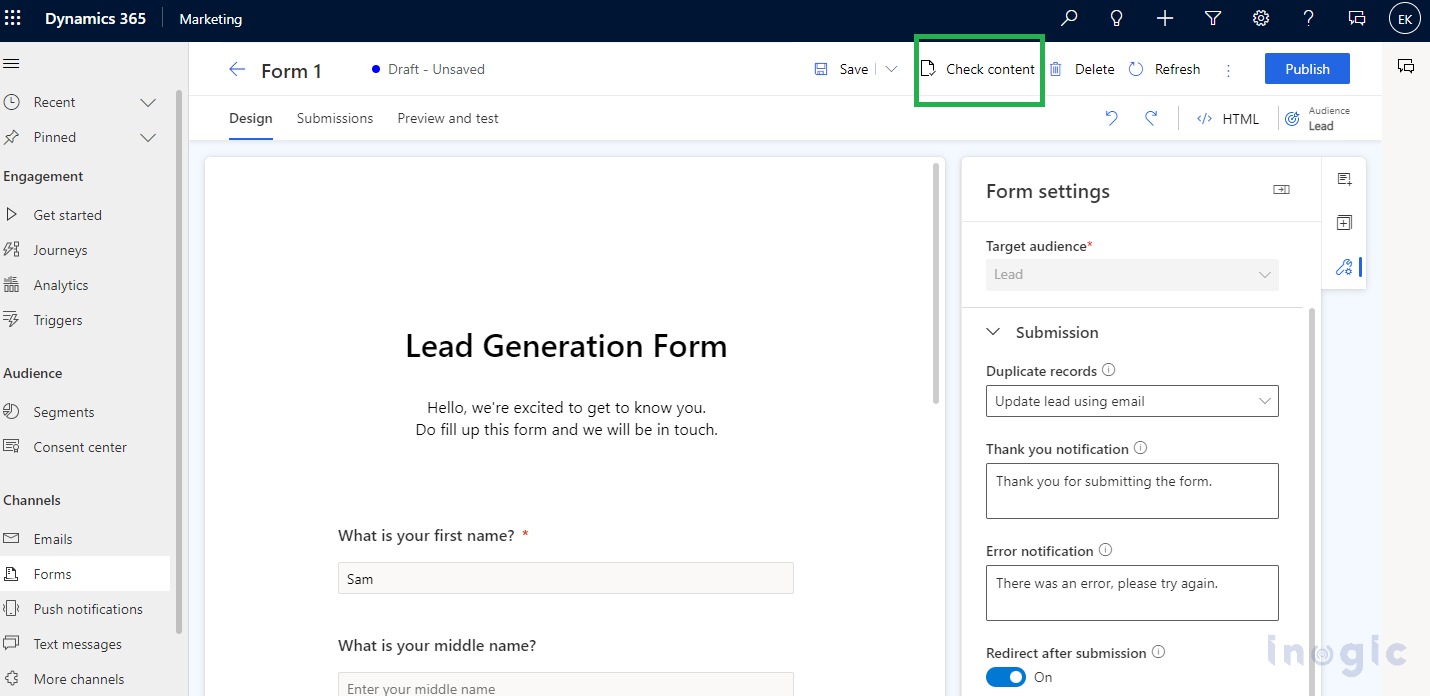
Form Validation can also be checked by using the “Check content” button on a form.
Advanced form Customization:
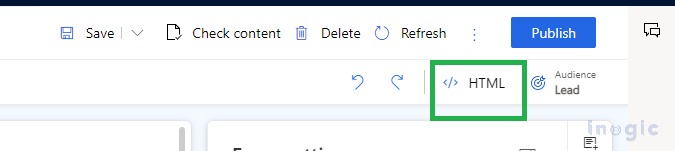
Select the HTML button in the top right corner, to display the source code of a form.
Customize form CSS:To achieve advanced form customization, you can change CSS in the HTML editor.
Using the HTML editor, you can also add custom JavaScript code.
Comparisons of Real-Time and Outbound marketing forms:
- The main difference between Real-Time and Outbound marketing forms is Real-Time marketing form update only one entity(Lead or Contact). This makes the configuration and maintenance of the form simpler and helps build targeted campaigns.
- Forms can be created without creating Marketing fields since all entity attributes are available as fields.
- Creating a Real-Time marketing form isn’t possible within outbound marketing pages. But you can create a Standalone form and host it in Power Portals.
- Embedding your form on a webpage is now easier than ever. You can simply create a code snippet to embed your form on a webpage.
- A Content Deliver Network (CDN) hosts Real-time Marketing forms, which reduces page load time considerably.
- A real-time marketing editor cannot edit outbound marketing forms and vice versa.
Security Notice:
To ensure the security of forms, Dynamics 365 Marketing takes the following precautions:
- Submission of marketing forms is accepted only from a domain that supports external form hosting.
- Several precautions are taken along with the Marketing app infrastructure to reduce the impact of potential DDoS attacks.
Conclusion
In this way, you can manage or customize your form.