Microsoft has announced the release of 2023 wave 1 where new features will be available in preview. In this blog, we will see one of the preview features of Dynamics 365 Marketing.
It is critical to have a form that captures lead information, converts visitors into leads, and converts leads into customers.
Inbound marketing forms enable customers to request quotations, register for newsletters, etc. They are configured as a set of input fields arranged in a form layout.
Each Dynamics 365 marketing form consists of fields, buttons, graphics, and configuration settings. Each field represents an attribute of an entity.
Forms can be created and published quickly and easily using the Real-Time marketing form editor.
Following are the steps to enable real-time marketing form preview:
1. Go to setting area -> Overview -> Feature switches.
2. Enable the Real-Time marketing forms to preview the toggle button.
3. Click on the Save button in the rightmost corner.

Steps to create a new form:
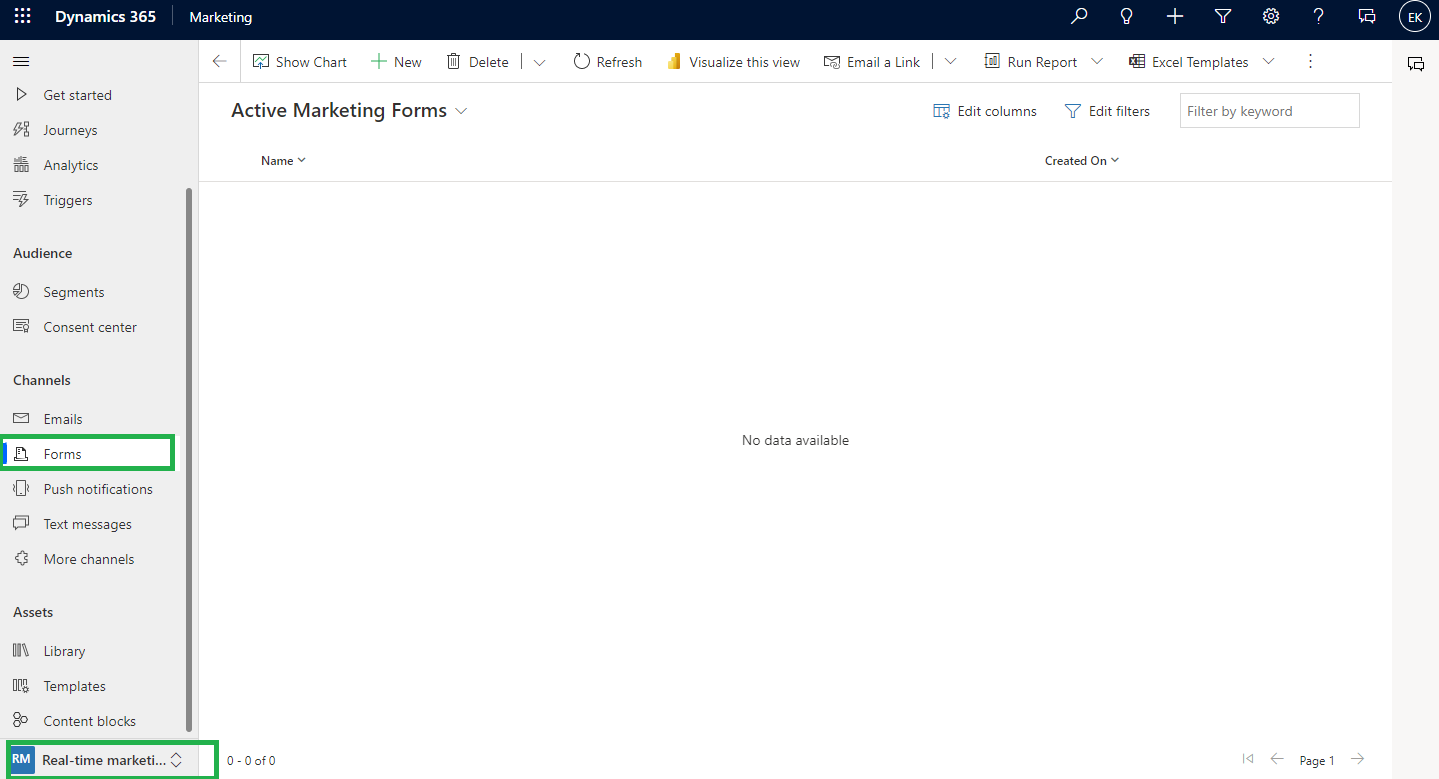
1. Go to Real-time Marketing area -> Channels -> click on the form.
2. Click on the New button in the ribbon bar.
3. Enter the form name, Select Target Audience, and click on create button.
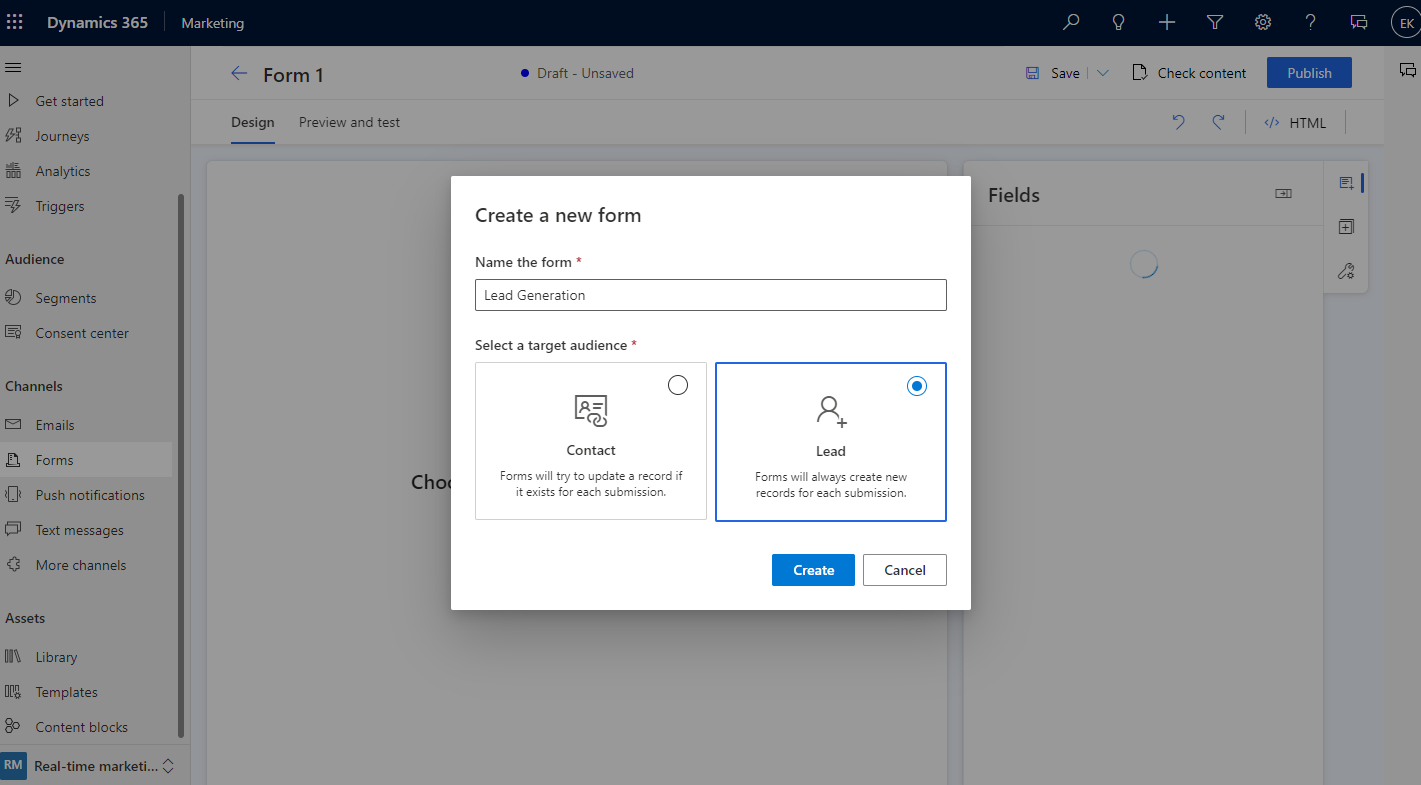
When you submit the form, the selected target audience will update accordingly. You can choose which target audience you want to update (Contacts and Leads). Each Target audience has a different strategy for dealing with duplicate records.
- If you select the target audience as Lead then every time a new lead record is created even if the email address is the same on submitting the form.
- If you select the target audience as Contact then if a record with the same email address is present it will be updated no duplicate record will get created.
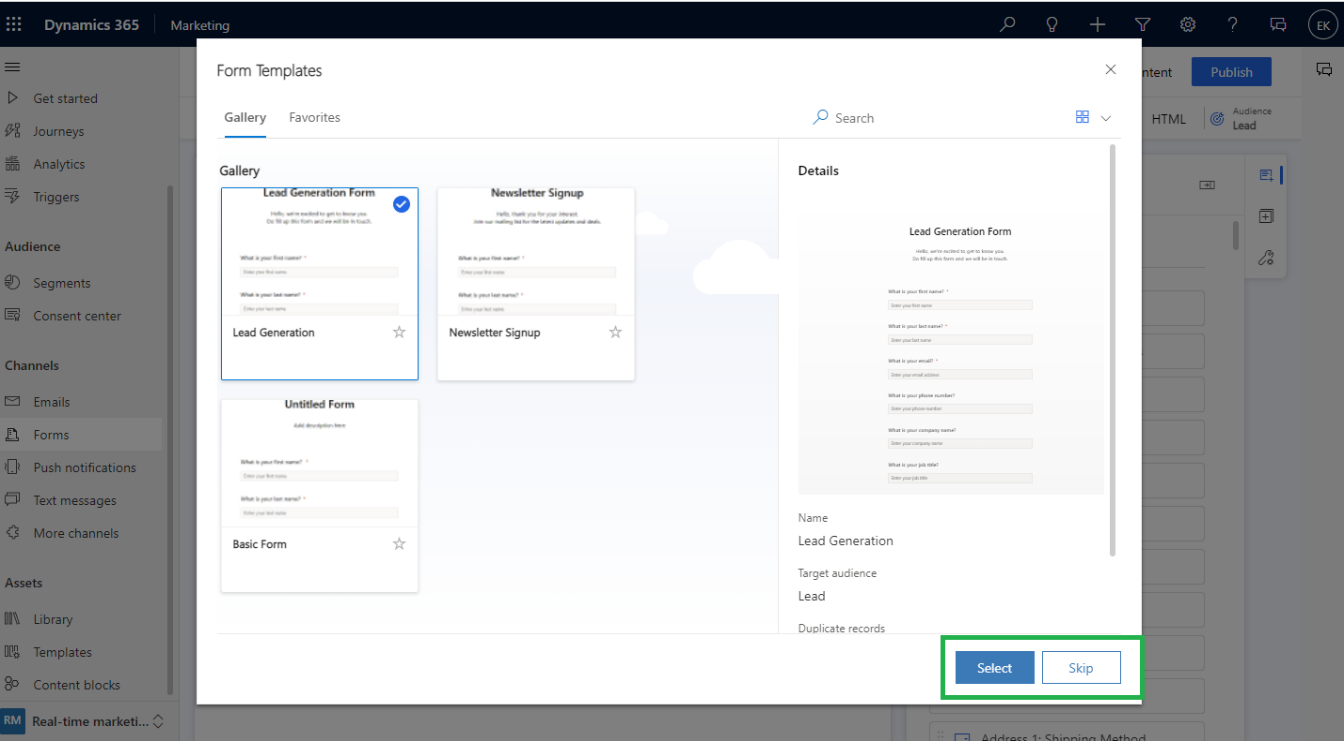
4. Depending on your Target audience, the list of templates will be filtered, but if you want to start from scratch, you can skip the template selection step by clicking on the skip button. After selecting a template or choosing skip, you will be on the form editor page where you can complete your form.
5. Using the form fields, you can now view a list of questions as well as the attributes of the target audience (Entity) in the right pane. Adding a custom attribute will appear in this list, and you can use it immediately as a field in your form. Some system fields may be hidden since they cannot be used. You can filter the list of fields using the search bar.

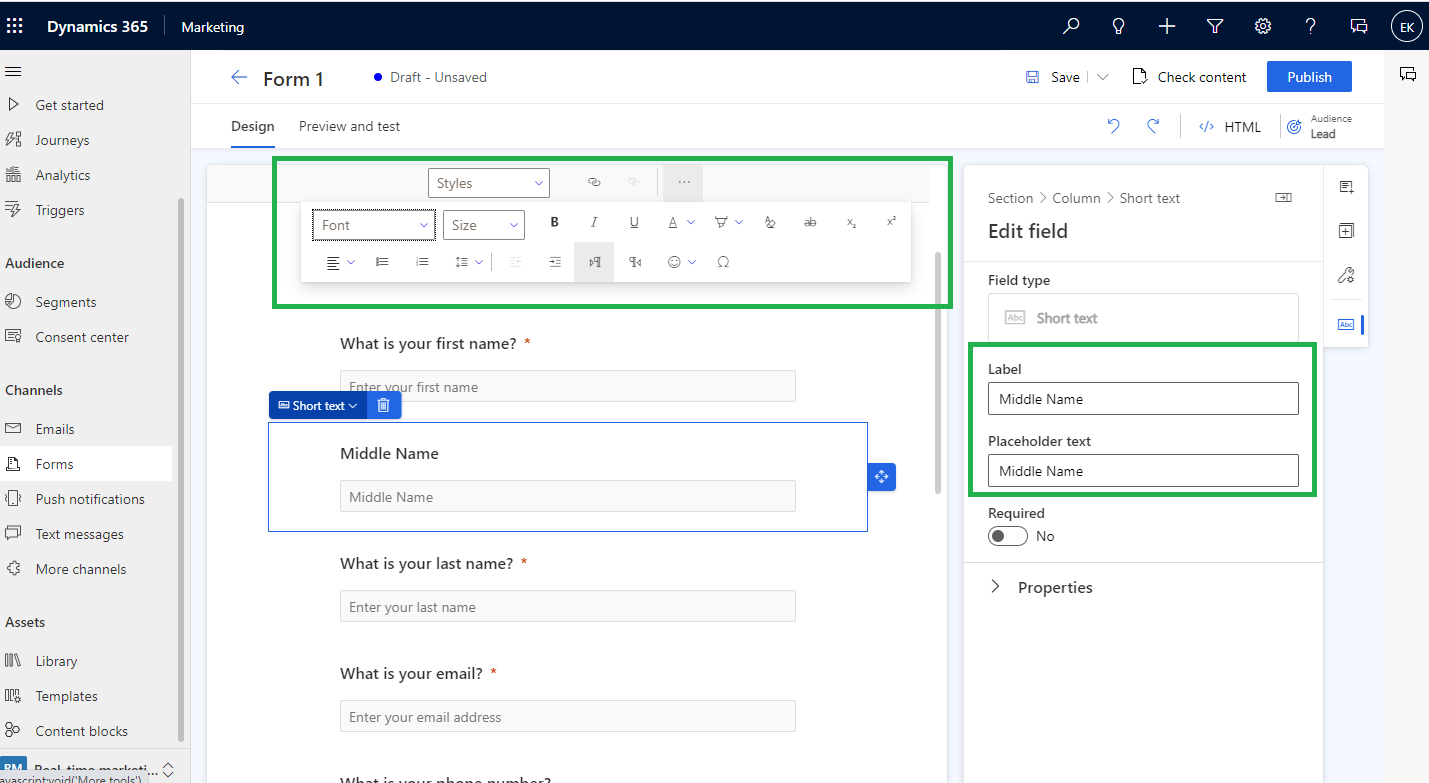
6. Adding a field to the form canvas is as simple as dragging and dropping it. The right pane contains the field properties, which can be used to set a field as a required field, configure validation, and many more.
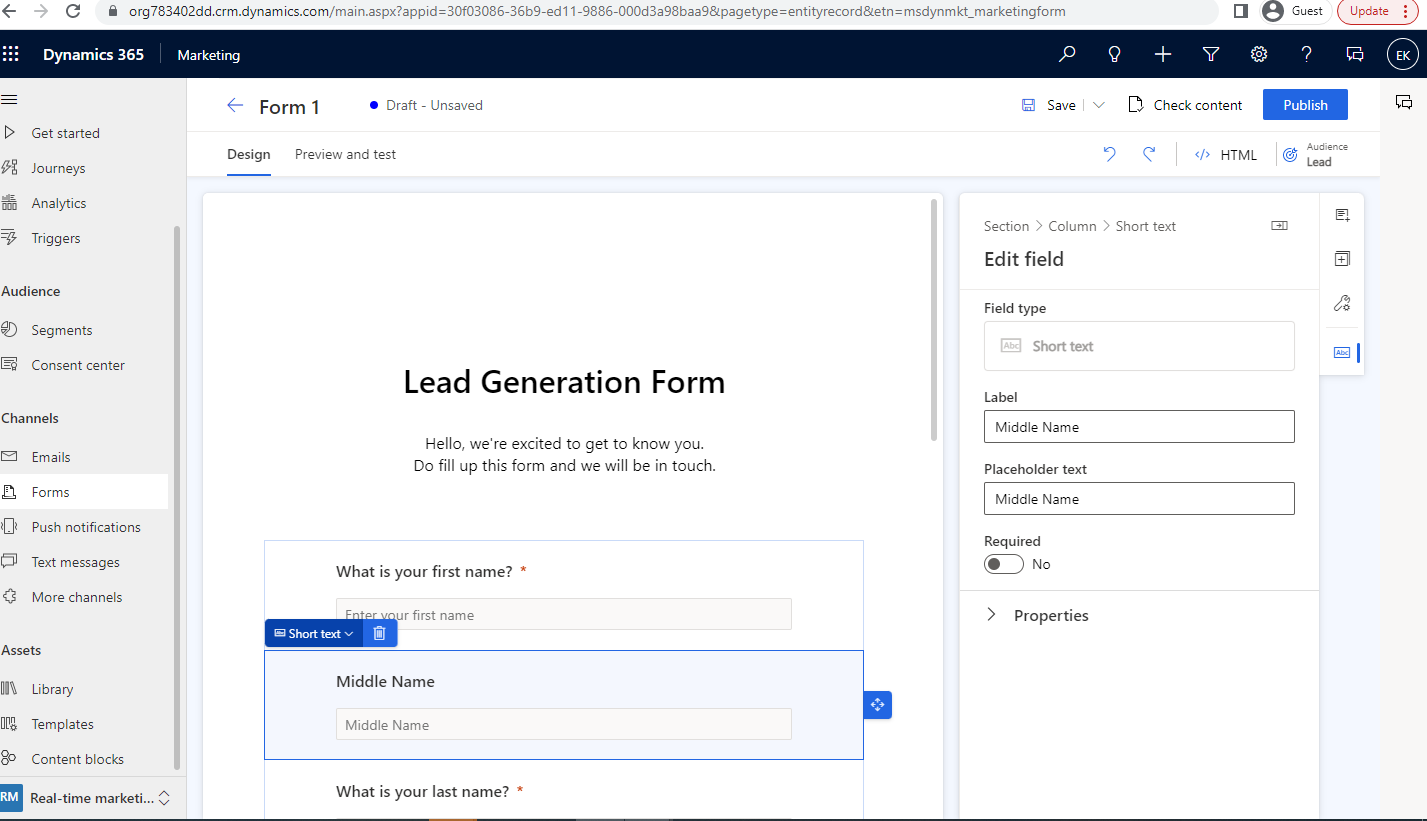
7. Using field properties, you can change the label of the field along with its placeholder label on the form. You can also delete the field by clicking on the delete icon.
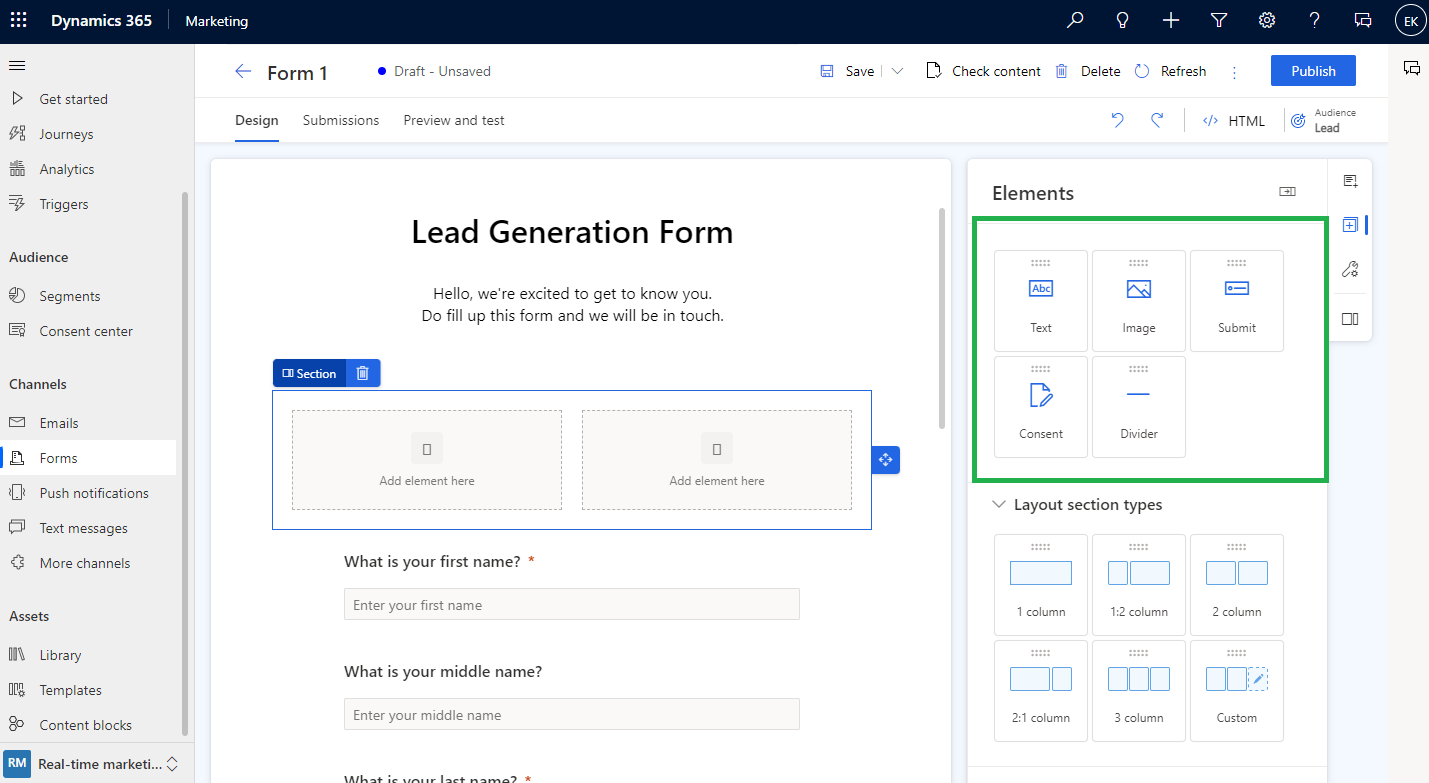
8. You can create multiple layout sections of your form if you want to make it more complex. In the Element section, you can drag and drop a column layout on the canvas form. You can also add elements and fields.
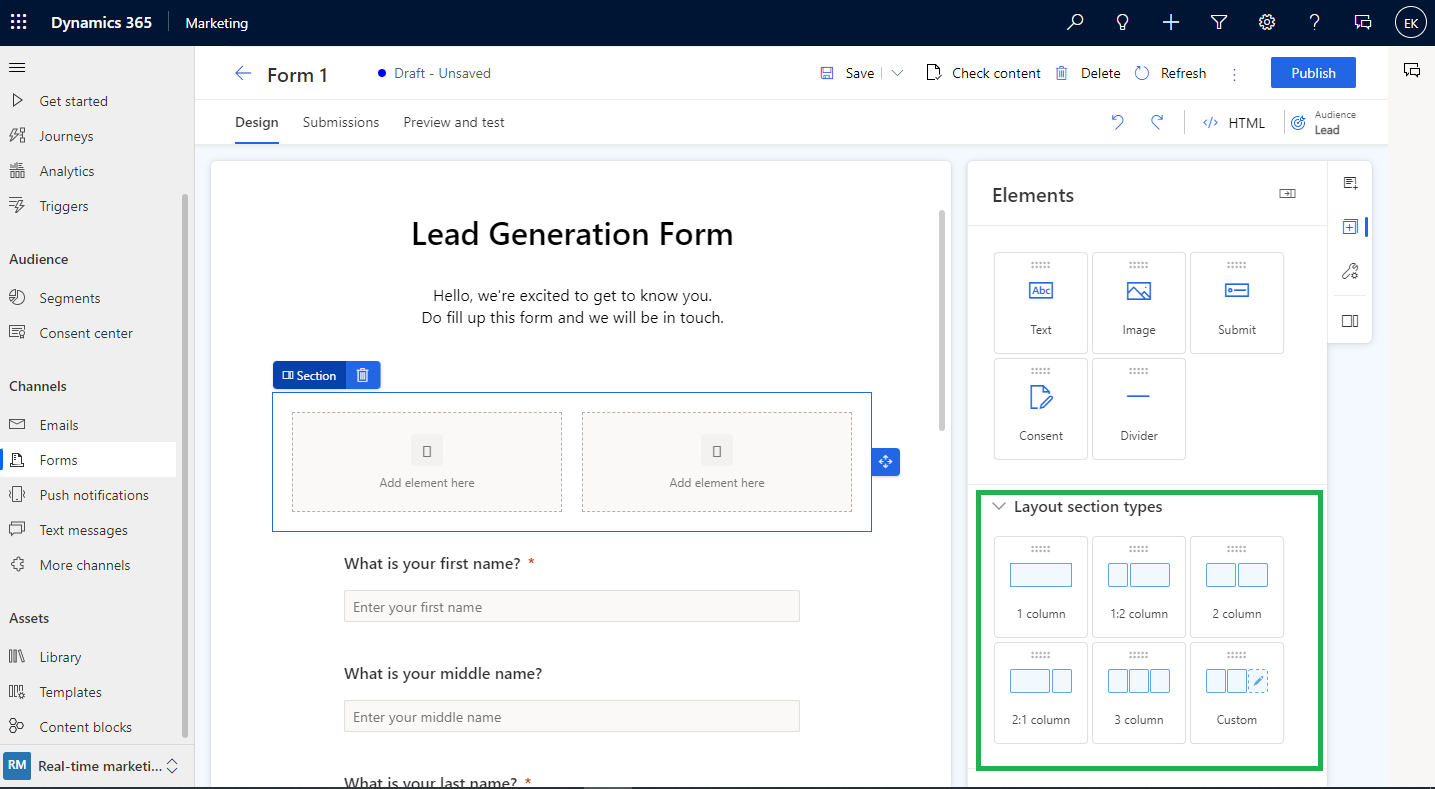
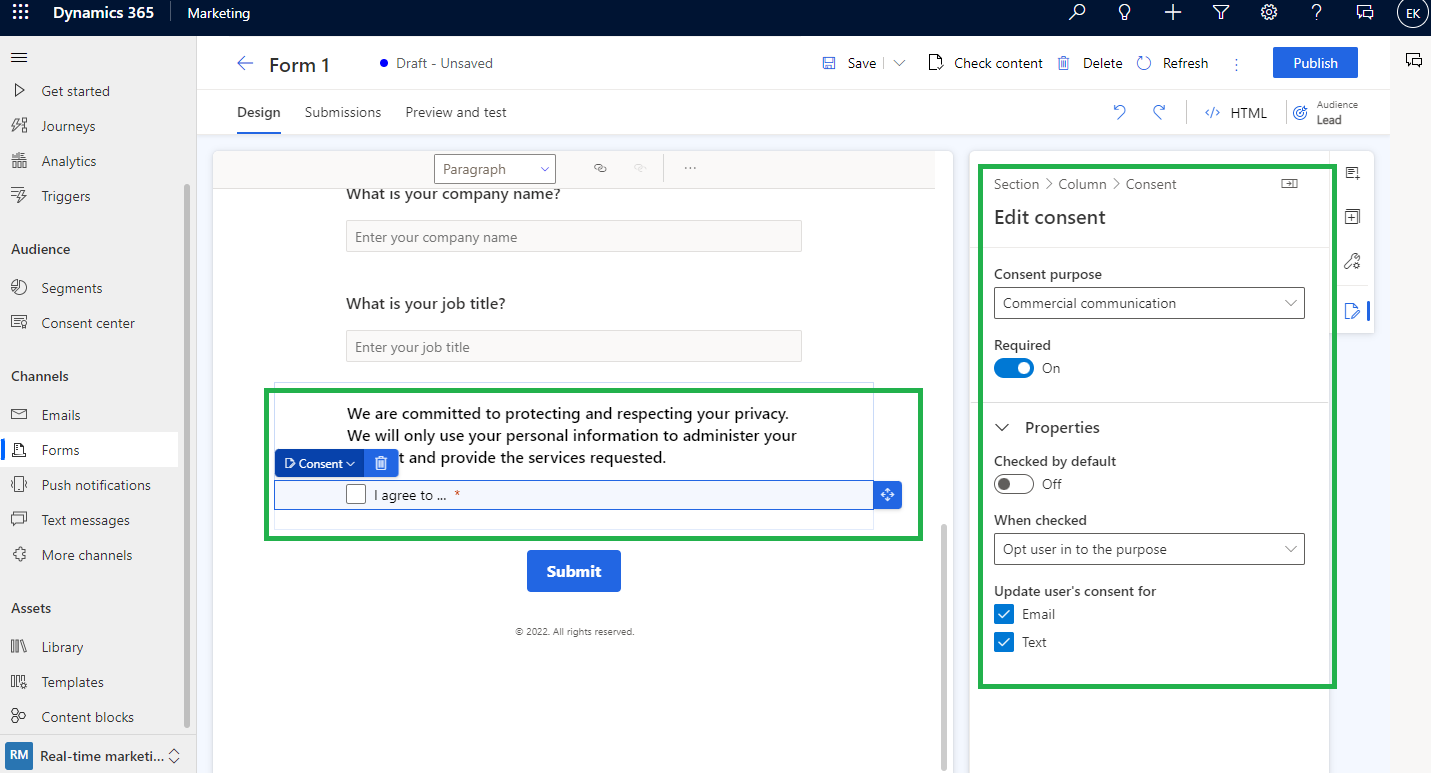
9. Select the Element section in the right pane. You can drag and drop elements like submit button, images, consent, and static text on the canvas form. The form editor will not allow publishing the form if submit button is not present on the canvas form.
Select the consent control from the element section and then select the right consent purpose. You can then change the consent checkbox text by selecting its caption.
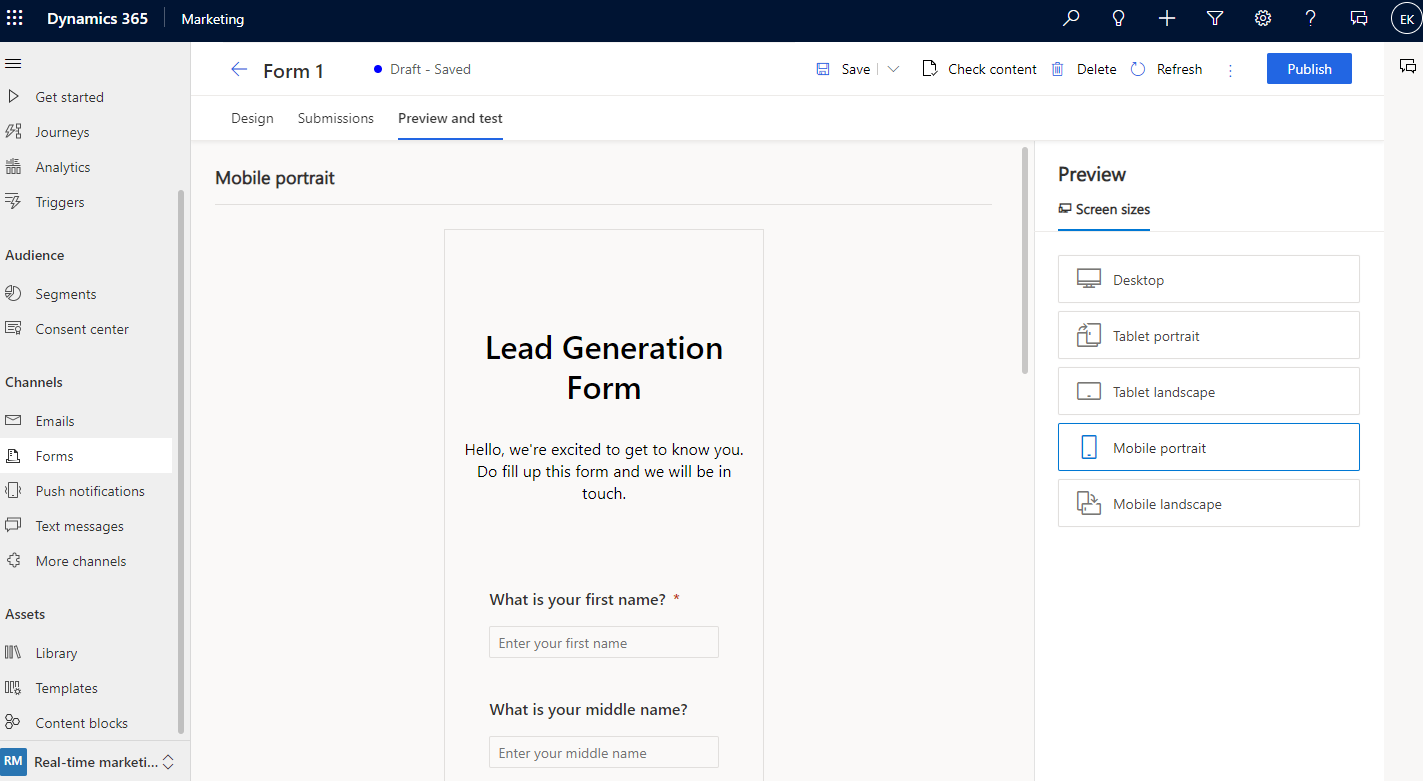
10. Now, it’s time to preview the form which you have created to see how it will look on various devices. Click the preview and test tab to open the preview. You can select different platforms to see how it looks on a tablet or a mobile device.
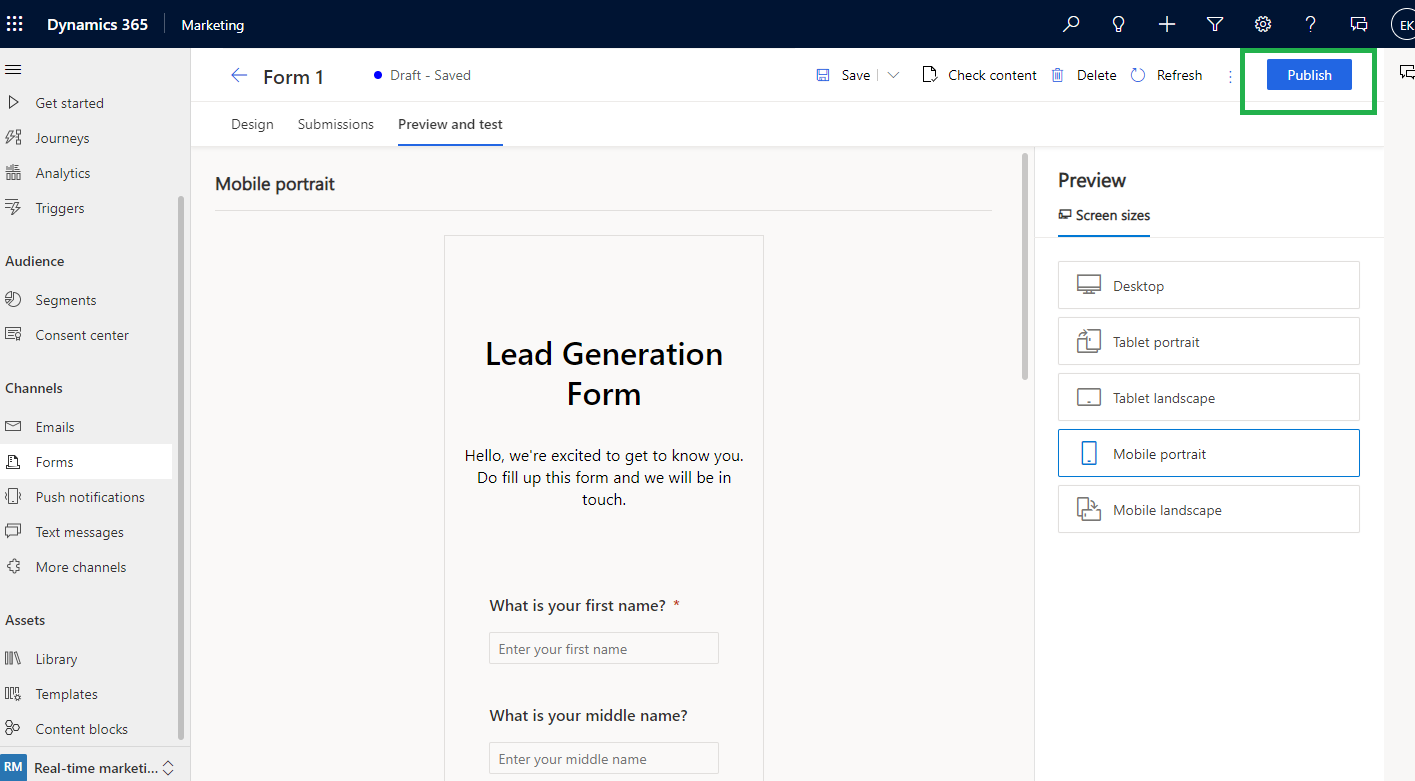
11. You can share your form publicly by clicking the Publish button at the top right. A form will automatically save and the validation process will begin automatically after you click Publish. When the form passes validation, you will see the following options on how to publish the form. Learn about how to publish your form. An email will need to be added to your form for it to pass validation as it is used to determine if the contact already exists by default.
12. The form will not render on your website if the domain where your form is embedded doesn’t allow external form hosting. Power Page domain is by default allowed for external form hosting.
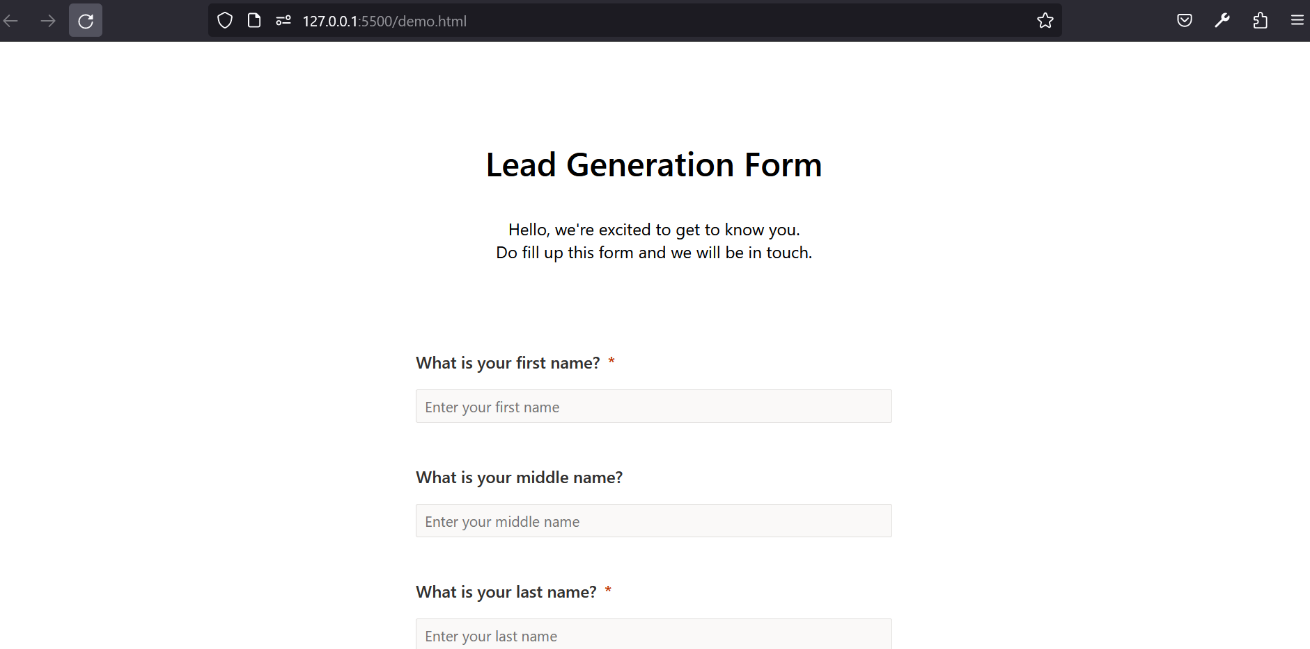
Once your form is integrated with your webpage, it will display on the webpage as shown below screenshot.
13. When a form is submitted you can set up a “Thank you” email to be sent to the visitors of the webpage. A new journey can be created using “Marketing form Submitted” which will be triggered whenever your form is submitted.
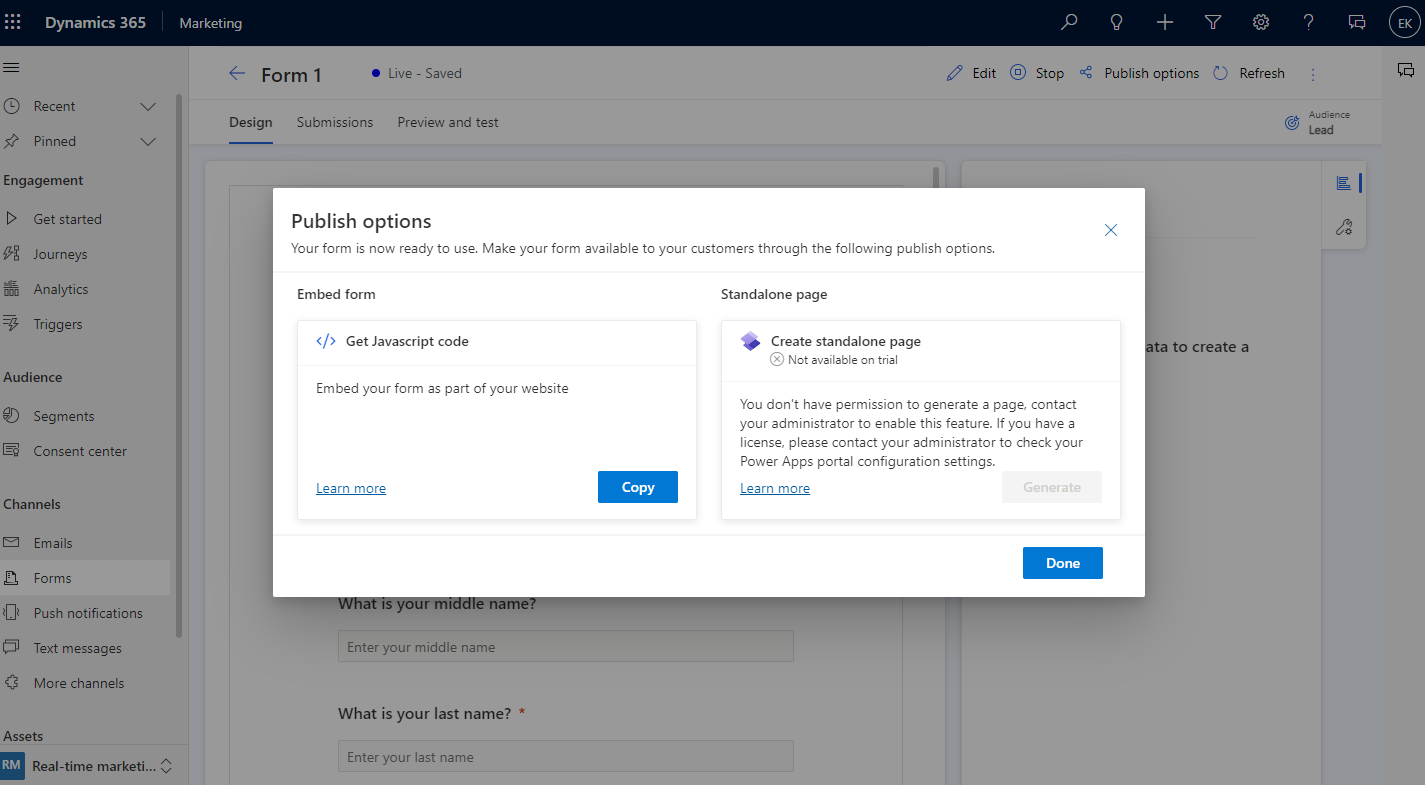
Publish your form:
When you publish your form by clicking on publish button present in the rightmost top corner, the following options will display:
- Embed to an external page using JavaScript: It is the most common method of integrating the form on your webpage. The same code snippet can be used on multiple web pages. A tracking script is also included to track the statistics of visitors to the page where the form is embedded. The form submission data includes the URL and the tracking information for the embedded form.
- Embed to an external page using iframe: Although iframes are limited in some ways, they are the best choice when you can’t use JavaScript code on your website. You can use iframe code on several websites. The form submission data will not include the URL for the embedded form.
- Create a Standalone page: To use this feature, you must have a Power Apps or Power Pages license. A Power Portal page will be automatically generated and the form will be included in the page. You’ll receive the public URL that you can share with your visitors so they can complete the form.
Conclusion
You can easily create advanced forms without relying on developers with the new intuitive forms experience in Real Time marketing.