Introduction
In Dynamics 365 CRM, user can modify his personal setting through Set Personal Options by clicking Gear Symbol present in Left side of form, after login into CRM.
But most of the time user is unaware about the options that are available in Personal Setting. For Example, Allow other Microsoft Dynamics 365 user to send email on your behalf have false value by default and user forgets to set value as True. In this scenario, administrator user is unable to send an email on behalf of that user.
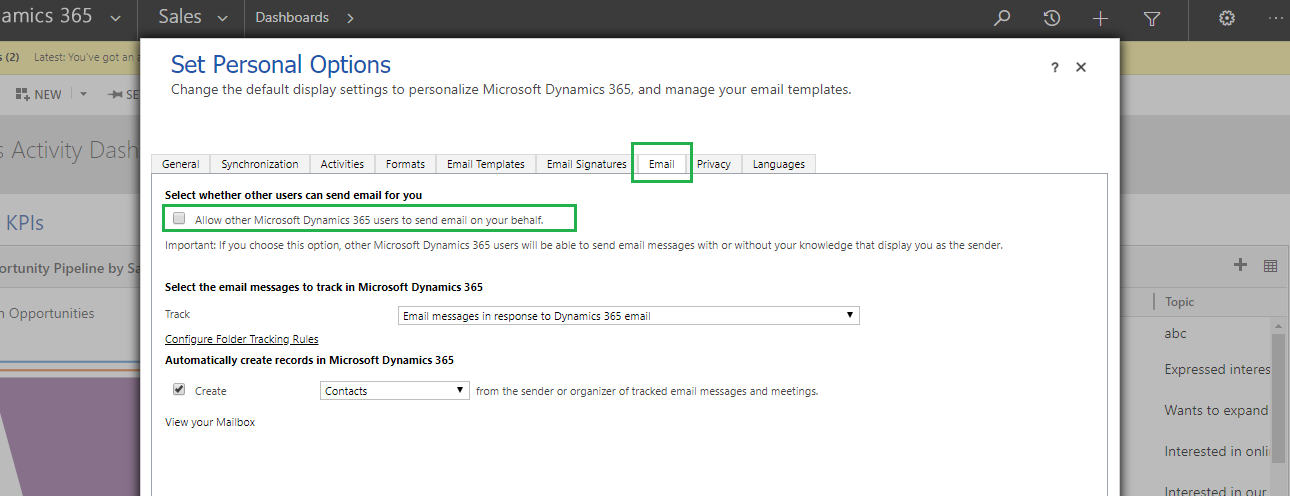
So in this blog, we will focus on how to update user personal setting, i.e. set default value of Allow other Microsoft Dynamics 365 user to send email on your behalf programmatically (without login into CRM).
Recently, we came across a scenario where an administrator user wants to send an email on behalf of some other user. In this case, if by default Allow other Microsoft Dynamics 365 user to send email on your behalf is not true then it will throw an error message as User Does not have permission to send Email.
To avoid this situation, we need to programmatically set Allow other Microsoft Dynamics 365 user to send email on your behalf as true in User Personal Setting.
To achieve this, we can either write plugin or assembly for the same.
We accomplished the same by using workflow assembly, because as per our functionality we required On Demand workflow. But you can also achieve the same by using plugin with Images i.e. Post Image.
Given below are the steps to set Allow other Microsoft Dynamics 365 user to send email on your behalf as True programmatically.
Step 1: Create workflow assembly.
Code Snipped to update user form Assembly and plugin
//Entity Name
Entity userSetting = new Entity(“usersettings”);
//Guid Of the user record
userSetting.Id = userId;
//Attribute to set value of “Allow other Microsoft Dynamics 365 user to send email on your behalf”
userSetting[“issendasallowed”] = true;
//Update the Record
service.Update(userSetting);
Step 2: Register Assembly.
Step 3: Create On Demand workflow which will also trigger on change of Outgoing Email Delivery Method field and call registered assembly in workflow.
Conclusion
One Pic = 1000 words! Analyze data 90% faster with visualization apps!
Get optimum visualization of Dynamics 365 CRM data with –
Kanban Board – Visualize Dynamics 365 CRM data in Kanban view by categorizing entity records in lanes and rows as per their status, priority, etc.
Map My Relationships – Map My Relationships – Visualize connections and relationships between Dynamics 365 CRM entities or related records in a Mind Map view.