Maplytics Maps can be accessed in two ways from Dynamics CRM:
- You will find two buttons namely Detail Map and Heat Map in upper toolbar of any entity page.
- You will find Map button in upper toolbar of individual records for entities you would like to plot.
Sometimes, we would like to plot the data from entity record form or would like to see heat map on entity record form. Maplytics maps can be added anywhere in Entity Form, to ease up the process of accessing information.
User can add detail map, heat map or individual map on existing entity record form or newly created view pane of entity form. In order to add Detail Map and Heat Map, it is not mandatory to configure entity map for that entity but for individual map it is mandatory to configure entity map.
Please follow the below steps to add Maplytics Maps to any entity record form:
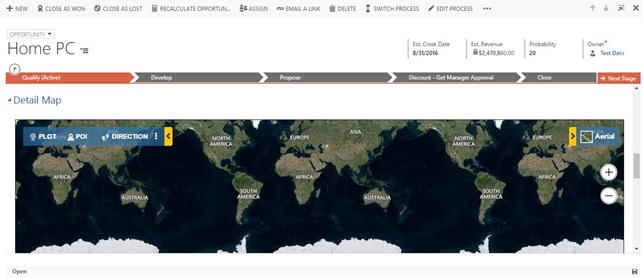
- Go to Setting → Customization → Entities → Entity Form. In this particular example, we will add detail map on opportunity entity. Please see the screenshot of the same:

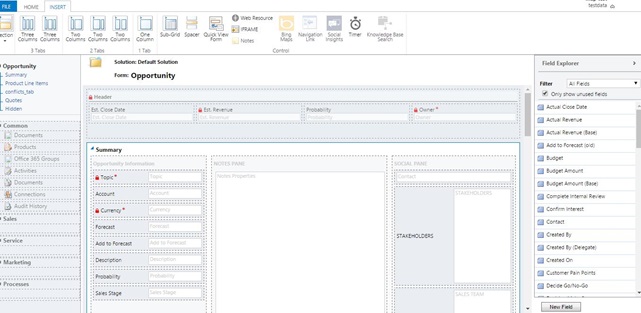
- Select view pane where you would like to add detail map and click on web resource button under insert tab.
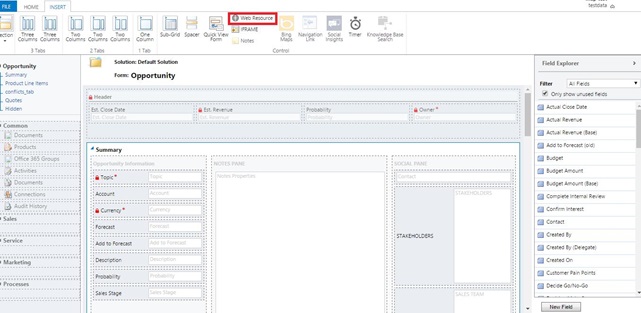
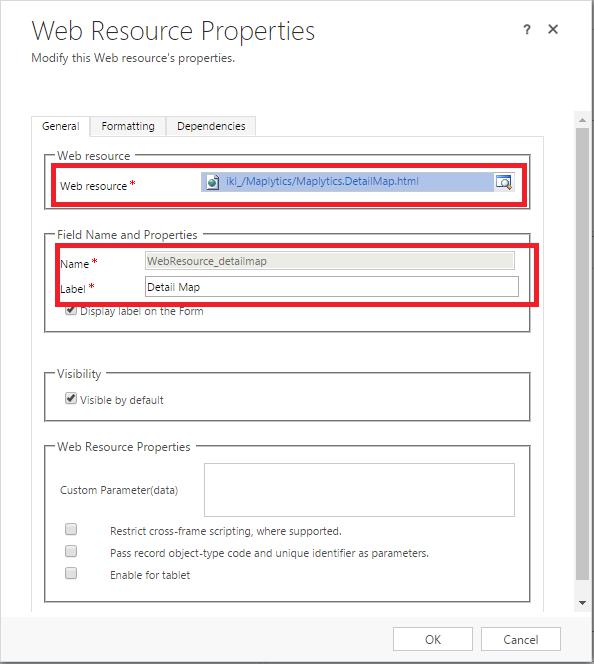
- Add following html web resource:
For Detail Map: ikl_/Maplytics/Maplytics.DetailMap.html
For Heat Map: ikl_/Maplytics/Maplytics.HeatMap.html
For Individual Map: ikl_/Maplytics/Maplytics.IndividualMap.html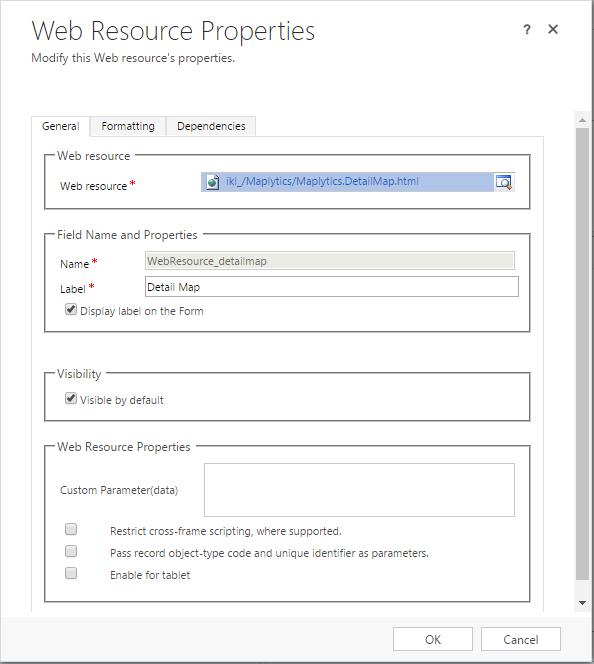
- Fill all required fields like Name, Label (you can write any name or label you would like to see) and click on OK button.

- After adding web resource Save and Publish the customization. Open the opportunity entity record form to see the changes:

In this way, users can add Maplytics maps on any entity form to access information in Dynamics CRM.