Custom Actions are one of the most useful methods of creating custom messages in Dynamics 365 CRM. Custom Actions enables us to create our own messages where we could register the plugin step the same way we register the Plugin step on Create, Update, Qualify Lead, etc. messages.
Microsoft has now brought an extension for Custom Action called Custom API which is in preview (at the time of writing this blog). As a developer, we should always be aware of what is coming in the future and how & where we can use it. In our quest of exploring something new, we stumbled across Custom APIs and this entire blog post is dedicated on creating a custom action from scratch.
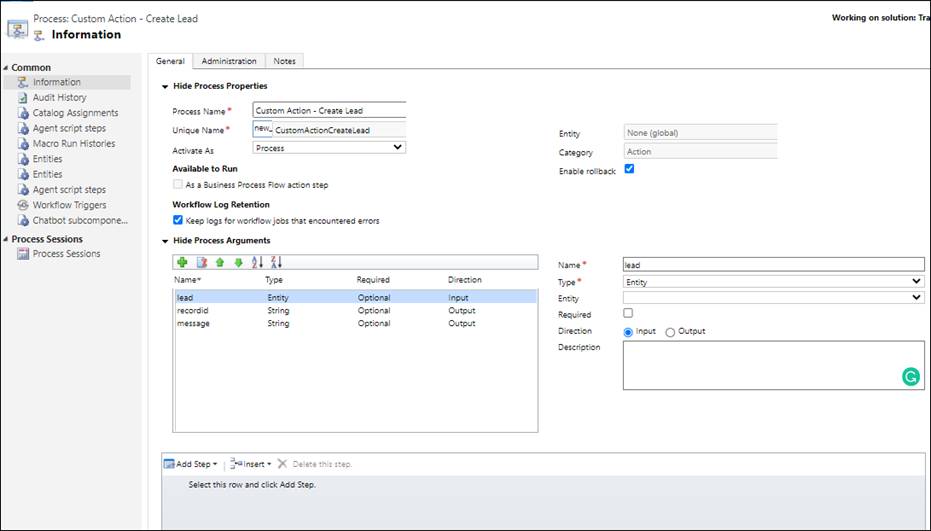
Custom API is a new way of creating Custom Action Messages in Dynamics 365 CRM. For many years, we were used to creating a Custom Action for Custom Messages. An example of which is seen in the below screenshot
Now with the Custom API we get some more advanced capabilities such as,
- PrivateCustom API: It makes the Custom API available only to the owner and the users the owner has shared it with. As per the Microsoft document, Microsoft itself uses this functionality to hide the internal actions and functions.
- API Type: We can define our Custom API to run as Function or as an Action. For the Function Type, we need to execute it using GET Method and for Action Type, we can execute it using POST Method.
- Code First Approach: Custom API supports Code first approach.
Custom API does not require us to create the custom messages the same way as we do for Custom Action but we need to create the simple records in Custom APIentity (as explained in the blog). In addition, we get more types of parameters and response types including the types we use in the Custom Action.
Let us see an example of how we can use the Custom API and register a plugin on it.
Just for the purpose of the example, we are creating a Custom API with one required parameter and two output properties.
In the Input parameter, we will be providing the lead data and the response of it the Custom API should bring to us the record ID which just created or updated the status message.
We will write the plugin code first and then associate our plugin to the Custom API.
Plugin Code:
public void Execute(IServiceProvider serviceProvider)
{
try
{ // tracing object
ITracingService tracing = (ITracingService)serviceProvider.GetService(typeof(ITracingService));
// ExecutionContext object
IPluginExecutionContext context = (IPluginExecutionContext)serviceProvider.GetService(typeof(IPluginExecutionContext));
// object Organization service factory object
IOrganizationServiceFactory serviceFactory = (IOrganizationServiceFactory)serviceProvider.GetService(typeof(IOrganizationServiceFactory));
// object organization object
IOrganizationService service = serviceFactory.CreateOrganizationService(context.UserId);
Guid recordId = Guid.Empty;
string message = string.Empty;
//check the key is present
if (context.InputParameters.Contains(“lead”))
{
//
Entity leadRef = context.InputParameters[“lead”] as Entity;
tracing.Trace($”Lead Reference value : {(leadRef != null ? leadRef.Id.ToString() : “is null”)}”);
if (leadRef != null && leadRef.Attributes.Contains(“leadid”))
{
recordId = leadRef.GetAttributeValue<Guid>(“leadid”);
service.Update(leadRef);
//pass output parameter
message = “Application has been successfully updated!”;
}
else
{
recordId = service.Create(leadRef);
message = “Application is successfully submitted!”; ;
}
context.OutputParameters[“recordid”] = recordId;
context.OutputParameters[“message”] = message;
}
}
catch (Exception ex)
{
throw new InvalidPluginExecutionException(ex.InnerException != null && ex.InnerException.Message != null ? ex.InnerException.Message : ex.Message);
}
}
After completing the plugin code, register the plugin assembly on the CRM using Plugin Registration Tool. If you are new to this then you can follow the steps from here.
Now start creating Custom API using the below steps.
Step 1: Create Custom API Record
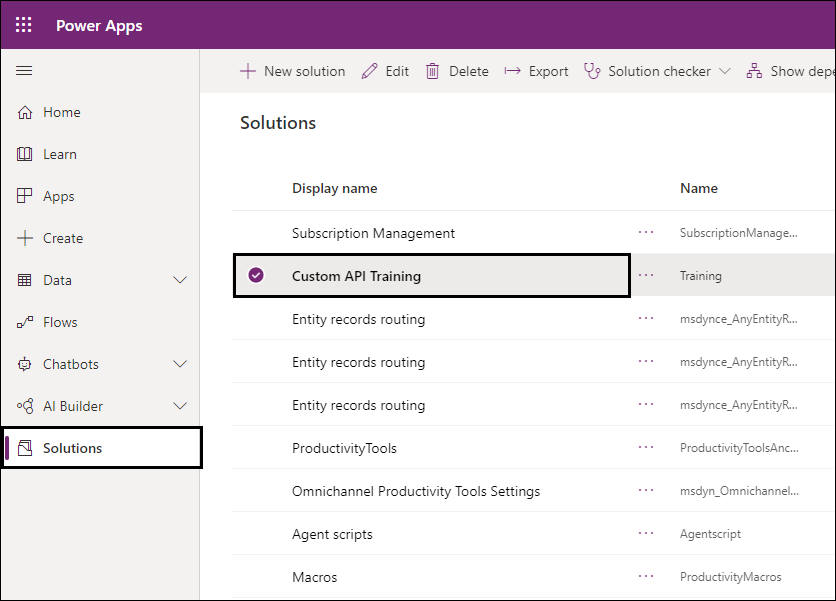
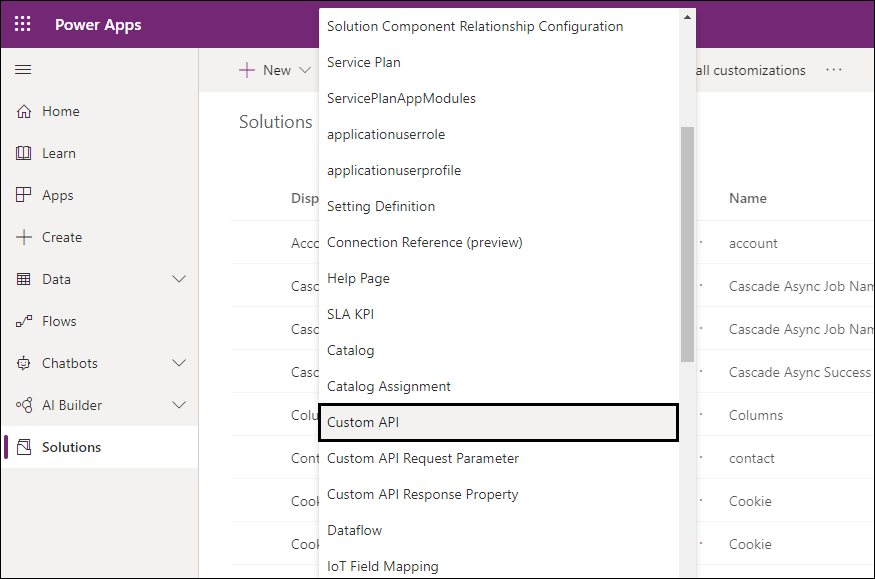
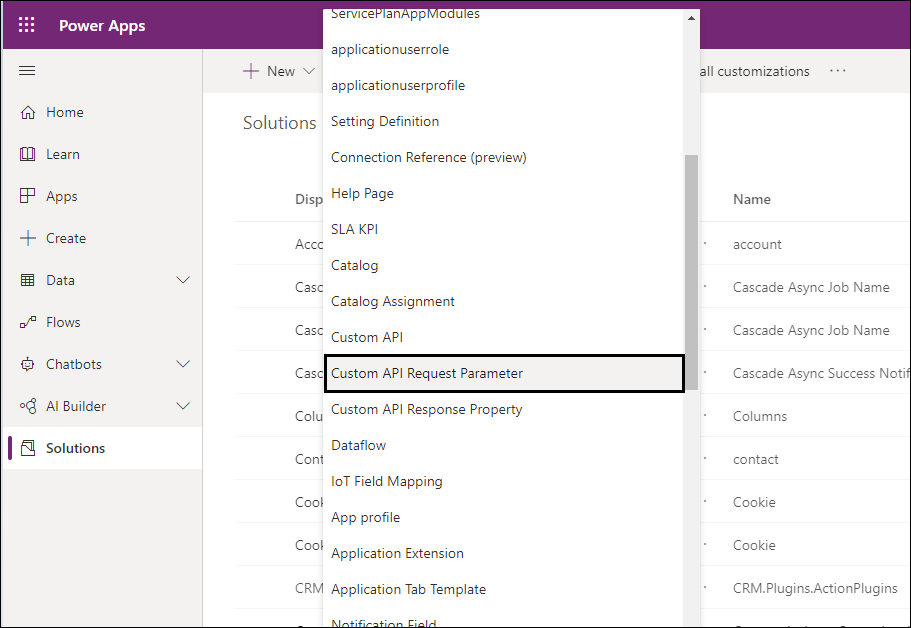
Move to your solution in the power platform, add a new item, and select the Custom API.
It will open up a new form of Custom API where we need to specify its name and some properties.
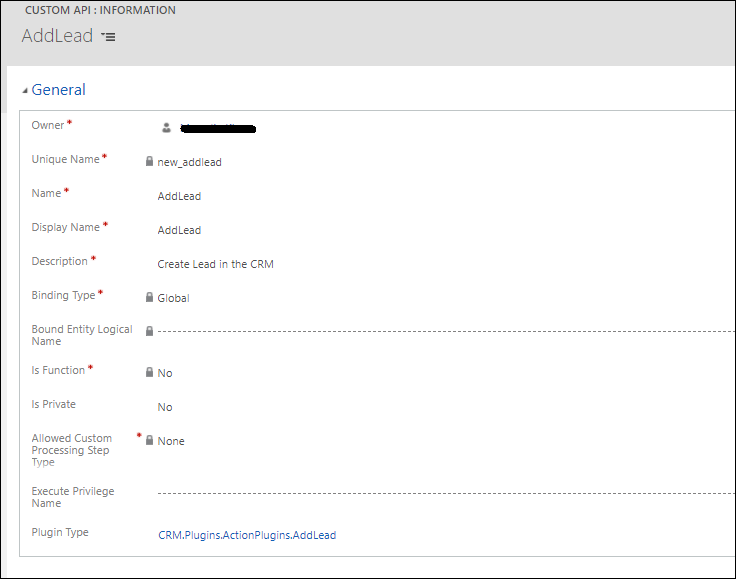
Unique Name: Unique name for the Custom API (Start with the publisher’s prefix which you have specified on your solution).
Name: Name for the Custom API.
Display Name: Display Name for this Custom API. In case we have enabled multi-languages on the System, we can provide a specific name for the custom API based on the language.
Description: This field is to store the description of this Custom API.
Binding Type: The Binding Type is the Options set field and could be set as Global, Entity, and Entity Collection. This should be specified as per your operation requirement (Entity Collection is only supported in Function Type Custom API).
Bound Entity Logical Name: This field is required when we select the Binding Type as Entity or Entity Collection. For the binding type as Global, it can be empty.
Is Function: It defines whether your custom API is a Function (this can only be called using Get Method) or Action (this can only be called using POST method).
Is Private: To define the Custom API is private or public (setting it private makes it accessible to only the owner of the Custom API).
Allowed Custom Processing Step Type: Allowed Custom Processing Step Type is another Option set field with options like None, Async Only, Sync, and Async. These options let you define whether the other plugins could be registered on this Custom Message and also lets you define its behavior. Like Async Only allows the plugins to register only onPost operation with Execution Mode to Asynchronous, and same for the Sync and Async option.
Execute Privilege Name: We can define the privilege that allows execution of the custom API. As per Microsoft docs, we can also create custom privileges and it is currently in development. We can use OOB privileges, for example,prvCreateLead, prvWriteLead, etc.
Plugin Type: Set the reference of your plugin for this API.
Step 2: Create Custom API Request Parameter record
The request parameter is optional for Custom API to be executed. In our case, we are passing the record data to the Custom API.
Move to your solution in Power Platform, add a new item, and select the Custom API Request Parameter.
It will open up a new form of Custom API Request Parameter. Set the required properties for the parameter as name and type, below is the detail of each property of the Custom API Request Parameter record.
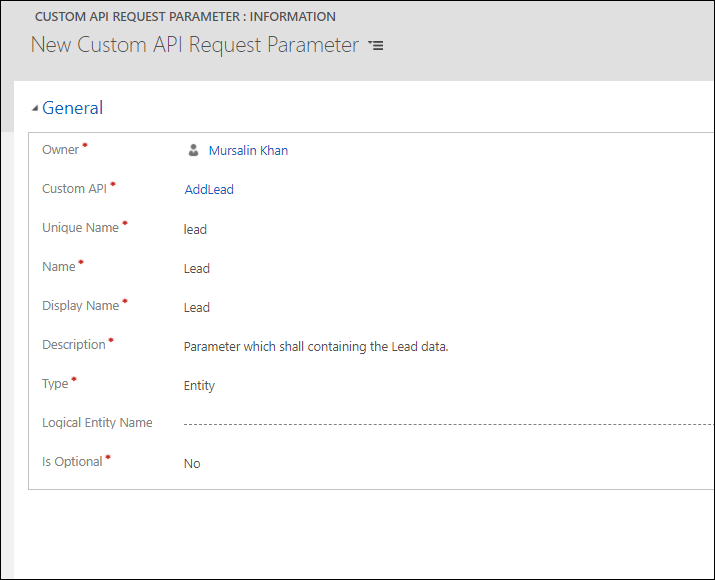
Custom API: Set the reference of your Custom API record.
Unique Name: Set the unique name for the parameter.
Name: Name of the custom API Request Parameter that shall be visible on the solution.
Display Name: Display Name for this Custom API Request Parameter which shall be used to called this Custom API from the App.
Description: This field is to store a description of this Parameter.
Type: Set the type of the parameter as per your requirement. Here, we get a rich set of data types. Below are the currently available data type options for Custom API.
- Boolean
- Date and Time
- Decimal
- Entity
- Entity Collection
- Entity Reference
- Float
- Integer
- Money
- Picklist
- String
- String Array
- GUID
Logical Entity Name: Set Logical Entity Name if you want to use parameter bounded with any specified entity. You can set this field only with Entity and Entity Reference Type of Parameter.
Is Optional: Define your parameter is optional or required.
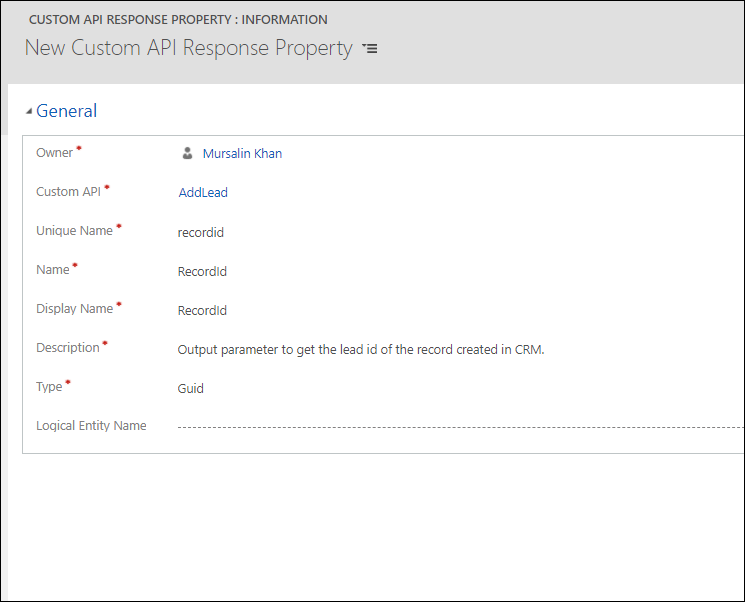
Step3: Create a Response Property for Custom API that will you get in your success response
Move to your solution in Power Platform, add a new item, and select the Custom API Response Property.

Properties are similar to Custom API Request Parameter, there is only one difference, here we do not need to define the response is optional or required.
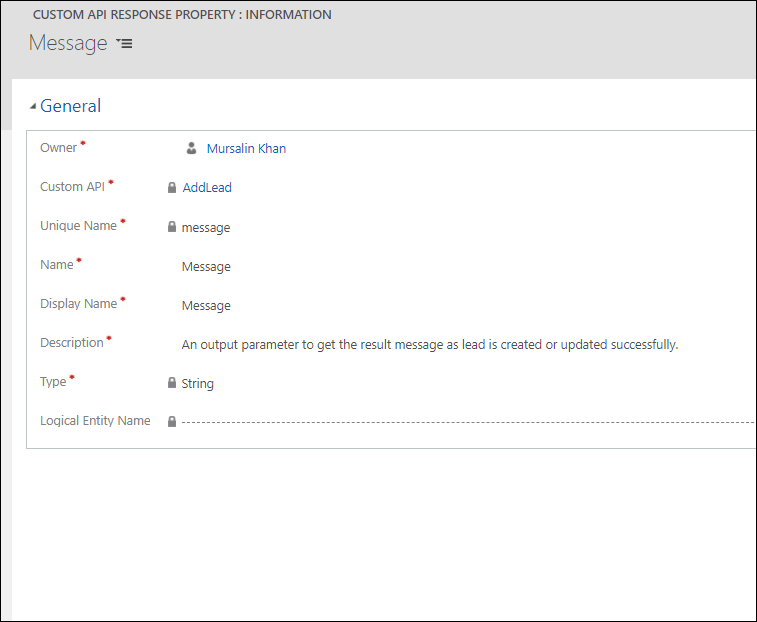
We have two output parameters -one for getting the record, which was just created or updated in the CRM. Second for messages which we shall receive once our Custom API is executed successfully.
Step 4:- Here we are done with Custom API configuration, we can now execute it using the Execution function of Xrm.WebApi, Fetch API, and XML HTTP Request.
Execute it using Fetch API:
// Create a variable to point to a contact record and with specific data in the needed fields
var leadData = {
“@odata.type”: “Microsoft.Dynamics.CRM.lead”,
“firstname”: “Mike”,
“lastname”: “Staurt”,
“subject”:”Interested in Car”,
“telephone1″:”+973426536”
}
async function GetResult(leadData) {
var result = await (await fetch(‘/api/data/v9.2/new_addlead’, {
method: ‘POST’, // *GET, POST, PUT, DELETE, etc.
cache: ‘no-cache’, // *default, no-cache, reload, force-cache, only-if-cached
headers: {
‘Content-Type’: ‘application/json’
},
referrerPolicy: ‘no-referrer’, // no-referrer, *no-referrer-when-downgrade, origin, origin-when-cross-origin, same-origin, strict-origin, strict-origin-when-cross-origin, unsafe-url
body: JSON.stringify({ “lead”:leadData}) // body data type must match “Content-Type” header
})).json();
console.log(result.message);
return result.message;
}
Execution using Xrm.WebApi.Online
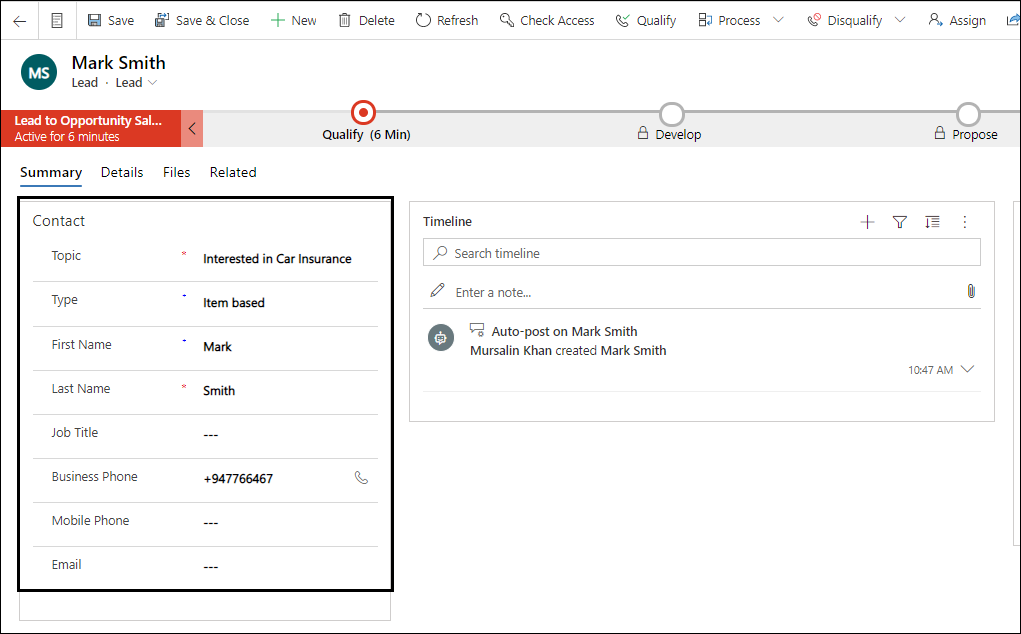
// Create a variable to point to a lead record and with specific data in the needed fields
var leadRecord = {
“@odata.type”: “Microsoft.Dynamics.CRM.lead”,
“firstname”: “Mark”,
“lastname”: “Smith”,
“subject”:”Interested in Car Insurance”,
“telephone1″:”+947766467”
}
var result= async function(leadRecord){
var Request = {};
/**
* Request to Get All Relationship Count
* @param {String} EntityName – Entity Logical Name.
*/
Request = function(lead) {
this.lead = lead;
};
// NOTE: The getMetadata property should be attached to the function prototype instead of the
// function object itself.
Request.prototype.getMetadata = function () {
return {
boundParameter: null,
parameterTypes: {
“lead”: {
“typeName”: “mscrm.crmbaseentity”,
“structuralProperty”: 5 // Entity Type
}
},
operationType: 0, // This is an action. Use ‘1’ for functions and ‘2’ for CRUD
operationName: “new_addlead”
};
};
// Construct a request object from the metadata
var req = new Request(leadRecord);
result = await Xrm.WebApi.online.execute(req);
return (await result.json()).message;
}
await result(leadRecord);
Result: Lead Record is created in the CRM, as seen below
NOTE: As this feature is in preview, do not use it for production use.
Conclusion
Custom API is the new and advanced way of registering the Custom Message on Dynamics CRM with the Code First approach.
One Pic = 1000 words! Analyze data 90% faster with visualization apps!
Get optimum visualization of Dynamics 365 CRM data with –
Kanban Board – Visualize Dynamics 365 CRM data in Kanban view by categorizing entity records in lanes and rows as per their status, priority, etc.
Map My Relationships – Map My Relationships – Visualize connections and relationships between Dynamics 365 CRM entities or related records in a Mind Map view.