We had a requirement in which we were supposed to use a addCustomView method in order to filter the Lookup. We came across a situation in which we were able to set the custom view(The view with filtered records) as a default view to restrict the users from choosing the other records, but if a user wants, he/she could choose the different view from the Lookup window dialog and select the other records too, which the users were not supposed to choose.
Let us first introduce you to the situation, on the Quote form we have a Lookup field called Project Template. And, on the Quote Product form we have another Lookup field called Project Template Items which should be filtered as per the value chosen for the Project Template.
We`ll start from the point where we have the ID of the chosen Project Template(to get the ID, you need to write a script on the Load of the Quote Product form).
Initially, what we started off was adding our custom view, but it still allowed the user to switch between different views, as a result users were able to choose records from other views.
We`ll explain you both the situations, the Initial Situation(which was adding the custom view) and the Ideal Situation(which was adding the custom view and restricting users from selecting other view) .
First and foremost, for the Lookup that`ll have filtered values, you need to change the below properties. These are the necessary steps.
Step 1:
From the form editor, go to the properties of the Lookup field.
Step 2:
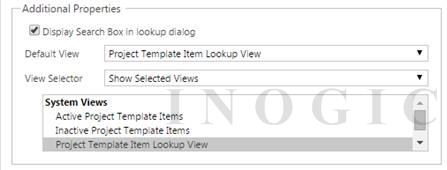
In the Additional Properties section,
Default View – Select a View.
View Selector – Choose “Show Selected Views“.
System Views – Only Select the view which was selected in the Default view.
Initial Situation:
In this situation, we were doing everything right but, we missed something that stopped us from getting the ideal output.
Code
function setCustomView(projectTemplateId) {
var functionName = “setCustomView”;
try {
//Check whether the field exist or not
if (isValid(Xrm.Page.getControl(“new_projecttemplateitemid”))) {
// add the randomly generated GUID for the view id
var viewId = ‘{00000000-0000-0000-0000-000000000001}’;
//add the entity name
var entityName = “new_projecttemplateitem”;
// add the view display name
var viewDisplayName = “Project Template Item Lookup View”;
// fetch xml for filtered Project Template Item records
var fetchXml = “<fetch version=’1.0′ output-format=’xml-platform’ mapping=’logical’ distinct=’false’> ” +
“<entity name=’new_projecttemplateitem’>” +
“<attribute name=’new_name’ />” +
“<filter type=’and’>” +
“<condition attribute=’new_projecttemplate’ operator=’eq’ value='” + projectTemplateId + “‘ />” +
“</filter>” +
“</entity>” +
“</fetch>”;
//Grid Layout for filtered records
var layoutXml = “<grid name=’resultset’ object=’1′ jump=’productid’ select=’1′ icon=’1′ preview=’1′>” +
“<row name=’result’ id=’new_projecttemplateitemid’>” +
“<cell name=’new_name’ width=’150′ />” +
“<cell name=’createdon’ width=’150′ />” +
“</row>” +
“</grid>”;
// add the custom view for the lookup field
Xrm.Page.getControl(“new_projecttemplateitemid”).addCustomView(viewId, entityName, viewDisplayName, fetchXml, layoutXml, true);
}
} catch (e) {
throwError(e, functionName);
}
}
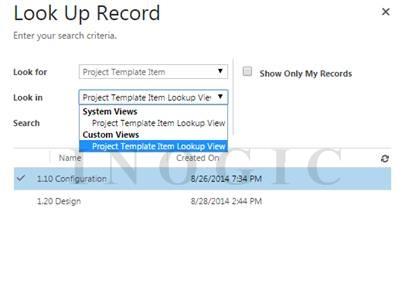
In the above code everything was right but,
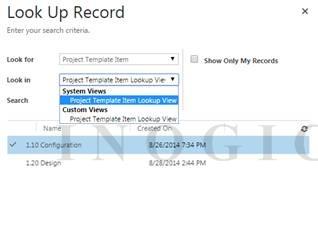
on selecting the Custom view, we were getting the below results:
And, on selecting the System View, we were getting the below results.
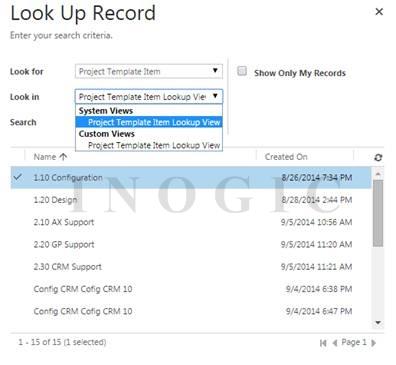
Both the views were giving us different results, which we never wanted.
So, in the search of an ideal situation we found the below solution.
Ideal Situation:
Replace the code in the box with the below code.
Code
// add the default View GUID for the view id
var viewId = Xrm.Page.getControl(“new_projecttemplateitemid”).getDefaultView();
This single piece of line works like a charm.
Now, we got the below results on selecting both the views.
Custom View:
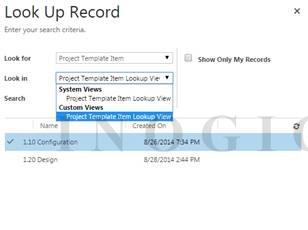
System View:
And, this is how we got the desirable result with a small tweak in the code.
Free 70% of storage space in CRM with Attachment Management Apps!
Attach2Dynamics – Store and manage documents/attachments in cloud storage of your choice – SharePoint, Dropbox or Azure Blob Storage from within Dynamics 365 CRM.
SharePoint Security Sync – Robust and secure solution to integrate Dynamics 365 CRM and SharePoint Security Sync thereby ensuring secure access to confidential documents stored in SharePoint.