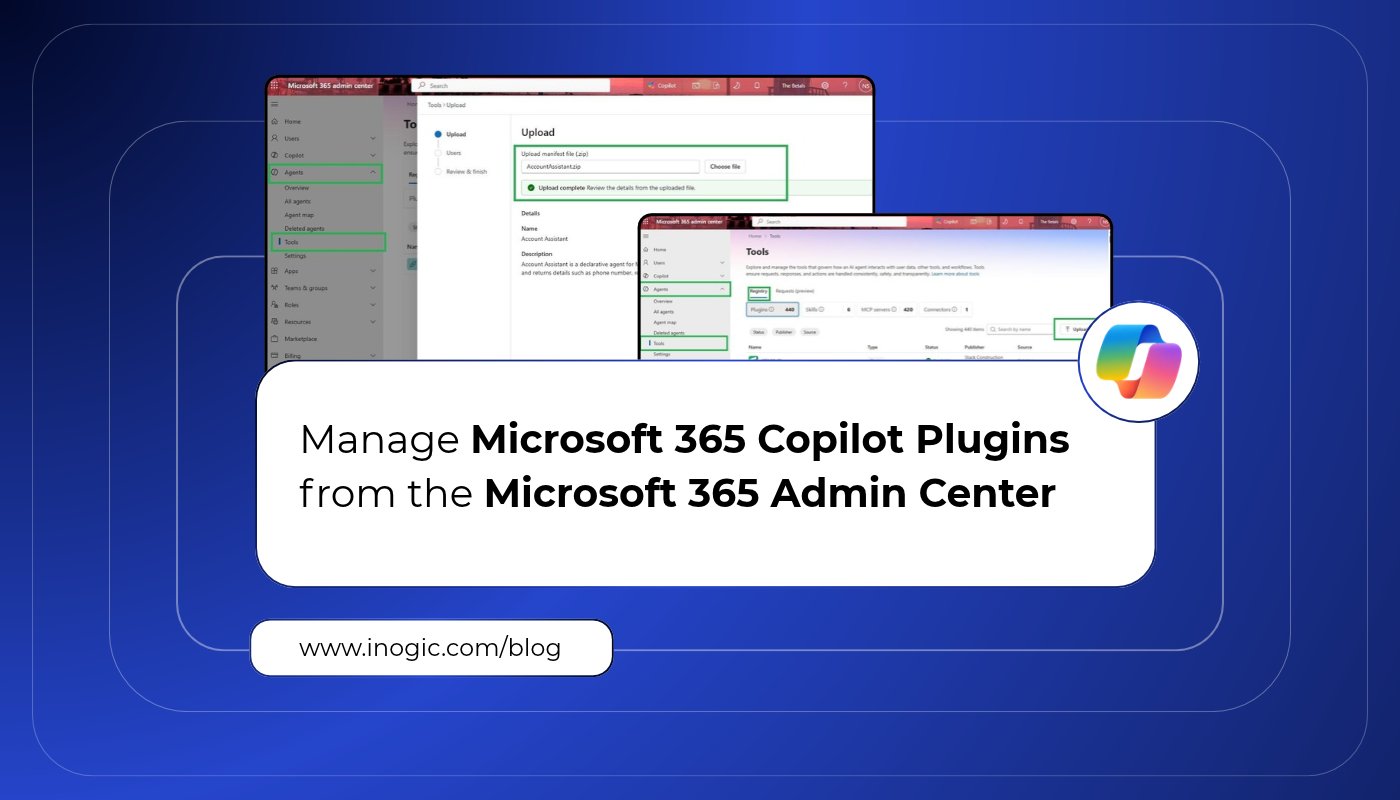
 Building a Copilot plugin is the easy part. The harder question comes after: who gets to use it, who approves it, and what happens when something goes wrong?
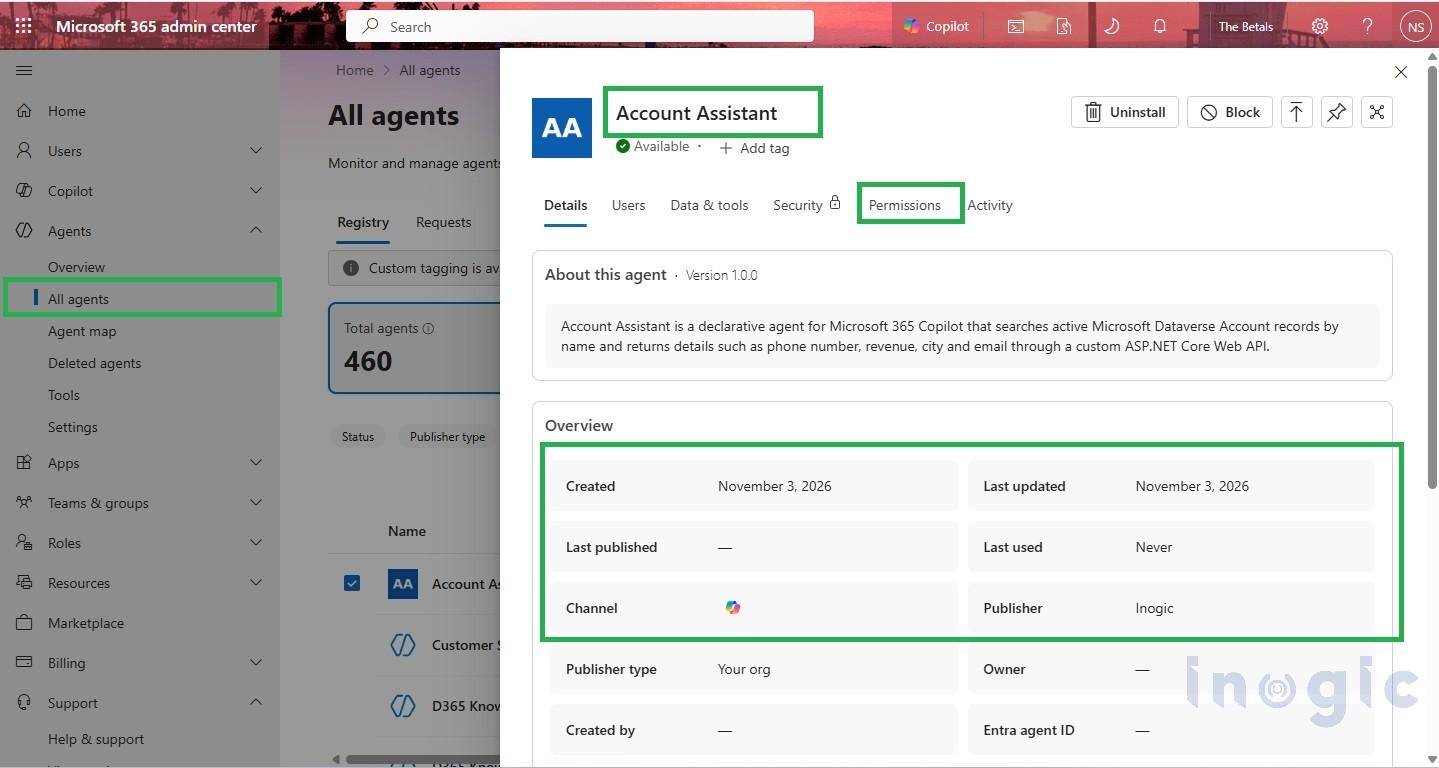
In our previous blog, Web API Plugin for Declarative Agents in Microsoft 365 Copilot, we built an Account Assistant that connects to Microsoft Dataverse and retrieves matching Account records through a custom Web API operation. It works well in a developer environment, but production is a different story. Administrators need to decide which teams can use a plugin, review what a package contains, apply rules based on who published it, and pull it back quickly if an API goes down or a security concern arises.
That is where the Tools experience in the Microsoft 365 admin center comes in. Part of Microsoft Agent 365, it gives administrators one place to govern plugins, skills, MCP servers, and connectors. The Registry offers a central inventory, while the Plugins and Requests areas handle availability and eligible access-request reviews.
In this walkthrough, we will use the Account Assistant as a real example and follow its lifecycle from the admin’s side: uploading the package, scoping it to a sales team, adjusting availability, setting publisher-based policies, and blocking or removing it when needed.
Use Case: Manage the Account Assistant plugin
Assume that the Account Assistant plugin created in our previous article is ready for organizational use. It connects Microsoft 365 Copilot to an ASP.NET Core API, and that API queries the Dataverse Account table. A sales team wants access to the assistant, but the organization does not want to make it available to every employee immediately.
The administrator can upload the package, review its components, scope availability to a selected group, and verify that intended users can access it.
Prerequisites
An account with the required Microsoft 365 admin permissions to access Agents and Tools.
The plugin package and its manifest, prepared by the developer.
A test user who belongs to the intended audience.
Microsoft documents AI Administrator and Global Administrator as roles that meet the stated requirements.
Please find below steps to Manage Microsoft 365 Copilot Plugins from the Microsoft 365 Admin Center:
Step 1: Open the Tools Registry
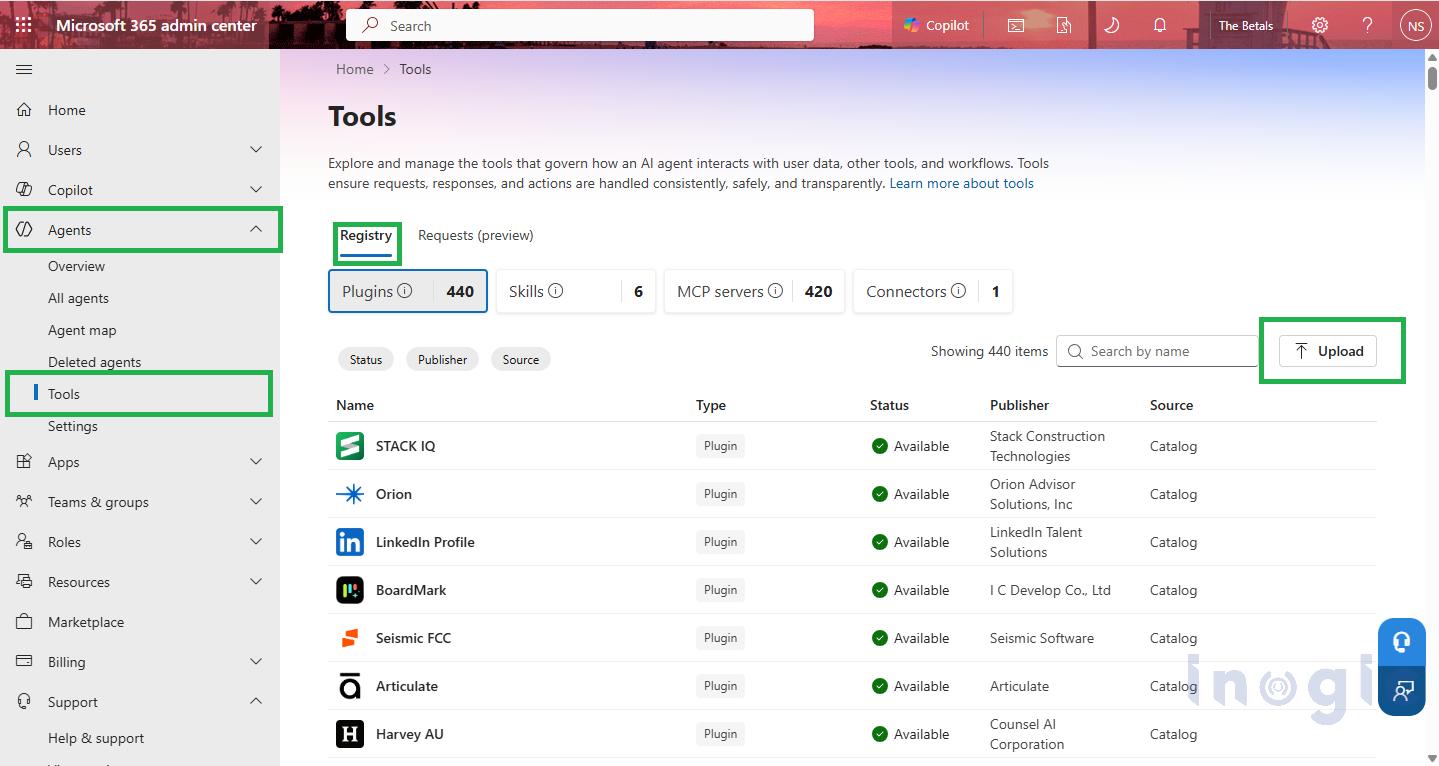
Sign in to the Microsoft 365 admin center. In the left navigation, open Agents, then Tools, and select Registry.
The Registry provides an inventory of tools registered for the organization. Depending on the tenant and rollout, the inventory can include plugin packages, and connectors. Use the available filters and status information to locate the item you need.
Step 2: Upload the Account Assistant package
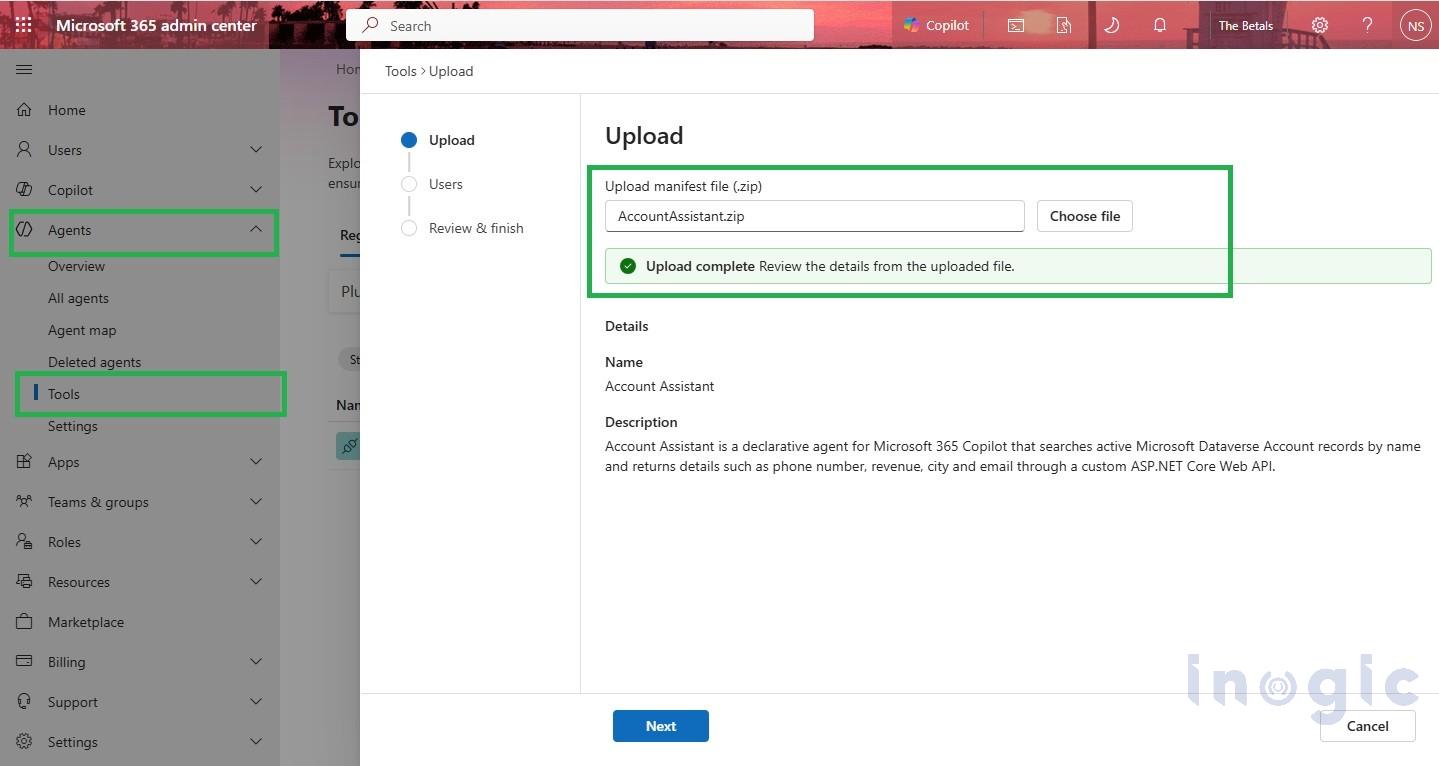
If the plugin was built for your organization and is not yet present in the Registry, select Upload and provide the package manifest prepared by the developer.
Open Agents > Tools > Registry > Select Upload > Choose the plugin manifest file.
After the upload completes, review the components included in the package.
For an API-backed plugin, separately confirm that the API endpoint and authentication requirements are documented and ready.
Important: uploading a package does not automatically prove that every dependency is configured. The API, Dataverse application identity, permissions, consent, and external services may still need their own configuration.
Step 3: Select the users who should receive the plugin
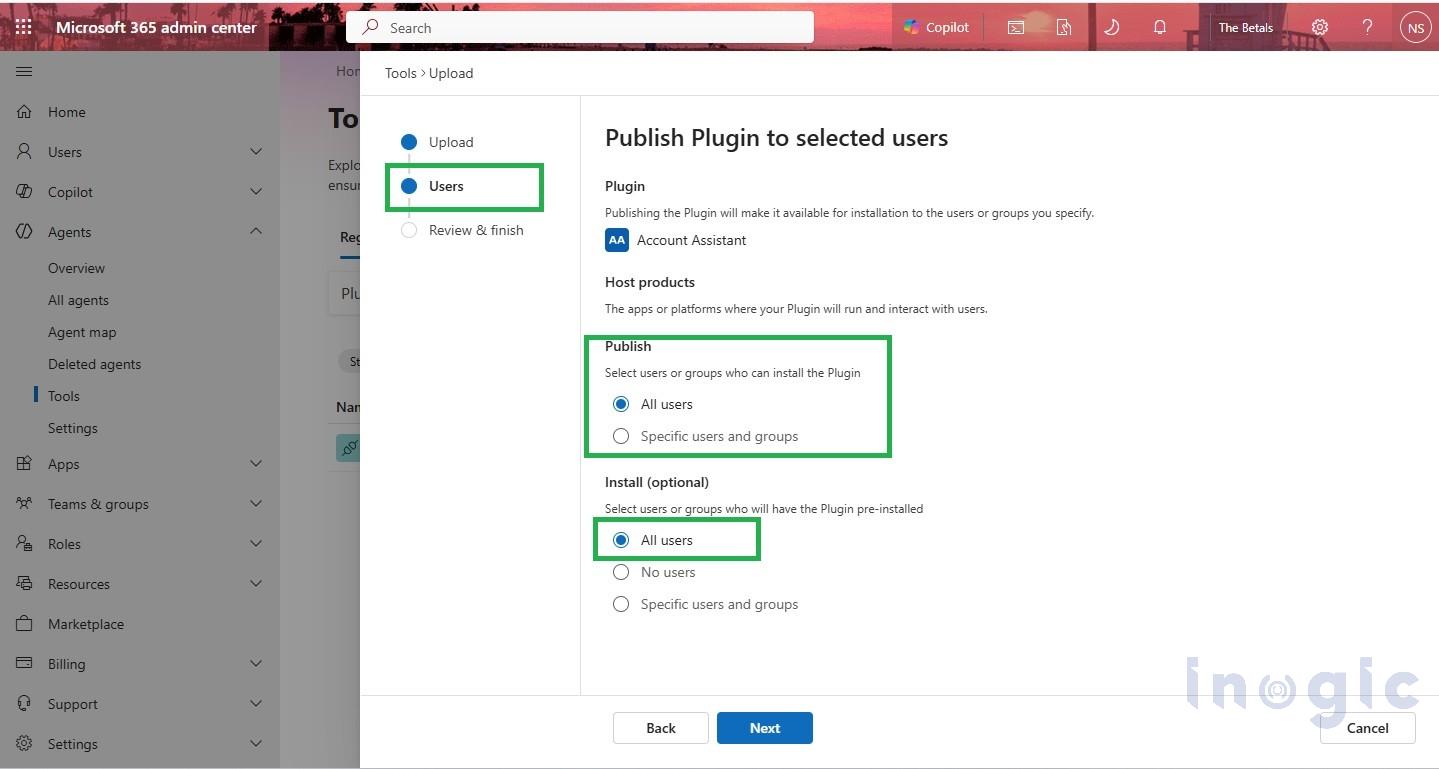
During the upload flow, the Scope user’s pane lets the administrator choose the audience. Microsoft documents options such as All users or Specific users or groups.
Review the configuration and select Install when ready. This lets the administrator deploy the plugin for the selected audience rather than relying on each user to locate and install it manually.
Step 4: Install a plugin for users
If a plugin is already listed under Agents > Tools, an administrator can select it and choose Install. Review the plugin details, select All users or Specific users or groups, continue to the review screen, and select Install to complete the process.
For the Account Assistant, confirm that the intended sales users are included.
Installation and availability are separate from the plugin’s external data permissions. A user being assigned the plugin does not automatically grant the API permission to read Dataverse data, nor does it automatically configure the user’s sign-in or consent requirements.
Step 5: Manage availability for an existing plugin
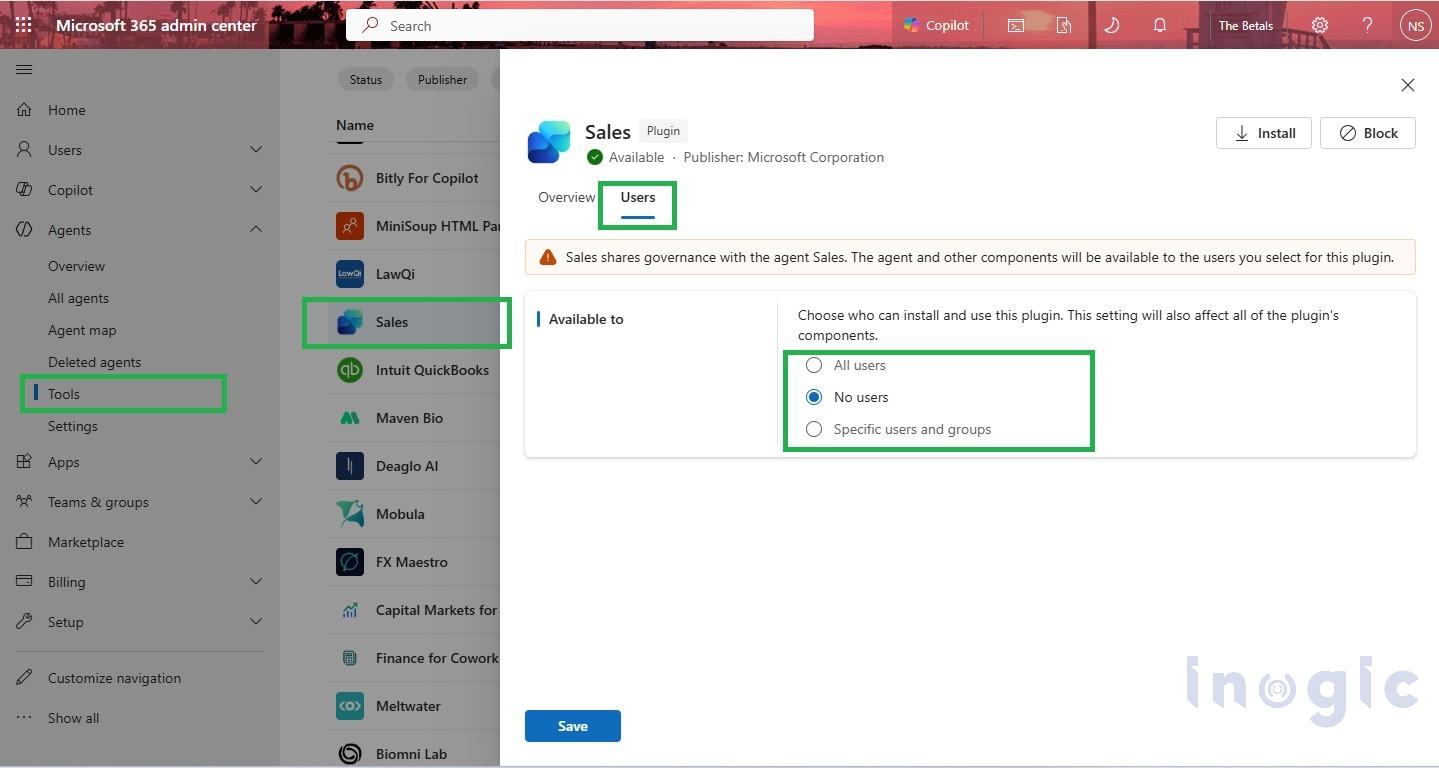
Administrators can change the audience for an individual plugin from
Agents > Tools > Plugins.
Open Agents > Tools > Plugins.
Select the plugin that you want to manage.
Open the Users section.
Choose All users, No users, or Specific users and groups.
Review the selection and save the changes.
For example, after a successful Sales Plugin, the administrator may expand availability from the Sales Operations group to a wider sales organization. If the API is undergoing maintenance, the administrator may temporarily choose No users while the development team investigates.
Step 6: Control plugin availability by publisher
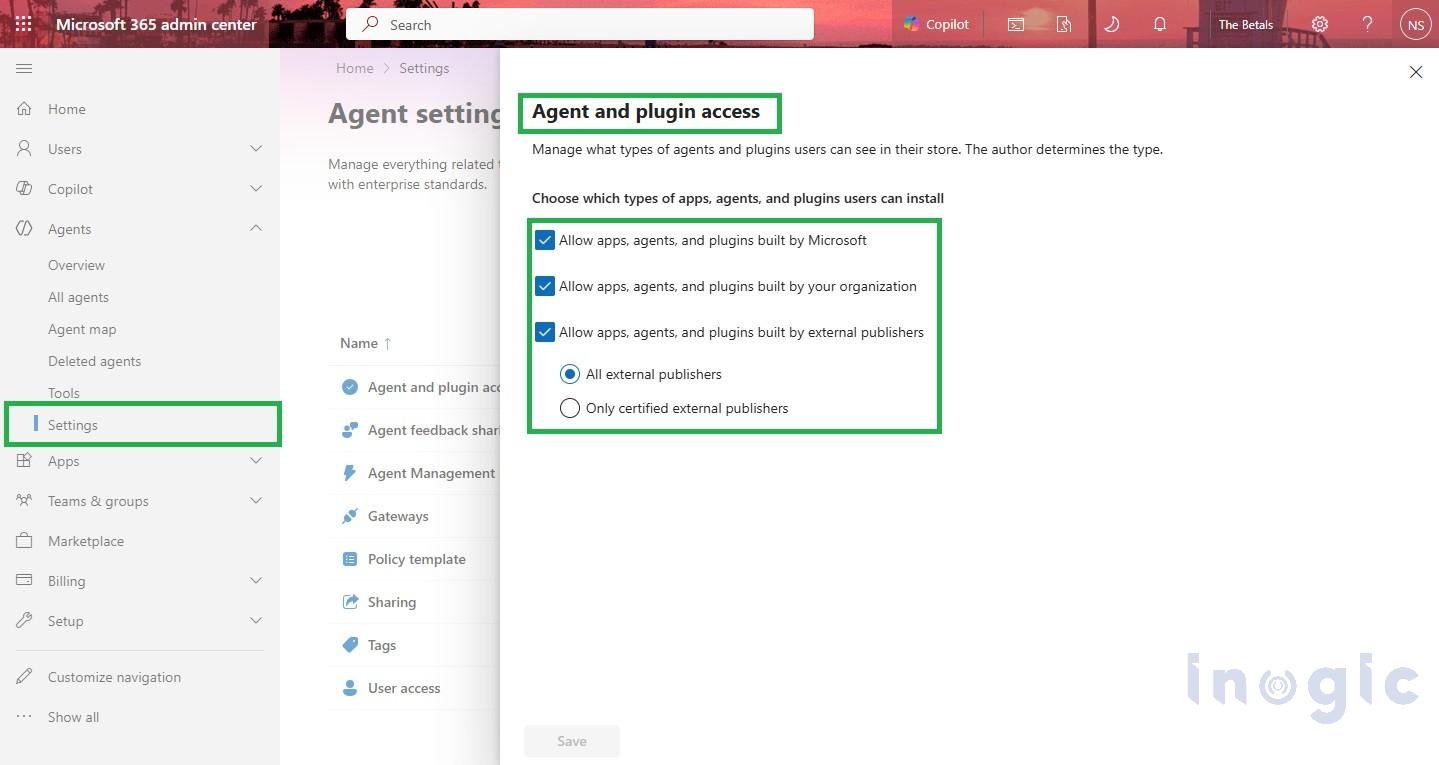
An organization may want to apply broader rules based on who publishes a plugin. Microsoft documents publisher-category controls under Agents > Settings > Agent and plugin access.
Open Agents > Settings > Agent and plugin access.
Review the available publisher categories, such as Microsoft, your organization, and certified external publishers.
Enable the publisher categories that users are allowed to discover and install.
Save the policy changes.
If a publisher category is not allowed, affected plugins can remain visible but are marked as blocked by organizational policy.
For example, an organization can allow Microsoft-published and internally published plugins while restricting certified external publishers until they complete an internal review.
Step 7: Block, uninstall, or delete a plugin
Microsoft provides different actions for different lifecycle needs.
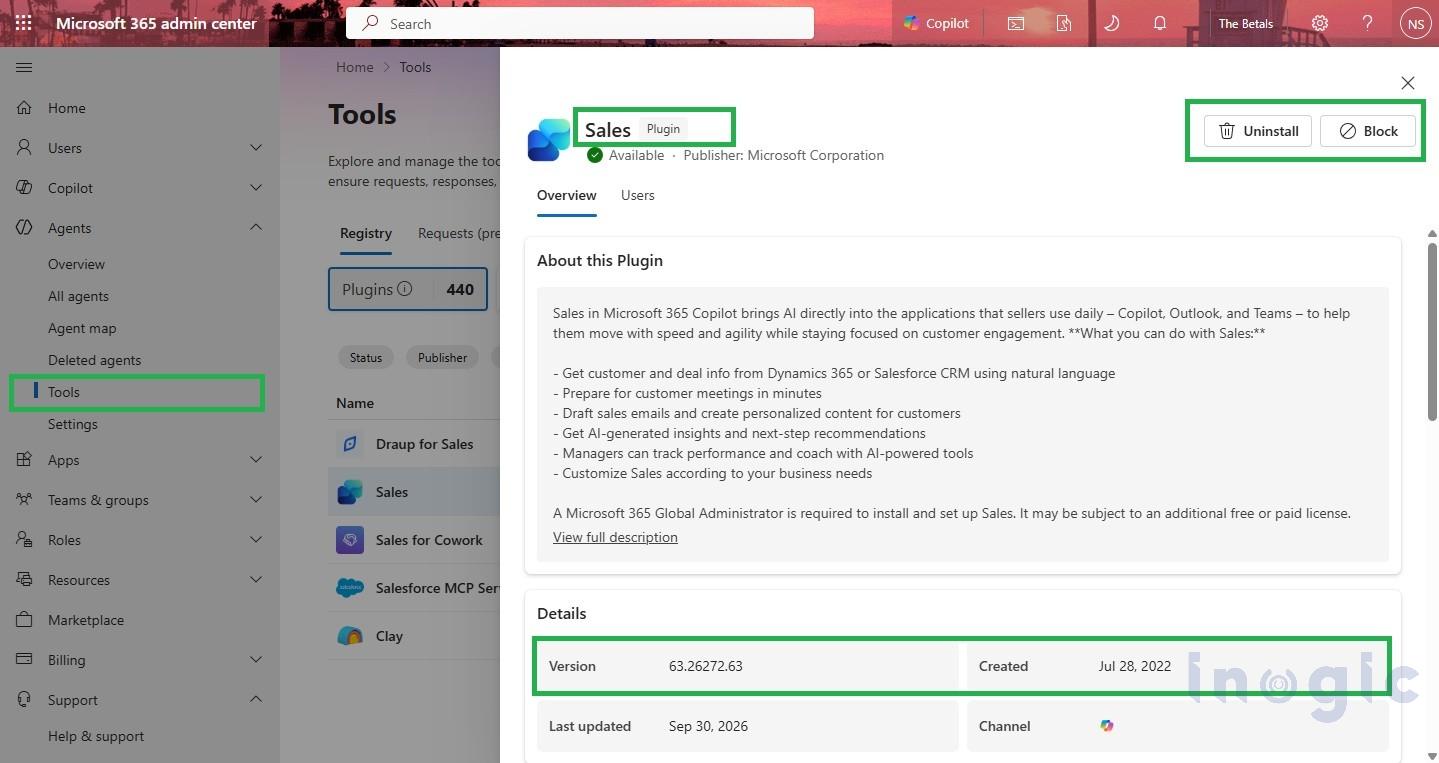
- Block: prevent the plugin package from being accessed by users and agents across the organization.
- Uninstall: remove the plugin from the environment so it is unavailable to agents until it is installed again.
Delete: remove a package uploaded to your tenant from the Registry. Delete is not available for plugins or skills that come from the Microsoft 365 Store.
To block a plugin, open Agents > Tools > Plugins, select the plugin, choose Block, and confirm. To uninstall or delete, open Agents > Tools, select the relevant item, choose the required action, and confirm.
Blocking a plugin package can also prevent access to agents included in that package.
Important: Plugin governance does not replace API security
While plugin governance controls availability and user access, the underlying API and Dataverse environment must enforce their own security.
Keep credentials secure, validate authentication tokens and API inputs, apply least-privilege Dataverse permissions, and monitor API activity without exposing sensitive information. Always review plugin packages, dependencies, and intended users before deployment.
Remember: Making a plugin available does not automatically grant access to external APIs or data. Server-side authentication and authorization remain essential.
Conclusion
Shipping a plugin is only the first milestone. Running it responsibly across an organization is the longer one, and the Microsoft 365 admin center gives administrators the controls to do that.
Using the Account Assistant as our example, we covered how to upload a package, scope it to a specific audience, change availability as needs evolve, apply publisher-level policies, and block, uninstall, or delete a plugin when required. Together, these controls let you start with a small group, expand once the plugin proves itself, and step back quickly if something needs attention.
One point is worth repeating: plugin governance controls who can use a plugin, not what the plugin can access. Your API and Dataverse environment must still enforce their own authentication, authorization, and least-privilege permissions. Admin-center controls and server-side security work best together.
The same approach applies to other supported plugins and agent tools, so you can use this workflow as a template for governing whatever your teams build next for Microsoft 365 Copilot.