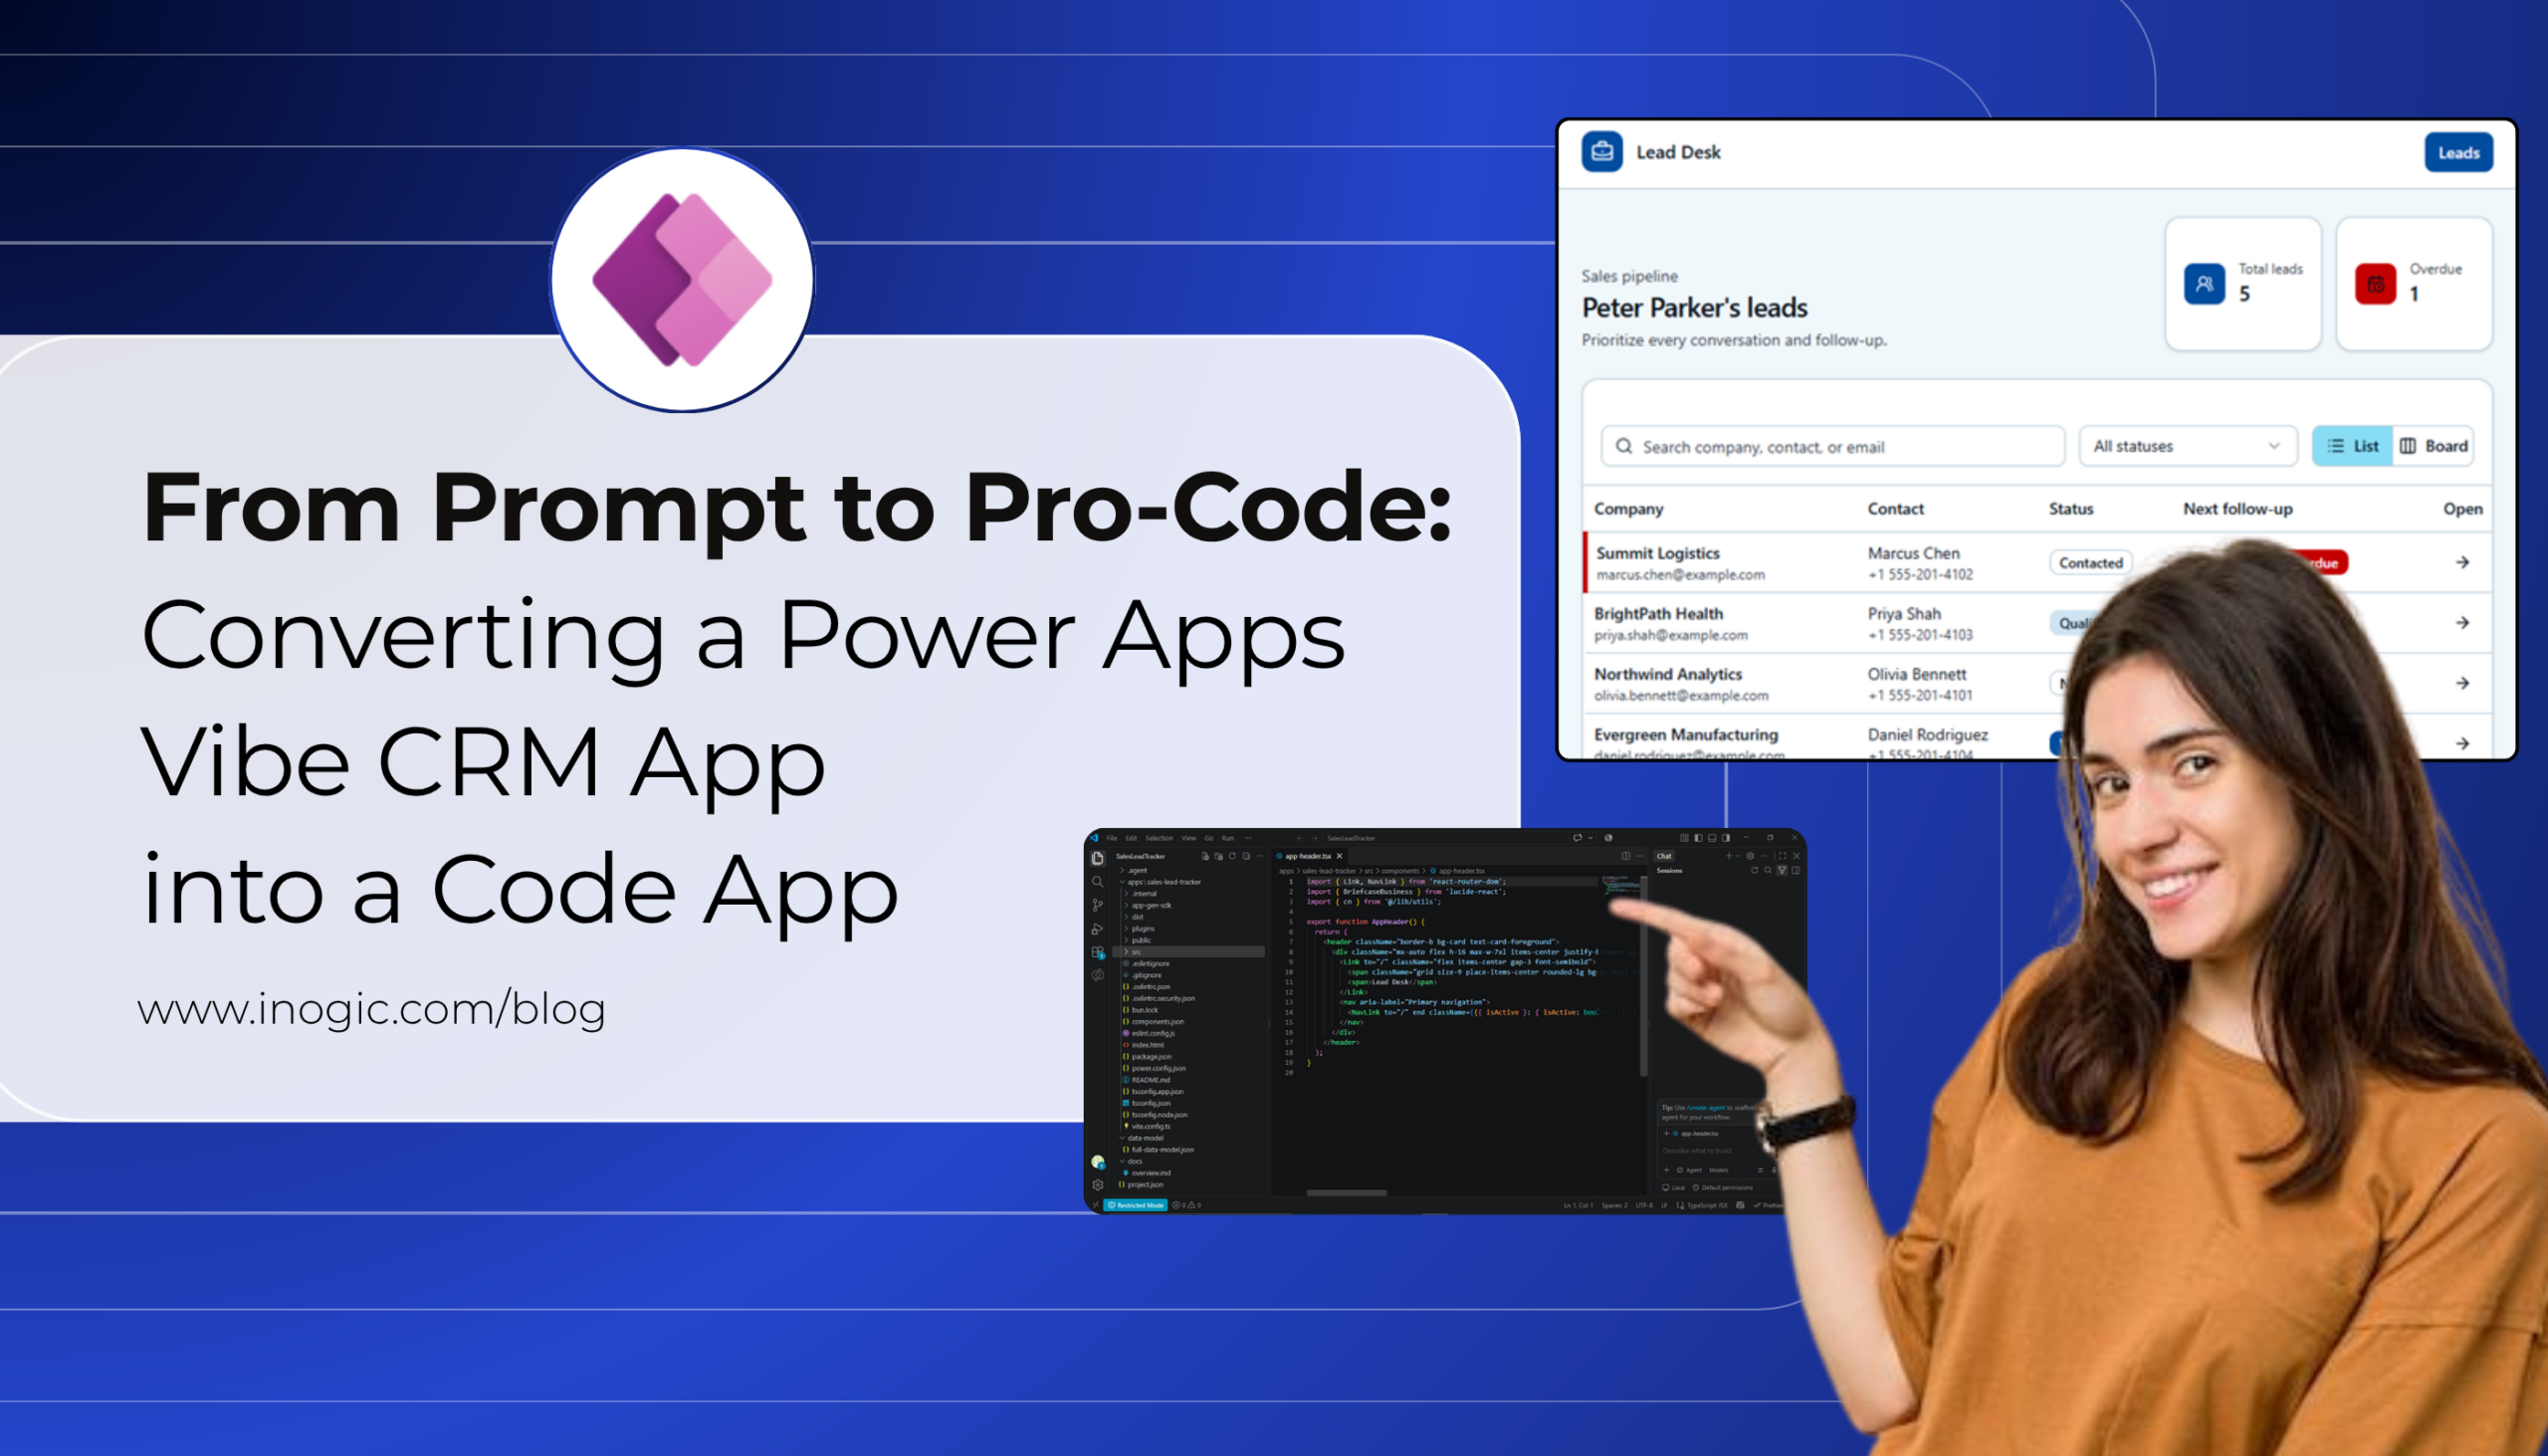
What happens when a sales team’s AI-generated lead tracker needs to graduate to a developer-owned codebase, including the CLI gotchas nobody warns you about.
Power Apps vibe lets you describe an app in plain English and generate a working application connected to Dataverse in minutes. That speed is useful for sales operations teams that need a lightweight CRM tool without starting from scratch. But once a prototype proves its value, another question often comes up: how can the team bring the app into source control, add custom logic, and manage it through a development pipeline?
Microsoft supports this next step by letting you convert a vibe app into a code app: a React and TypeScript project that you can edit in VS Code and deploy using the Power Apps CLI.
This guide walks through the process using a Sales Lead Tracker as an example. You will build the app in vibe, download its source, initialize it as a code app, and run it locally in VS Code. Along the way, you will also find practical fixes for setup issues, including differences between the commands in Microsoft’s documentation and those available in the CLI.
Note: Vibe and code apps are preview features. Commands and menus may change, so verify against the latest Microsoft Learn documentation.
The use case: Sales Lead Tracker
Scenario: A sales ops manager needs a lightweight CRM companion app to track leads and follow-ups. Later, the engineering team wants to harden it (custom validation, lead scoring, CI/CD).
Stage 1, citizen developer: build the app with natural-language prompts in vibe.
Stage 2, pro developer: convert it to a code app, take it into VS Code, and extend it.
The app tracks leads with company, contact, email, phone, status (New, Contacted, Qualified, Won, Lost) and next follow-up date. It highlights overdue follow-ups.
Prerequisites
- A Power Platform environment with code apps enabled and Dataverse available
- A vibe app you have edit access to
- js 22 LTS (the project’s Vite requires Node 20.19+ or 22.12+)
- VS Code
- The Power Apps CLI (installation notes below, including a Windows gotcha)
Part 1: Build the lead tracker in vibe
Everything in this part happens in the browser at vibe.powerapps.com, with no code.
Step 1: Select your environment and describe the app
Open vibe.powerapps.com and use the environment switcher on the left to pick an environment that has Dataverse and where you have the Admin role. I used a trial environment named Sales Trial – Package. Trial environments are time-limited, so use a sandbox or production environment for anything you plan to keep. Then enter a prompt on the home screen and keep the Plan option on, so vibe proposes a plan before it builds anything:
Create a sales lead tracker app. Each lead has company name, contact name, email, phone, lead status (New, Contacted, Qualified, Won, Lost) and next follow-up date. Show a list view with search and status filter, highlight overdue follow-ups, and a detail screen to update notes.
Step 2: Review the plan
Vibe returns a written plan with the goal, the users and the pages, such as a lead list with search and status filters. Read it, then choose Accept this plan and create app (recommended) or Keep editing and refine the plan, and select Submit.
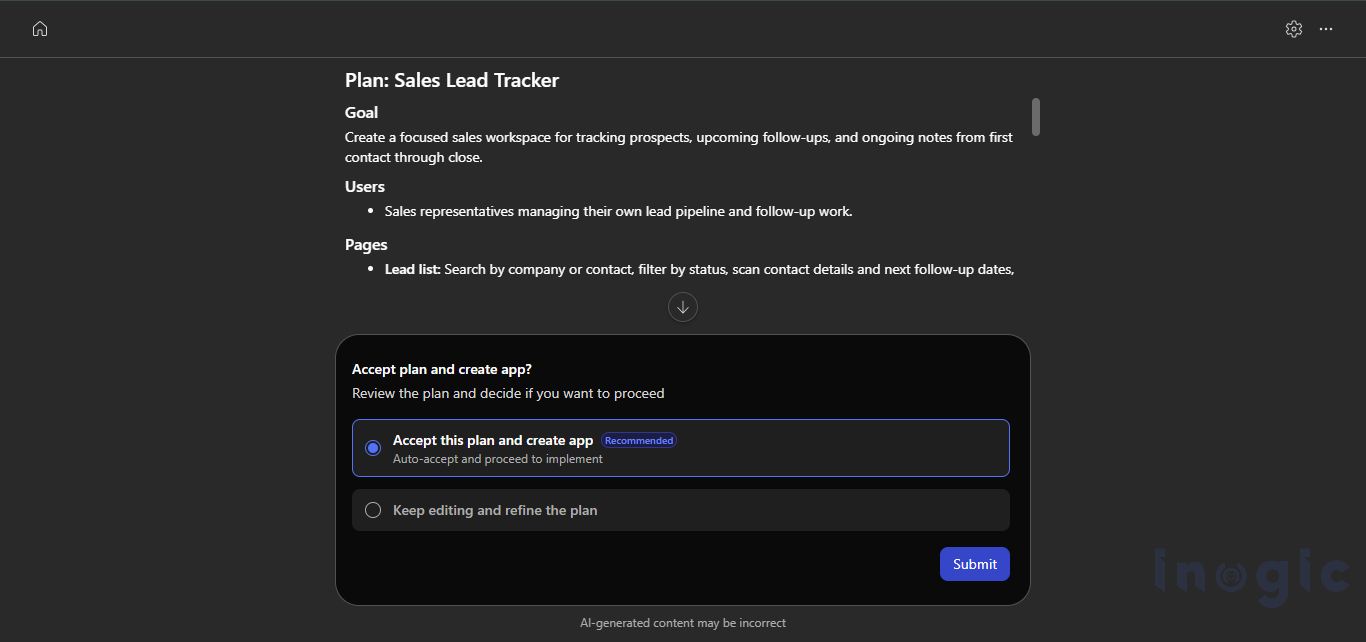
Figure 1: The generated plan and the accept-or-edit choice.
Step 3: Review the app and refine it with prompts
When the build finishes, check the Plan, Data (the Dataverse tables) and App tabs. Then use follow-up prompts or the suggestion chips under the chat box. I entered Add pipeline summary charts, and vibe added lead counts by stage and an active-versus-closed donut, then re-validated the app. Other suggestions it offered were Add new lead creation and Add follow-up reminders.
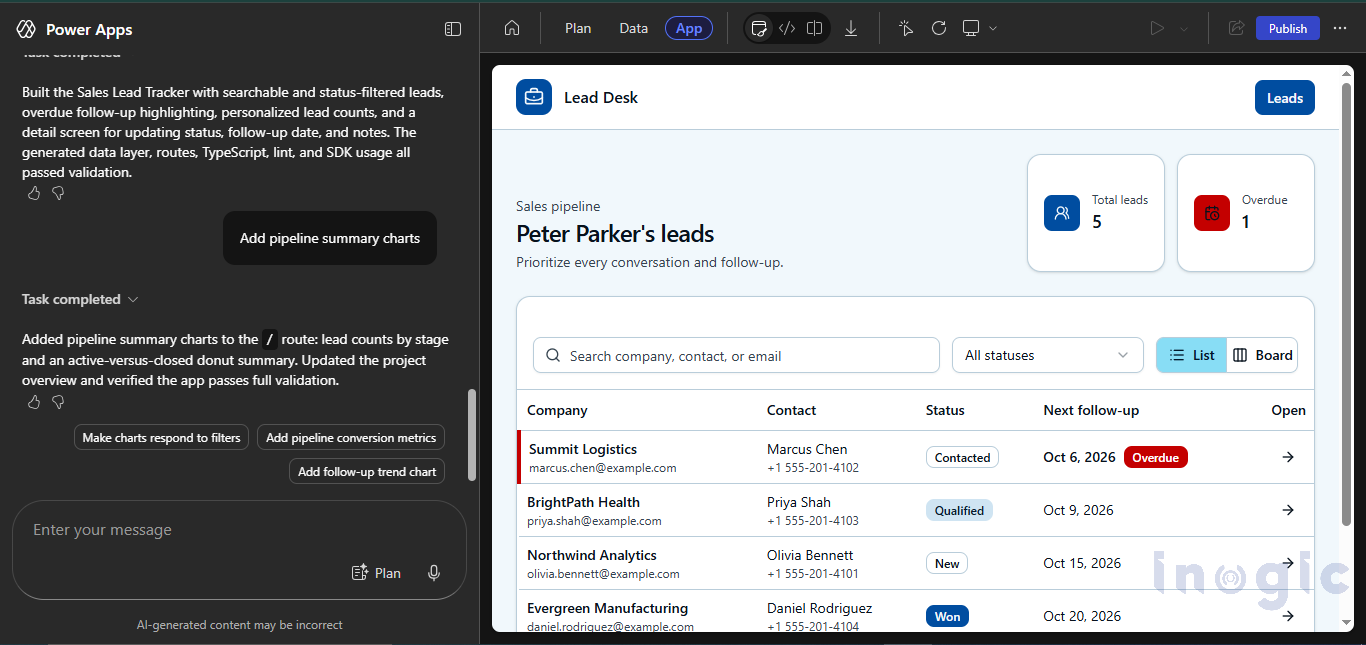
Figure 2: The generated Lead Desk app after the follow-up prompt, with 5 sample leads and 1 overdue follow-up.
Step 4: Publish the app
Select Publish. Vibe prepares, builds and deploys the app. When it finishes, you get an App URL with Share and Play buttons.
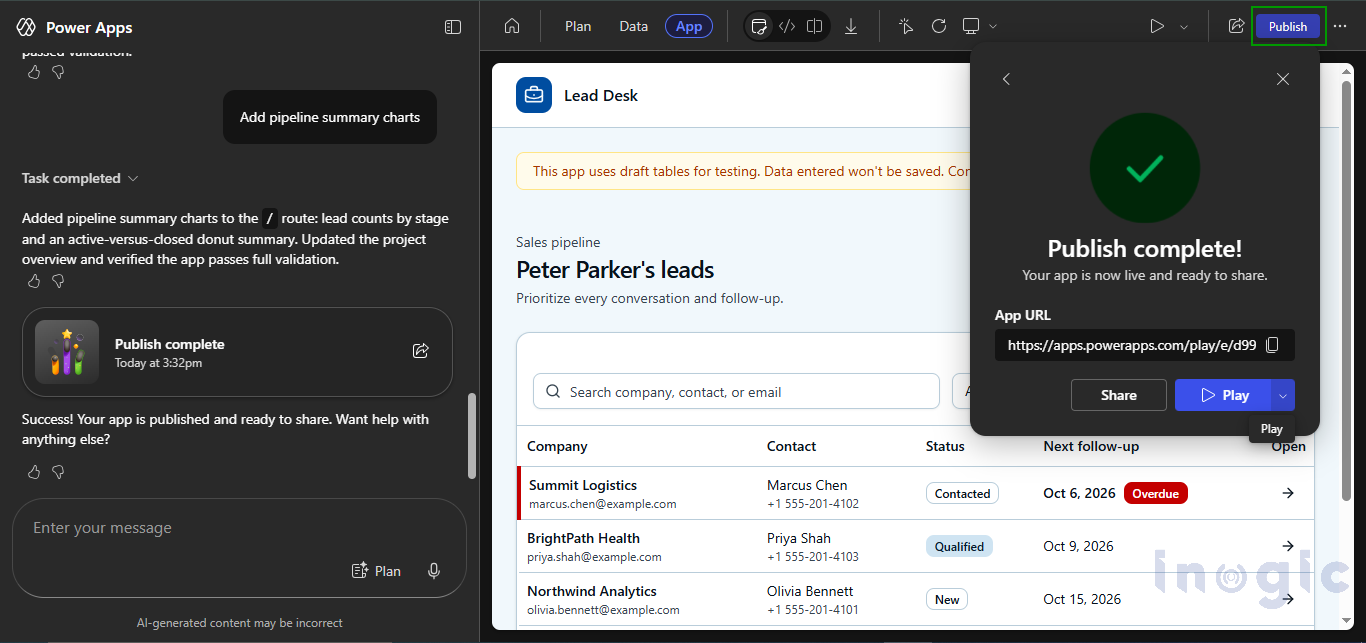
Figure 3: Publish complete, with the app URL and the Share and Play buttons.
Draft tables: after publishing, the editor in my environment still showed the banner “This app uses draft tables for testing. Data entered won’t be saved.” Before you rely on saved data, open the Data tab and follow the banner’s guidance on enabling storage.
Part 2: Download the source
Download source is the download arrow in the editor’s top toolbar. It sits to the right of the three view icons (preview, code, split) and to the left of the pointer and refresh icons. Hovering over it shows the Download source tooltip. The ⋯ menu next to Publish only offers Settings and Give feedback, so you will not find it there.
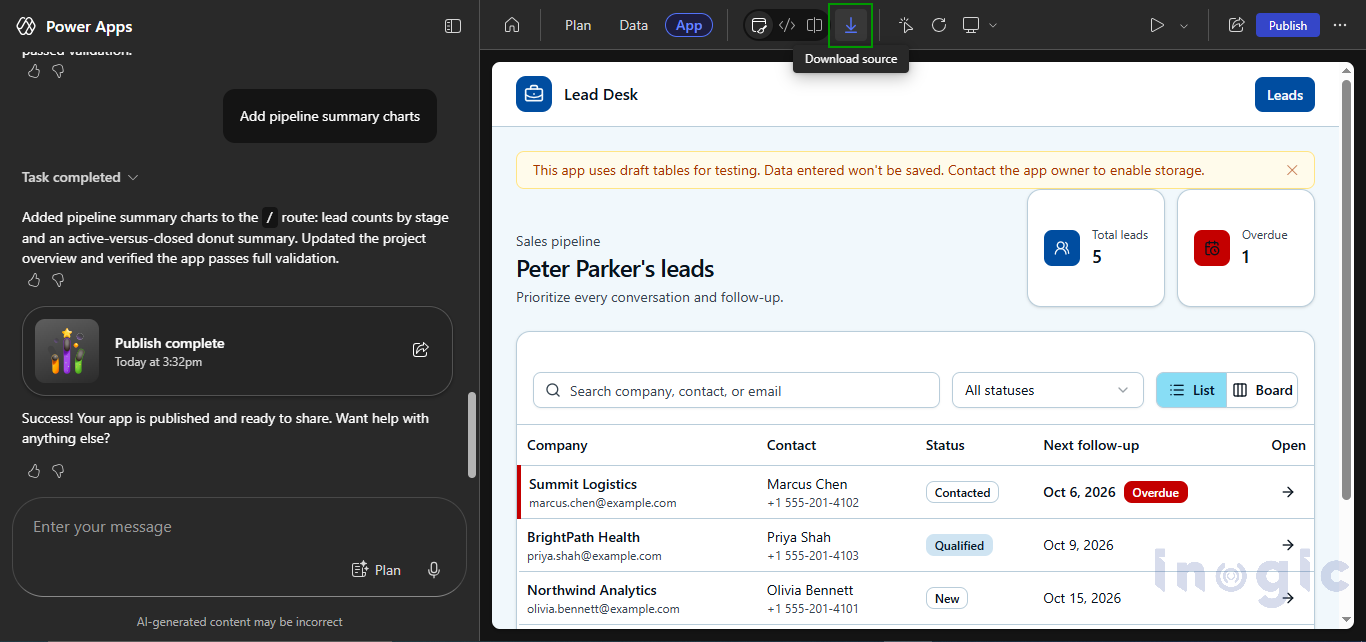
Figure 4: The Download source icon in the top toolbar.
- In the vibe editor, stay on the App tab and select the Download source
- Your browser downloads a compressed file. Extract it to a working folder, for example
SalesLeadTracker. - In VS Code, choose File > Open Folder and open the extracted folder.
- Expand apps\sales-lead-tracker. This is the folder you work in from here on.
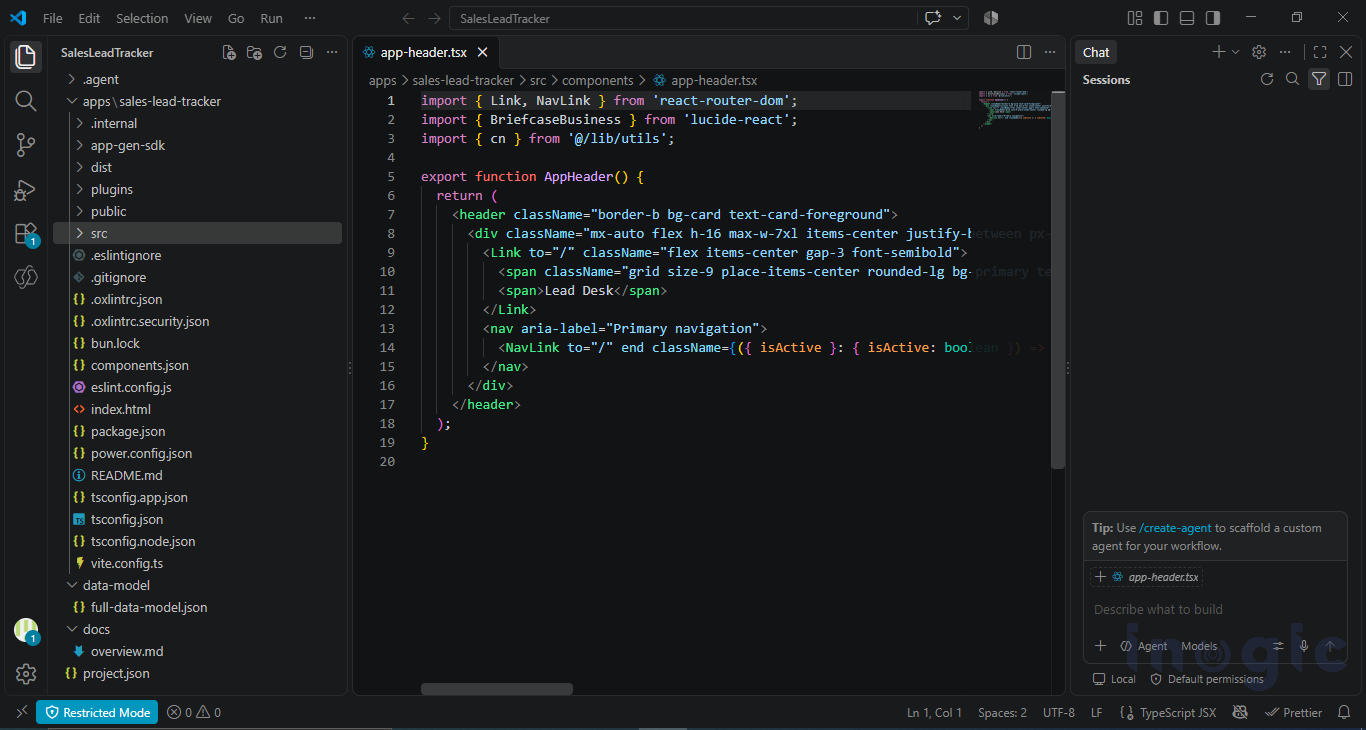
Figure 5: The extracted project open in VS Code.
Here is what the main files and folders are:
| Path | What it is |
| apps\sales-lead-tracker\src | React and TypeScript source, for example components\app-header.tsx |
| apps\sales-lead-tracker\power.config.json | Power Apps settings for the app, including data connections |
| apps\sales-lead-tracker\package.json | npm dependencies and scripts, such as the build script |
| data-model\full-data-model.json | The data model vibe generated for the Dataverse tables |
| docs\overview.md | The project overview that vibe updates as you prompt |
Before you move on: copy power.config.json somewhere safe. Part 4 explains why.
Part 3: Install the Power Apps CLI
Microsoft’s article calls the CLI command pa and uses commands like pa app init. On my machine the CLI installed as power-apps, and its commands have no app prefix, so pa app init became power-apps init. Each step below shows the article’s command first, then the one that worked for me.
- Install js (LTS) and VS Code if you don’t have them.
- Install the CLI and the Power Apps package:
npm install –global @microsoft/power-apps-cli
npm install –global @microsoft/power-apps
- Check the install:
pa –version
# if not recognized:
power-apps –version
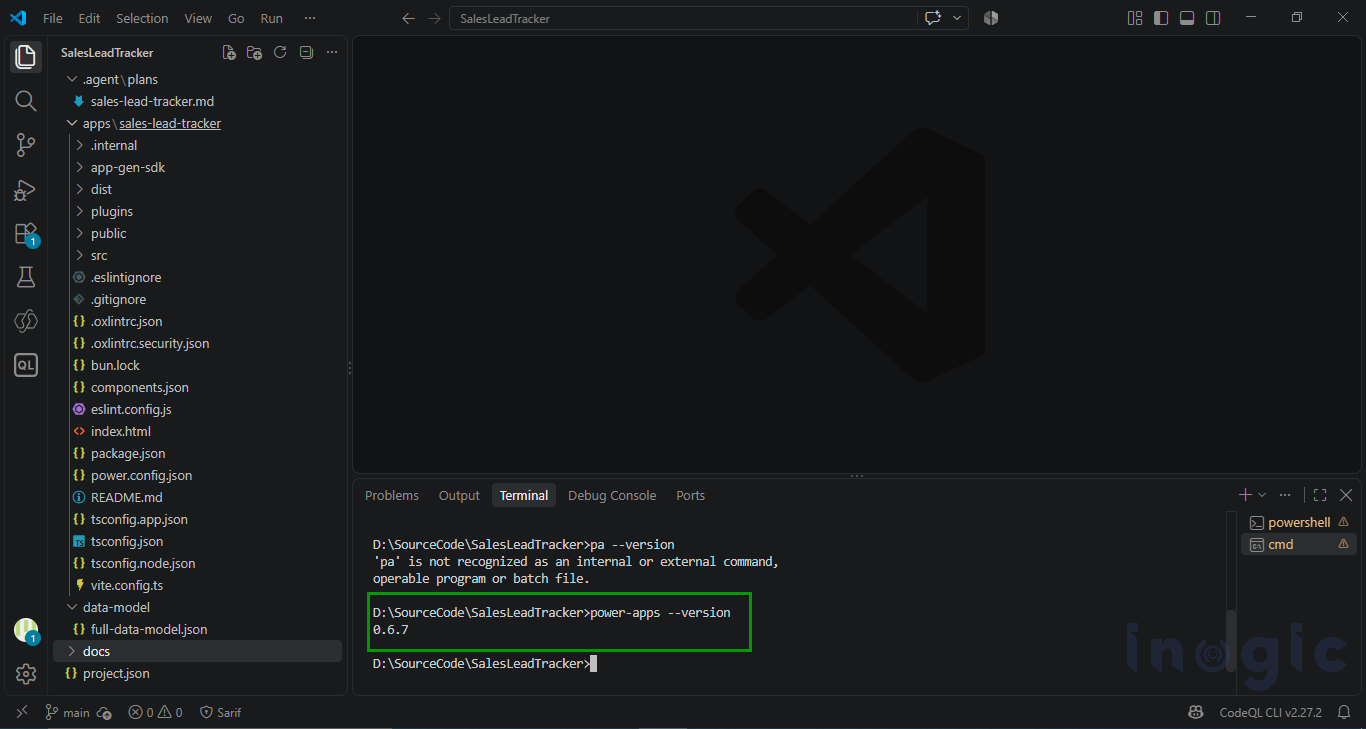
Figure 6: pa is not recognized, but power-apps –version returns the CLI version.
If it fails
- The install ends with ETIMEDOUT and “Could not find any Python installation”: a dependency (keytar) could not download its prebuilt file and tried to build from source. Install Python 3.11 or 3.12 (tick Add python.exe to PATH) and Visual Studio Build Tools with the Desktop development with C++ Then reinstall from source:
npm uninstall –global @microsoft/power-apps-cli
npm install –global @microsoft/power-apps-cli –build-from-source
- pa is not recognized: use power-apps instead, and open a new terminal after installing so the PATH refreshes.
Part 4: Prepare and initialize the code app
- In VS Code, open the app folder (apps\<your app name>).
- Open config.json. If it contains connectionReferences or databaseReferences, copy those properties and everything after them, and keep the copy. You can also copy the description value if you want to keep it. Then delete the file, because init creates a new one.
- Run these commands in the folder that contains json and power.config.json. Running them from the outer SalesLeadTracker folder won’t work. Open a terminal there and install the dependencies:
npm install –save-dev “oxlint-tsgolint@^7.0.2001” –allow-remote=all
- Initialize the code app:
pa app init
# newer CLI builds:
power-apps init
- Enter the environment ID and a display name when prompted. I used Sales Lead Tracker. Pick the environment that contains your Dataverse tables.
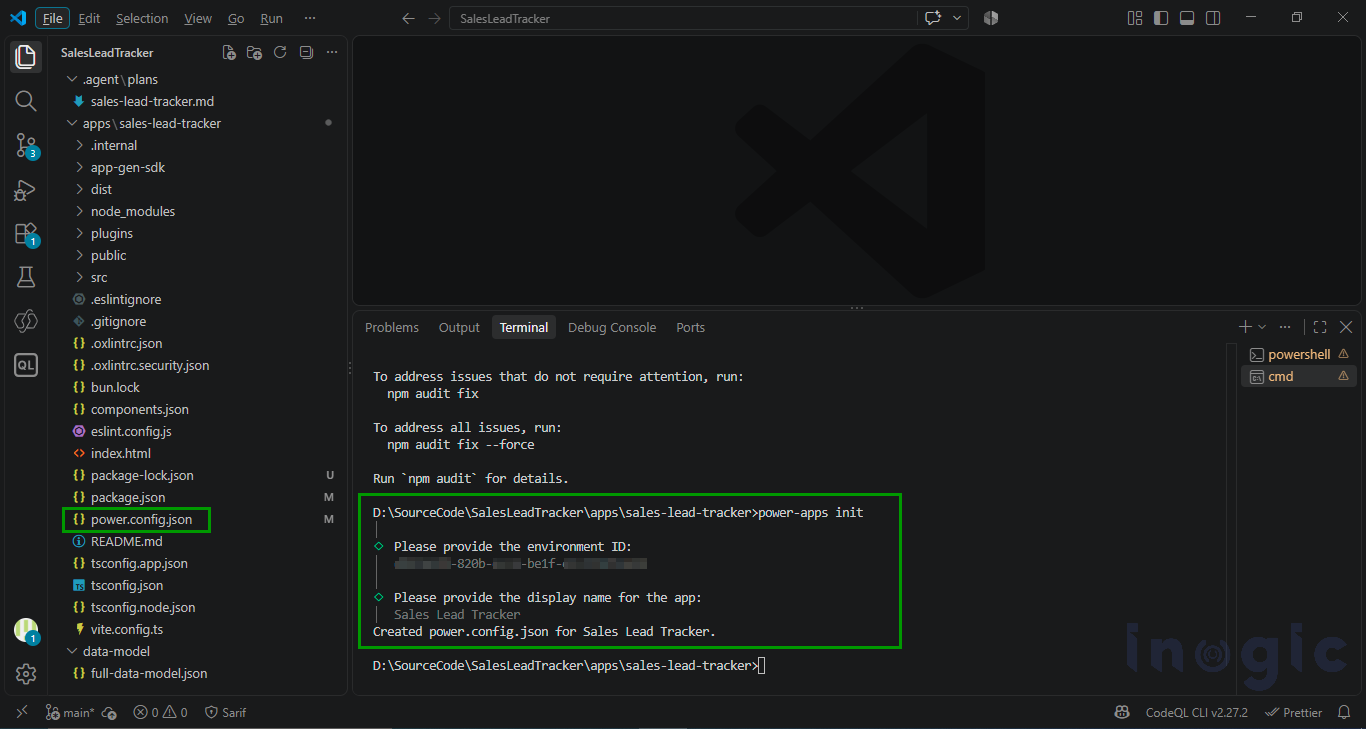
Figure 7: The init prompts and the new power.config.json.
If it fails
- “Environment ‘<id>’ not found”: copy the environment ID from the Power Platform admin center or the maker portal URL, and check that you are signed in with an account that has access to that environment.
Part 5: Update the configuration and run locally
- Start the app’s dev server in the app folder and note the Local URL it prints. Mine was http://localhost:5173/. Leave this terminal open:
npm run dev
- Open the new config.json that init created and set localAppUrl to the URL from step 1. Init sets it to port 3000, so Local Play fails if the dev server uses a different port. You can also paste in the description you saved in Part 4:
“localAppUrl”: “http://localhost:5173”,
“description”: “A focused sales workspace for managing leads, follow-up dates, statuses, and notes.”
If you saved any connectionReferences or databaseReferences with values in Part 4, paste them in and make sure the file is still valid JSON. If both were empty ({}), there is nothing to restore.
- In a second terminal, run the app:
pa app run
# newer CLI builds:
power-apps run
- Open the Local Play URL in the same browser profile you use for your Power Platform tenant.
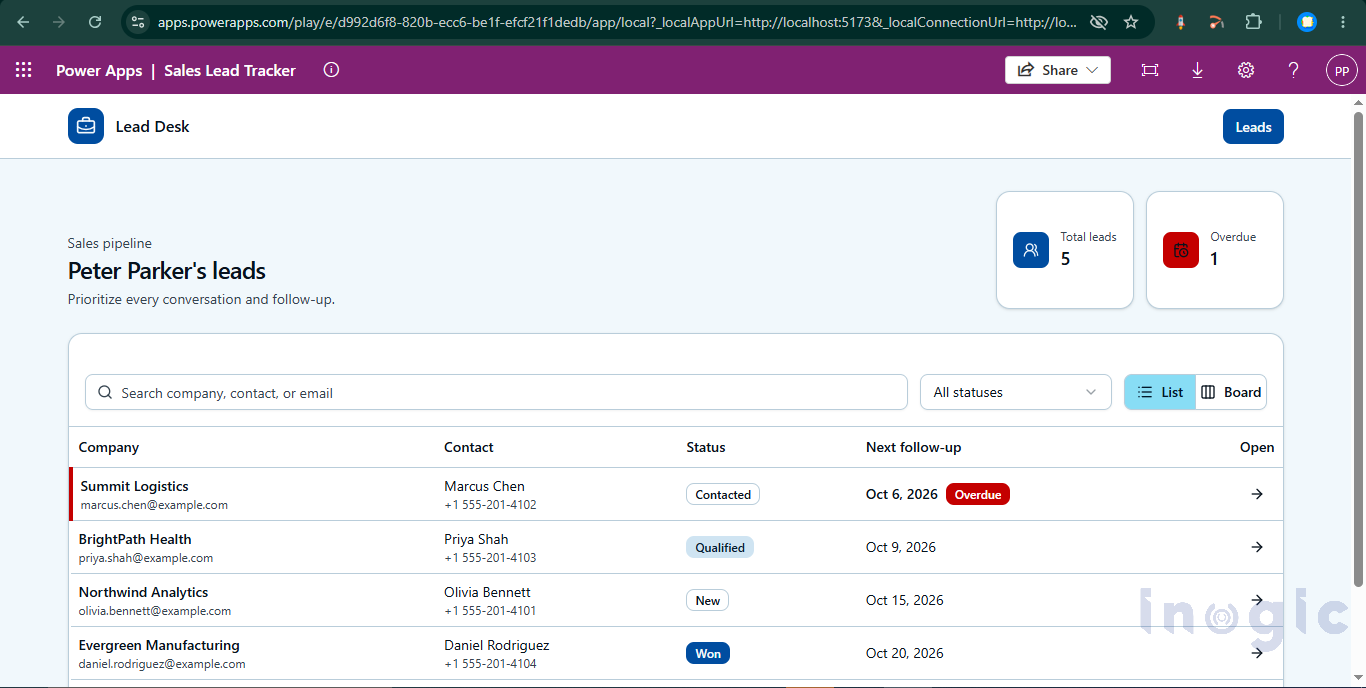
Figure 8: The code app running locally through Local Play.
If it fails
- npm run dev shows “Vite requires Node.js version 20.19+ or 22.12+” and then fails with “Cannot find native binding”: your Node.js version is too old for this project. Run node -v to check it. Upgrade to the current LTS version of Node.js, open a new terminal, and run npm run dev
- “localhost refused to connect” in Local Play: the dev server is not running, or localAppUrl uses a different port than the one npm run dev Fix the port, then restart power-apps run.
Part 6: Build and publish
- Build the app:
npm run build
- Publish it:
pa app push
# newer CLI builds:
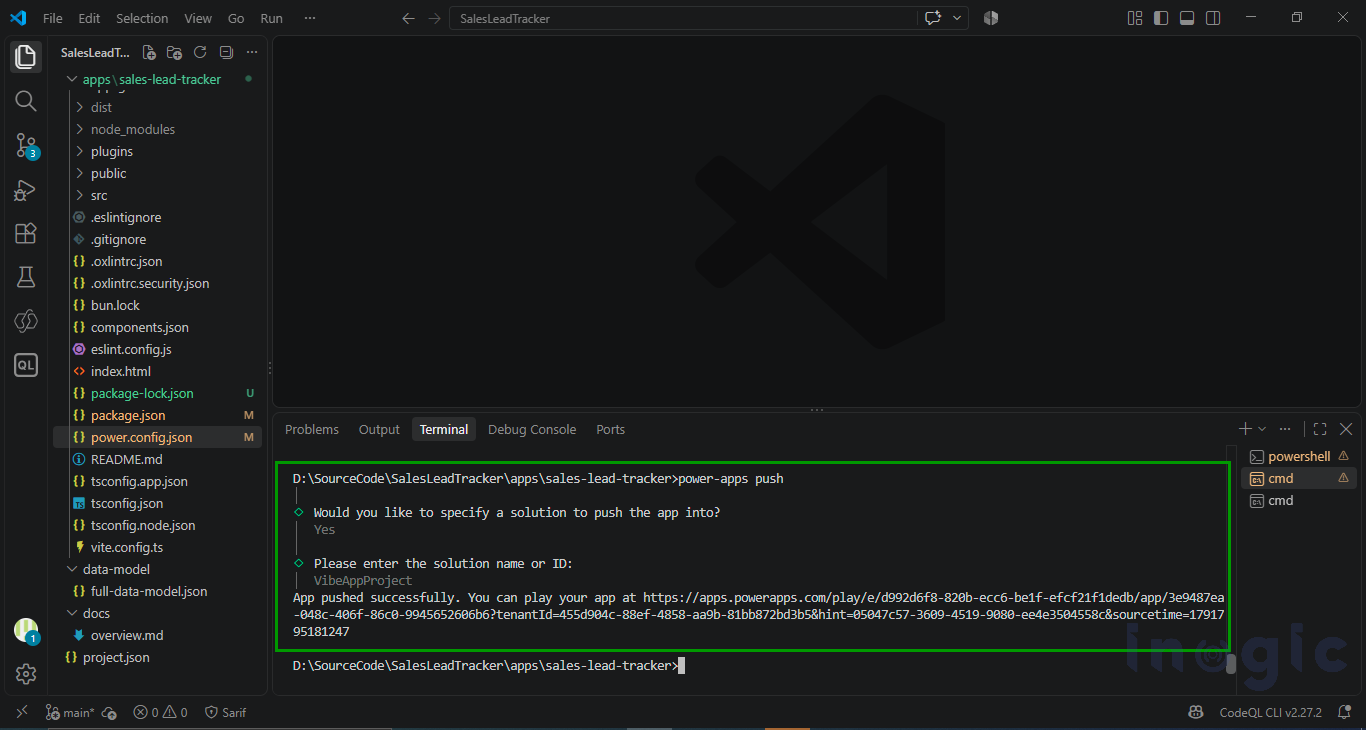
power-apps push
When the command finishes, it returns a Power Apps URL where you can run the code app.
Part 7: What to do next
Now that the app is a normal codebase, a dev team can:
- Add a lead-scoring function in TypeScript
- Enforce validation rules, for example no past follow-up date on new leads
- Add unit tests and linting to a pull-request pipeline
- Keep the project in Git for review and history
When should you convert?
Convert when: the prototype proved its value, you need source control, custom logic, testing or CI/CD, or a dev team will own it long term.
Stay in vibe when: it is a quick departmental tool and natural-language edits are enough.
Remember that conversion is a fork. Later changes made by prompting in vibe will not flow into the code app.
Conclusion
Power Apps vibe makes it easier to turn ideas into working CRM apps, while converting a vibe app into a code app gives developers greater control over customization, testing, source control, and deployment. Although the conversion process still has a few challenges while these features remain in preview, understanding the setup requirements and common CLI issues can help teams make the transition more smoothly.
Looking to extend Dynamics 365 CRM or Power Apps to meet your business needs? Email crm@inogic.com to discuss your requirements with our team and explore how Inogic can help.