I recently came across a unique client need that they wanted to streamline the process of creating new email records in Dynamics 365 by having certain fields pre-populated based on existing emails. The client’s goal was to generate a nearly similar email record with an existing email, modifying only a few specific field details. After assessing the requirement, it became clear that manually copying information from one email to another was not an efficient solution.
In my search for a better method, I delved into the possibilities of field mapping. However, field mapping serves primarily to transfer data between related entities, facilitating the mapping of fields from parent records to their child entities. This approach falls short in scenarios where the task is to duplicate records within the same entity, such as emails in our case.
Xrm.Navigation.openForm method was also utilized to access CRM records, which would then be displayed in either a new tab or the same window of the browser, but with the help of Xrm.Navigation.NavigateTo, we have the capability to open CRM records as a dialog within our existing custom web resource or CRM form. This allows us to interact with additional CRM records without needing to navigate away from our current form or web resource.
This method facilitates the opening of a new record form within Dynamics 365 as a dialog, already filled with the fields from an existing record.
Below is the approach to fulfilling the client’s requirement to open a new email form within a dialog already filled with the fields from an existing email :
You need to create a button using the command bar editor.
For more information about the command bar editor, you can follow this link. Command Designer allows you to personalize the command bar.
1. Create a new command button
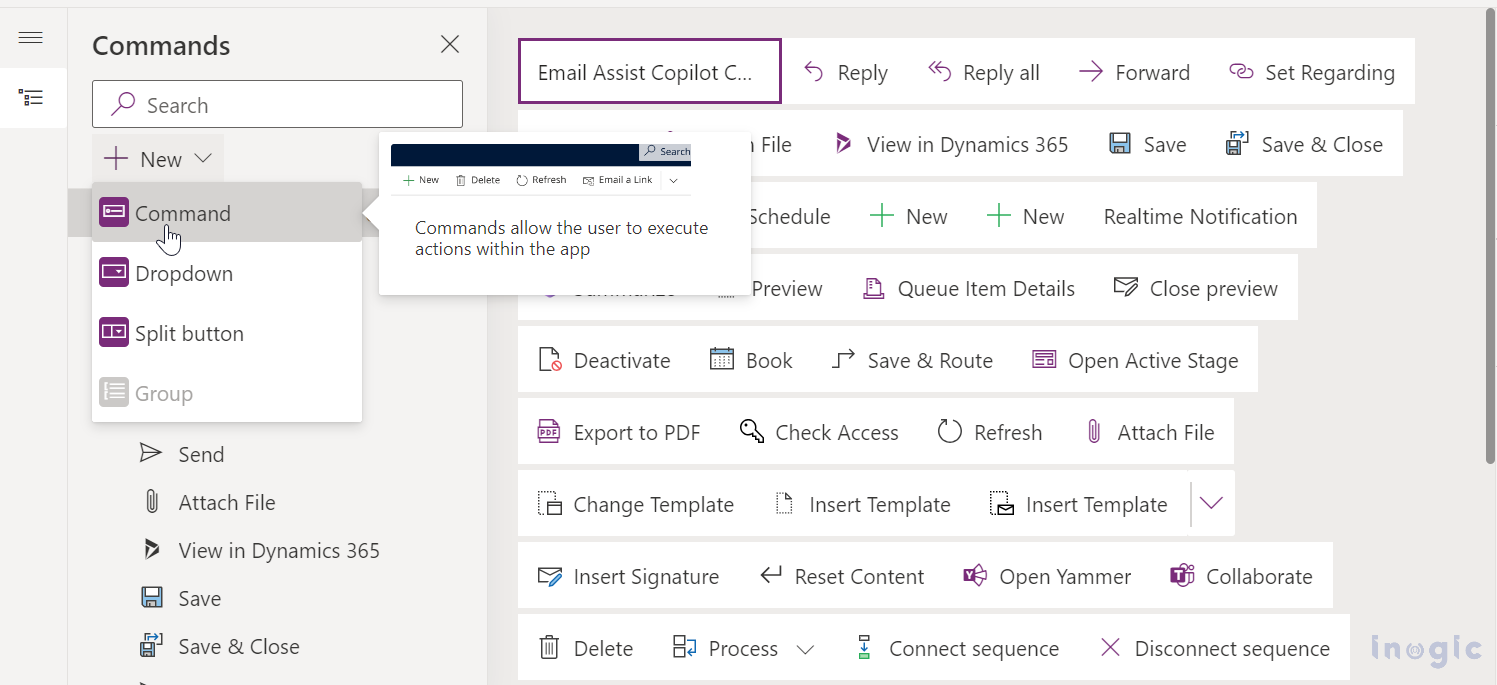
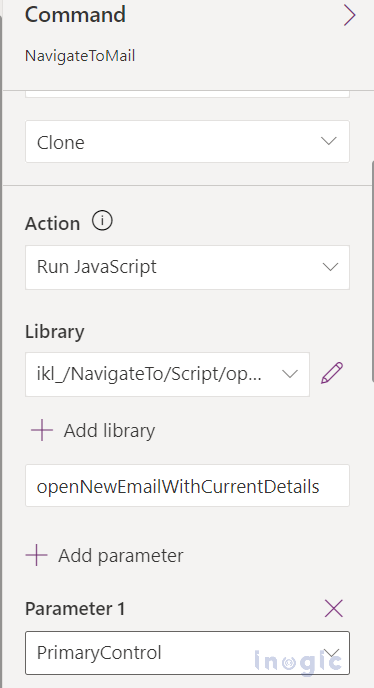
2. Set the properties of the newly created button –
Note: Make sure to set “PrimaryControl” as your first parameter, as it expects the primary control context to be passed to it.
3. Creating the JavaScript file:
Below is the fetchXML query to retrieve data of current email.
function openNewEmailWithCurrentDetails(primaryControl) {
let fetchXml = `
<fetch version="1.0" output-format="xml-platform" mapping="logical" distinct="false">
<entity name="email">
<attribute name="actualend" />
<attribute name="actualstart" />
<attribute name="description" />
<attribute name="prioritycode" />
<attribute name="sender" />
<attribute name="statecode" />
<attribute name="subject" />
<attribute name="torecipients" />
<attribute name="actualdurationminutes" />
<attribute name="scheduledend" />
<attribute name="statuscode" />
<attribute name="activityid" />
<link-entity name="activityparty" to="activityid" from="activityid" alias="from">
<filter type="and">
<condition value="1" attribute="participationtypemask" operator="eq" /> <!-- CC activity parties -->
</filter>
<attribute name="partyid"/>
<attribute name='participationtypemask'/>
</link-entity>
<link-entity name="activityparty" to="activityid" from="activityid" alias="to">
<filter type="and">
<condition value="2" attribute="participationtypemask" operator="eq" /> <!-- to activity parties -->
</filter>
<attribute name="partyid"/>
<attribute name='participationtypemask'/>
</link-entity>
<filter type="and">
<condition attribute="activityid" operator="eq" value="${emailId}" />
</filter>
</entity>
</fetch>`;
I utilized the Xrm.WebApi.retrieveMultipleRecords method to collect data for specified attributes from the current email, as detailed in the FetchXML query. Subsequently, I populated this data into the parameters and sender objects.
Xrm.Navigation.navigateTo method takes two key parameters:
- Page Input Object
- Navigation options object
In page input object, we need to define the type of page to navigate to (in this case, a new email form) and include data to pre-populate the form.
let pageInput = {
pageType: "entityrecord",
entityName: "email", //Replace "email" with your target entity logical name
data: parameters,
formId: formId, // Replace with your desired form ID or remove the parameter if there is only one form
createFromEntity: sender // This will populate the lookup to the current record e.g. regardingobjectid and other mapping fields
}
};
After that, we need to define target, width, and height in the navigation options object, which specifies how the page is displayed, such as opening the form in a dialog over the current page.
let navigationOptions = {
target: 2, // Open the page in a dialog
width: {value: 80, unit:"%"}, // Dialog width
height: {value: 80, unit:"%"} // Dialog height
};
After that, we need to pass pageInput, navigationOptions in navigateTo method.
Xrm.Navigation.navigateTo(pageInput, navigationOptions).then(
function success() {
console.log("New email form opened successfully.");
},
function error() {
console.log("Error opening new email form.");
}
);
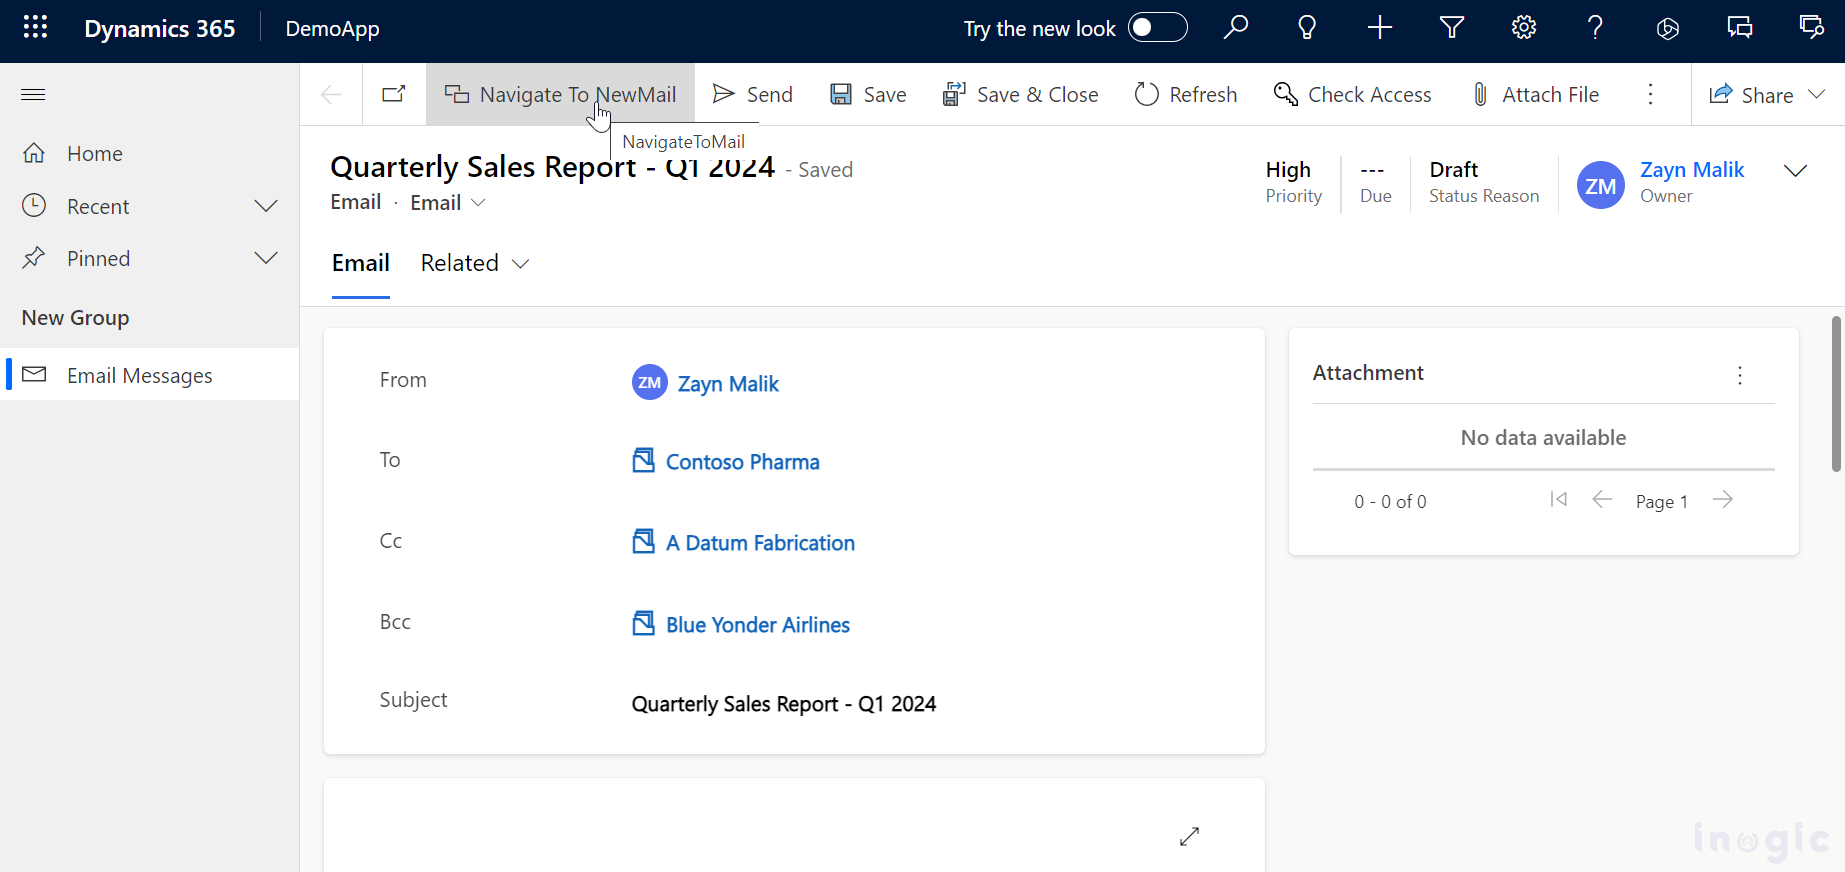
The current email record, along with a custom command button labeled “Navigate To New Mail“, as depicted in the following image.
Upon clicking “Navigate To NewMail“, a dialog will emerge, showcasing pre-populated fields derived from the current email, as illustrated in the image below:

Conclusion:
In summary, the process described showcases how to initiate new records with fields pre-filled from an existing record. This technique proves invaluable when the task at hand involves creating a new record with almost identical details to a prior one, requiring only minor adjustments. It significantly reduces the need for manual data entry.