Introduction
The Enhanced Case Experience in Dynamics 365 Customer Service Workspace is designed to help agents interact more efficiently with customers and manage cases more effectively.
This enhanced experience is available only within the Customer Service Workspace app and introduces modernized case forms along with powerful new controls that improve visibility, reduce clutter, and streamline agent workflows.
In this blog, we’ll explore how to enable the Enhanced Case Experience and take a closer look at the key features available in the enhanced case forms.
How to Enable Enhanced Case Experience
Follow the steps below to enable the enhanced experience for both the Main Case Form and the Quick Create Case Form.
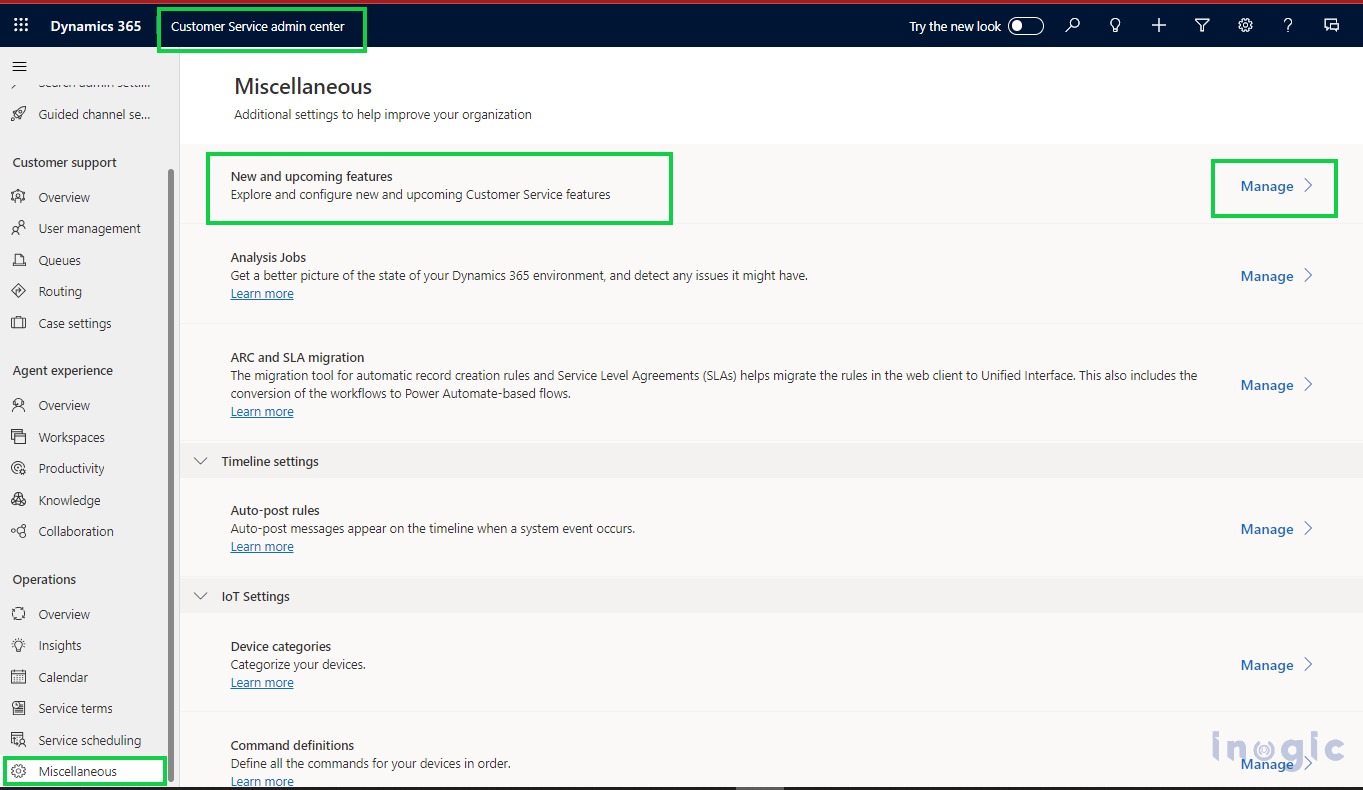
Step 1: Enable the Feature from Customer Service Admin Center
- Open the Customer Service Admin Center app
- Navigate to Operations > Miscellaneous
- Click Manage under New and Upcoming Features
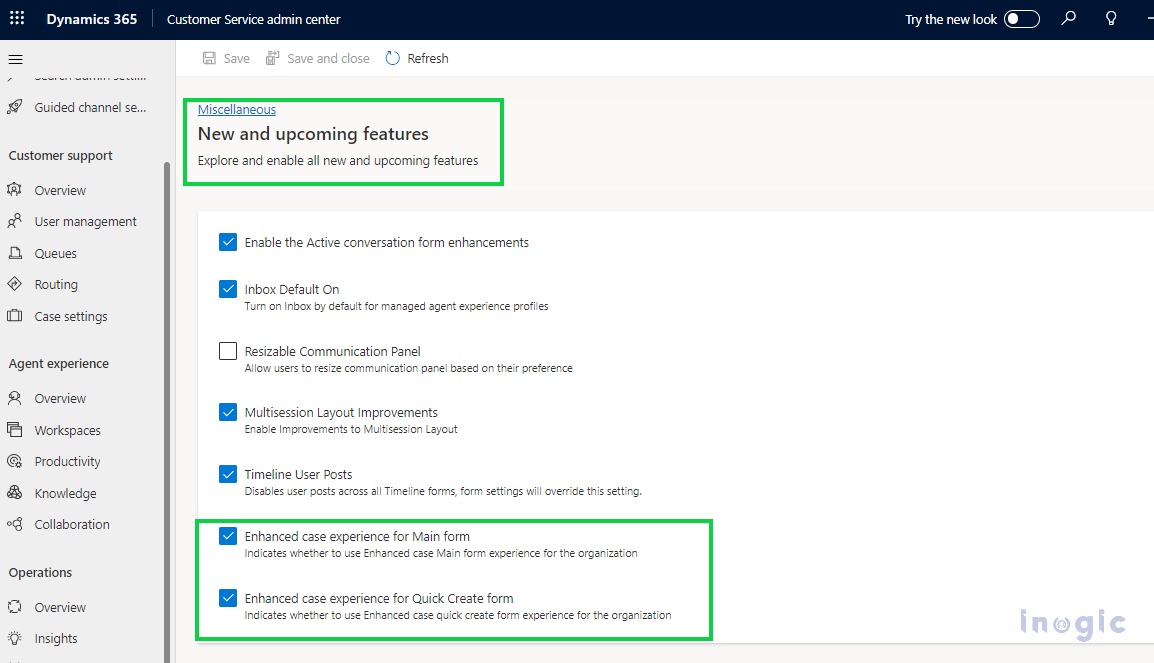
Step 2: Enable Enhanced Case Forms
- Enable the following options:
- Enhanced case experience for Main Form
- Enhanced case experience for Quick Create Form
- Click Save
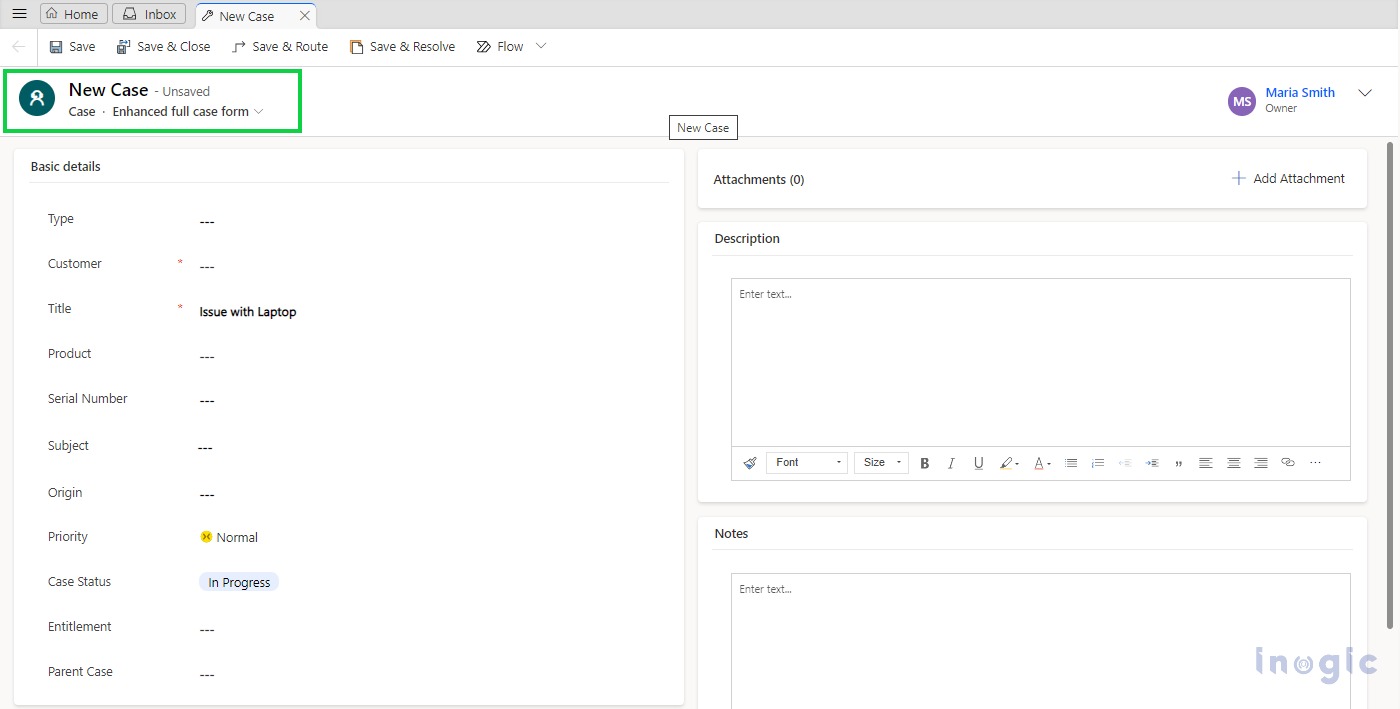
Step 3: Access the Enhanced Case Forms
Once enabled:
- When creating a new case, agents will see the Enhanced Full Case Form or Enhanced Quick Create Form
- To view the enhanced form for existing case records, you must:
- Set the enhanced form as the default, or
- Move the enhanced form to the top of the form order
But if you want to see the Enhanced form for the existing case record, then you have to set the enhanced form as the default form or set the form order of the enhanced form on top of the other forms.
Note: If the enhanced full case form has a higher form order than the default case form, agents might see the enhanced full case form even if you haven’t enabled the enhanced case experience. To enable agents to view the default case experience, adjust the form order of the enhanced form so that it is lower than the default form’s order..
Let’s see what’s in the new enhanced form as of default case form!
What’s New in the Enhanced Case Form?
Let’s explore the key enhancements and new controls available in the enhanced case experience.
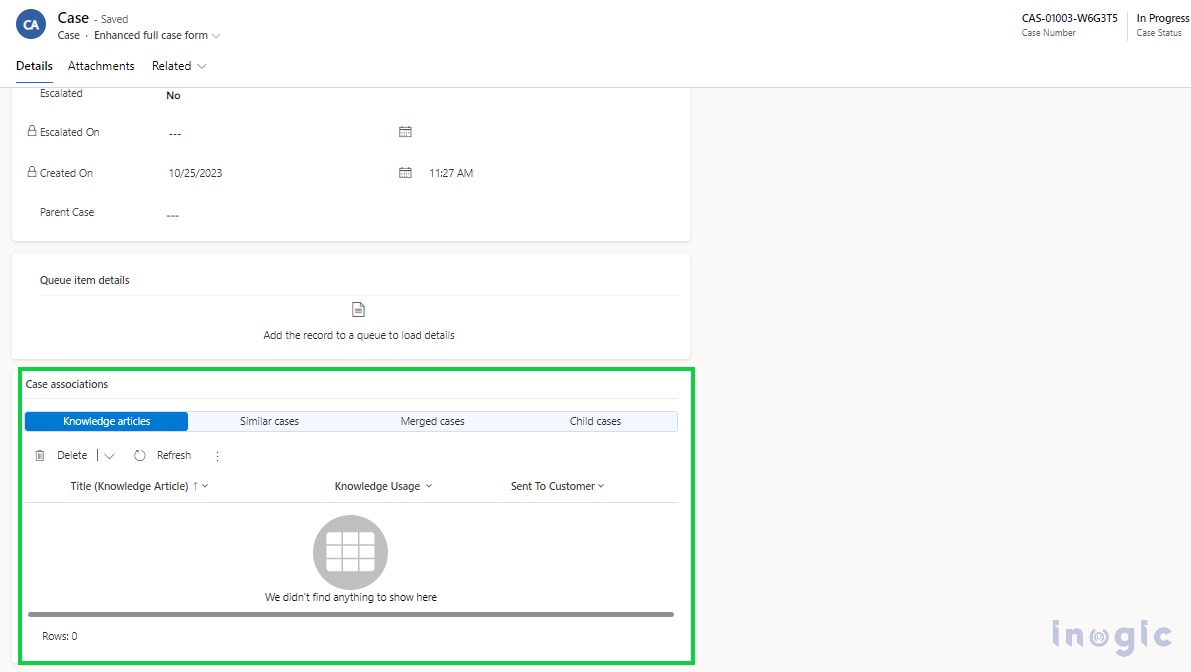
- Associated Grid Control
Previously, viewing related records required multiple subgrids, which consumed significant form space.
With the Associated Grid Control, you can:
- Display related records in a single, consolidated subgrid
- Configure up to 4 related subgrids
- Reduce form clutter significantly
This control is available for all tables, making form design simpler and more efficient.
For more details about how this control works, refer to this blog.
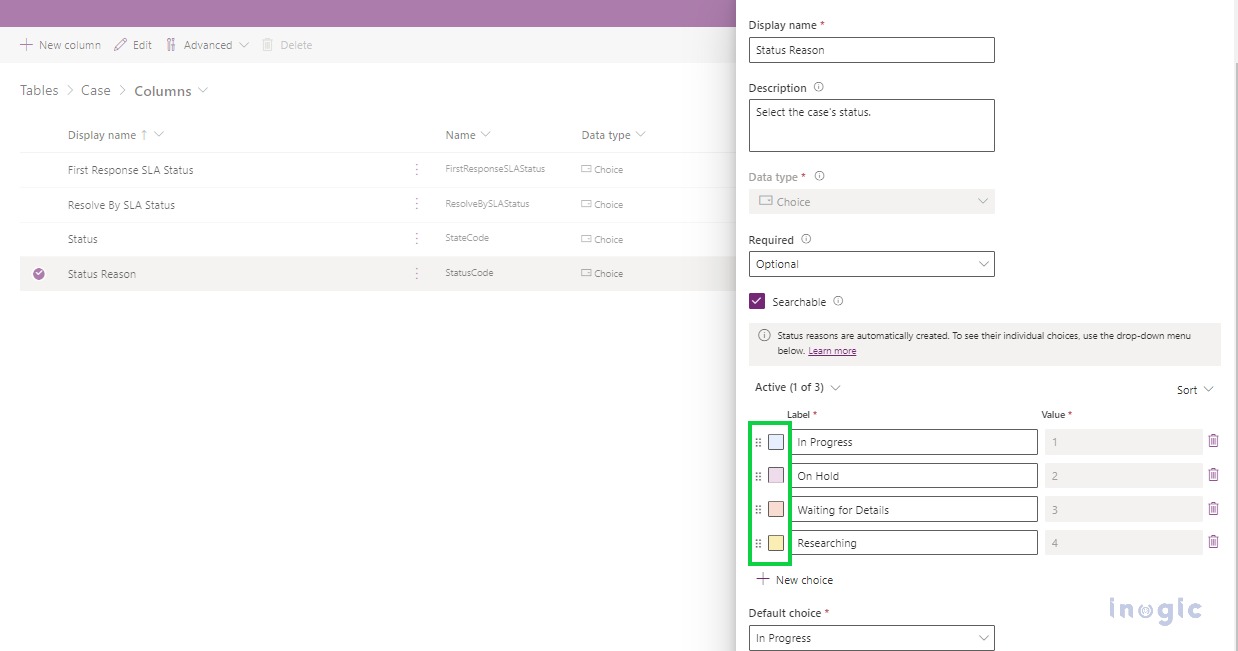
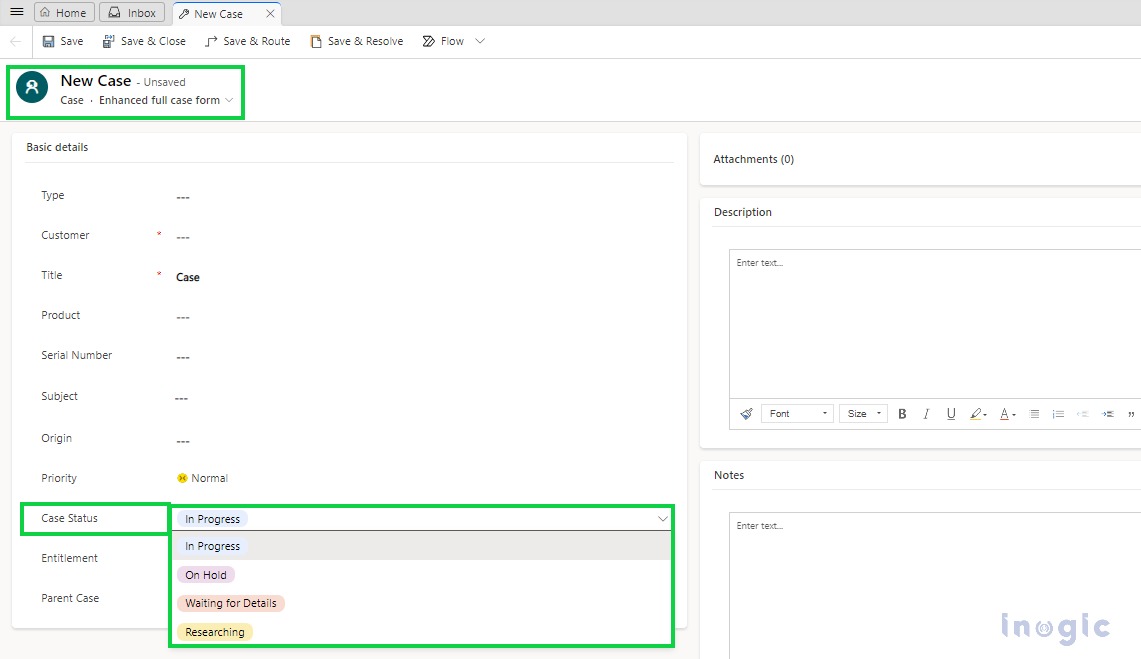
- OptionSet Wrapper Control
The OptionSet Wrapper Control allows option set values to be displayed as color-coded labels directly on the form.
Key benefits:
- Improved visual clarity
- Faster status recognition for agents
- Configurable colors via column properties
This control is available for all tables.
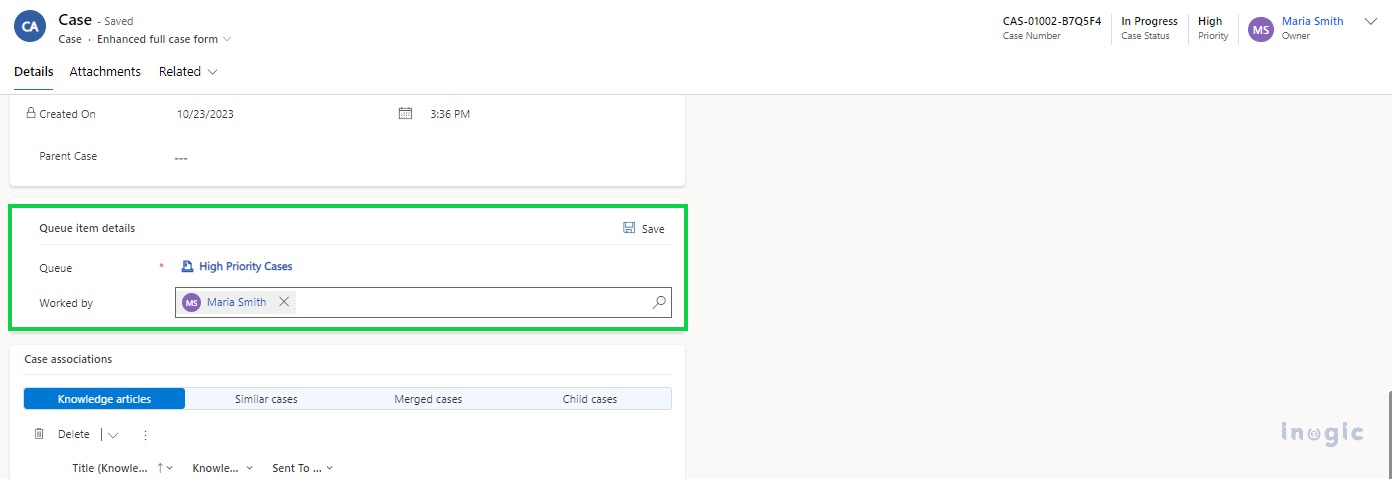
- Queue Item Control
Earlier, there was no direct way to see which queue a case belonged to from the case form.
With the Queue Item Control, agents can now:
- View the queue to which the case is assigned
- See who is working on the case via the Worked By field
- Update the Worked By value and save changes
This control is available for all queue-enabled entities and displays data only after the record is added to a queue.
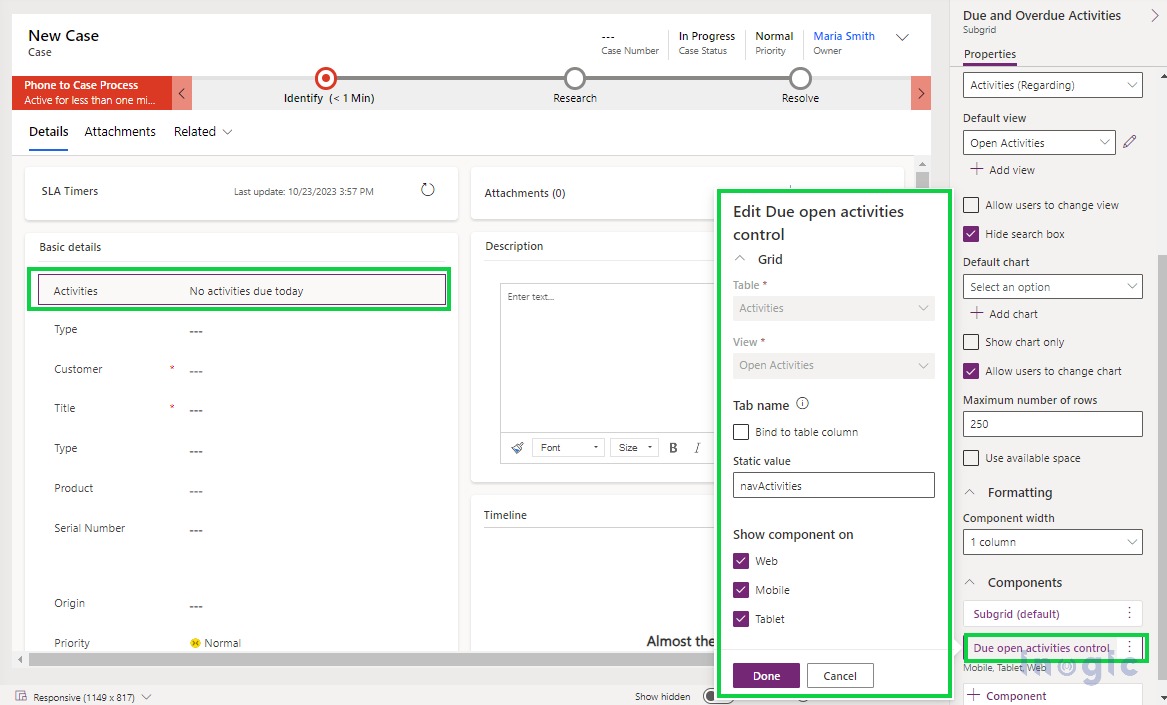
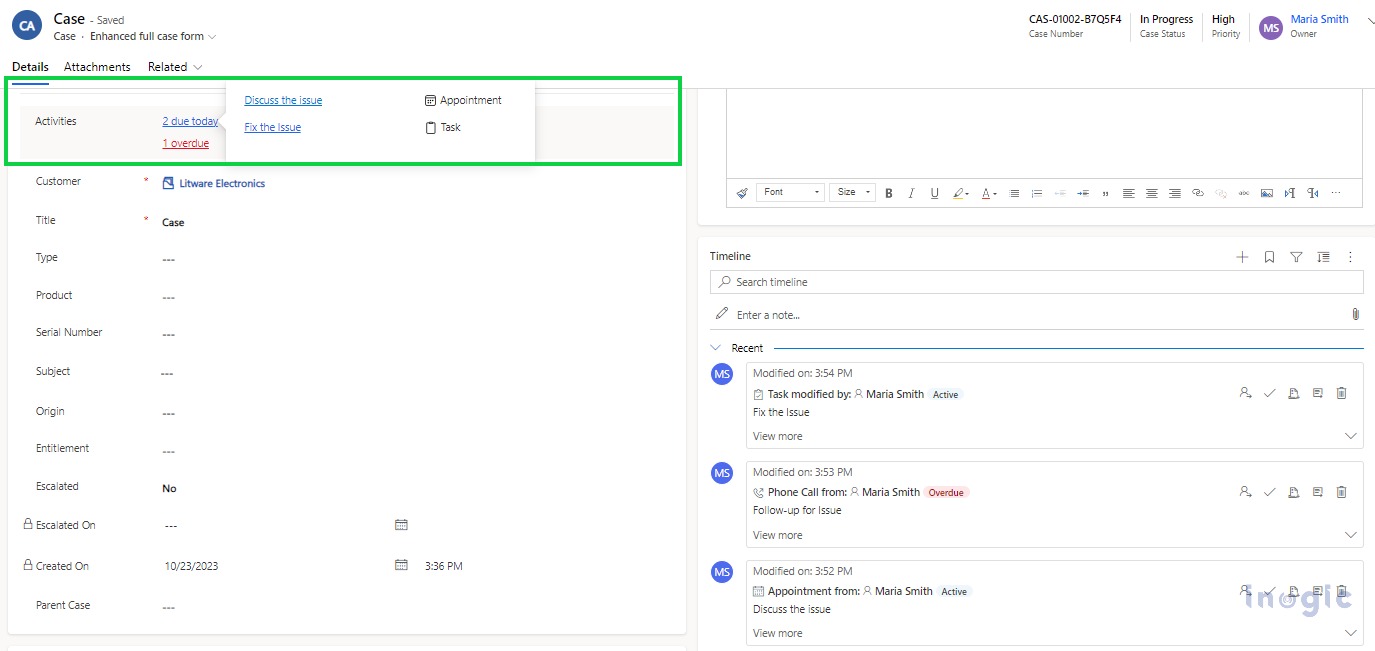
- Due Open Activities Control
The Due Open Activities Control helps agents stay on top of their tasks by displaying:
- Due activities
- Overdue activities related to the case
Agents can click directly on the activity link to navigate to the respective record, improving productivity and response times.
This control is available for all tables.
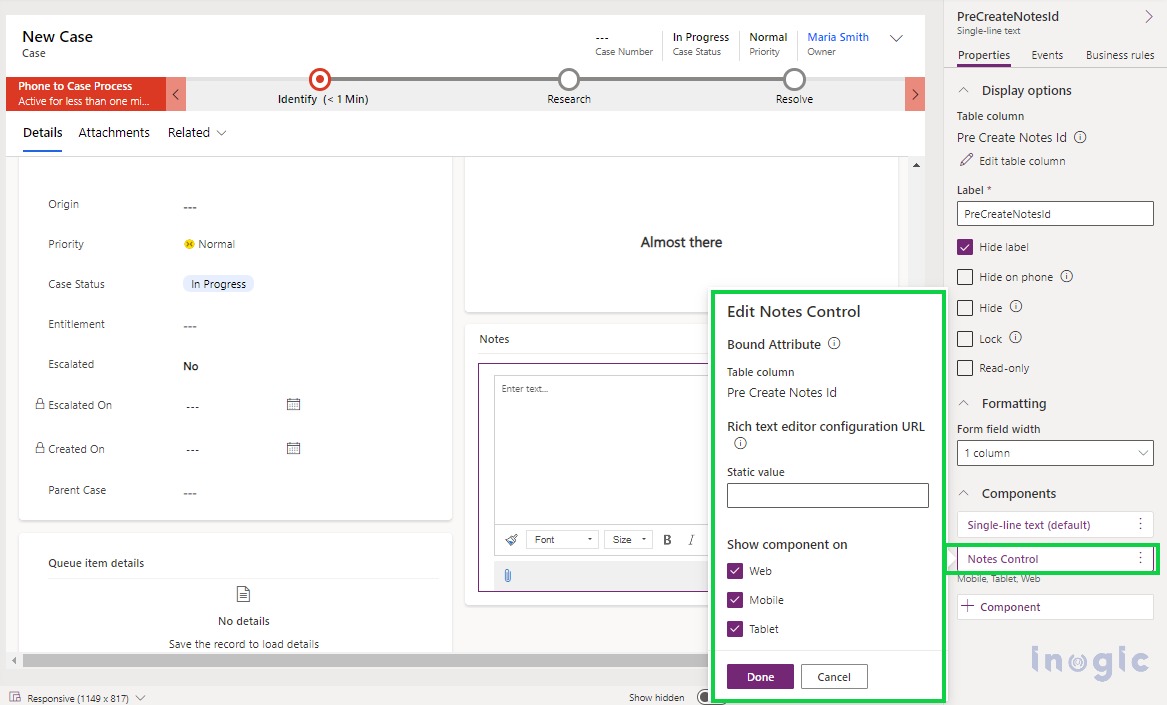
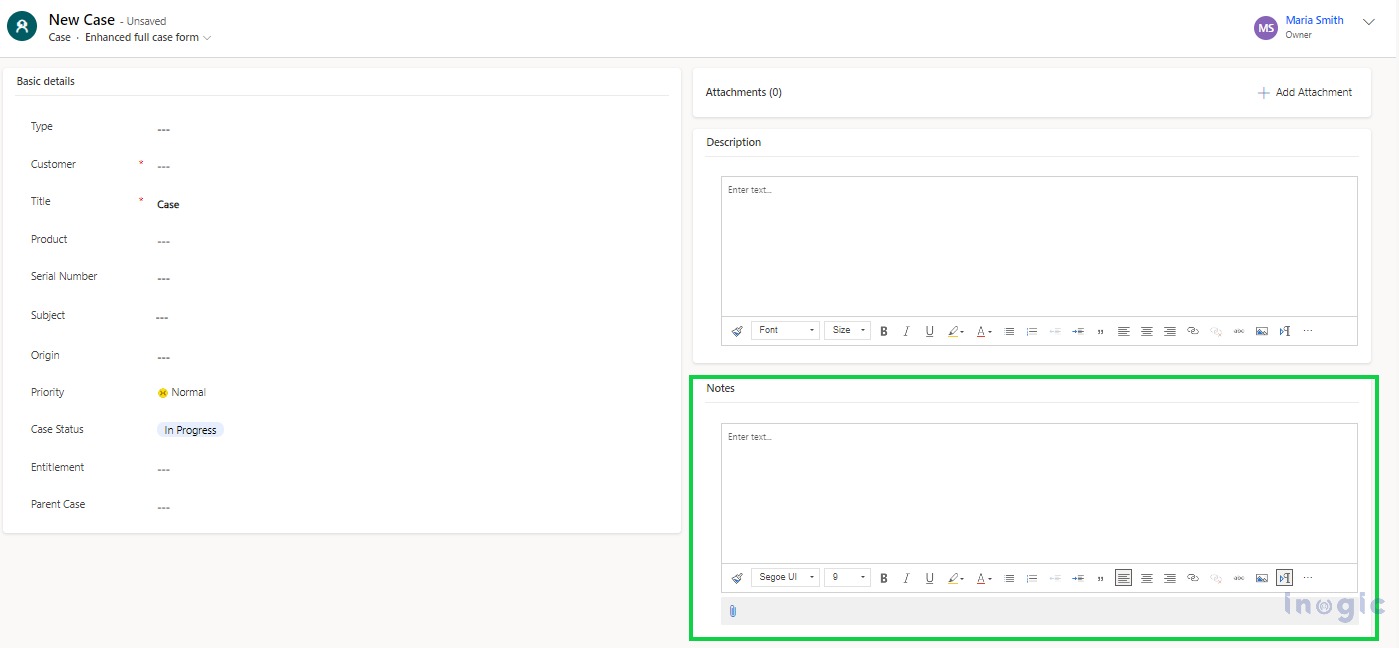
- Notes Control (Pre-Save Notes)
Previously, agents could add notes only after saving a record.
With the Notes Control, agents can now:
- Add notes before saving the case
- Enable Rich Text Editor support by configuring the control URL
This control is currently available only for the Case table.
Conclusion
The Enhanced Case Experience in Dynamics 365 Customer Service Workspace introduces modern case forms and powerful new controls that significantly improve usability for customer service agents.
By reducing form complexity, improving visibility, and enabling faster actions, these enhancements help agents resolve cases more efficiently and deliver a better customer experience.
FAQs
What is Enhanced Case Experience in Dynamics 365?
Enhanced Case Experience is a modernized case form experience available in the Customer Service Workspace app, offering new controls and improved usability for agents.
Is Enhanced Case Experience available in all apps?
No. It is available only in the Customer Service Workspace app.
Do I need to enable it manually?
Yes. It must be enabled from Customer Service Admin Center > New and Upcoming Features.
Can I use enhanced controls on other tables?
Most enhanced controls are available for all tables, except the Notes Control, which is currently limited to the Case table.
Will this affect existing case forms?
Only if the enhanced form has a higher form order. Form order determines which form users see first.