The marketing segment is the starting point for many marketing activities, targeting a specific type of audience based on filtered queries.
You can easily filter your audience (e.g. Contacts or Leads) based on customer journeys and target them accordingly.
Segmentation for Outbound Marketing:
According to the client’s business, they may target leads or contacts. Segmentation can assist them in achieving this goal.
A segment can be created from outbound marketing or real-time marketing.
As we discussed in the previous blog, segment creation is a major aspect of Real-Time Marketing. However, we will focus on segment creation as it pertains to outbound marketing in this blog.
OOB marketing segments include an in-built segment query designer. It allows you to define queries that target specific audiences and is very easy to use.
To demonstrate, let’s create a simple segment query targeting contacts belonging to a specific city (e.g. New York).
Here Are the Steps to Create Dynamic Segments within Outbound Marketing with the Above Example:
Open the Marketing app > Navigate to the “Outbound Marketing” area > click on Segments under Customers > click on the + New button dropdown > select + New Dynamic Segment as shown in the screenshot below:

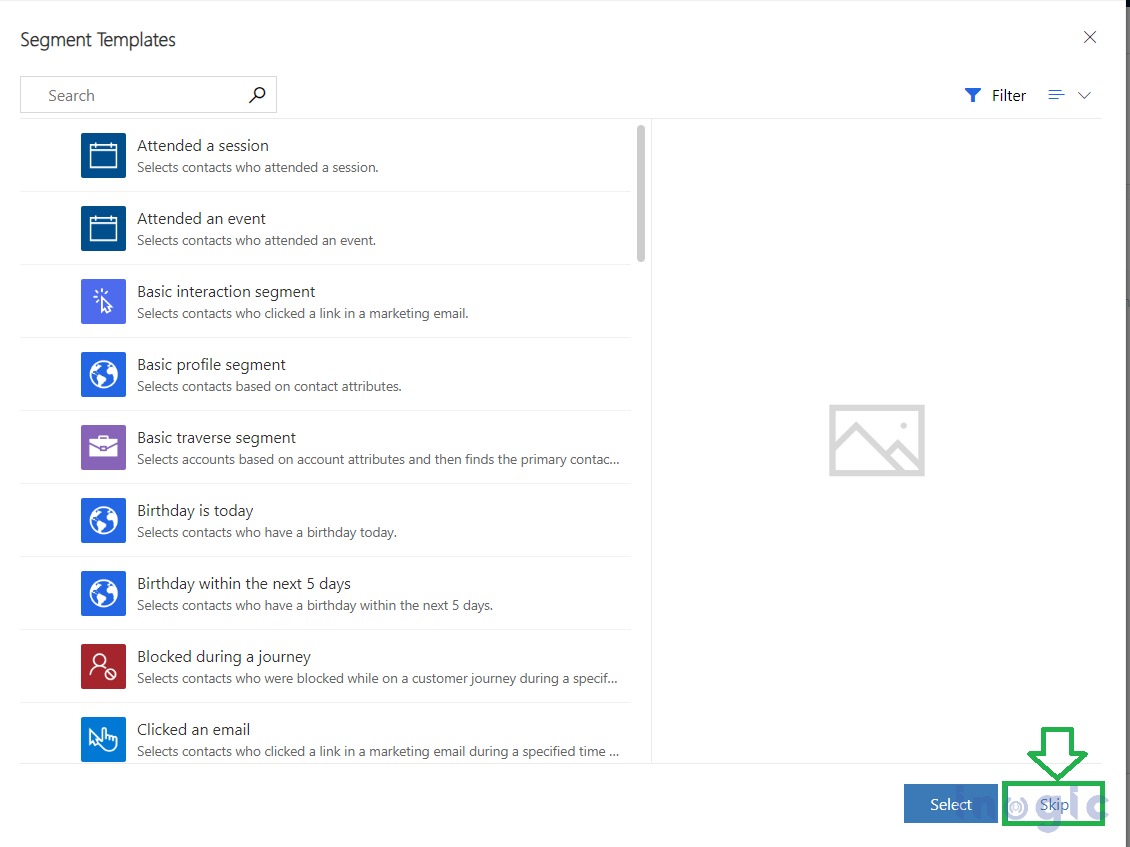
After you click + New Dynamic Segment, you can either choose the existing template and create a segment or simply click skip – as shown in the screenshot below:
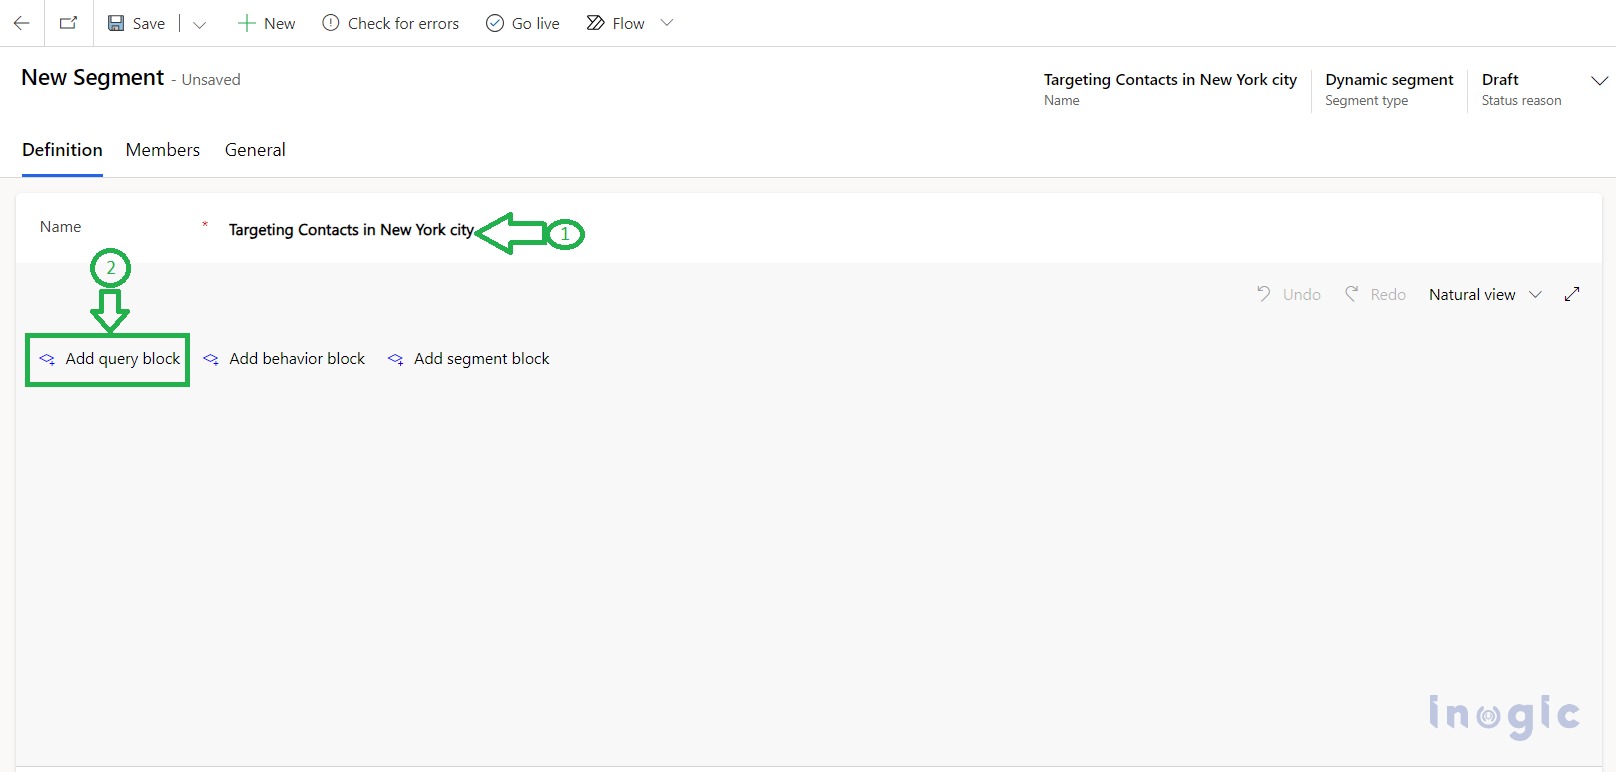
Step 1: Give an appropriate name to the segment

Step 2: Click on “Add query block”
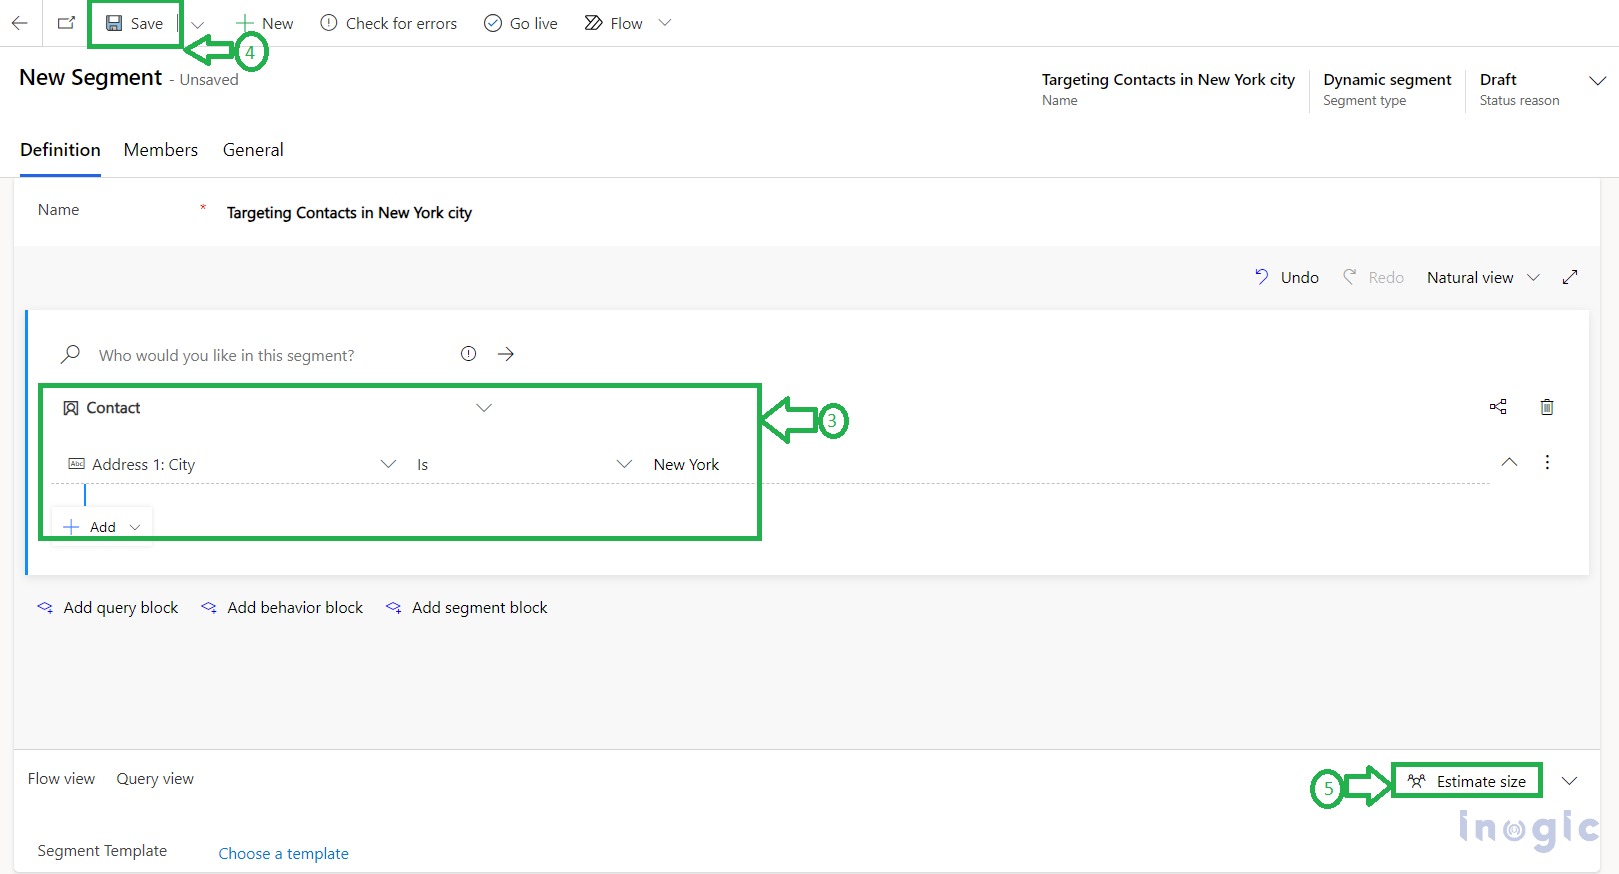
Step 3: Using the query block builder, select queries based on which contacts should be included as members in the segment.
Step 4: Click on Save
Step 5: When your segment is not in a LIVE state, you can verify the estimated size by clicking “Estimate Size”.
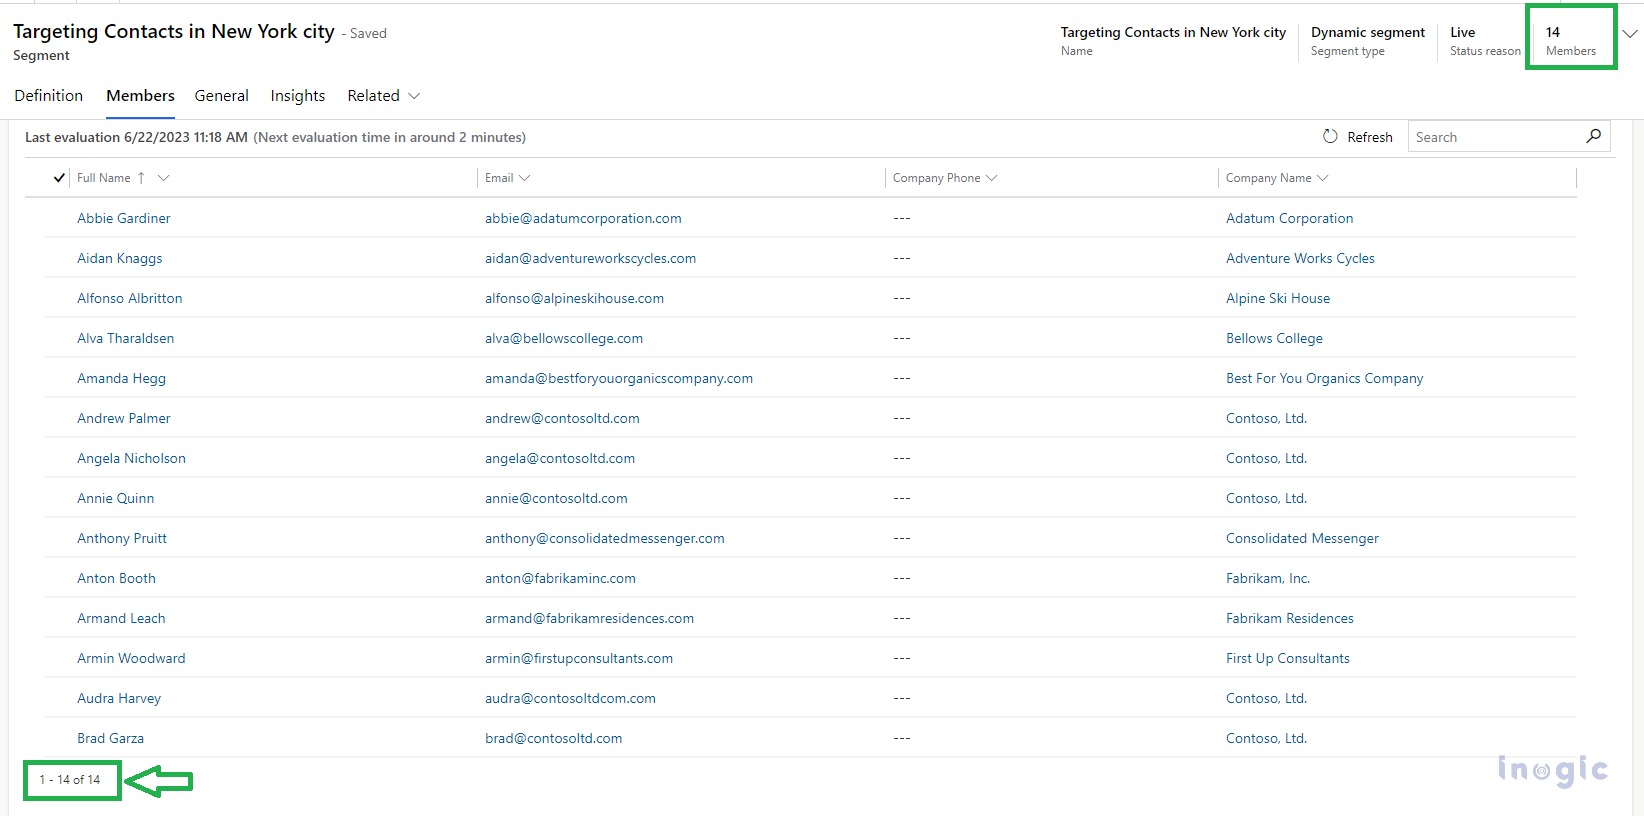
System will auto add 13 contact records to this segment once it is published, as you can see in the screenshot below:

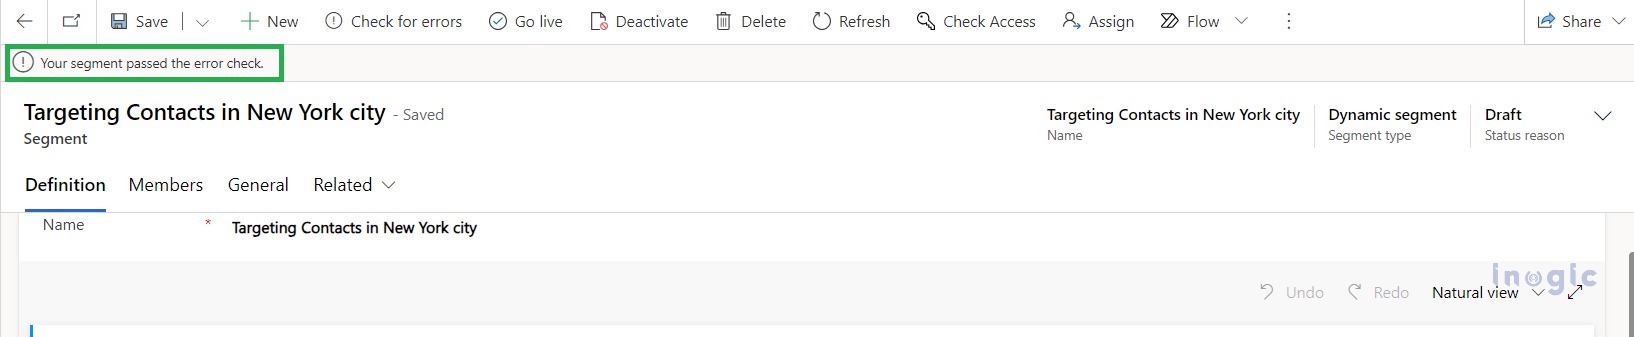
Step 6: Next step is to click on the “Check for errors” button- This is just a quick check for errors (if any) before publishing the segment.
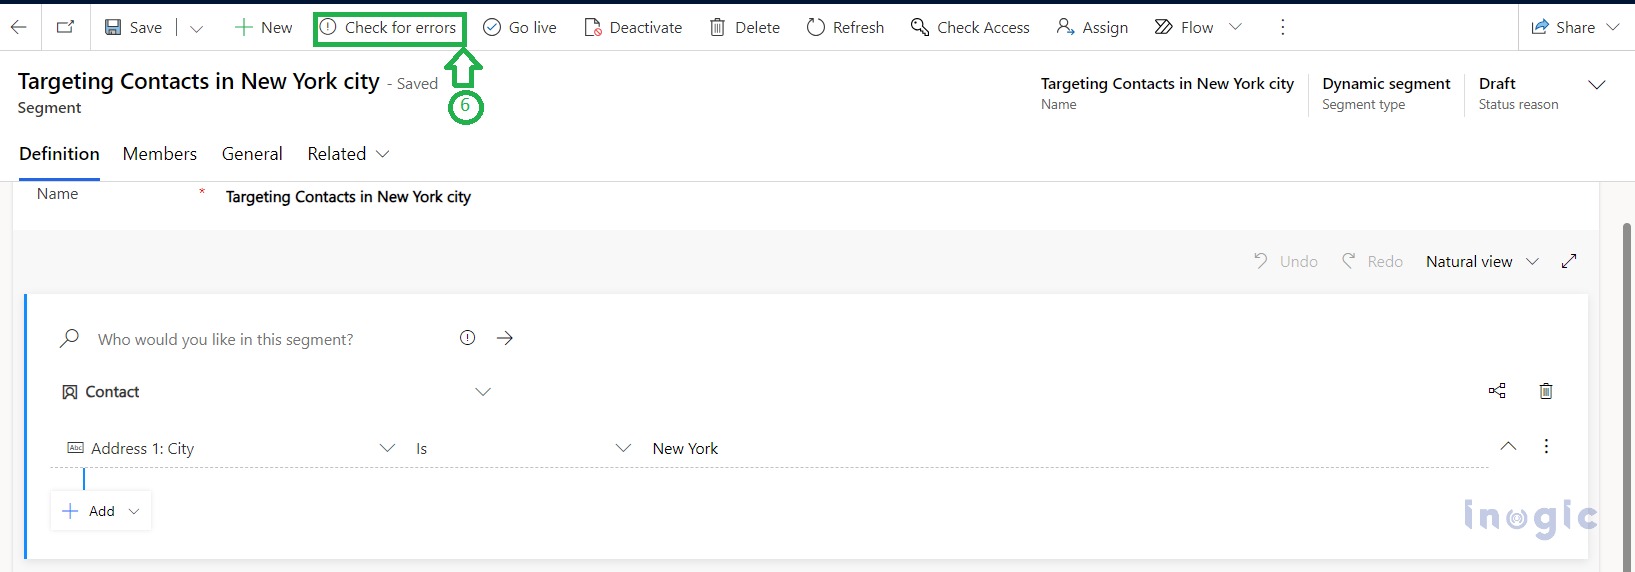
If your segment is error-free, you will be notified in the left top corner with the status “Your segment passed the error check.”
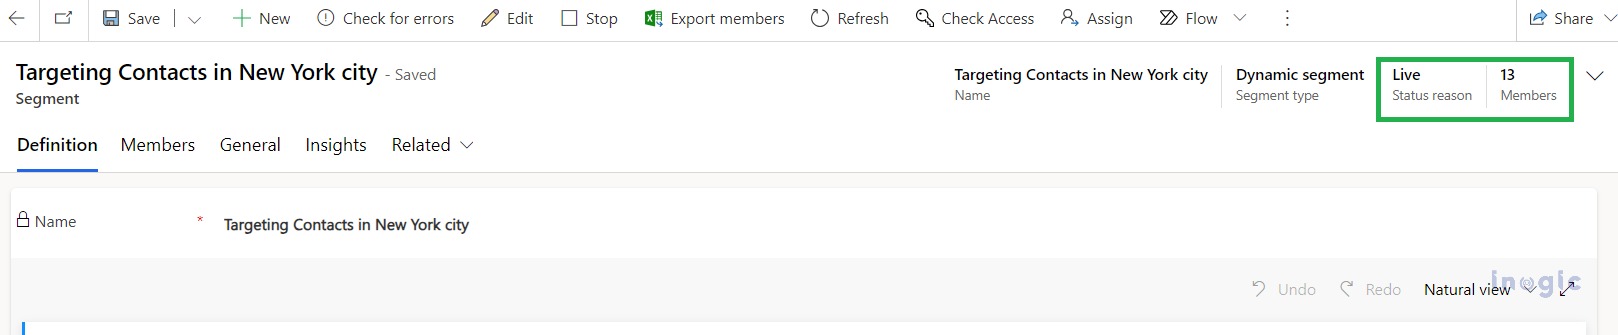
Step 7: Once the segment is ready to publish, click on the “Go Live” button as shown below:

After the Segment is published, you will observe the Status Reason is set as LIVE. The count of members can be seen in the Members field on the header as shown in the screenshot:
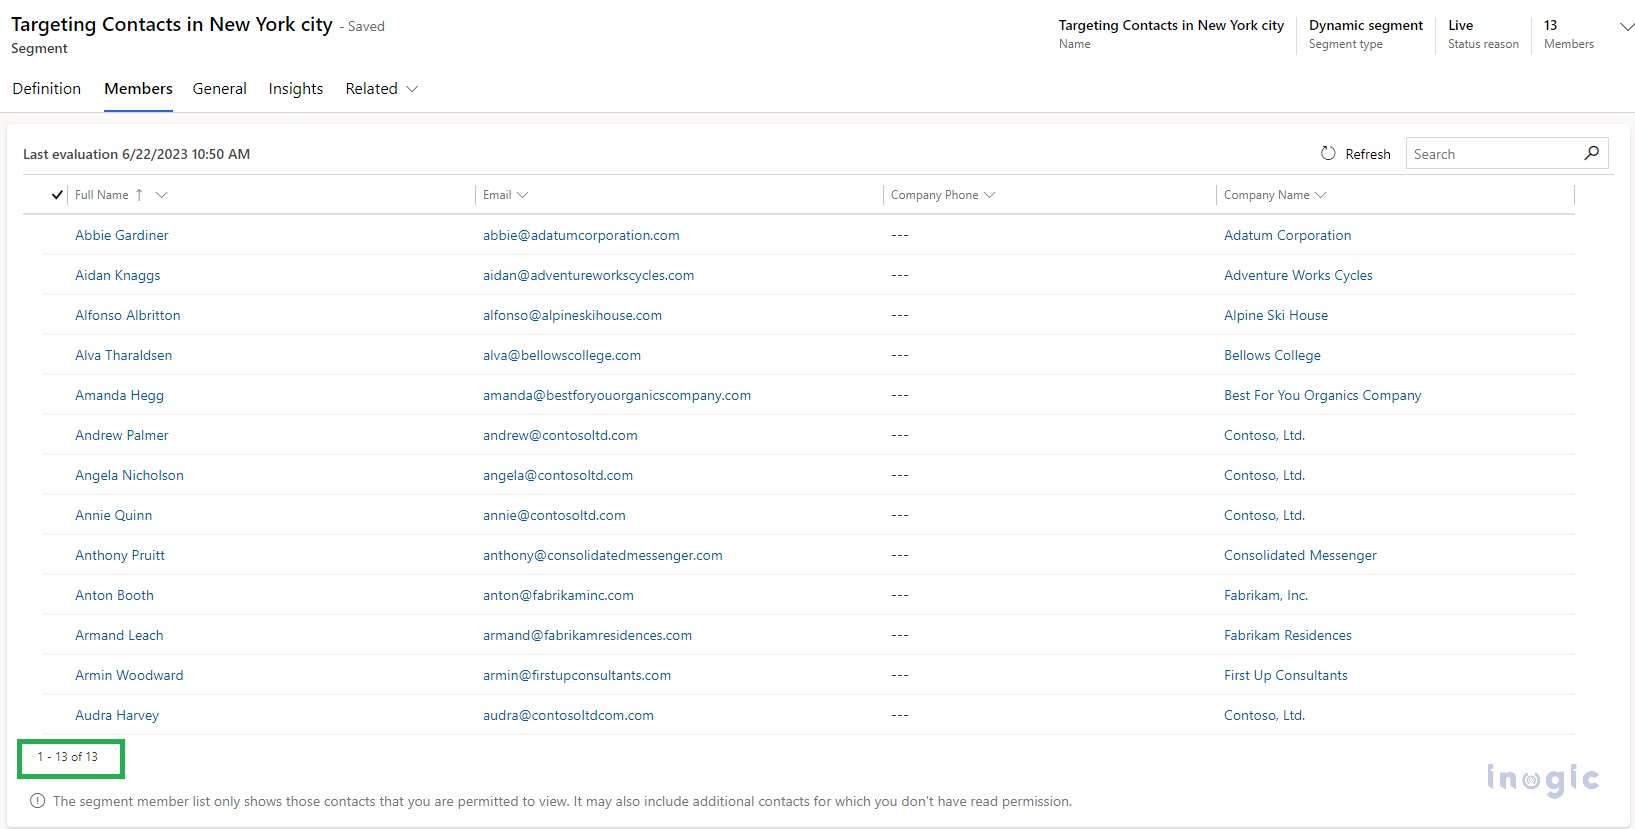
In the “Members” tab you can view the list of contact records added for this segment:
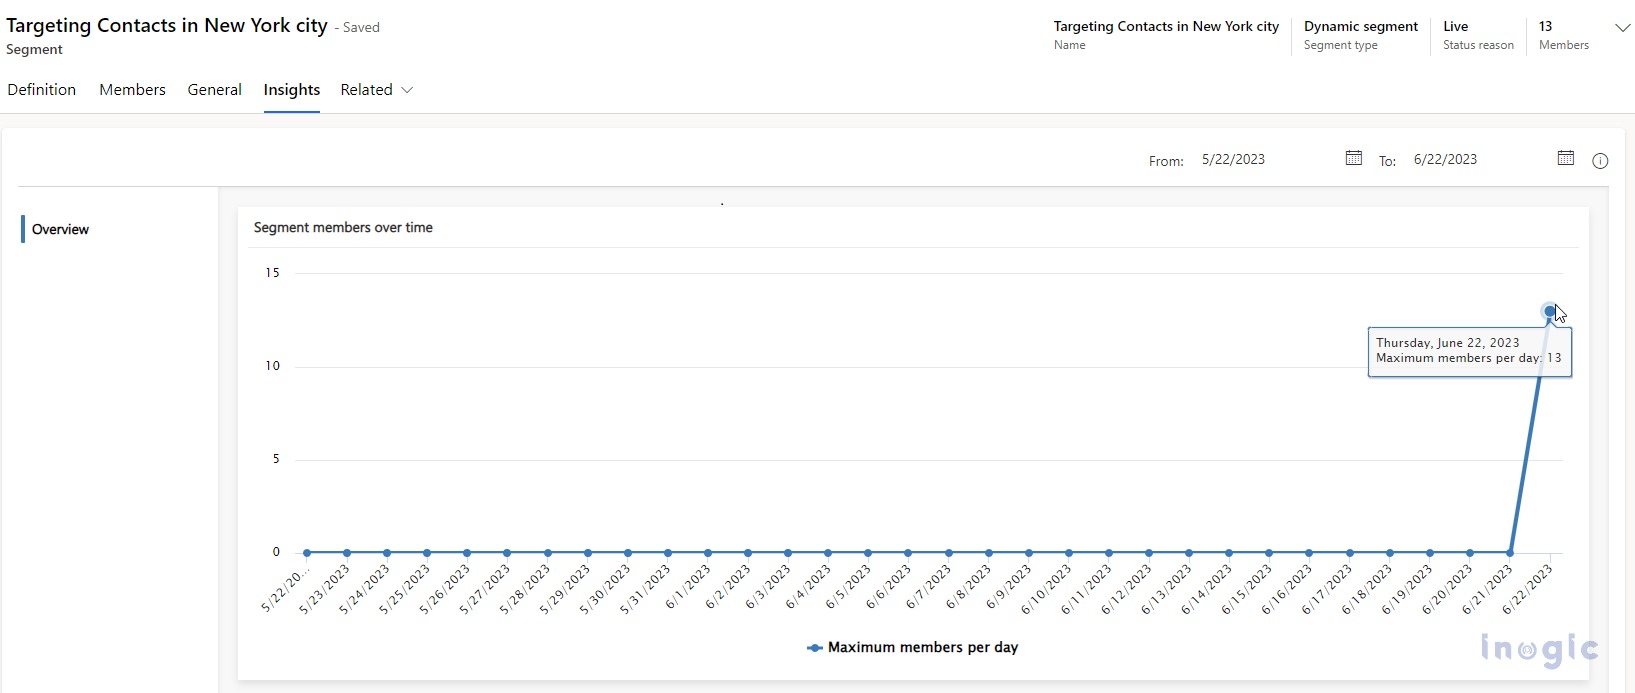
Under the “Insights” tab you can view detailed analytics such as member count per day and other such metrics.
NOTE: For more information about the Dynamics 365 segments and their implementation, you can refer to this Microsoft doc.

Static vs Dynamic segments:
In the above demonstration, we have purposefully selected Dynamic Segmentation. But in this next section, segmentation will be Static and there won’t be dynamic addition of members once published.
You can start by creating the segment by clicking on “+ New Static Segment” as shown in the screenshot below:

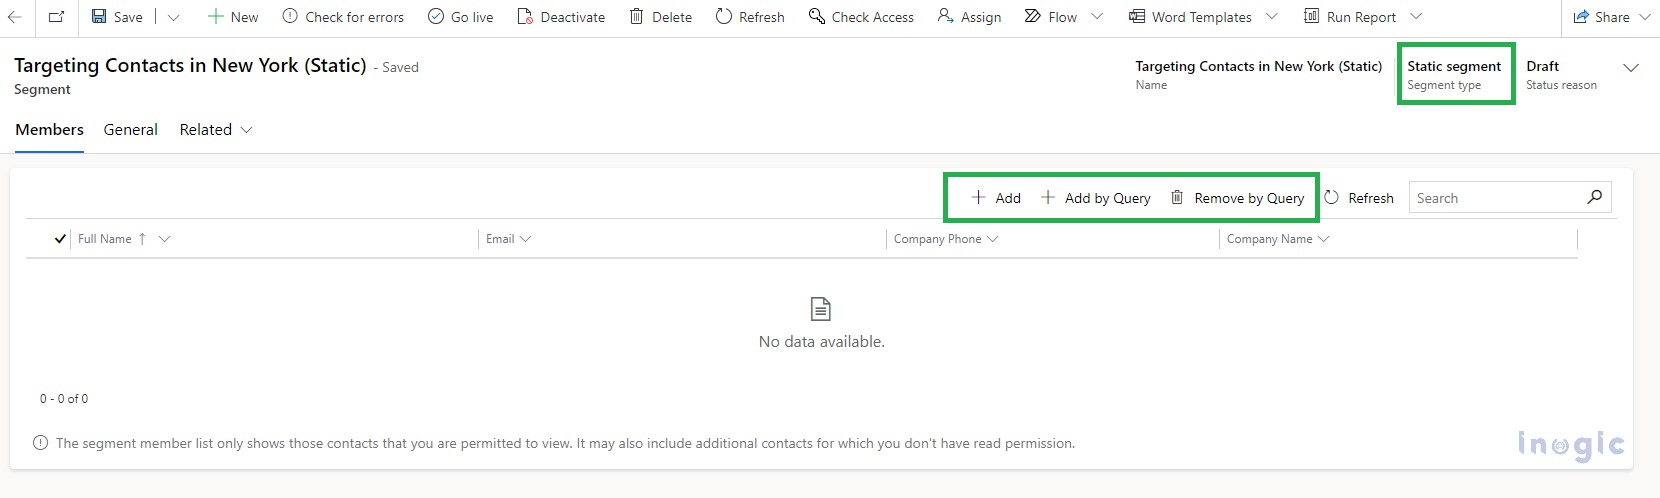
The Quick Create form will open up. You can then provide the name e.g. “Targeting Contacts in New York (Static)”
You need to manually add the members by clicking on the “+Add” button or if you want to add a condition click on “+Add by Query”.
Also, if you want to remove the members from the Static segment, you can then simply click on the “Remove by Query” button in the Dynamic segment and it will get automatically removed.
NOTE: Observe that the Segment Type is set to “Static Segment” before being set to “Dynamic Segment” as shown in the above screenshot.
There is one major difference between these two types of segments! It is imperative to note that once these two types of segments are live and any new contact records are added OR if existing contact records are modified, the contact records that match the query defined will be dynamically added to the dynamic segment.
In our scenario, when a new contact record is created that belongs to New York, it is automatically added to the Dynamic Segment, but not to the Static Segment.
Dynamic Segment Members list (Member count incremented):
As “Brad Garza” was added automatically, the count incremented to 14 as displayed in the screenshot below:
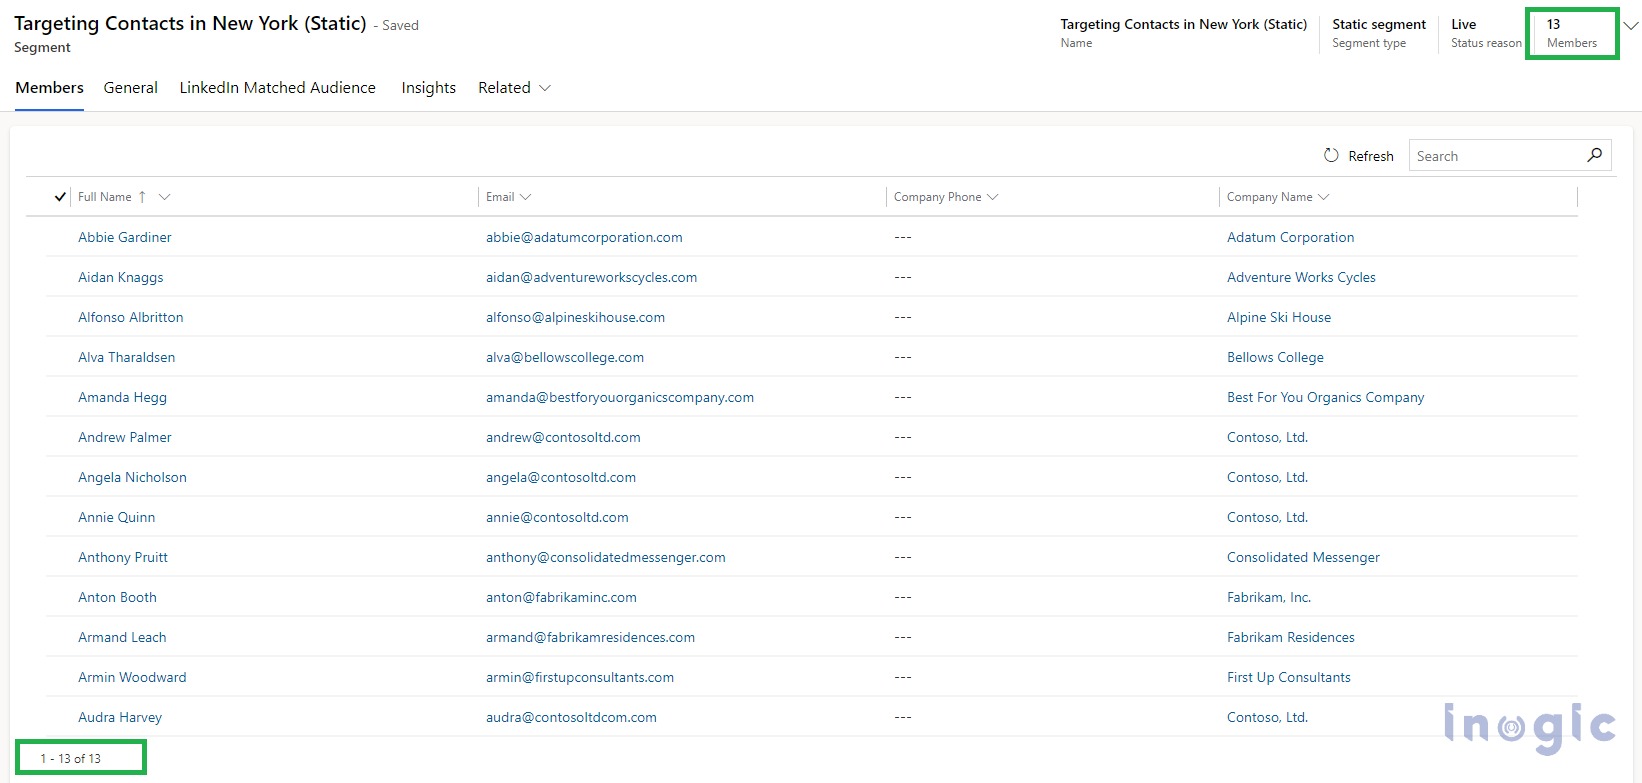
Static Segment Members list (Member count remains static):
Likewise, when the contact record “Brad Garza” is not added automatically to the Static segment, the count remains the same, as shown below:
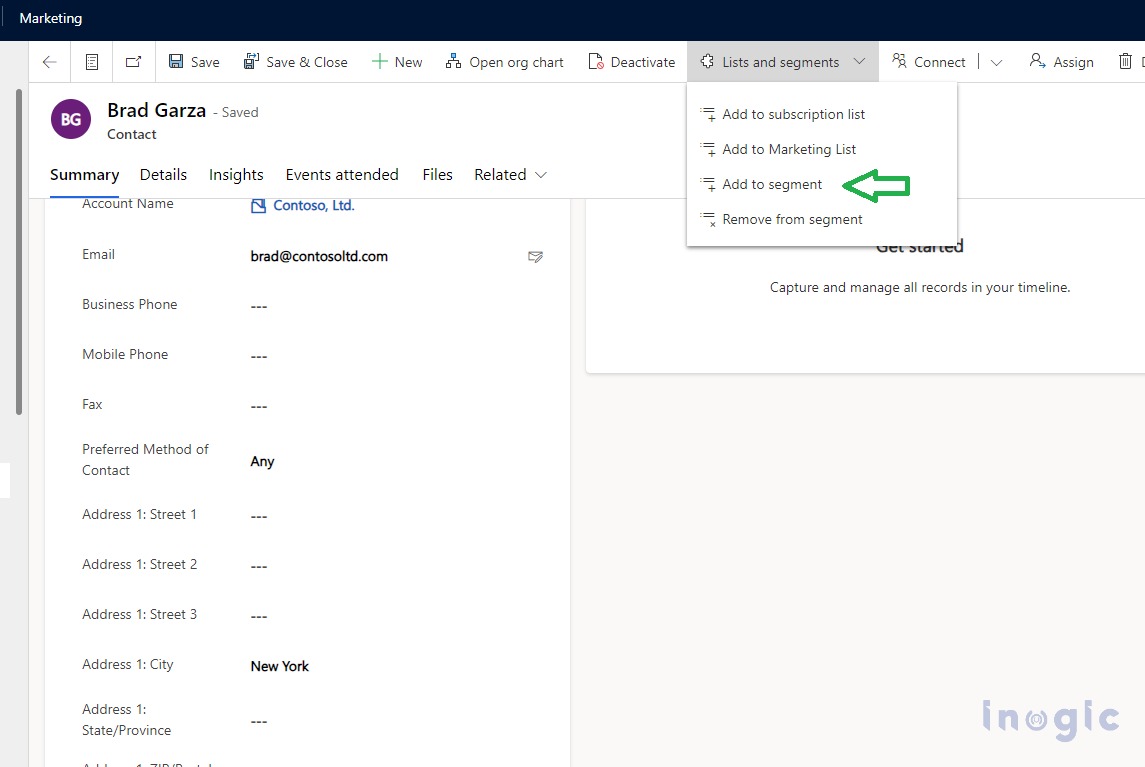
To update the static segment’s count of members, you can manually add that additional contact by clicking the “+ Add” button or by opening that particular contact record and clicking the “Lists and segments” dropdown menu > finding the “Add to segment” option. In this way, you can manually add the underlined record to the segment.
Few Observations:
- Edit button functionality:
Segments once made LIVE cannot be edited unless you click on the Edit button.
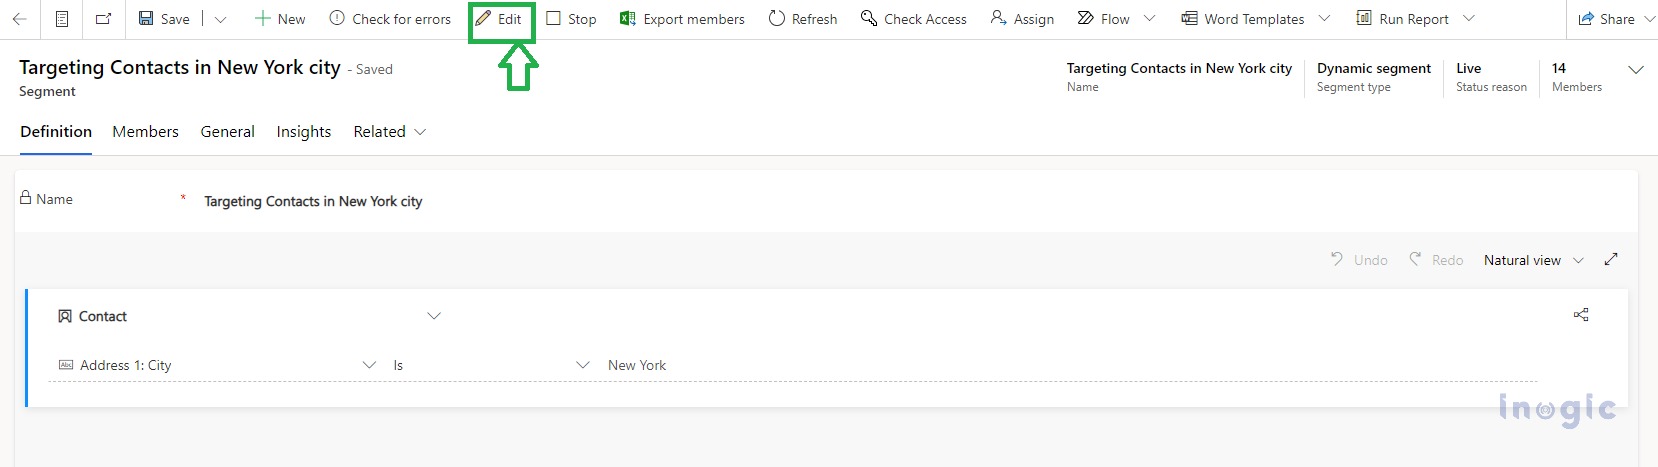
If you wanted to modify the query defined here, then click Edit. Upon clicking the confirmation pop-up will appear as displayed below:
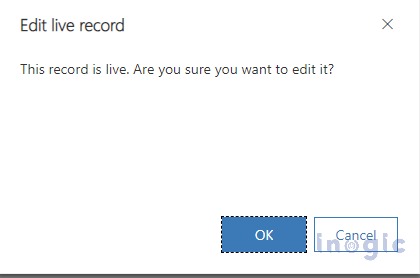
Here click on the OK button to make the segment editable. Note that the status will be “LIVE EDITABLE” as highlighted below:
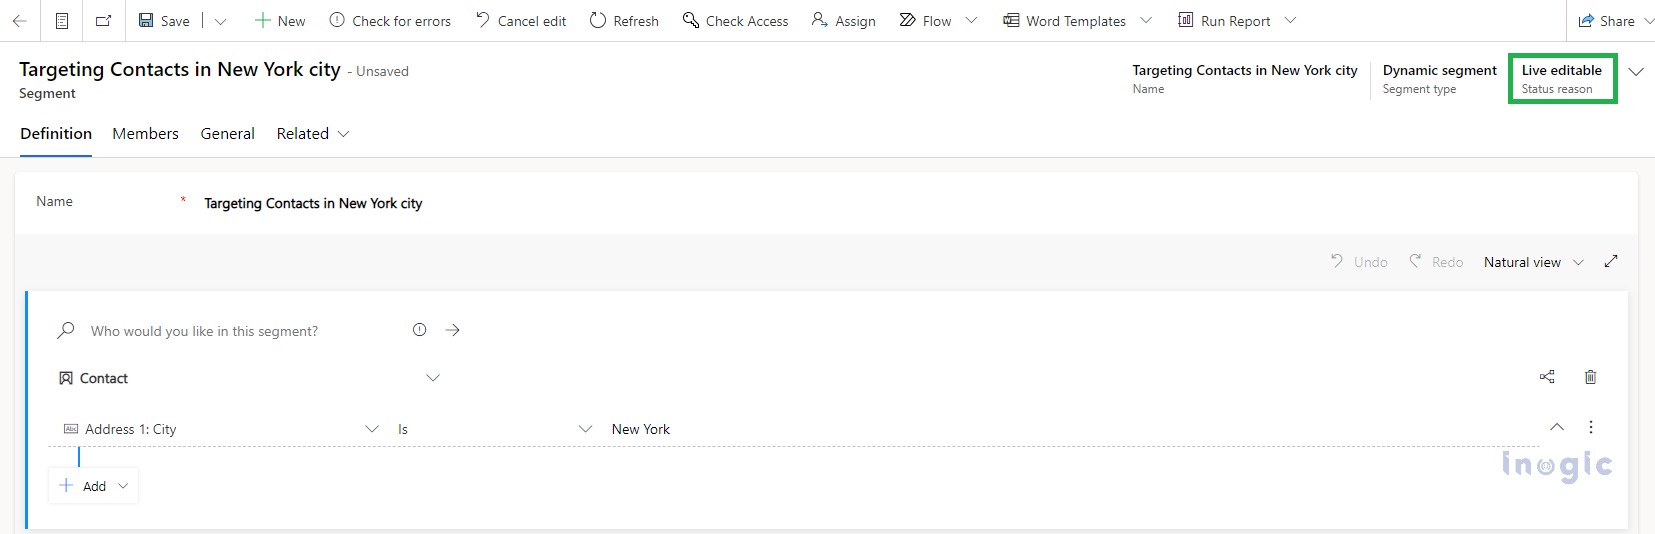
There is an additional provision provided to cancel the edit using the “Cancel edit” button if in case you want to cancel the changes you have made.

After clicking the “Cancel edit” button the confirmation pop-up will appear as shown below:
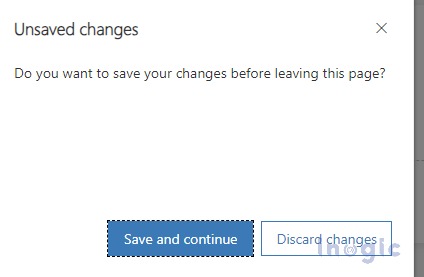
You can either click on the “Save and continue” button to save the changes you made OR you can click on the “Discard changes” button to discard the changes.
Once done, the segment will return to LIVE immediately!
Please note that if you have made the changes in the query builder and clicked on the “Save and continue” button, you will receive the below warning message.
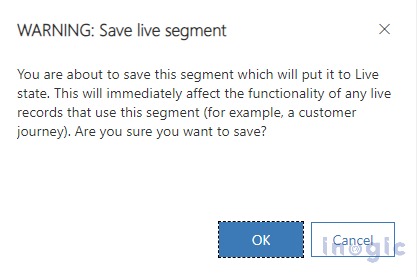
Please know that the changes you made to the segment will be immediately reflected in the places where this segment is utilized. For instance, if this segment is currently being used in the Customer Journey or as part of a query group for another segment, those places will also reflect the changes.
- Stop button functionality:
At any point in time, you can click on the Stop button to change the status of the segment from LIVE to Stopped.
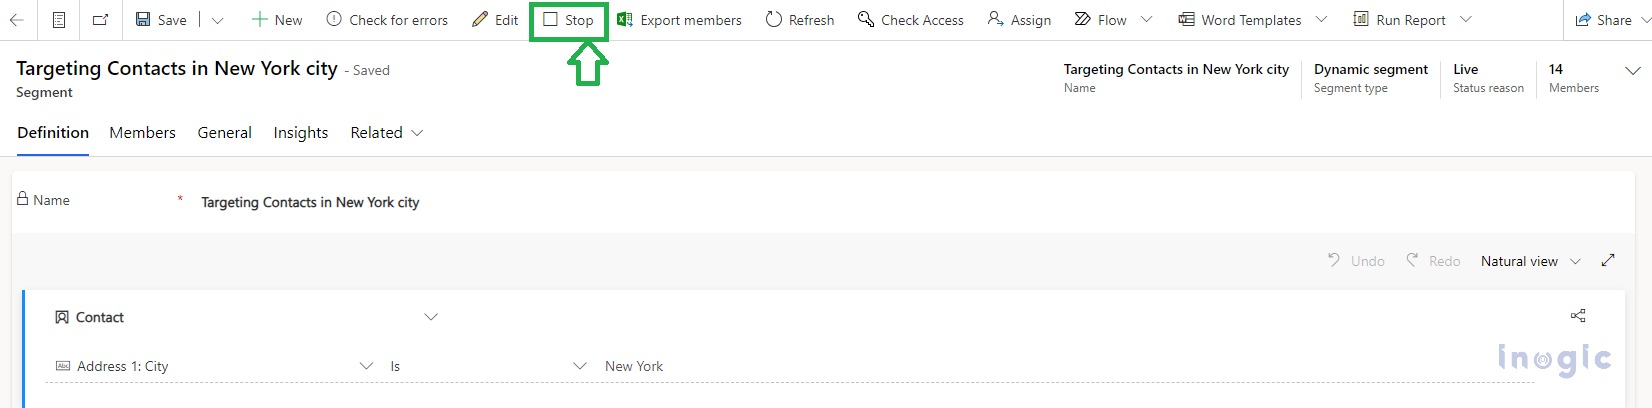
Click the “Stop” button and a confirmation pop-up will be displayed as shown below:
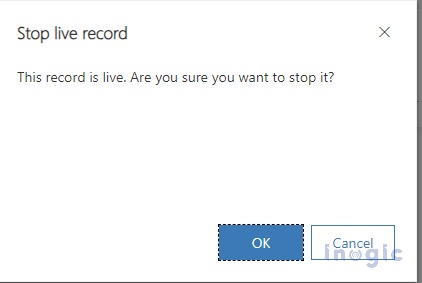
Clicking OK will change the segment status reason to stopped and the Members tab will immediately decrement the members count to zero, removing all members.

NOTE: Don’t forget to click on “Check for errors” and then click on “Go Live” to make the segment LIVE again with all the members.
- Selecting LIVE segments on the Customer Journey:
You can only select LIVE segments if you wish to use them elsewhere. Consider if you want to create a Customer Journey. Ensure that the segments you want to use are made Live beforehand. Then Only they will appear as shown in the screenshot below:
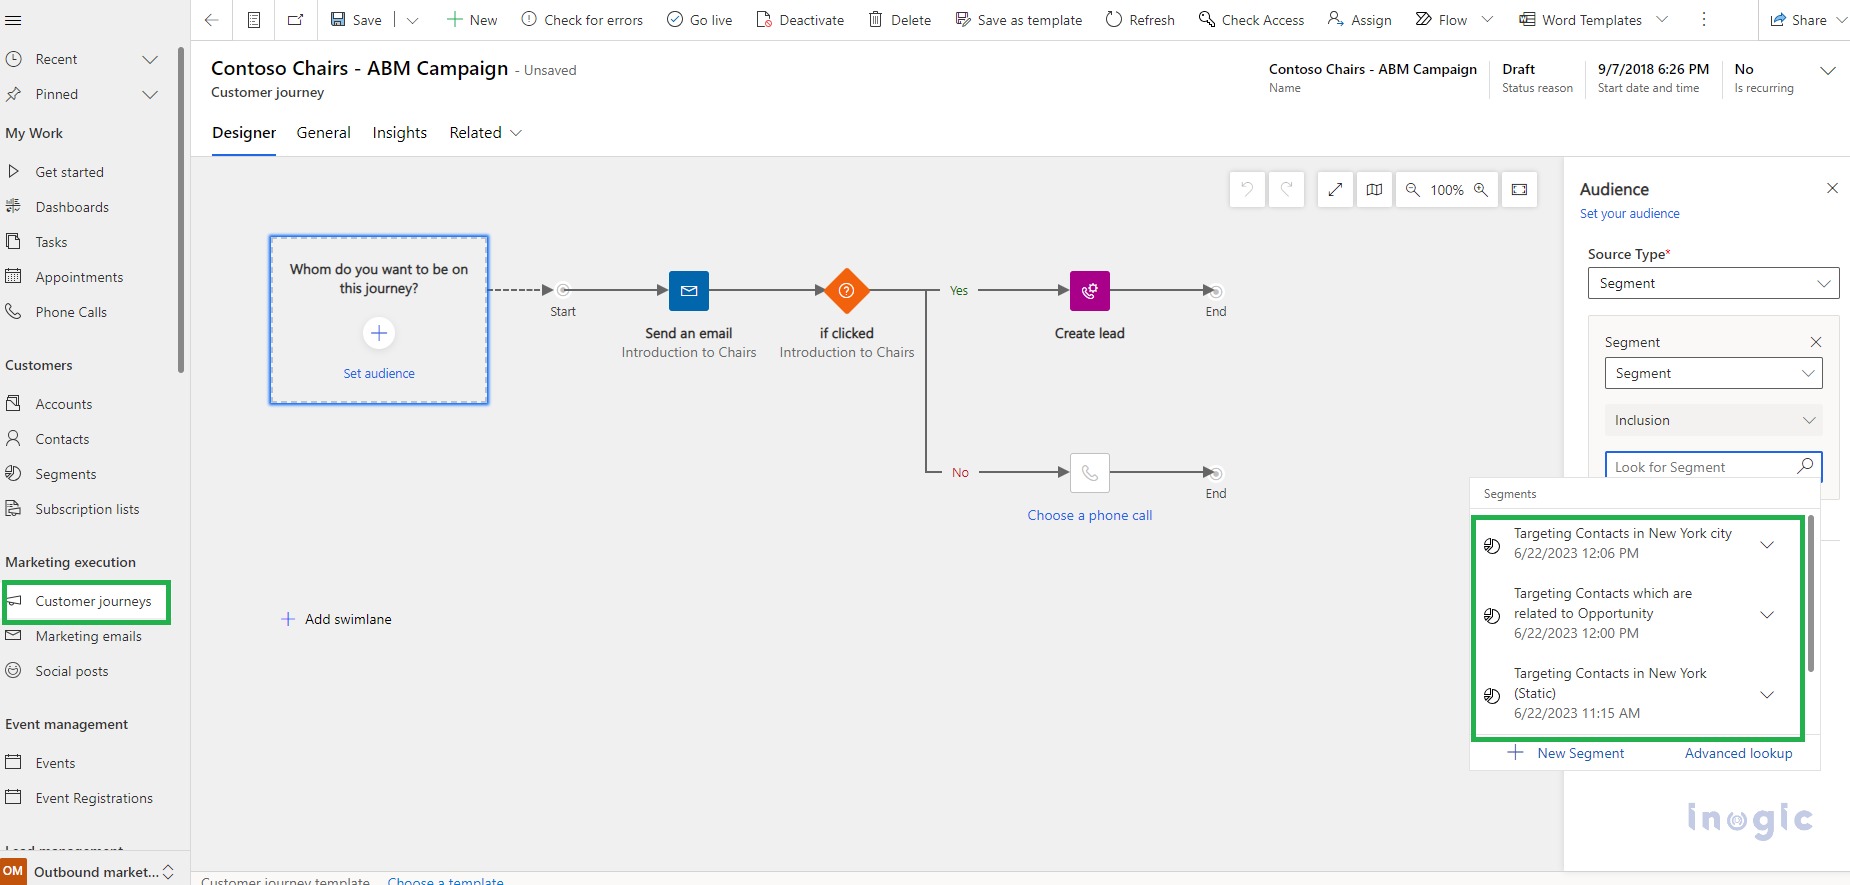
NOTE: If you cannot see your segment record in Customer Journey, it may be in the Draft state. As the “Inclusion” lookup shown above has defaulted to showing “Active Segments” which will filter only ACTIVE or LIVE segment records.
Conclusion
Marketing segmentation is one of the most powerful features of Marketing and it can be used easily to target the audience accurately and effectively.
By using the inbuilt Query builder panel, one can start with a very simple implementation of queries. One can extend it to more complex queries by defining relationships with other entities and using the grouping and subgrouping features available within.