Introduction:
Microsoft Power Automate Button provides flexibility that enables users to run/trigger the flow from their mobile, anywhere, anytime. An earlier time-consuming process of opening Power Platform, searching flow, and then running it is quick!
But now, by using the ‘Power Automate’ app on Mobile, users can easily search the Button and run the flow. In a recent business requirement, clients using Dynamics 365 CRM could mark all their Orders as ‘Submit’, and on the click of ‘Order Submit,’ the existing pre-built integration logic would trigger and move Orders to another system. These orders could be submitted at any time as there was no specific time frame, however, the clients wanted to run the flow as per convenience.
The following steps were suggested by us as a solution.
Prerequisite: To click the ‘Power Automate’ button on the Mobile, one needs to download the Power Automate app on the smartphone or tablet.


In the below steps we have shown how easily we can develop a Power Automate Button.

Once the download is complete,
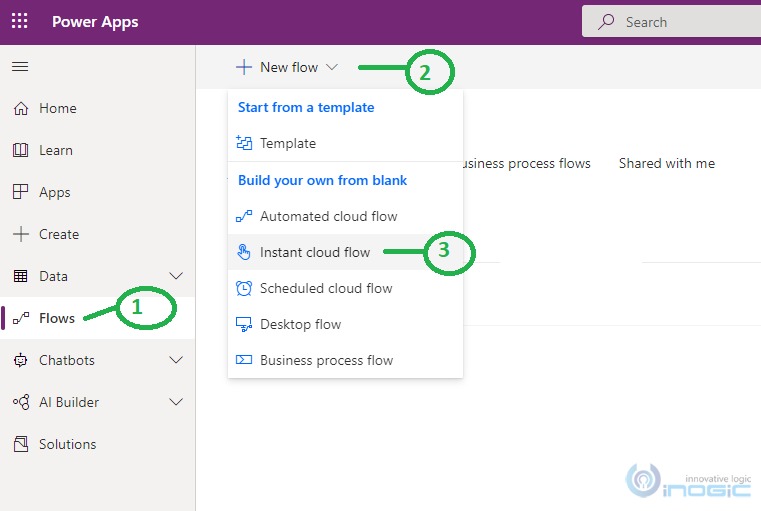
Step 1: Create the flow from outside the solution i.e. from Cloud Flow as shown below:
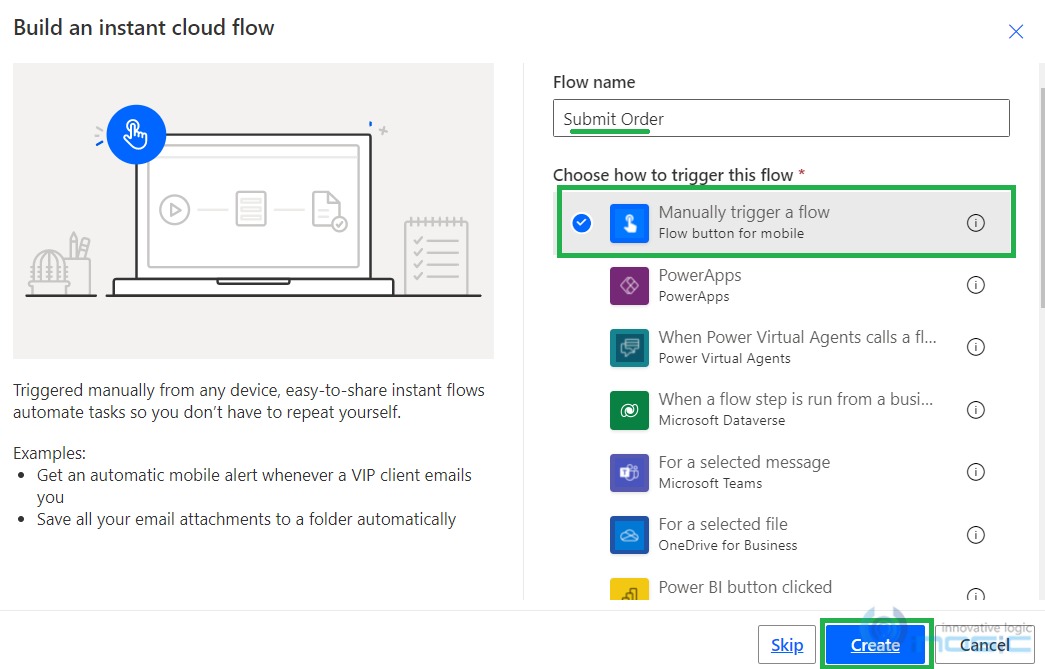
Step 2: In the next step, one gives the Power Automate flow a name and selects the triggering event. As one wants the flow to trigger on the click of a button, select trigger as ‘Manually Trigger a Flow’ and then finally click on the ‘Create’ button.
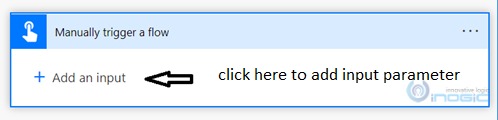
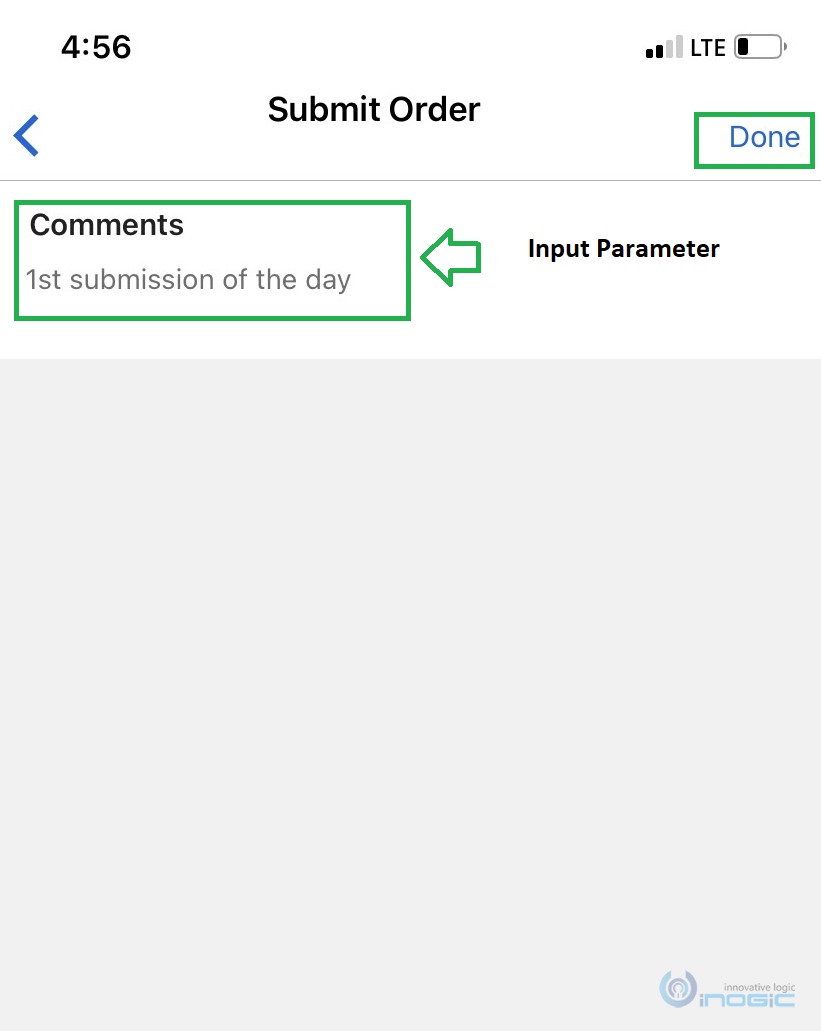
Step 3: One can also add Input parameters on the button that will take input from the user when the ‘Power Automate Button’ is clicked.
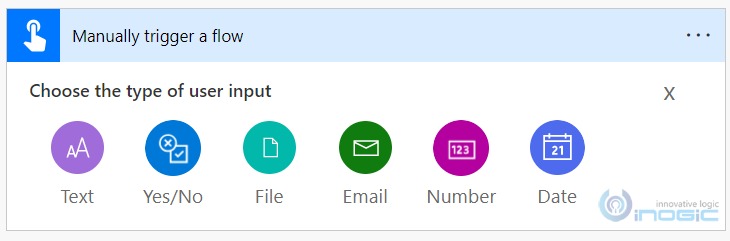
This will show parameters and their types i.e. text, Yes/No, Email, Date, Number. One can use them as per the need. In this case, we selected the input parameter as ‘Text’.
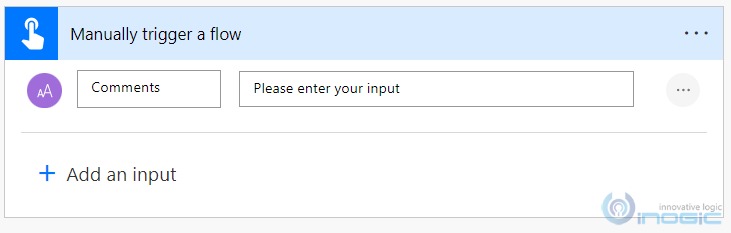
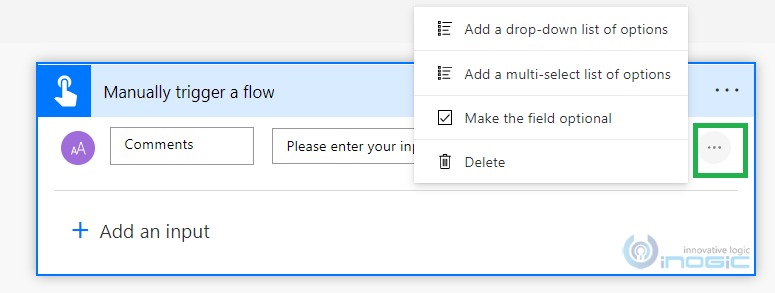
One can also update field properties by making them optional/required, adding a dropdown list, or multi-select list. To update field properties, click on the menu icon and select the required option.
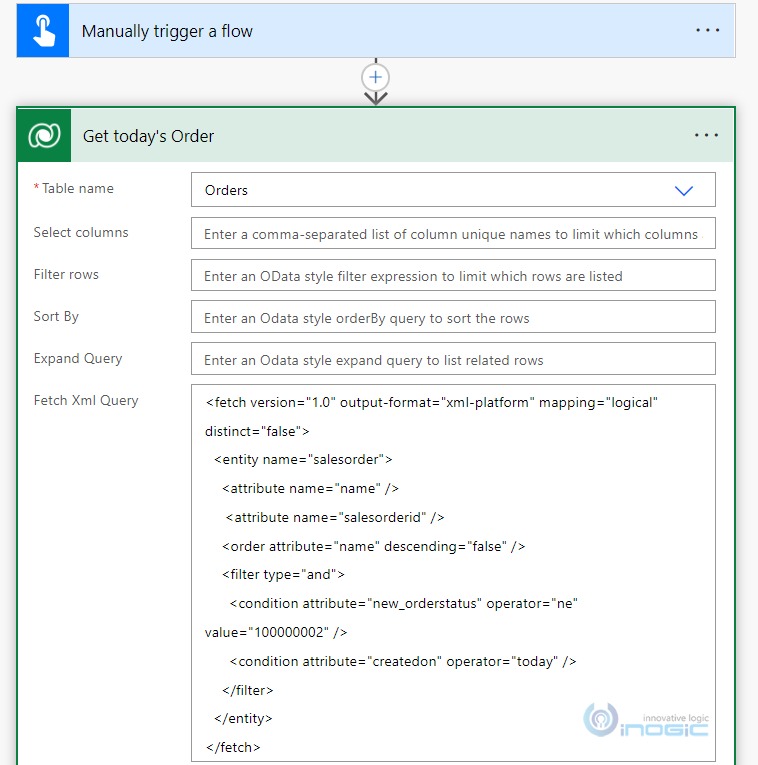
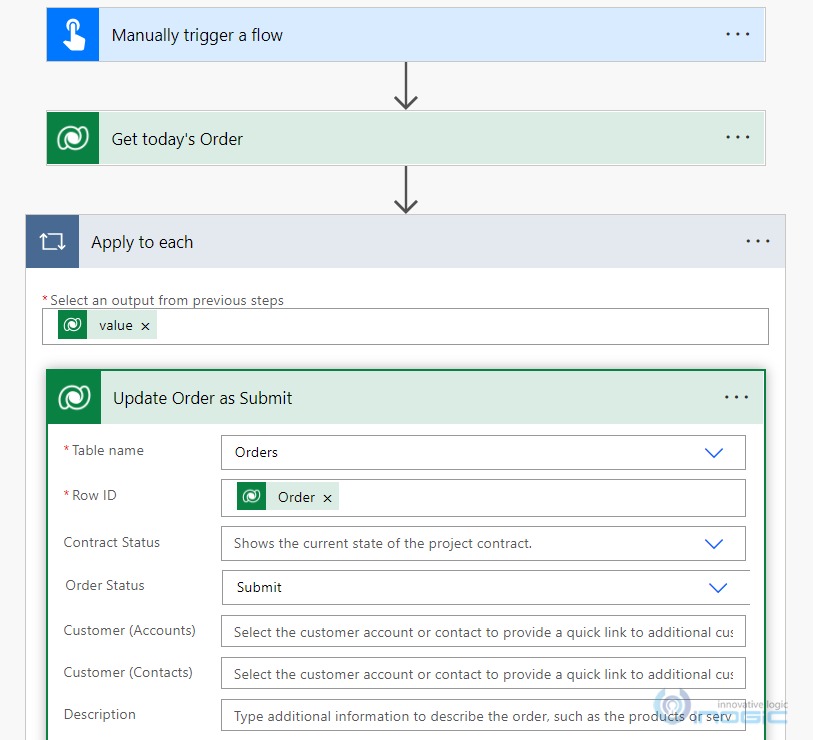
Step 4: In the below step one retrieves all Orders which are created today and need to be submitted. To retrieve Orders, here, we used the Dataverse ‘List rows’ action
Step 5: Now in the next step we have added the Dataverse ‘update a row’ action to update the retrieved Order status as “Submit”.
Step 6: Involves saving the flow.
Now that the Button is ready to use and can be tested through the Phone ‘Power Automate’ app. All the Power Automate buttons will show under the Buttons section as seen in the below screenshot
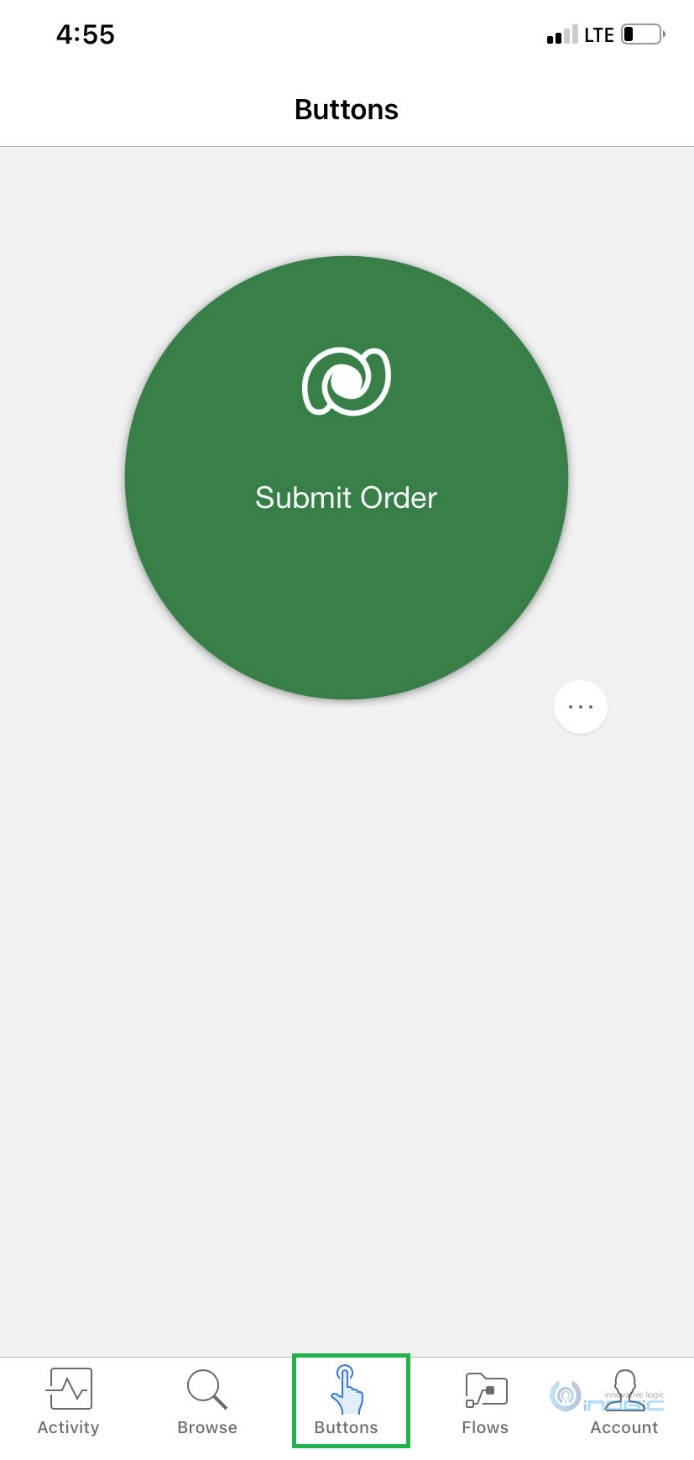
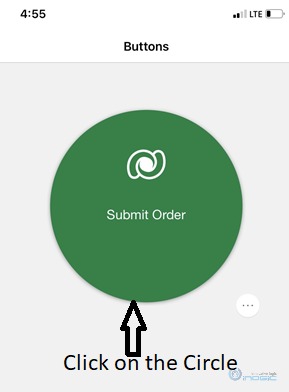
Step 7: To run the Button, one needs to click on the ‘Submit Order’ button and a pop-up will appear with the parameter/ field that we created. Next, one just needs to fill in the fields and click on ‘Done’. The Power Automate flow is set to run.
One can also allow another user to run the ‘Power Automate button’ by sharing it with them.
Conclusion
Thus, through the scenario we saw how the Power Automate Button feature provides flexibility where users can run the logic just by tapping a button, thereby saving time!