Introduction:
Field Service technicians use Field Service Mobile application which provides brief information related to the Work Order, Booking and Service location. And, Woodford application allows us to help customize the Field Service Mobile application based on the business requirements for each organization.
Woodford customization application provide various ways to automate process so that technician can easily complete their tasks at the service location. For example, custom buttons on the forms/views, using JavaScript on the forms/views, On load/On Change/On Save rules etc. With latest Woodford solution version 14.2.0, we are now able to execute the JavaScript function within Rules on the form by “Execute JS” feature.
Previously we were required to develop the JavaScript to execute the functionalities for On Change/On Load etc. event using “MobileCRM.UI.EntityForm.onChange” functions, which further includes the code for the logic to achieve specific requirement. However, using ExecuteJS function we can eliminate the code for “MobileCRM.UI.EntityForm.onChange” and reuse the simple JavaScript functions within On load/On change rules directly.
We can add the Rules on the forms in order to automatically populate default values, hide show fields, update record values etc. But previously it was difficult to add complicated logic within Rules on the forms. Now as we have an option to execute the JS function from Rules we are not supposed to add additional Iframe on the Form in order execute JavaScript functionality.
Now, let’s consider an example where user wants to schedule an appointment for particular Account from the Field Service Mobile application by single change on the Account form. To achieve this requirement using the Execute JS feature within the Rules on the Form, follow the steps given below:
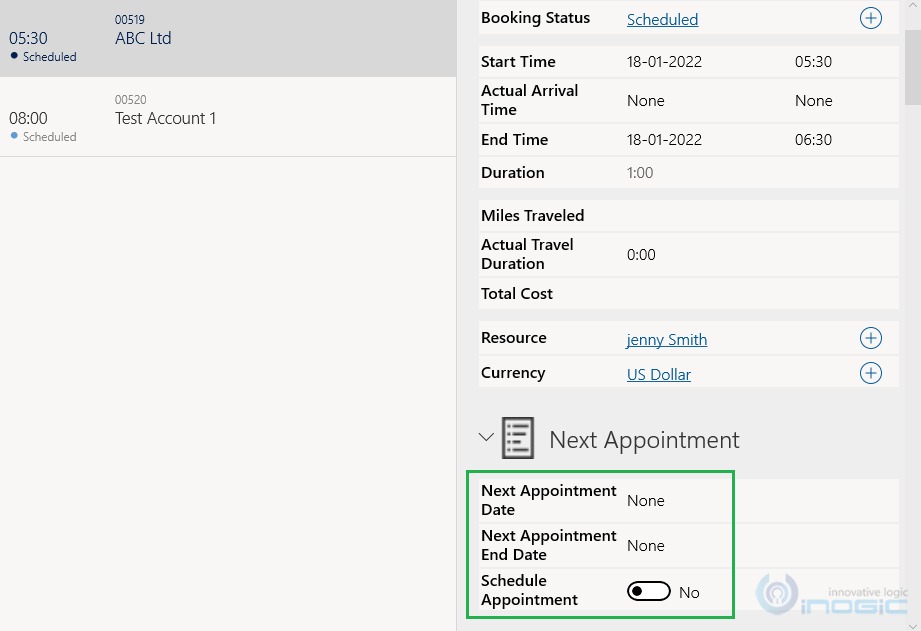
1. On Booking, add “Schedule Appointment?”, “Next Appointment Date”, “Next Appointment End Date” custom fields which will be used to create a new Appointment record.
2. Open Woodford mobile project and navigate to the Bookable Resource Booking entity form and add these fields on the same so that technician can have access to the functionality within Field Service Mobile as shown in the below screenshot:
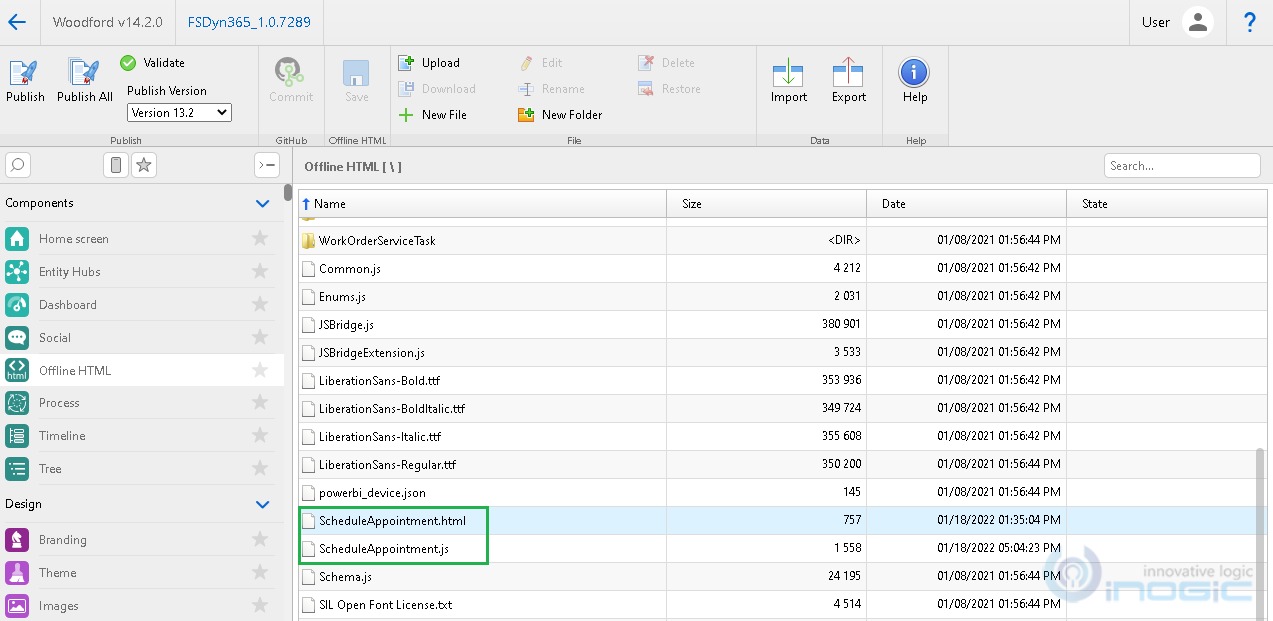
3. On change of Schedule Appointment field value as Yes, we need to trigger a JavaScript function, which will create an Appointment record. So, will create the Iframe, JavaScript Library with below code to create an appointment and add these files in the Offline HTML.
function ScheduleAppointment() {
try {

MobileCRM.UI.EntityForm.requestObject(

function (entityForm) {

var BookingEn = entityForm.entity;

if (BookingEn == null || BookingEn.properties == null)

return;

var AppointmentRequired = BookingEn.properties.new_scheduleappointment;

var WorkOrderRef = BookingEn.properties.msdyn_workorder;

if (!AppointmentRequired) return;

//create appointment record with Service Account

var appointmentRec = new MobileCRM.DynamicEntity.createNew("appointment");

appointmentRec.properties.subject = "Appointment For " + WorkOrderRef.primaryName;

appointmentRec.properties.regardingobjectid = new  MobileCRM.Reference(BookingEn.entityName, BookingEn.id);

appointmentRec.properties.scheduledstart = BookingEn.properties.new_nextappointmentdate;

appointmentRec.properties.scheduledend = BookingEn.properties.new_nextappointmentenddate;

appointmentRec.save(

function (err) {

if (err)

MobileCRM.bridge.alert(err);

else {

MobileCRM.bridge.alert("Appointment Scheduled Successfully...");

}

}

);

},

);

}

catch (err) {

MobileCRM.bridge.alert(err);

}

}
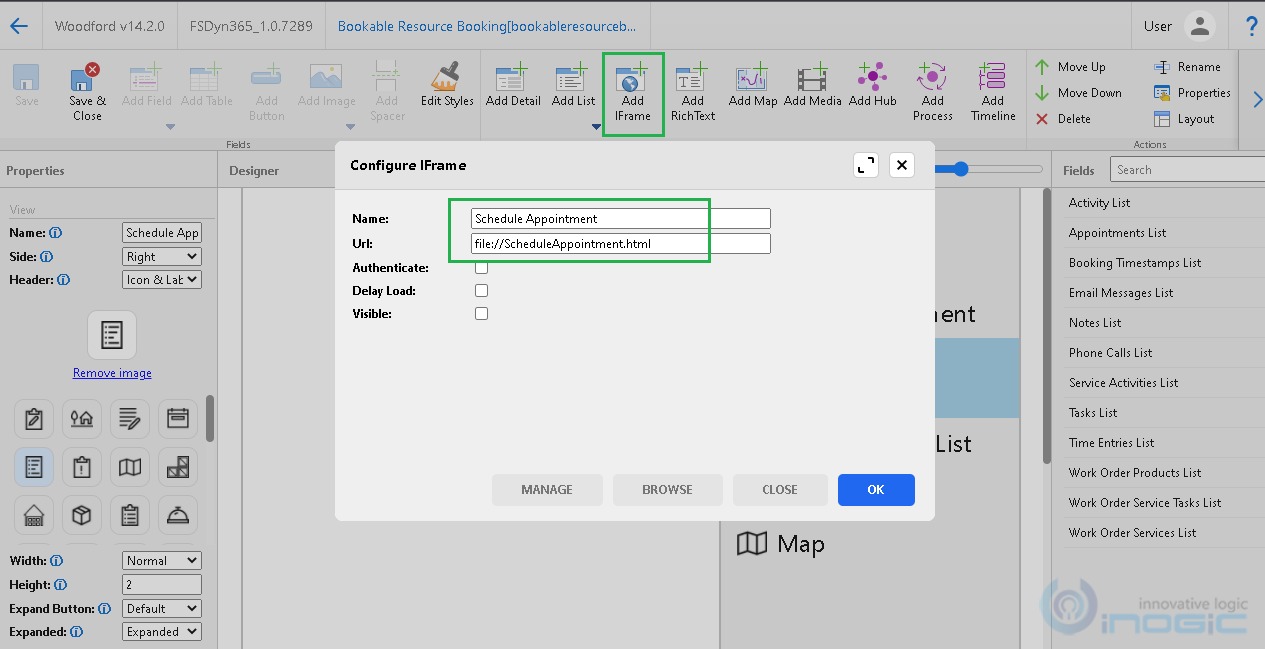
4. Now add the Iframe on the Booking form using “Add Iframe” button within mobile app project as shown in the below screenshot:
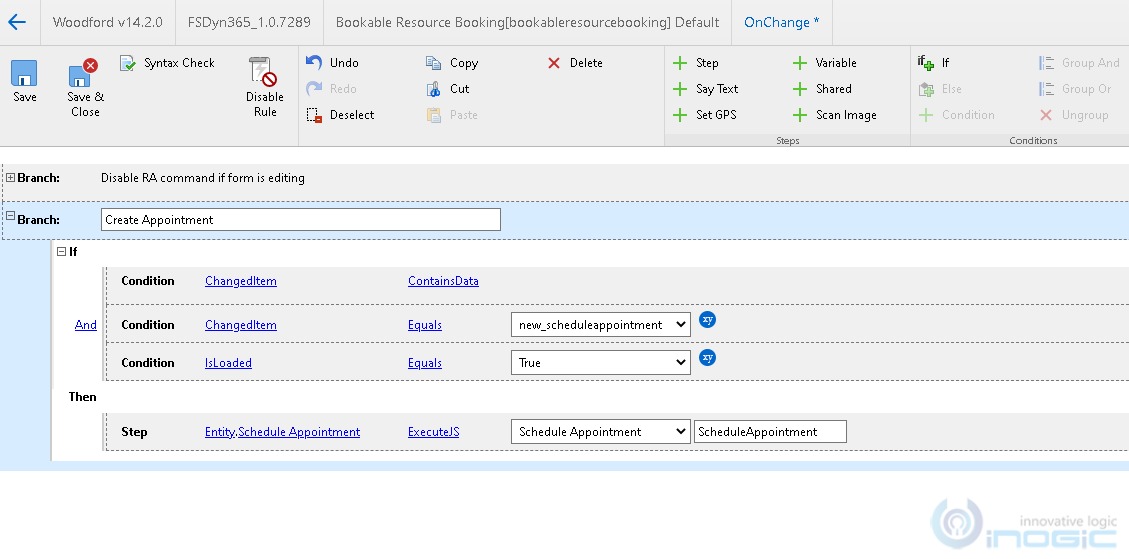
5. Now this functionality can be triggered on change of “Schedule appointment” field on the Booking record by adding the resco rules with ExecuteJS function by mentioning the tab and function Name from the script.
Please refer below screenshot for the same.
6. Next, save the changes and publish the customizations of the mobile project.
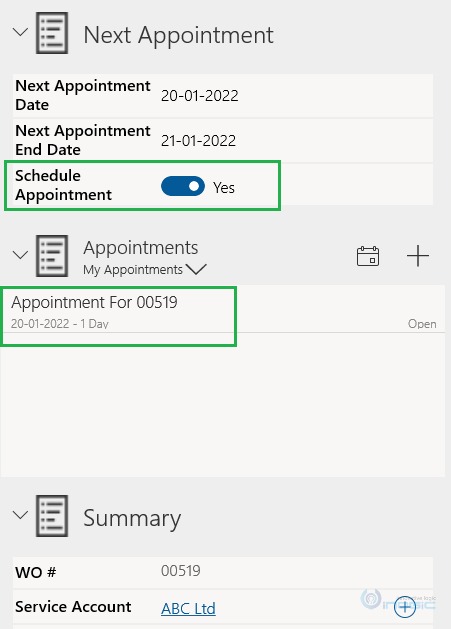
7. Technician can now open the Field Service Mobile app, navigate to the Booking Record, fill the Next Appointment Date, Next Appointment End Date and change the Schedule Appointment as Yes. This will create the appointment record with below listed details.
- Subject: Appointment For <<Work Order Number>>
- Regarding: Bookable Resource Booking record
- Scheduled Start: Next Appointment Date on Booking
- Scheduled End: Next Appointment End Date on Booking
Please refer below screenshot for the same.
Conclusion:
This ExecuteJS function within Resco rules allow us to easily execute the JavaScript functionality using simple rules instead of adding the complex code of request Objects as On load/On change/On save, which enhances the Field Service Mobile app functionalities.
Need any help with Microsoft Dynamics 365 Field Service module / Microsoft CRM / Power Platform development?
Want to manage your field services portal more effectively? Contact us at crm@inogic.com and our Inogic- Professional Services Division will help you modify, optimize, and automate all our requirements within Microsoft Dynamics 365 Field Service!
Happy Servicing!