Introduction:
Microsoft recently introduced us to the Custom API feature which is a new way of creating custom actions in Dynamics 365 CRM as seen in our previous blog. However, while writing the previous blog, there wasn’t any way of using this custom API in workflows.
But recently, we did see an approach to make use of the custom API with workflows.
Now let’s see how to achieve this.
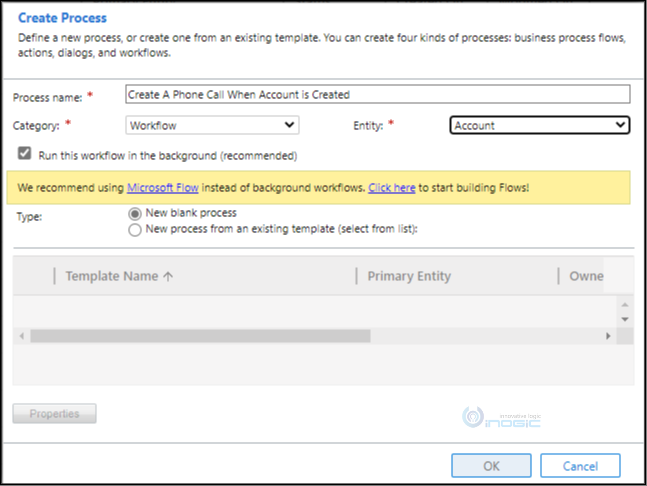
For demonstration purpose, we are creating a custom API that will be used in a workflow which will be triggered on creation of an account record. And every time this workflow gets triggered, it’ll call the custom API created by us, which will create a Phone Call activity associated to the same account with the due date set as the next day.
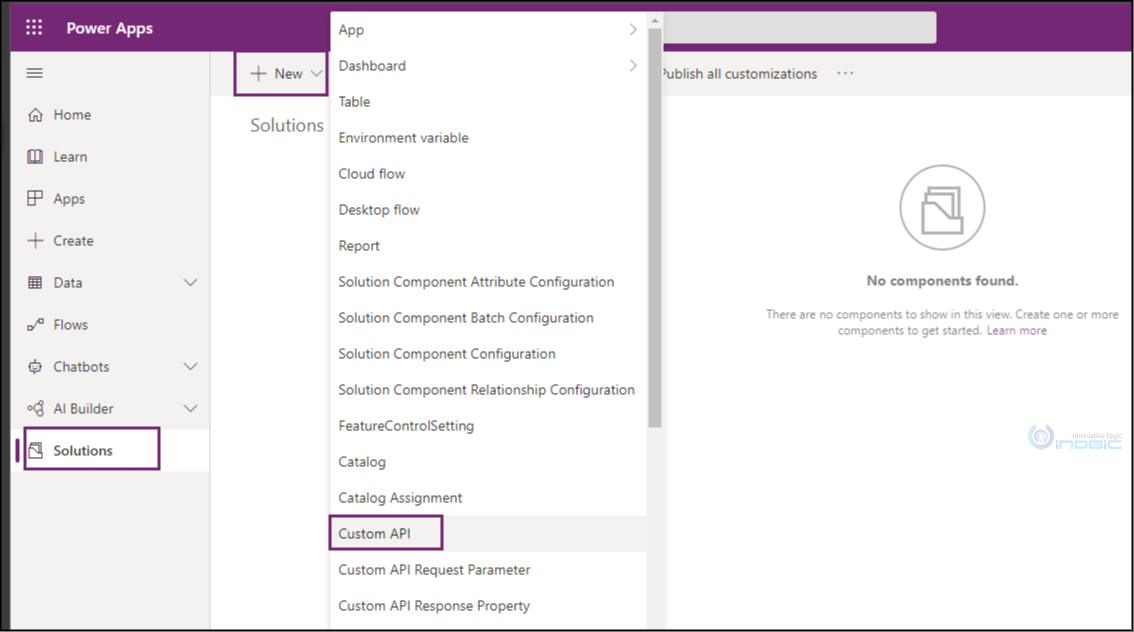
Step 1: Go to your solution in the power platform, click on ‘New’ and select the Custom API.
Step 2: A system form for Custom API will open up. Fill up the information about custom API.
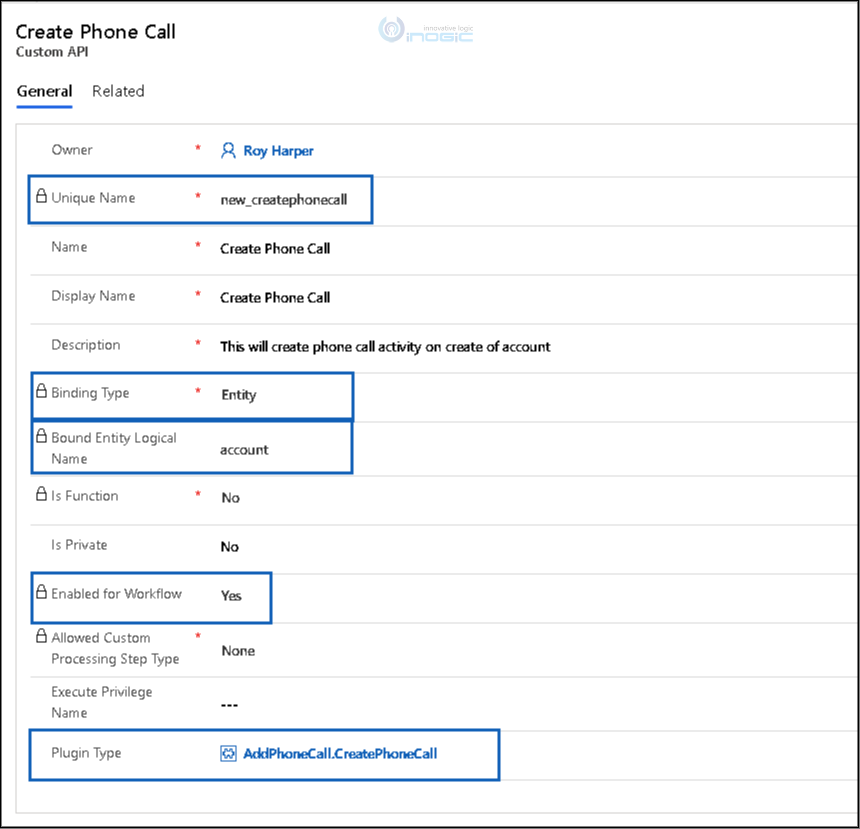
Unique Name: Unique name for the Custom API. This will be shown in the Perform Action step in the workflow, so keep it easily identifiable.
Binding Type: Binding Type is an option set field and could be set as Global, Entity, and Entity Collection. Here, we have set it to Entity, because we need to bind this API to the account entity.
Bound Entity Logical Name: Here we need to put the logical name of the entity if we set Binding type as Entity.
Note:-Since we want to retrieve the account record in context of which the workflow was fired, we are setting Binding type to Entity & Bound Entity logical Name to account so that we will be able to pass that as the target to our plugin called in the custom API.
Enabled for Workflow: It is a Boolean type field, in which we set if we want to allow this custom API to be used in workflow steps or not. We are setting it to true since we want to use it in the workflow step.
Note:- This is the important field which plays the key role in making use of the custom API with workflows, which was not made available earlier but now it can very much be seen on the custom API form.
Plugin Type: As explained in our previous blog as well, this is the lookup type of field which shall hold the already registered Plug-in assembly that is responsible for creation of phone call activity. Thus, it is advisable to first write and register your plug-in in CRM before starting with the custom API. If you are new to Plug-ins, then you can follow the steps from here.
From the next steps, we shall see how to use the custom API created in the above steps in workflow.
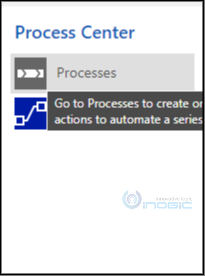
Step 3: Navigate to Advanced Settings -> Processes -> Create on New.

![]()
Step 4: After filling up the information in the dialog box, click on Ok.
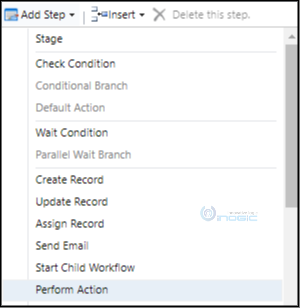
Step 5: Click on Add Step -> Select Perform Action.
Step 6: Select the custom API that we have created before. Note that the Entity will be automatically selected as Accounts. Click on Set Properties.

Step 7: Select Account -> Account in ‘Look for’ and click on Add and then on Ok. It should look similar to this.

Step 8: Activate the process.
Step 9: Create an Account record. And a phone call activity record will get created associated to the account with the due date as the next day and thus can be seen in the Timeline as well.
Conclusion: This is how we can use the Enabled for Workflow feature of custom API to use custom API in a workflow step.