 As we previously learned how to configure and set up a Code App component in our earlier blog, we will now extend that implementation further. You can refer to the earlier blog on Building Standalone Apps with Power Apps Code Apps: Using Dataverse and Office 365 Users Connectors for the initial setup.
In this blog, we will focus on connecting a Code App with a Microsoft Copilot Studio agent, enabling users to interact with data using natural language instead of traditional data sources.
Client Requirement
The client is a Sales Representative who needs quick access to CRM data without navigating through multiple screens.
They want to query data using natural language, such as:
- “Shortlist all the Appointments scheduled between specific dates”
- “Shortlist all the Opportunities in New York City”
- “Shortlist all the existing Contacts in Seattle”
The goal is to provide a chat-based assistant that fetches relevant data instantly using Copilot.
Prerequisites
Before starting, ensure:
- You have access to Power Platform Admin Center
- A published Copilot Studio agent
- Power Apps CLI (pac) installed
- Appropriate admin permissions on the environment
Step 1: Initialize Code App Project
Convert your React project into a Power Apps Code App to run following command in VS Code terminal.
pac code init –displayName “Code App Copilot” –description “React Code App with Copilot and Dataverse”
Step 2:Install the Power Apps SDK using following command
npm install @microsoft/power-apps
Step 3: Add Copilot Studio as Data Source to run following command.
pac code add-data-source -a “shared_microsoftcopilotstudio” -c “<connectionId>”
Note: Ensure that your agent is in Published in Copilot Studio.
Step 4: Select Environment – ensure you are logged in and select the target environment:
pac org select –environment <environment ID>
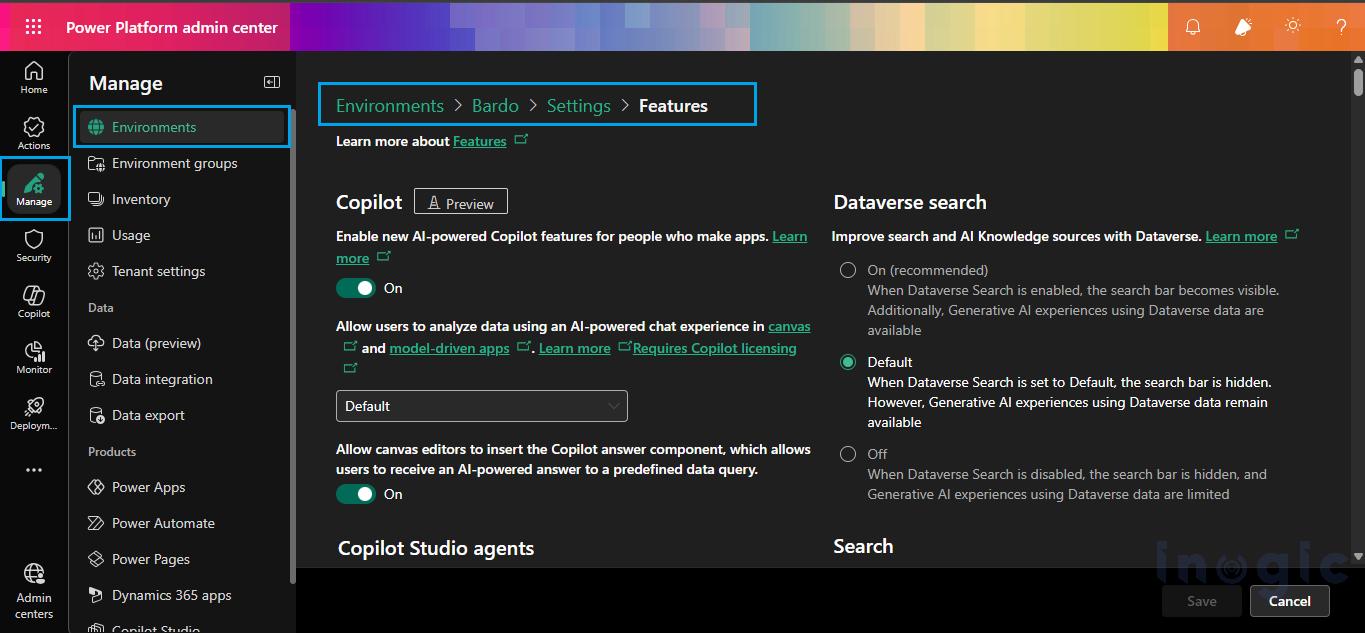
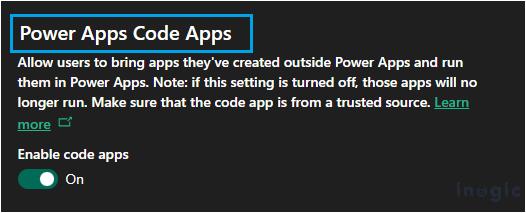
Step 5: Navigate to Admin Center > Environments > Settings > Product > Features and enable Code Apps option as shown in screenshot below:
Step 6: Implement Copilot Chat Component
Below is the working TypeScript implementation to establish conversation with the agent:
export const CopilotChat = () => {

const [messages, setMessages] = useState<

{ role: "user" | "copilot"; text: string }[]

>([]);

const [input, setInput] = useState("");

const agentSchemaName = 'cr720_agent';

const [conversationId, setConversationId] = useState<string | null>(null);


const sendMessage = async () => {

if (!input) return;


try {

setMessages(prev => [...prev, { role: "user", text: input }, { role: "copilot", text: "Thinking..." }]);


const response = await MicrosoftCopilotStudioService.ExecuteCopilotAsyncV2(

agentSchemaName,

{

message: input,

notificationUrl: "https://notificationurlplaceholder",

agentName: agentSchemaName,

conversationId: conversationId || undefined,

}

) as CopilotResponse;


const copilotText =

response.data?.responses?.[0] ?? "No response from Copilot.";


if (response.data?.conversationId) {

setConversationId(response.data.conversationId);

}


setMessages(prev => {

const updated = [...prev];

updated[updated.length - 1] = {

role: "copilot",

text: copilotText

};

return updated;

});


} catch (error) {

console.error("Error calling Copilot API:", error);


setMessages(prev => {

const updated = [...prev];

updated[updated.length - 1] = {

role: "copilot",

text: "Error getting response."

};

return updated;

});

}


setInput("");

};


return (

<div>

<h3>Copilot Assistant</h3>


<div style={{

height: "350px",

overflowY: "auto",

border: "1px solid #ccc",

padding: "10px",

marginBottom: "10px",

width: "150vh",

}}>

{messages.map((msg, index) => (

<div key={index} style={{ marginBottom: "10px" }}>

<strong>{msg.role === "user" ? "You" : "Copilot"}:</strong>


{msg.role === "copilot" ? (

<ReactMarkdown>{msg.text}</ReactMarkdown>

) : (

<span>{msg.text}</span>

)}

</div>

))}

</div>


<TextField

value={input}

onChange={(_, val) => setInput(val || "")}

placeholder="Ask Copilot..."

/>


<PrimaryButton

text="Send"

onClick={sendMessage}

style={{ marginTop: "10px" }}

/>

</div>

);

};
Step 7: Push Code App
Once configured, your project structure will look like:
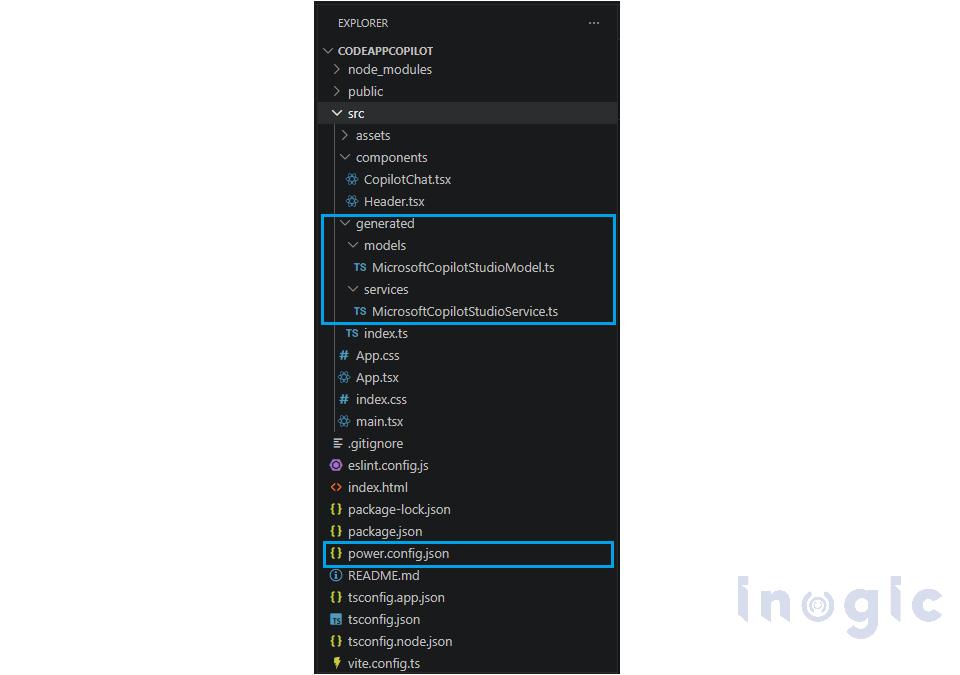 Key files:
- CopilotChat.tsx – Chat UI logic
- MicrosoftCopilotStudioModel.ts – data structures (TypeScript interfaces/types) used when interacting with the Copilot API.
- MicrosoftCopilotStudioService.ts – MicrosoftCopilotStudioService.ts
- power.config.json → Configuration
- vite.config.ts → Build setup
Ensure you are logged into PAC CLI and push your code:
pac code push
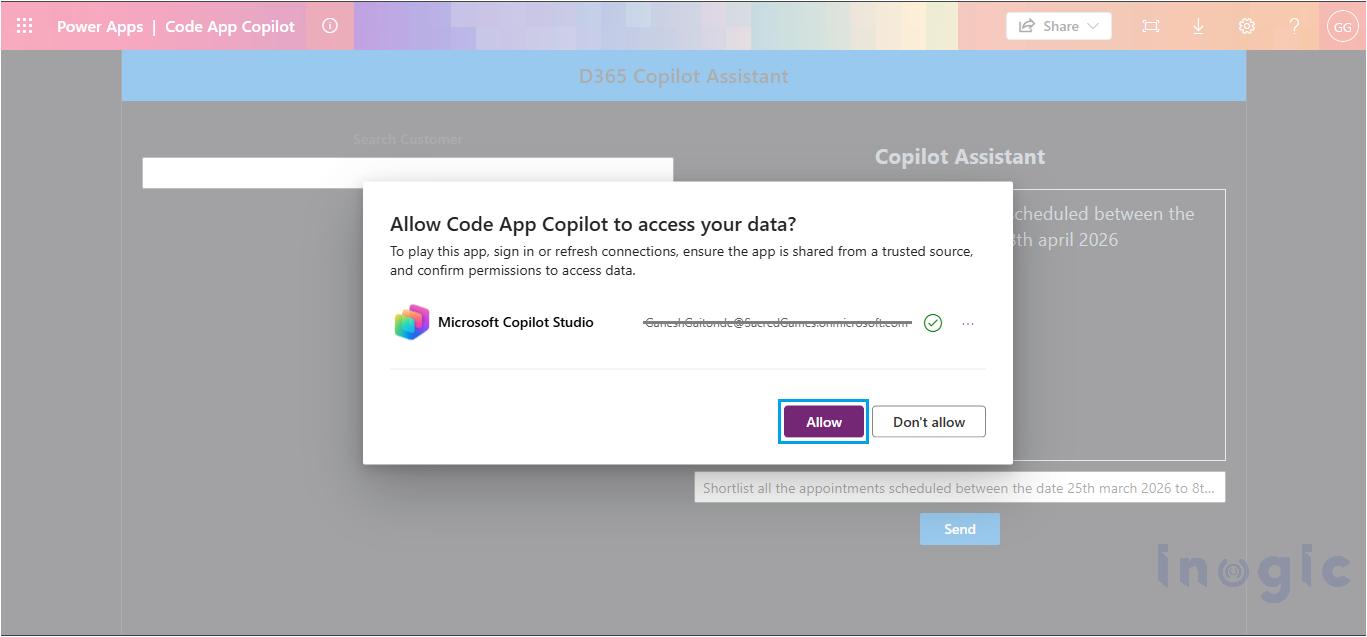
Step 9: Allow Connection Permissions
When opening the app, Allow Code App Copilot to access your data by click on Allow button.
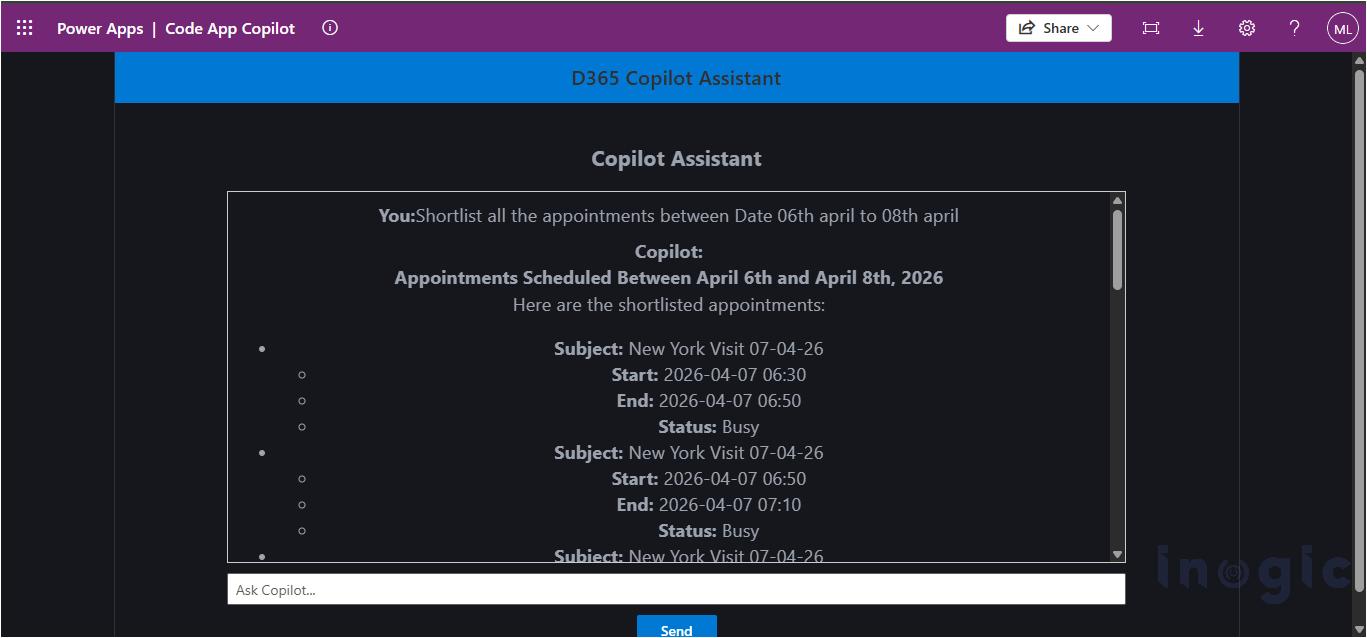
 Final Output
 Final Output
The application allows users to:
- Interacts with the app using simple text queries
- Copilot processes queries and returns relevant data instantly
- Responses displayed in a chat-like conversational format
- Supports queries like:
“Shortlist appointments between <Date Range>”
 Conclusion
 Conclusion
Easy integration of Power Apps Code App with AI capabilities using Microsoft Copilot Studio Agent.
FAQs
What is a Power Apps Code App?
A Power Apps Code App is a developer-centric application model that allows you to build custom apps using modern frameworks like React while still integrating deeply with the Power Platform ecosystem. It enables seamless connectivity with Dataverse, connectors, and external services.
What is Microsoft Copilot Studio used for in Power Apps?
Microsoft Copilot Studio is used to build intelligent conversational agents that can understand natural language and return contextual responses. In Power Apps Code Apps, it enables chat-based interaction with CRM or business data.
Can Power Apps Code Apps use natural language queries?
Yes. By integrating Copilot Studio, users can query data using natural language such as:
- “Show appointments between date range”
- “List opportunities in New York”
- “Get contacts in Seattle”
The Copilot agent interprets these queries and returns structured data.
What are the prerequisites to integrate Copilot Studio with Code Apps?
To integrate successfully, you need:
- Access to Power Platform Admin Center
- A published Microsoft Copilot Studio agent
- Installed Power Apps CLI (PAC)
- Proper environment admin permissions
- A configured Power Apps Code App project