In the Dynamics 365 and Power Apps ecosystem, we have several options for building applications, each one is for a specific type of requirement. Model-driven Apps works well when we need a structured UI with standard components, while we use Canvas Apps to create custom, mobile-friendly interfaces with a low-code approach. Recently, Microsoft introduced another application type called Code Apps, which offers a completely different way to build applications using pro code approach.
With the introduction of Power Apps Code Apps, things have changed. Code Apps let us build standalone single page applications using modern web frameworks. These are independent applications that cannot be integrated with Canvas Apps or Model-driven Apps.
The best part is that we get direct access to more than 1,500 standard and premium connectors through the Power Apps SDK. We do not have to write any authentication code, no OAuth flows, no custom APIs, no middleware. We just have to connect and use.
In this article, we’ll walk you through creating a Code App from scratch. We’ll build Personal Dashboard, a simple application that pulls assigned cases and leads from Dataverse and shows current logged in user details using the Office 365 Users and Dataverse connectors.
What Makes Code Apps Different?
We can build a UI of our own choice and connect to a wide range of data sources using more than 1,500 standard and premium connectors provided by the Power Platform. All connections are secure because the Power Apps SDK handles authentication, and each connector enforces user-level permissions. This means the app can only access data that the signed-in user is allowed to see, so there’s no need to write custom authentication code.
Code Apps provide a balanced approach with several key advantages:
- A standalone application that runs directly within Power Platform
- Full development with modern web frameworks such as React, Vue, or Angular, with support for your preferred libraries
- Direct access to connectors through the Power Apps SDK without custom authentication code
- Streamlined deployment through a single command to your environment
The connector integration is particularly valuable. Whether the need is to query Dataverse, access current user profile details, or use other services, the connector can be called directly. There’s no need to configure service principals, manage app registrations, or implement token management. The integration works seamlessly within the platform.
Prerequisites
Before getting started, we have to make sure the following prerequisites are in place:
- Power Apps Premium license with Code Apps enabled environment
- Visual Studio Code installed
- Node.js LTS version
- Power Platform Tools for VS Code extension
Step 1: Setting Up the Code App
Let’s create the app. Open VS Code, launch a PowerShell terminal, and run the following command:
npm create vite@latest PersonalDashboard — –template react-ts
For this application, we are using React as the framework and TypeScript as the variant. After that, navigate to the project folder and install the dependencies:
npm install
Install the node type definitions:
npm i –save-dev @types/node
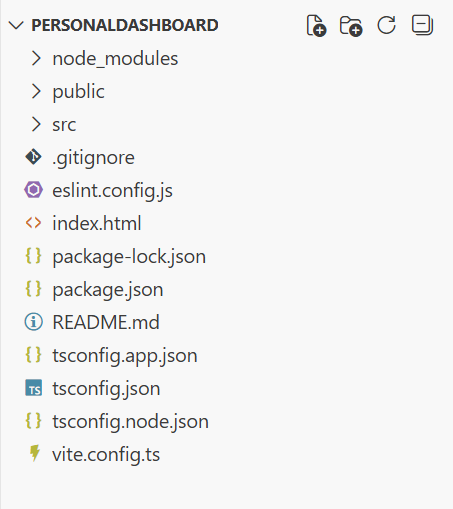
After executing these commands, the project structure will appear as shown in the image below.
According to the official Microsoft documentation, the Power Apps SDK currently requires the port to be 3000 in the default configuration. To configure this, open vite.config.ts and replace the content with the following code:
import { defineConfig } from 'vite'

import react from '@vitejs/plugin-react'

import * as path from 'path'


// https://vite.dev/config/

export default defineConfig({

base: "./",

server: {

host: "::",

port: 3000,

},

plugins: [react()],

resolve: {

alias: {

"@": path.resolve(__dirname, "./src"),

},

},

});
Note for Mac users: It may be necessary to modify the package.json scripts section.
Change from:
"scripts":  {

"dev": "start vite && start pac code run",

"build": "tsc -b && vite build",

"lint": "eslint .",

"preview": "vite preview"

}
to this
"scripts": {
"dev": "vite && pac code run",
"build": "tsc -b && vite build",
"lint": "eslint .",
"preview": "vite preview"
}
Save the file and run the Code App locally by executing:
npm run dev
Browse to http://localhost:3000. If the application loads successfully, press Ctrl+C to stop the server.
Step 2: Initialize the Code App
First authenticate to Power Platform:
pac auth create
After that, sign in with the credentials and select the environment:
pac env select -env <environment-url>
Initialize the Code App:
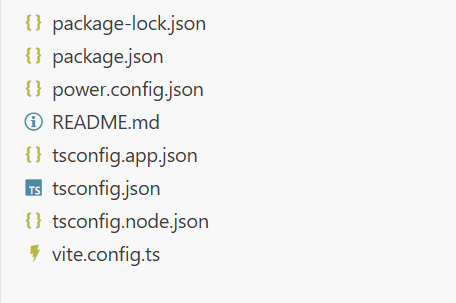
pac code init –displayName “Personal Dashboard”
This will create a power.config.json file in the project as shown in the image below.
Now install the Power Apps SDK. This package provides APIs that allow the application to interact directly with Power Platform services and includes built-in logic to manage connections automatically as they are added or removed.
npm install –save-dev “@microsoft/power-apps
Update package.json to run both Vite and the Power Apps SDK server:
"scripts": {
"dev": "start pac code run && vite",
"build": "tsc -b && vite build",
"lint": "eslint .",
"preview": "vite preview"
}
Step 3: Configure Power Provider
Create PowerProvider.tsx under src and add the Power SDK context provider code given below.
import { initialize } from "@microsoft/power-apps/app";

import { useEffect, type ReactNode } from "react";

interface PowerProviderProps {

children: ReactNode;

}

export default function PowerProvider({ children }: PowerProviderProps) {

useEffect(() => {

const initApp = async () => {

try {

await initialize();

console.log('Power Platform SDK initialized successfully');

} catch (error) {

console.error('Failed to initialize Power Platform SDK:', error);

}

};

initApp();

}, []);

return <>{children}</>;

}
Update the main.tsx and add this line in the imports section:
import PowerProvider from './PowerProvider.tsx'
and change this code snippet
<StrictMode>
<App />
</StrictMode>,
to this
<StrictMode>

<PowerProvider>

<App />

</PowerProvider>

</StrictMode>,
Run the app by executing :
npm run dev
Open the URL provided by the Power SDK Server in the same browser profile as that of power platform tenant.
Step 4: Adding Dataverse Connector
Now comes the part where we will add the data source to our application. In this step, we’ll use the Dataverse connector to fetch assigned cases and leads for the logged-in user.
For that First, we need to create a connection:
1. Go to Power Apps and open Connections.
2. Click New Connection and select Dataverse.
Follow the instruction properly to create the connection, as shown in the
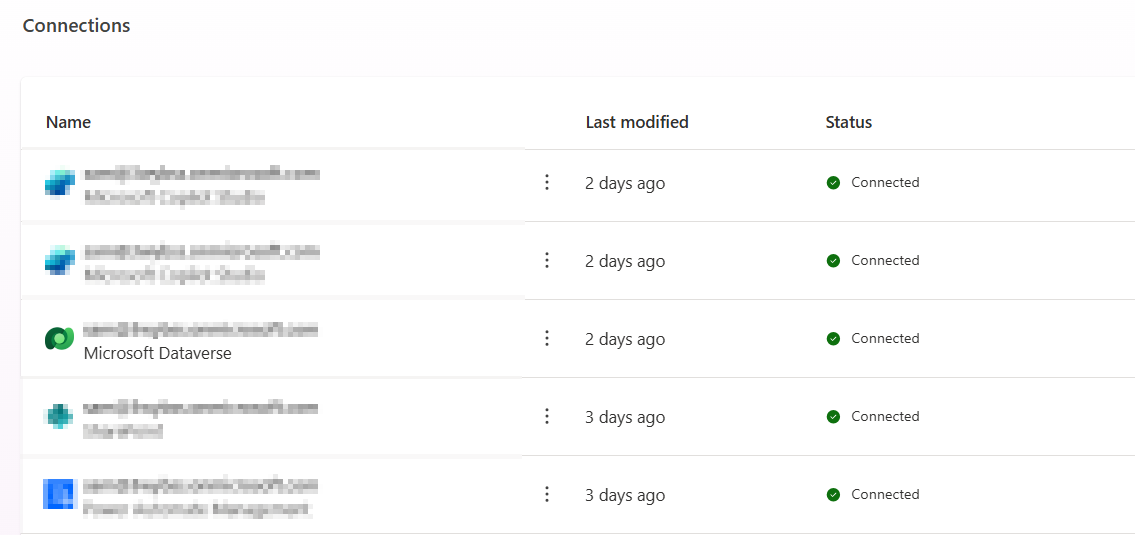
Once the connection is ready, we have to open the terminal. For Dataverse, we have to add the tables required for the application. For this example, we’ll add the Leads and Incident (Cases) tables using the following commands:
pac code add-data-source -a dataverse -t lead
pac code add-data-source -a dataverse -t incident
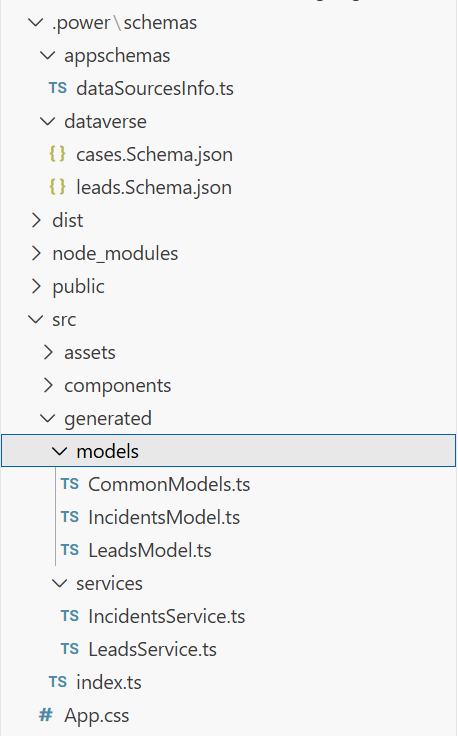
After running these commands, we can see that some files and folders are added to the project. Inside the generated folder, there are services and models folders. These contain the files for Leads, Incidents, and other tables, which can be used in the code. For example:
import { AccountsService } from './generated/services/AccountsService';

Import type { Accounts } from './generated/models/AccountsModel';
CRUD operations can be performed on Dataverse using the app. Before accessing any data, we have to initialize the Power Apps SDK to avoid errors. An async function or state check can ensure the SDK is ready before making API calls. For example:
useEffect(() => {

// Define a function of asynchronous type to properly initialize the Power Apps SDK to avoid any error during runtime


const init = async () => {

try {

await initialize(); // Wait for SDK initialization

setIsInitialized(true); // Mark the app as ready for data operations

} catch (err) {

setError('Failed to initialize Power Apps SDK'); // Handle initialization errors

setLoading(false); // Stop any loading indicators

}

};


init(); // Call the initialization function when the component mounts

}, []);


useEffect(() => {

If (!isInitialized) return;


// Place your data reading logic here
}, []);
Step 5: Adding Office 365 Users Connector
Similar to Dataverse, we need to create a connection for Office 365 Users by following the same steps. Once the connection is ready, we need to add it to the application. First, list all available connections to get the connection ID using command:
pac connection list
It will list all the connections available in the selected environment. We need to Copy the connection ID for Office 365 Users from the list, then add it to the project using:
pac code add-data-source -a “shared_office365users” -c “<connection-id>”
After running this command, the Office 365 Users connector will be available to use in the application, allowing access to user profiles, and other Office 365 user data.
Step 6: Building the UI
There are two ways to build a good UI. The first is the traditional coding approach where we write the complete code manually. The second is by using GitHub Copilot integrated in VS Code with the help of prompts.
Using GitHub Copilot:
We can generate the UI by writing a detailed prompt in GitHub Copilot. Here’s an example prompt:
Create a Personal Dashboard UI component in React with TypeScript that displays:
- A header section showing the current logged-in user’s profile information (name, email, job title, and profile photo) fetched from Office 365 Users connector
- Two main sections side by side:
– Left section: Display a list of assigned Cases (Incidents) from Dataverse
* Show case title, case number, priority, status, and created date
* Use card layout for each case
* Add loading state and error handling
– Right section: Display a list of assigned Leads from Dataverse
* Show lead name, company, topic, status, and created date
* Use card layout for each lead
* Add loading state and error handling
- Use modern, clean UI design with:
– Responsive layout (works on desktop and mobile)
– Tailwind CSS for styling
– Professional color scheme (blues and grays)
– Proper spacing and typography
– Loading spinners while data is fetching
– Error messages if data fails to load
After providing this prompt to GitHub Copilot, it will generate the complete component code. We can then review the generated code, make any necessary adjustments, and integrate it into our application.
Step 7: Deploy Your Code App
Once the code is complete and the app is running locally, the next step is to deploy the application. For Code Apps, deployment is straightforward. First, build the application by running:
npm run build
After a successful build, execute the following command to push the application to Power Apps:
pac code push
This command will deploy the application to Power Apps. To verify the deployment, go to the Power Apps portal and open the Apps section. The newly deployed Code App will be visible in the list as shown in the image below.
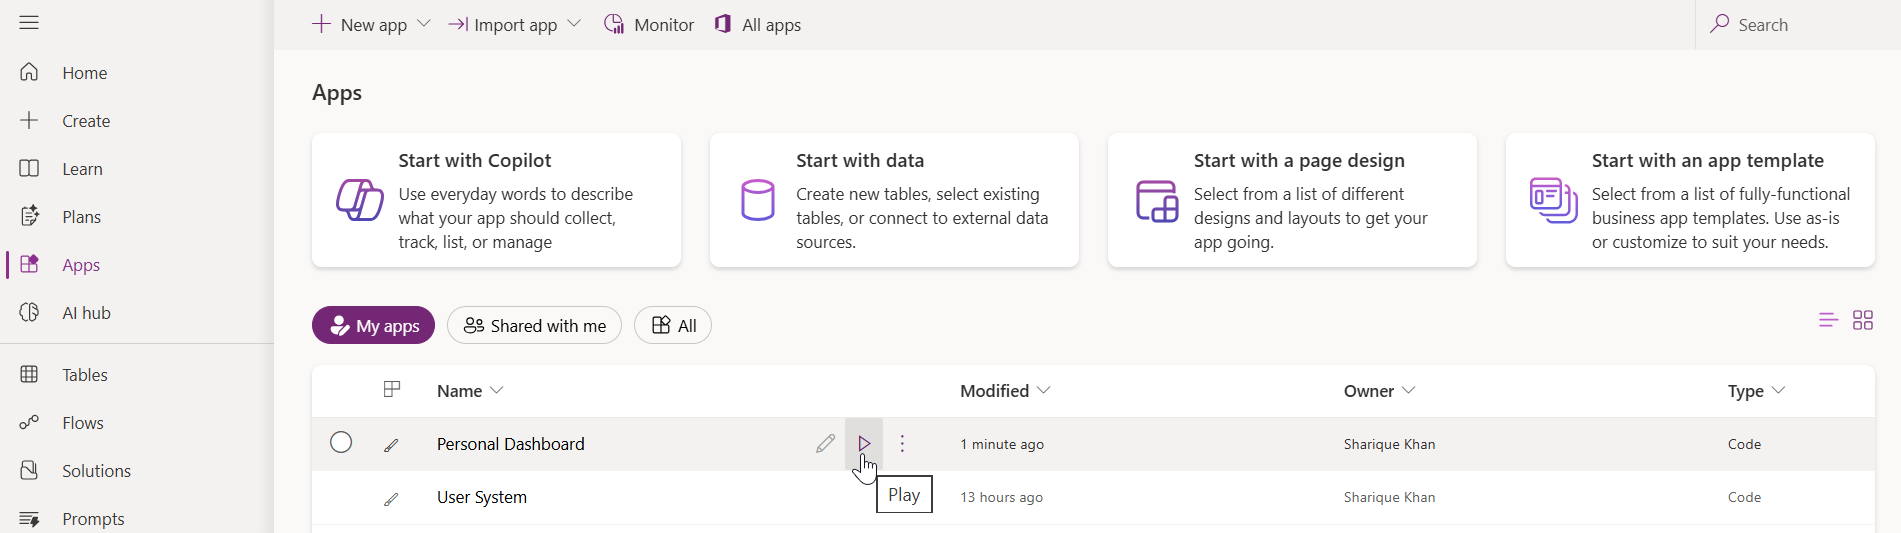
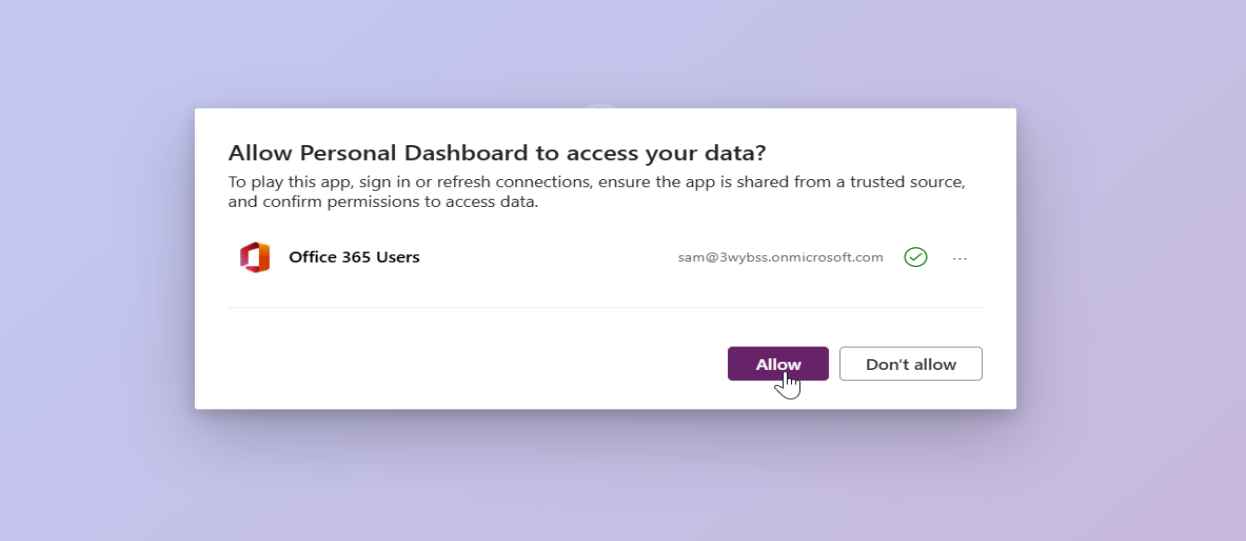
To run the app, click the play button. On the first launch, the application will prompt for permission to access the connected data sources. After allowing the permissions, the application will use those connection references for all subsequent operations.
Conclusion
With Power Apps Code Apps, we can now build standalone applications. The real advantage here is the direct access to over 1,500 connectors through the Power Apps SDK. We can connect to Dataverse, Office 365 Users, and other services without writing any authentication code. The Power Apps SDK handles all the security, and each connector respects user level permissions automatically.
We also get complete freedom to design our own UI using any libraries we prefer. The deployment process is simple. Just run the build command and push it to Power Platform with a single command.
In this article, we built a Personal Dashboard that pulls data from Dataverse and Office 365 Users. The same approach works for any application that needs to connect with Power Platform services. The setup is straightforward, and once the project is initialized, adding new data sources is just a matter of running a few commands.
Code Apps provide a practical way to build custom applications within the Power Platform ecosystem while maintaining secure connections and proper access control.
Frequently Asked Questions (FAQs)
What are Power Apps Code Apps?
Power Apps Code Apps are a new application type in Microsoft Power Platform that allow developers to build standalone single-page applications using modern web frameworks such as React, Angular, or Vue. They provide direct access to Power Platform connectors through the Power Apps SDK without requiring custom authentication code.
How are Code Apps different from Canvas Apps and Model-Driven Apps?
Unlike Canvas Apps and Model-Driven Apps, Code Apps:
- Are fully standalone applications
- Use a pro-code development approach
- Allow complete control over UI and application architecture
- Cannot be embedded into Canvas or Model-Driven Apps
- Use modern frontend frameworks instead of low-code designers
Do Power Apps Code Apps require authentication setup?
No. Authentication is handled automatically by the Power Apps SDK. Developers do not need to implement OAuth flows, manage tokens, or configure app registrations. All connectors enforce user-level permissions by default.
Can Power Apps Code Apps connect to Dataverse?
Yes. Power Apps Code Apps can connect directly to Dataverse using the Dataverse connector. Developers can perform CRUD operations on Dataverse tables, such as Leads and Incidents once the SDK is initialized.
How do Code Apps access Office 365 user information?
Code Apps use the Office 365 Users connector to retrieve profile details such as name, email, job title, and profile photo. The connector respects the signed-in user’s permissions automatically.