 In today’s digital-first business environment, customer portals are expected to deliver far more than convenience. They must provide a seamless user experience while maintaining strong security, compliance, and data protection standards. For organizations using Microsoft Power Pages, balancing usability with security is often one of the biggest operational challenges.
Our team recently experienced this firsthand while managing a business-critical customer portal built on Power Pages. The portal enabled registered users to track service requests, raise support tickets, and securely download business documents, a standard yet essential self-service experience for the customer’s operations.
The platform had been live for several months and appeared to be performing well. User adoption was growing, support requests had reduced significantly, and stakeholders were satisfied with the overall experience. However, one important aspect had never been formally validated: security.
The situation changed when the customer’s internal audit team classified the portal as “security unverified” during a routine compliance review. Suddenly, the focus shifted from functionality to risk assessment. With a strict two-week deadline to demonstrate that the portal met enterprise security expectations, the team needed a faster and more efficient way to identify vulnerabilities, validate configurations, and strengthen the overall security posture.
This is where the Power Pages Security Agent proved invaluable, transforming what could have been a lengthy manual audit exercise into a streamlined and actionable security review process.
What Is the Security Agent?
Before we walk through what we did, here’s a quick explanation for anyone who hasn’t used it yet.
The Security Agent is an AI-powered feature built directly inside the Power Pages design studio. It does three things automatically:
- Runs a security scan every two weeks using the OWASP ZAP engine, checking 37 common vulnerability rules.
- Monitors your live traffic continuously using Microsoft Sentinel signals, looking for suspicious spikes or bot patterns.
- Provides a chat panel where you can ask security questions in plain English and get answers specific to your site.
The key difference from other security tools is that it doesn’t just find problems, it walks you through fixing them, one step at a time, without needing any security expertise.
Step 1 — Opening the Site in Power Pages
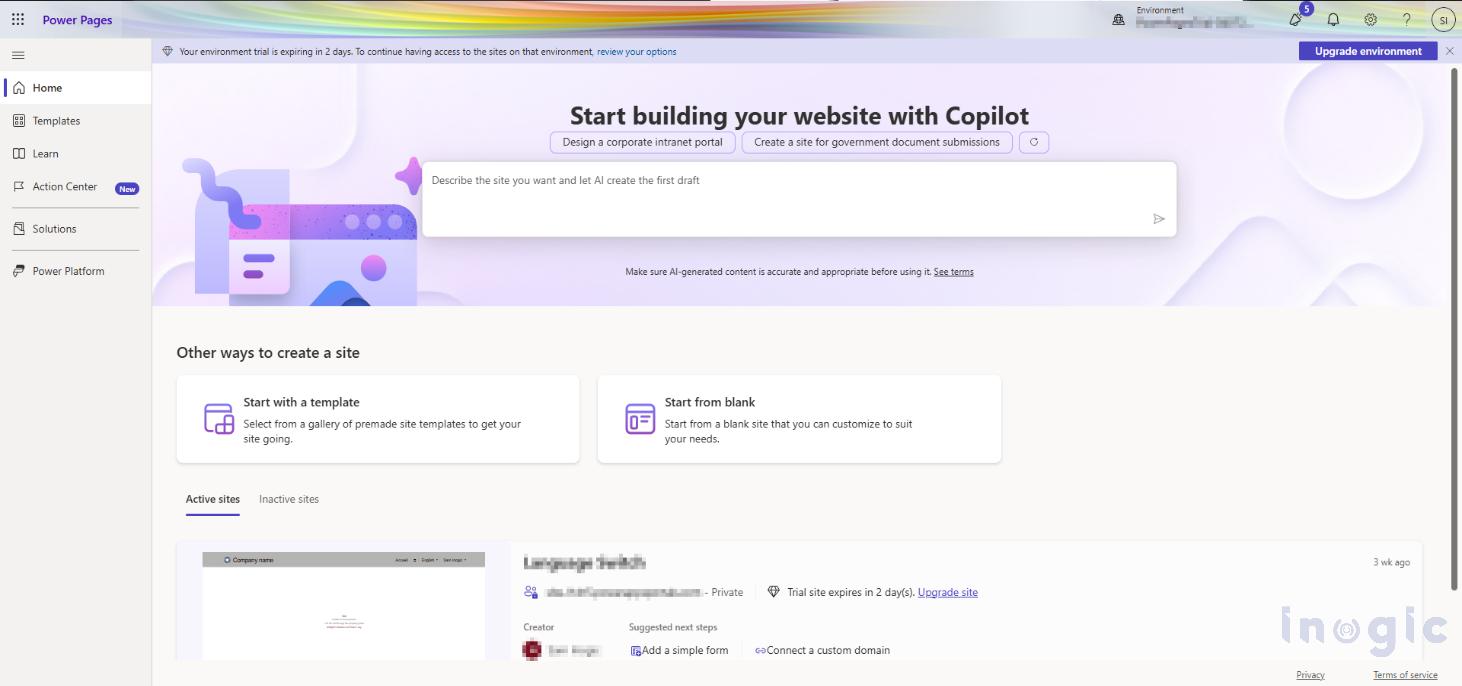
We started by going to make.powerpages.microsoft.com and signing in. The home screen showed all our active sites. We could see our portal listed there, shown here as the ‘Language Switch’ site, which is the test environment we used before the actual deployment.
From this screen, we clicked the Edit button on our site. This opens the full Power Pages design studio, which is where all the real work happens.
Important: You cannot access the Security Agent from the home screen. It only appears once you’re inside the design studio.
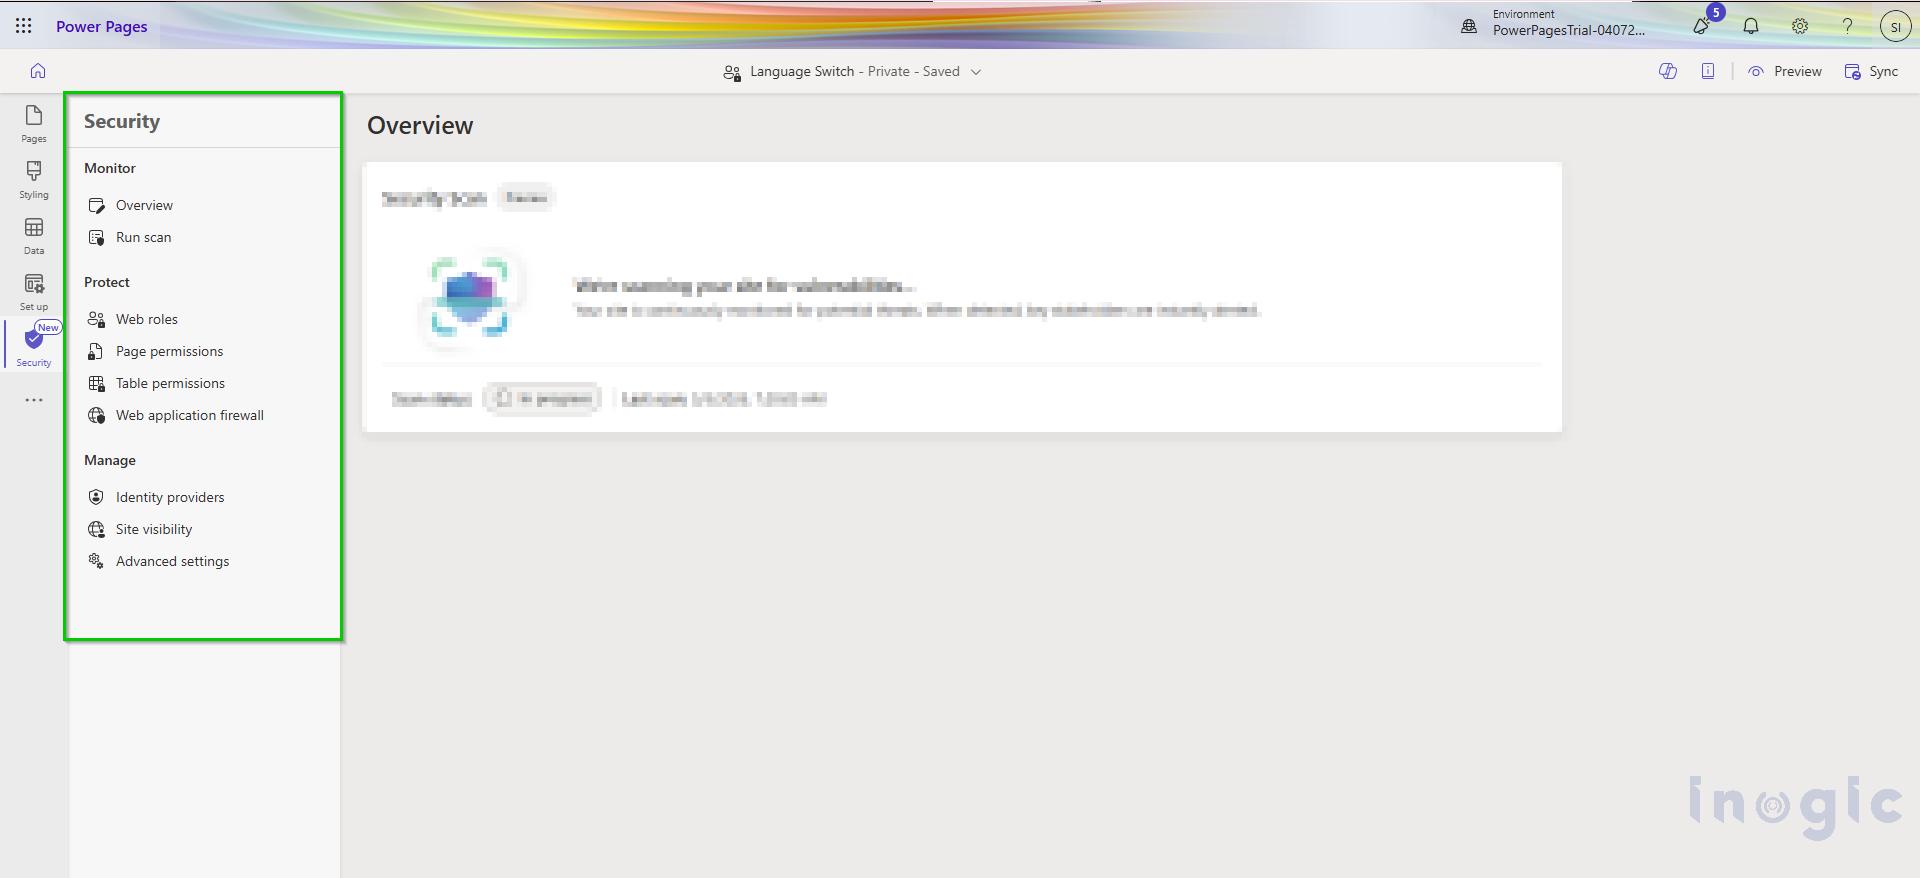
Step 2 — Finding the Security Workspace
Once inside the design studio, we looked at the left navigation bar. There’s a shield icon, that’s the Security workspace. It sits below Pages, Styling, Data, and Set up in the sidebar.
We clicked it and saw three tabs: Monitor, Protect, and Manage. This is the control center for everything security-related on the site.
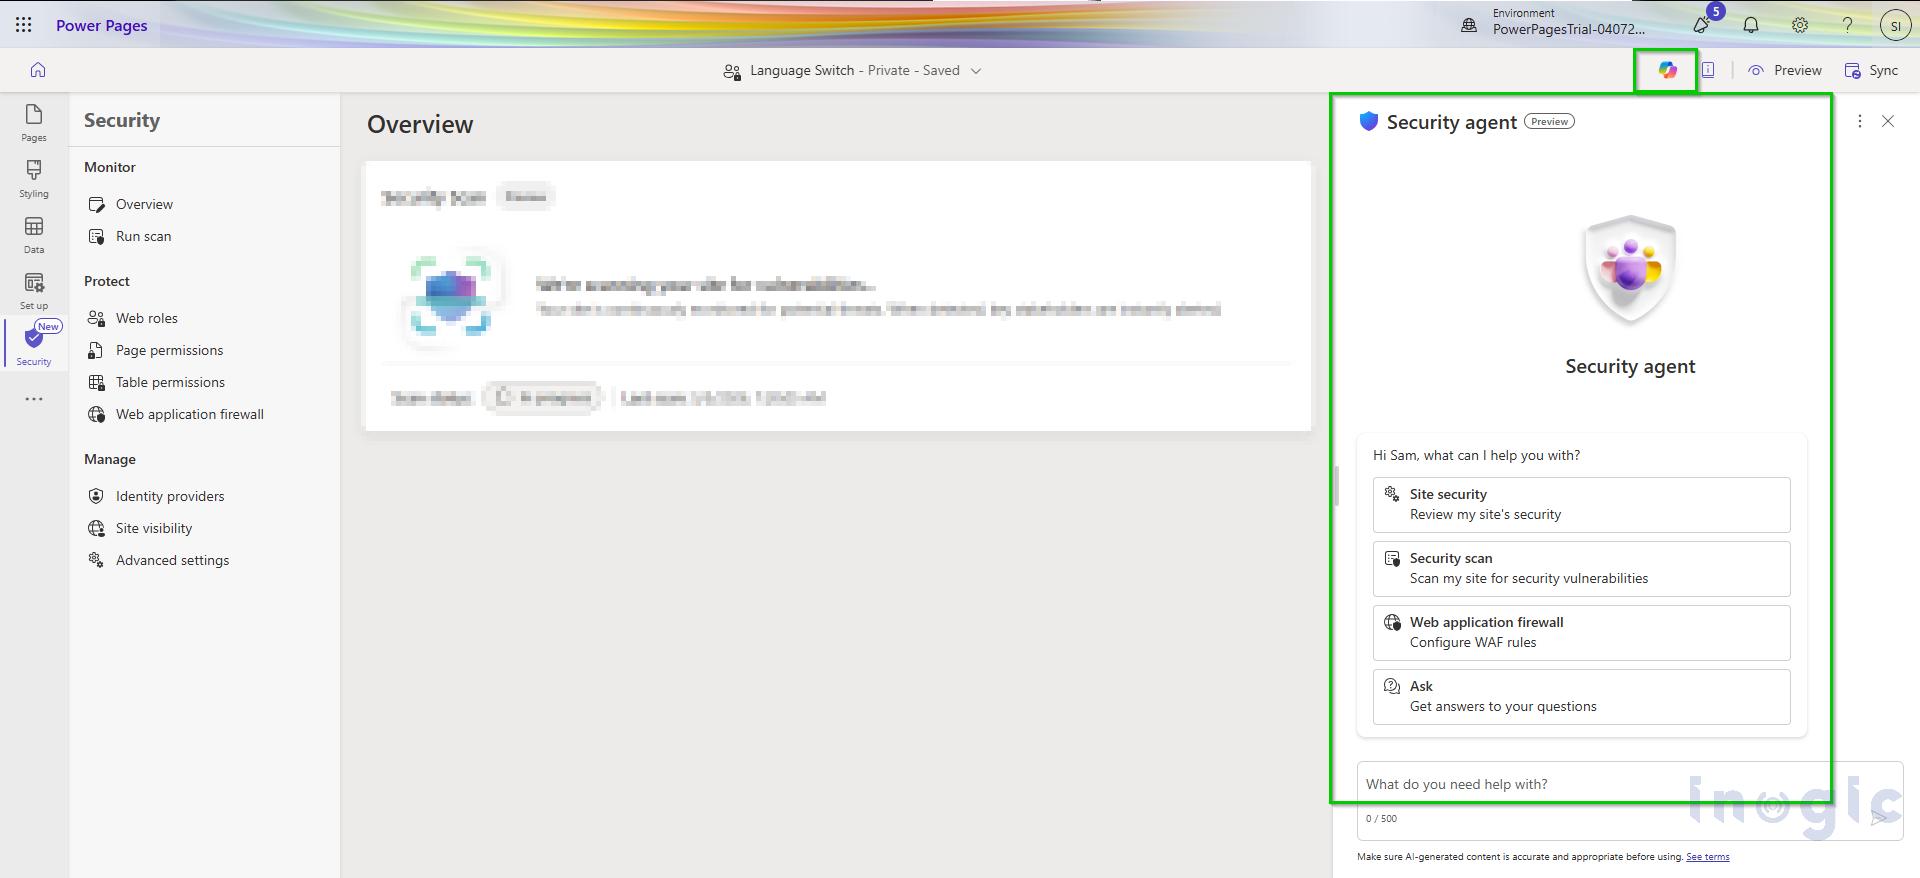
Step 3 — Open the Security Agent
You will find it as a Copilot icon in the top-right corner of the design studio page.
Clicking that icon opens the Security Agent as a panel on the left side of the screen. This is the AI-powered chat interface, you can type your security questions directly here, and it responds with guidance specific to your site.
If your environment looks different from what you have read in other blogs, this is completely normal. Microsoft has been rolling out the Security Agent UI in phases. Some environments show it as a tab with toggles, while others surface it through the Copilot icon. The underlying capability is the same either way.
Step 4 — Running the Security Scan
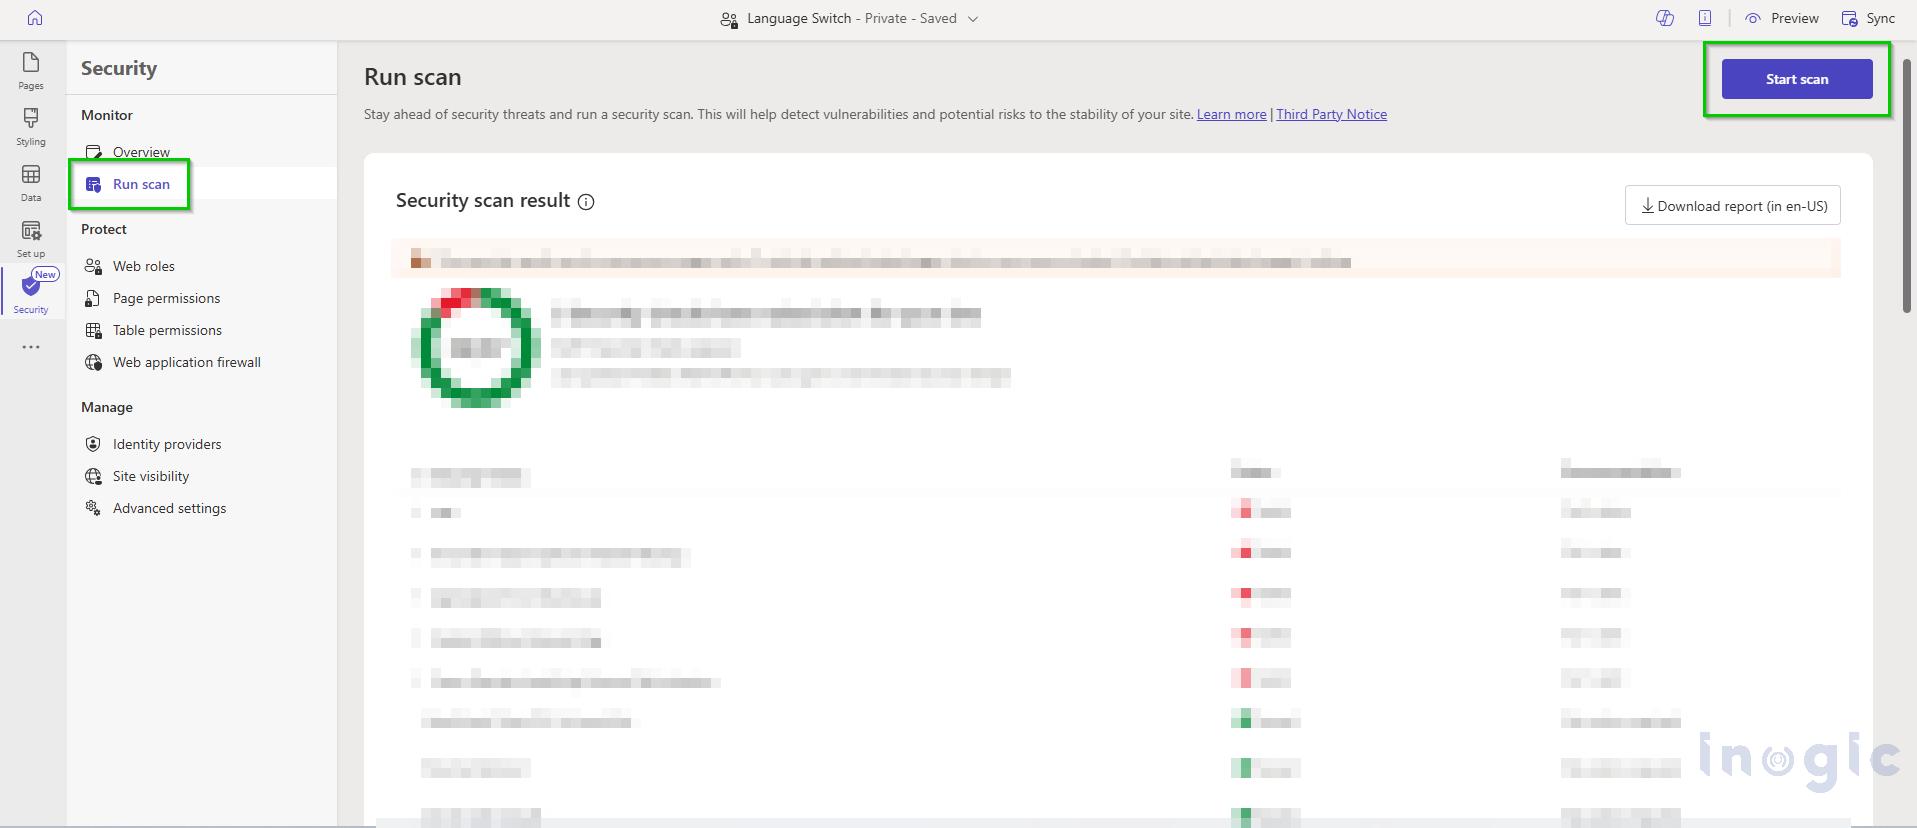
Once the Security Agent was open, the first thing we needed to do was actually run a scan on the portal.
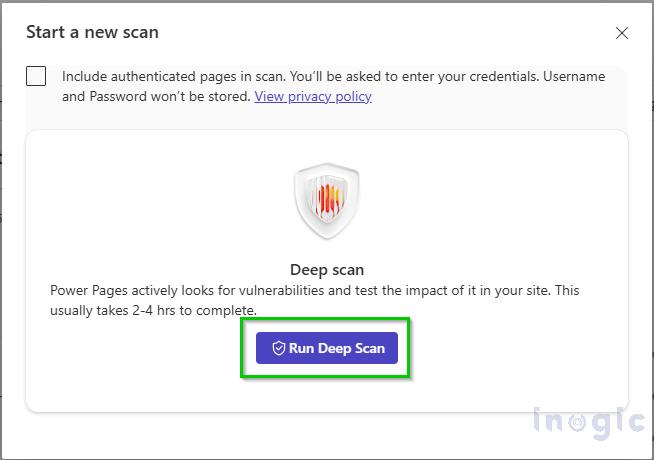
Inside the design studio, go to the Security workspace → Monitor tab, then go to the Run Scan. You will see a Start Scan button at the top right of the page. Click it and the scan starts immediately.
The scan uses the OWASP ZAP engine and checks your site against 37 security rules covering the most common web vulnerabilities. Depending on the size of your site, it usually completes within a few minutes. You will see a progress indicator while it runs.
Once it finishes, the Overview screen refreshes automatically and shows you the full list of findings.
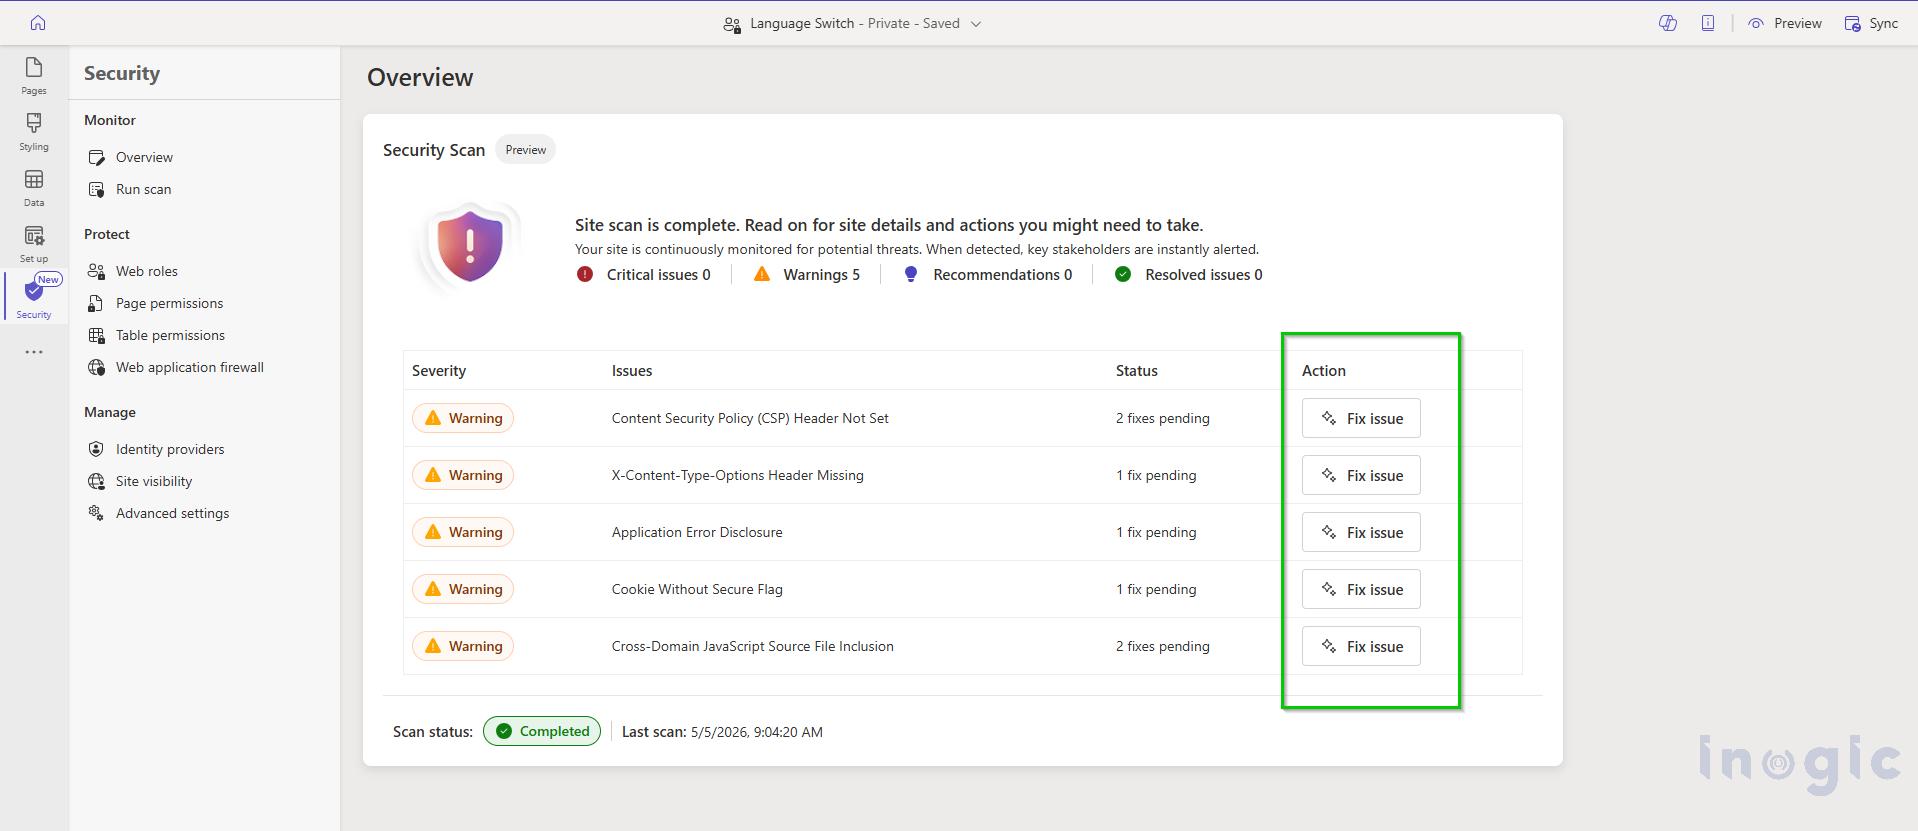
Step 5 — Reviewing the Scan Results
After the scan completes, the Overview screen displays all findings organized by severity: Critical, High, Medium, and Low.
For our portal we had two High-severity findings:
X-Frame-Options header not set, leaving the site open to clickjacking attacks, where a malicious site can embed your portal inside a hidden frame and trick users into clicking things they cannot see.
Content Security Policy (CSP) not configured, making it easier for attackers to inject malicious scripts into your pages.
There were also three medium alerts around cookie settings and referrer policy. Each alert showed a plain-English description of the risk and a View Fix button right next to it — so you never have to figure out the solution on your own.
Step 6 — Fixing the Alert (The Easy Part)
Understanding the risk first
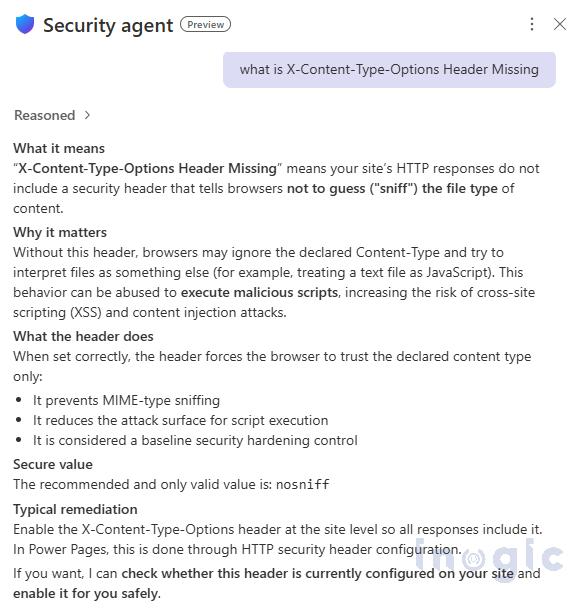
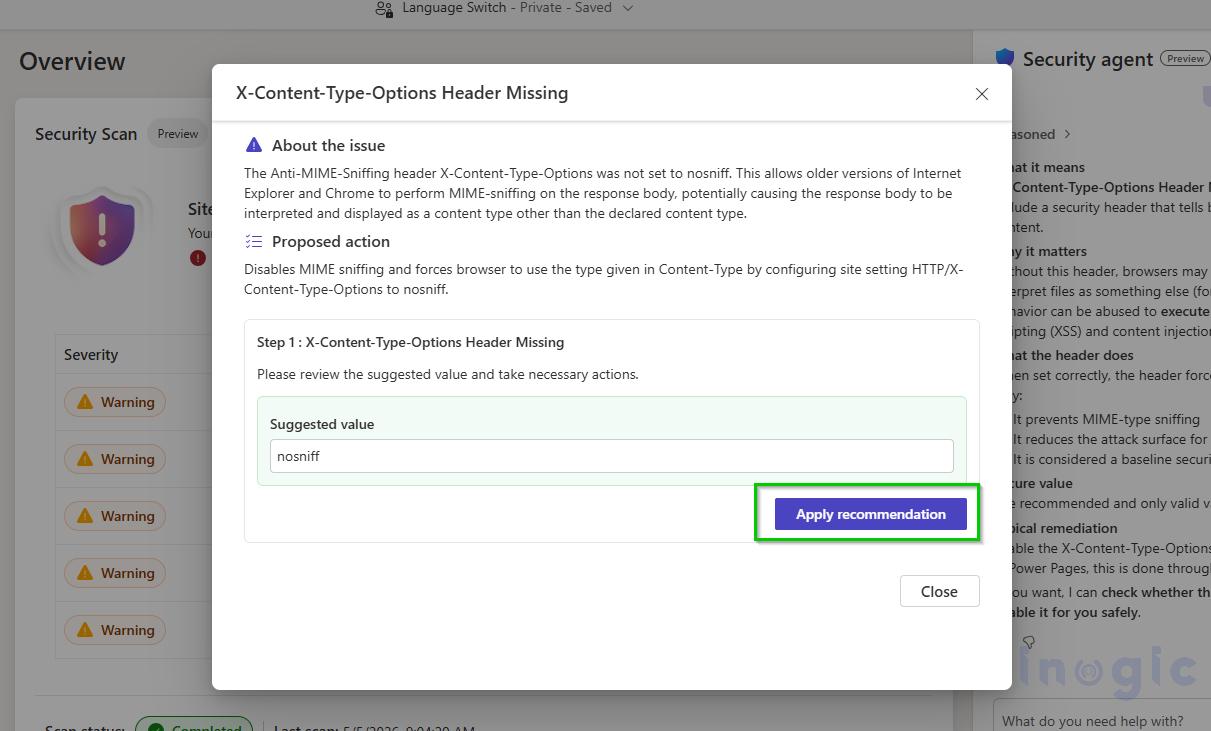
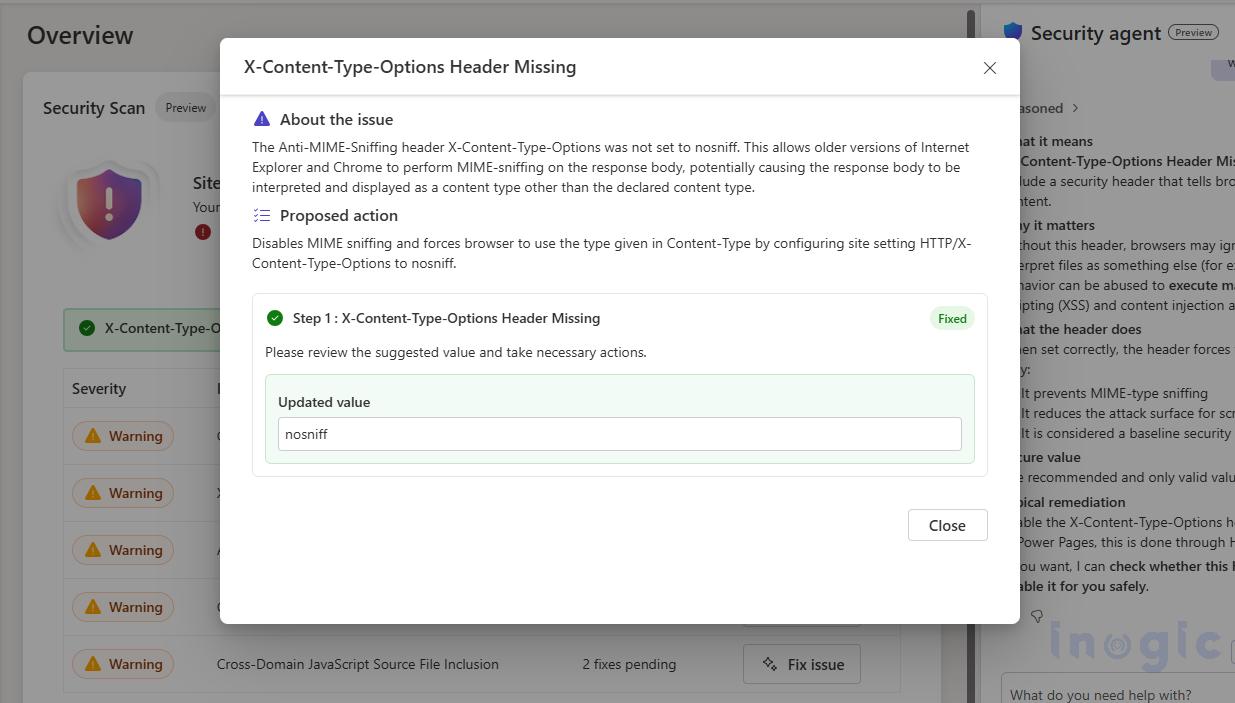
Before clicking anything, we opened the Security Agent chat and typed: what is X-Content-Type-Options Header Missing’
The agent explained it in plain terms: “X-Content-Type-Options Header Missing” means your site’s HTTP responses do not include a security header that tells browsers not to guess (“sniff”) the file type of content.
Applying the fix
We clicked View Fix on the X-Content-Type-Options Header Missing alert. The fix panel showed us the plain-English explanation again, a pre-filled value field with no sniff, and an editable text box in case we needed to adjust it.
We reviewed it, left the value as suggested, and clicked Apply. The agent confirmed the change was made and the alert status immediately updated to Resolved.
Conclusion
The Power Pages Security Agent is one of those features that quietly solves a problem most teams have been ignoring. Security has always been something that happens ‘later’ in a portal project, after the go-live, when there’s time when someone flags it.
Having the agent built into the design studio means security is no longer a separate conversation. It’s just part of building the site. And for a team like ours that manages multiple client portals, that shift matters a lot.
If you have a Power Pages site that hasn’t been scanned yet, turn the Security Agent on today. Run the scan. Spend an hour going through the alerts. Chances are you’ll find something worth fixing, and now you have a tool that shows you exactly how.
FAQs
What is the Power Pages Security Agent?
The Power Pages Security Agent is an AI-powered security assistant built into Microsoft Power Pages. It helps administrators identify vulnerabilities, monitor suspicious activity, and apply security fixes directly from the Power Pages design studio.
How does the Security Agent improve Power Pages security?
The Security Agent improves security by automatically scanning websites for vulnerabilities, monitoring traffic patterns for threats, and providing guided recommendations to fix security issues without requiring advanced cybersecurity expertise.
What security vulnerabilities does Power Pages Security Agent detect?
The Security Agent detects common web vulnerabilities such as missing security headers, clickjacking risks, insecure cookie settings, Content Security Policy (CSP) issues, and other threats identified through OWASP ZAP security rules.
Does the Power Pages Security Agent use OWASP standards?
Yes. The Security Agent uses the OWASP ZAP engine to scan Power Pages websites against 37 common web security vulnerability checks aligned with industry-standard OWASP practices.
Where can I find the Security Agent in Power Pages?
The Security Agent can be accessed inside the Power Pages design studio through the Security workspace or the Copilot icon located in the top-right corner of the interface, depending on the environment version.
Can non-technical users use the Security Agent?
Yes. The Security Agent is designed for both technical and non-technical users. It explains vulnerabilities in plain English and provides step-by-step guidance for resolving issues.