The agenda for today’s blog is-
1. How to show CRM entity data in tabular format using a data table control of the Canvas App.
2. How to read the selected data table row details.
3. How to filter or search data table data based on some condition.
Requirement:
We have a customer requirement in that the user wants to display the Accounts on the Data Table control. After displaying Accounts on the Data Table, the user wants to search Accounts data based on the Account Name column along with that user wants to read the individual row data, if any user clicks on an individual row then retrieved data should be displayed on a specific form. One more important requirement users have, they need to filter the Accounts which contain Annual Revenue of more than 5000.
Solution:
To achieve the above customer requirement, we have created a Canvas App and tried to implement the above three requirements one by one.
1. Display the Account entity records on the Data Table control
After creating the Canvas App, add Data Table control on the current app screen as shown in the screenshot below:
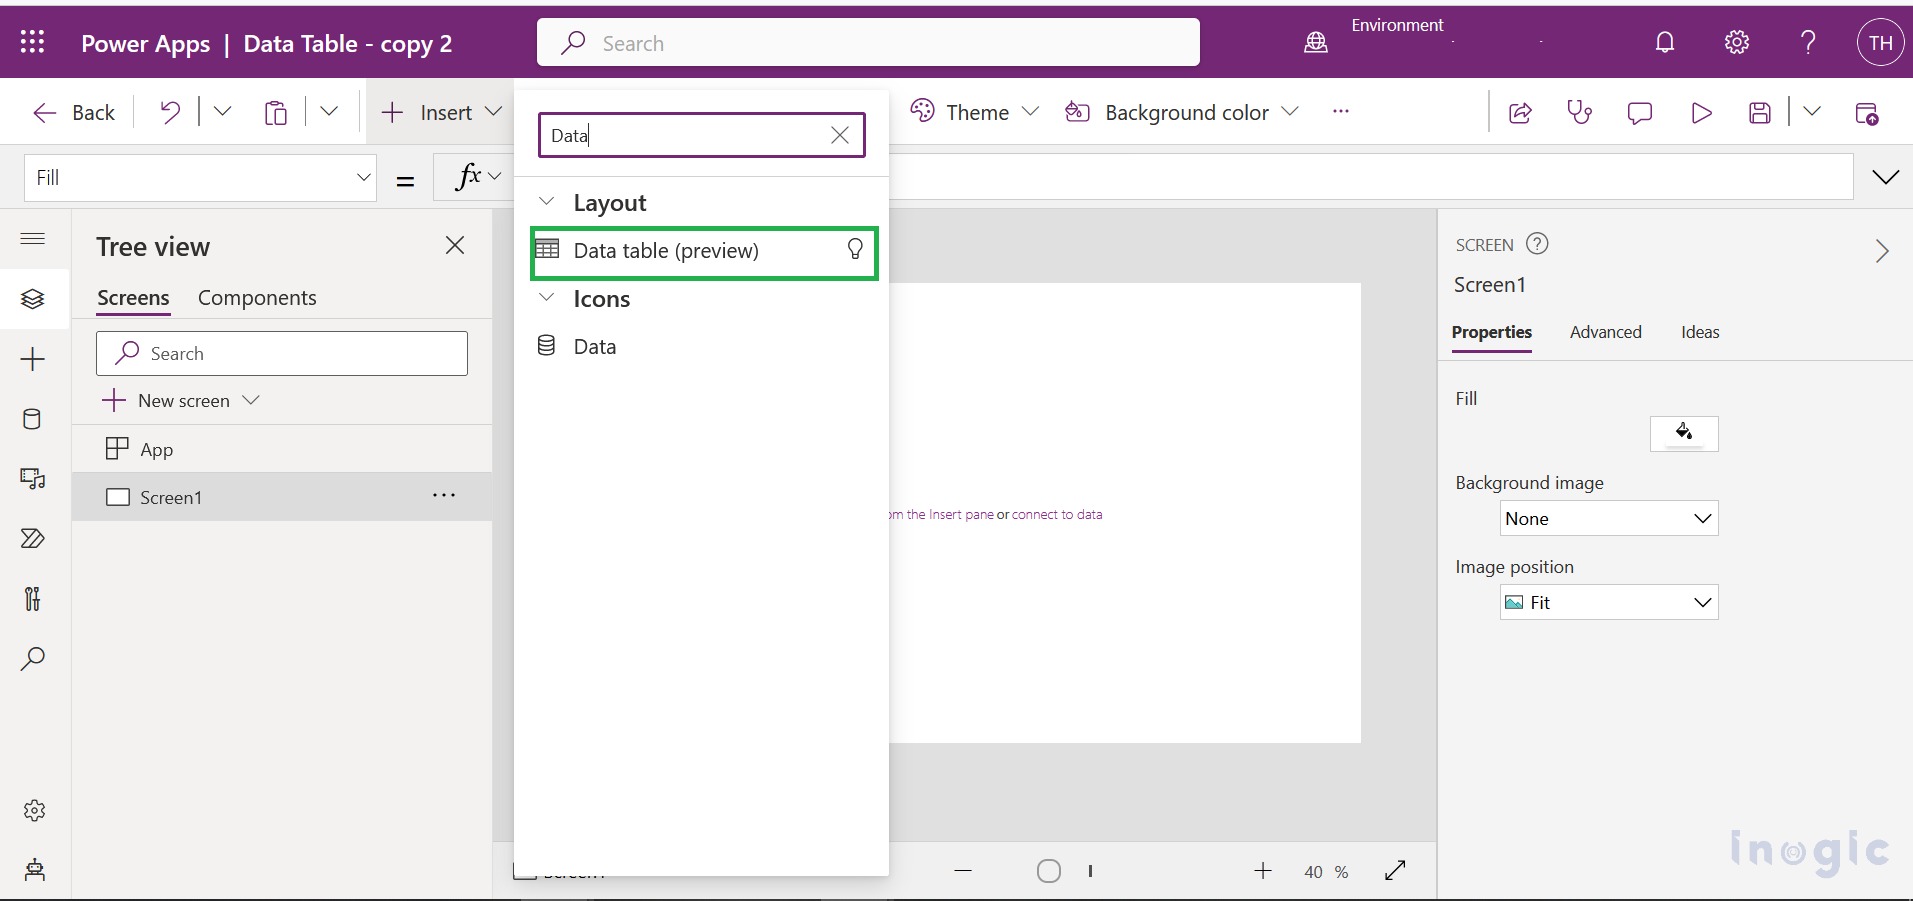
After adding the data table control, we have to set the Data Source property for added Data Table. So, in our scenario, we have selected the Account entity because the user wants to see the Account entity records.
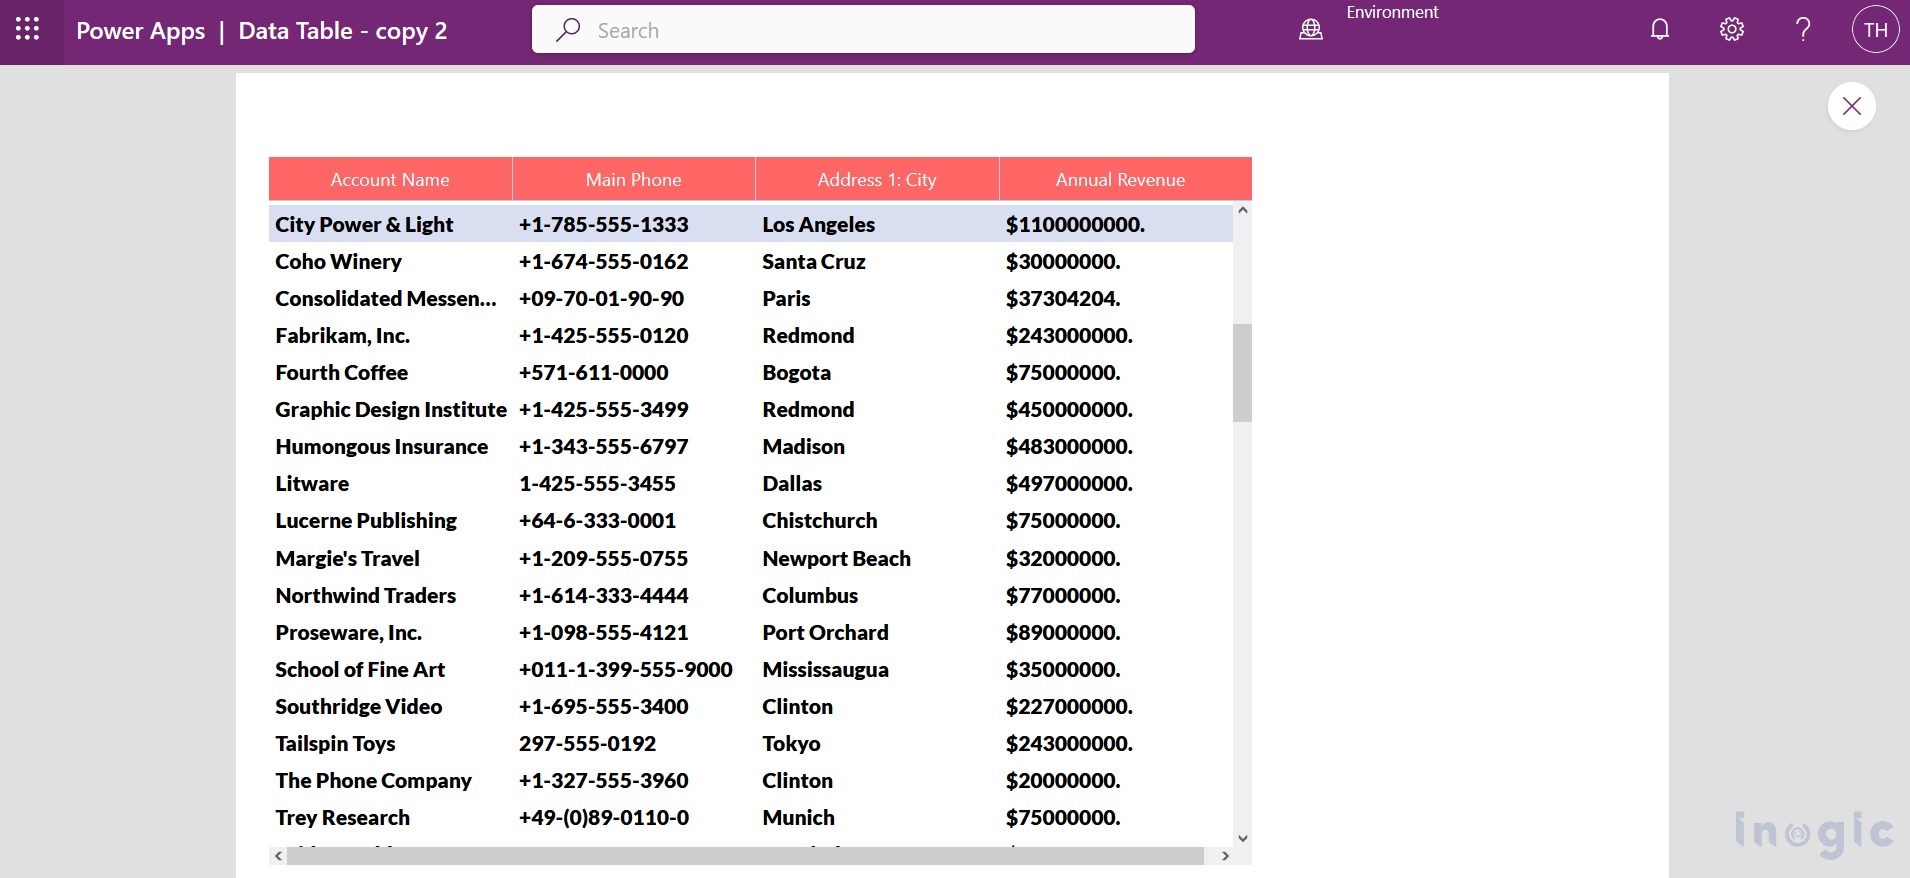
After setting the Account entity as Data Source and running the Canvas App, we have got all Account entity records bound in the data table.
2. How to read the selected data table row details.
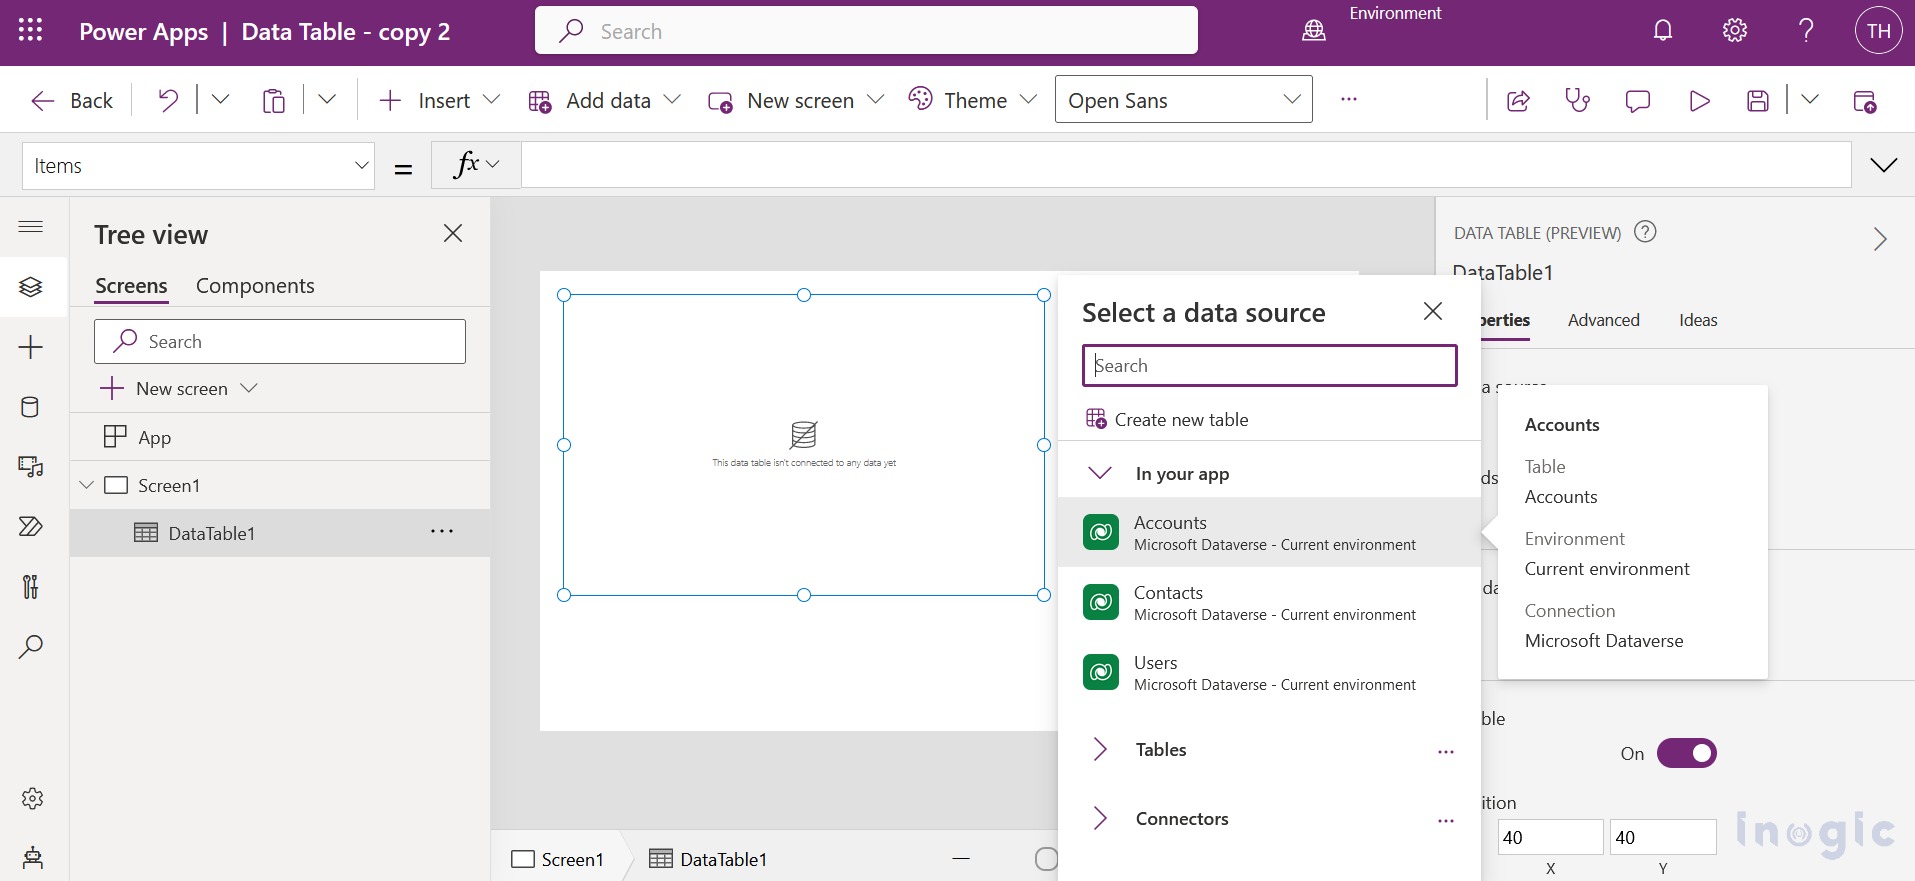
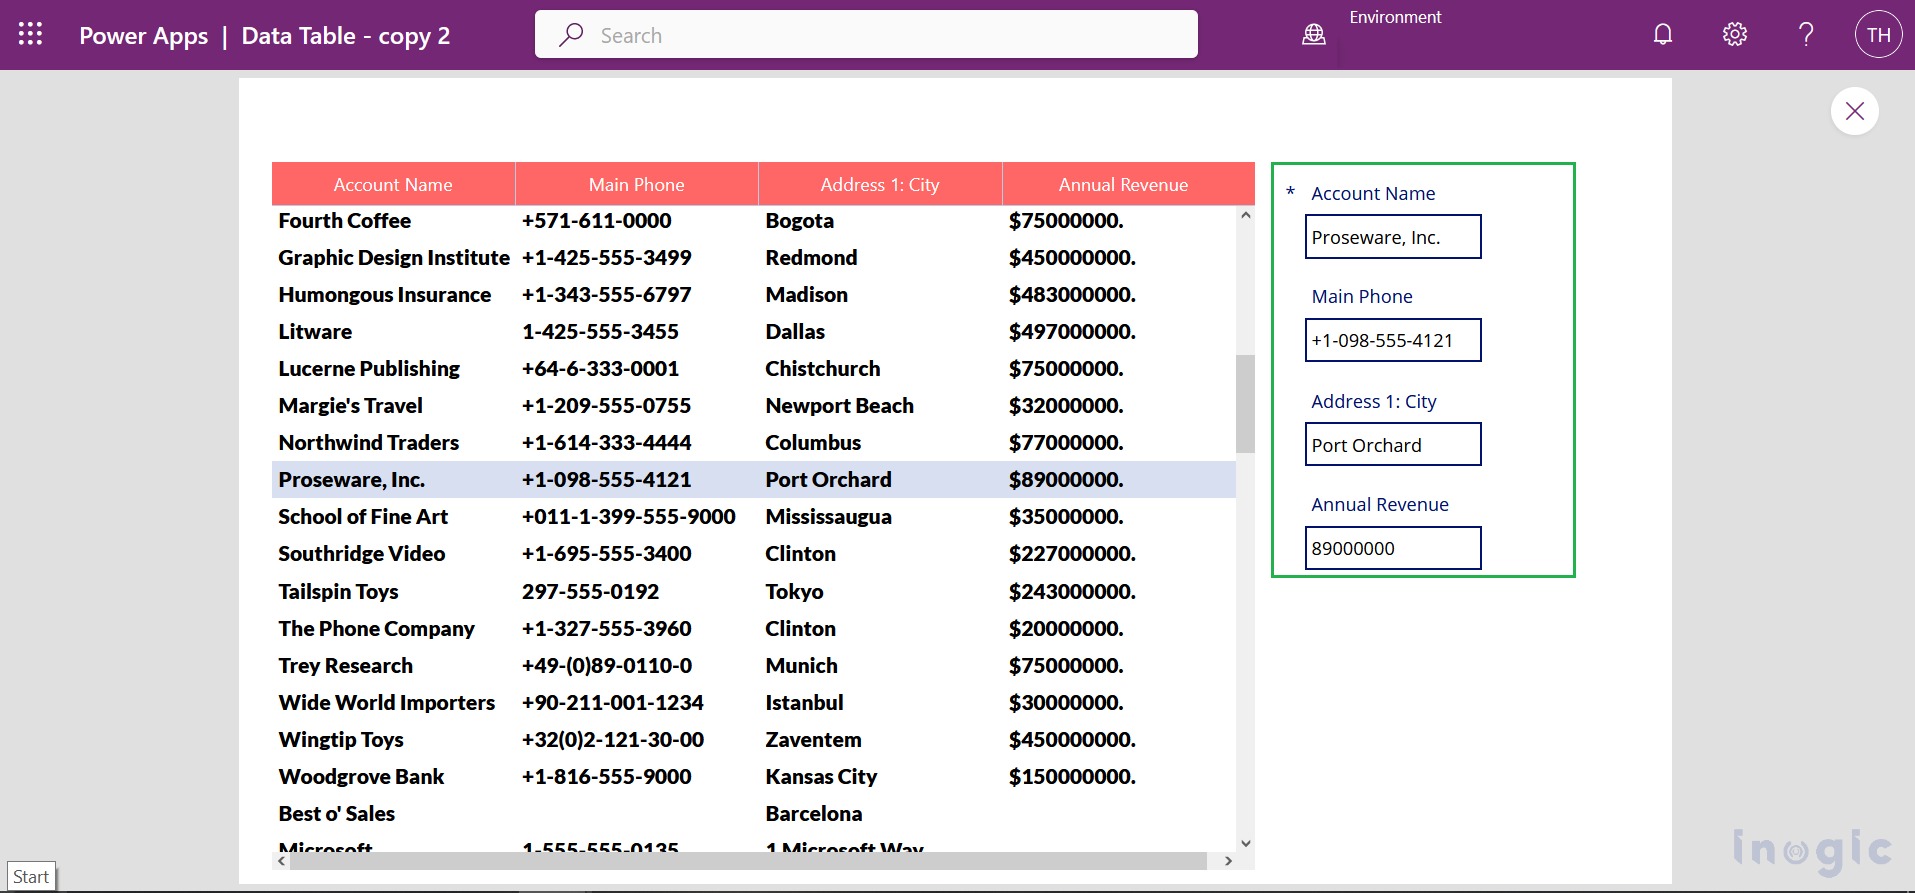
To achieve this, add one Edit Form control on the same screen of the app as shown below screenshot:
After adding Edit Form we have to set the Item and Data Source properties of the form. In our example, we have set the Item as “Account.Selected”, where Account indicates the Data Table object and Selected indicates the selected row of the current data table. Also, we have set the Data Source property as “Accounts” as we have connected this form to Account Data Table.
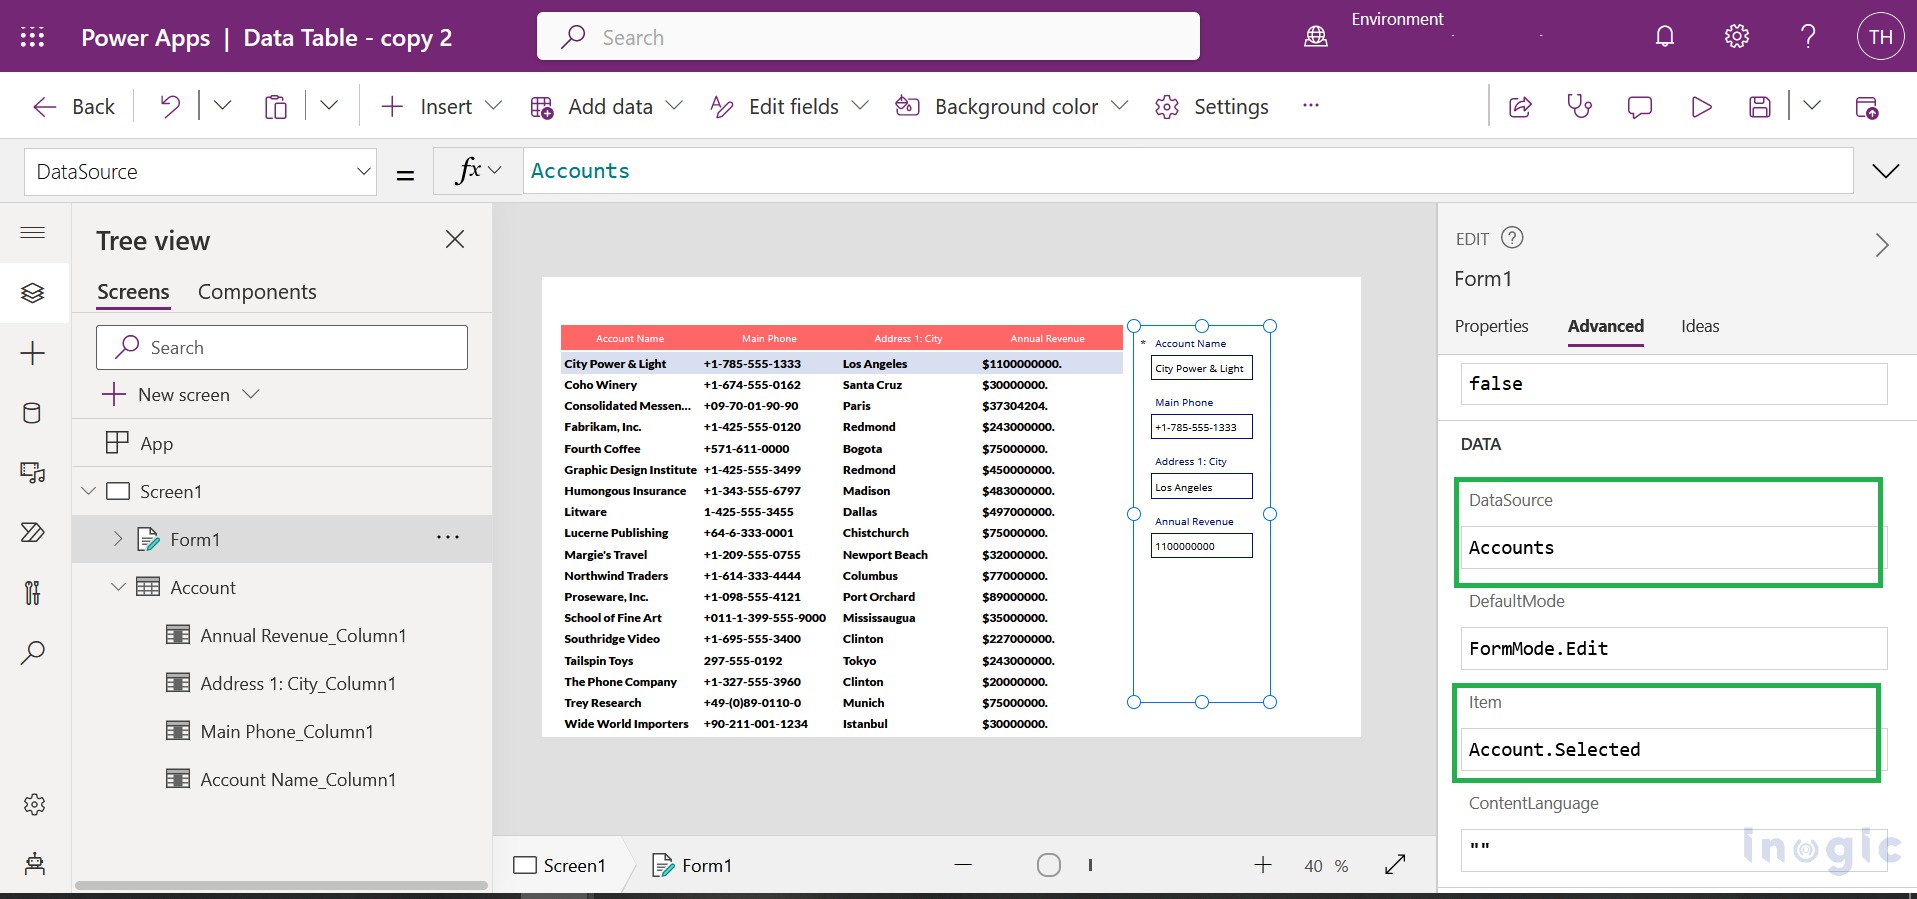
After saving the above changes we have again run the canvas app and we got the correct result bind in Edit Form as shown in the screenshot below:
3. How to filter or search data table data based on some condition
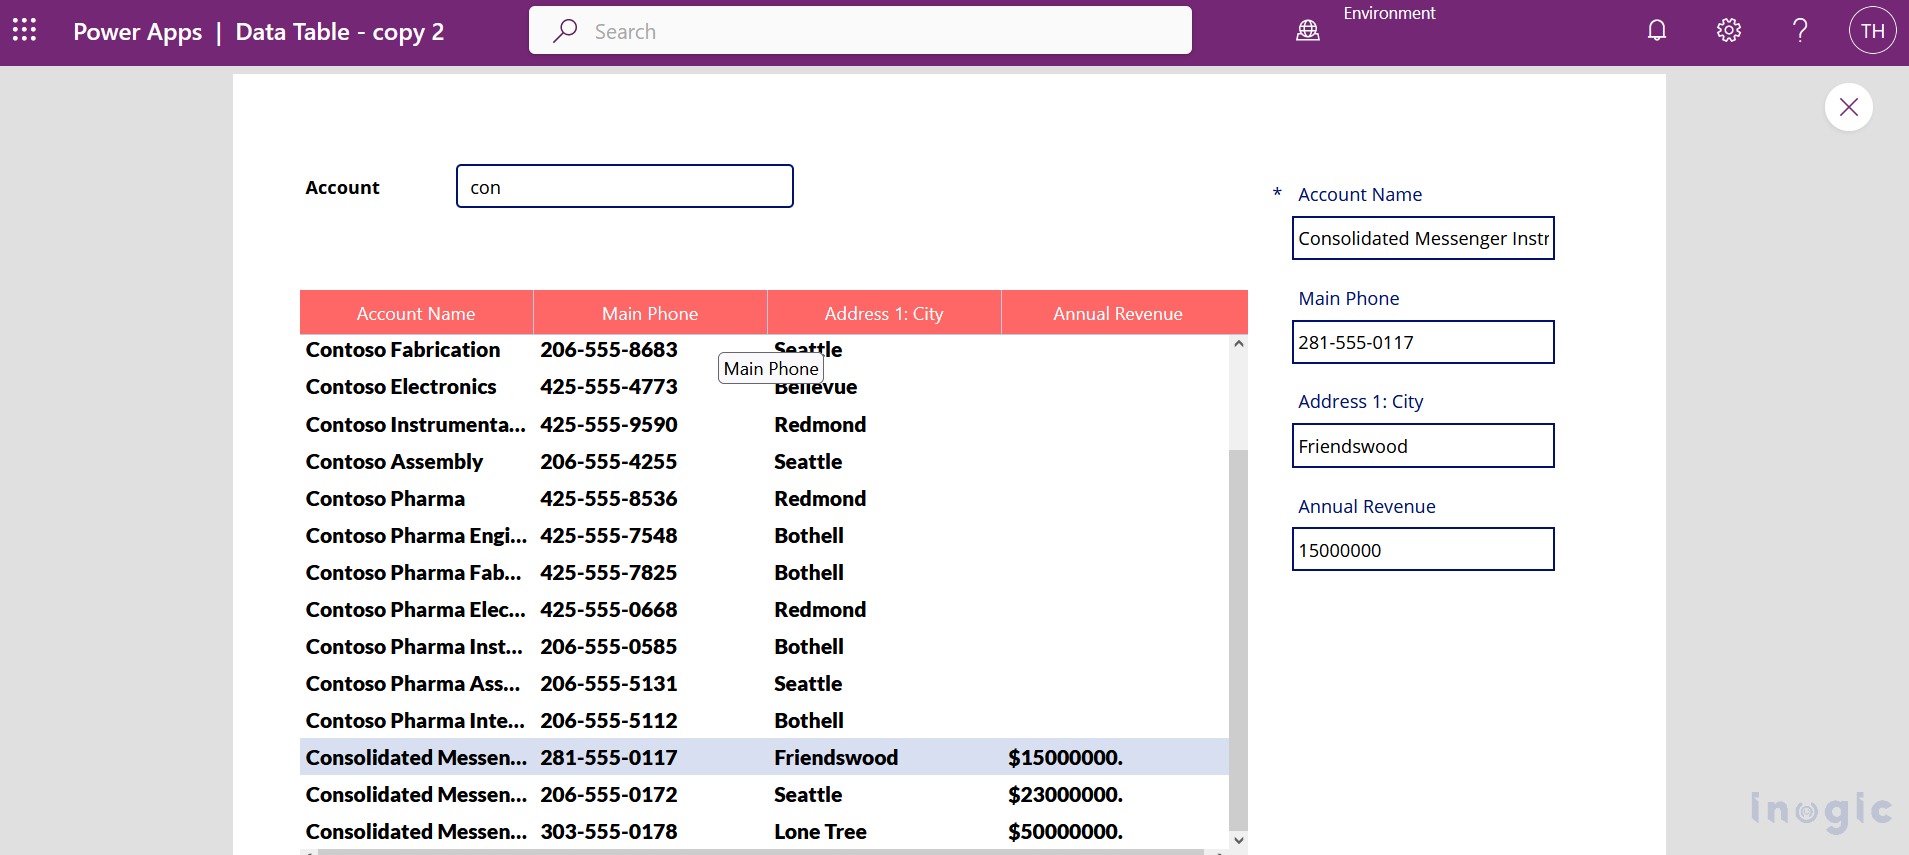
To search data in Data Table we have added a Text Input control on the same screen of the app. After adding the Text Input apply the PowerFx formula to the Accounts data table as follows which helps to show only those accounts which contain the Account Name column.
Search(Accounts,TextInput1.Text,”name”)
After setting the above powerFx formula we have run the Canvas App and we got the expected output as shown screenshot below:
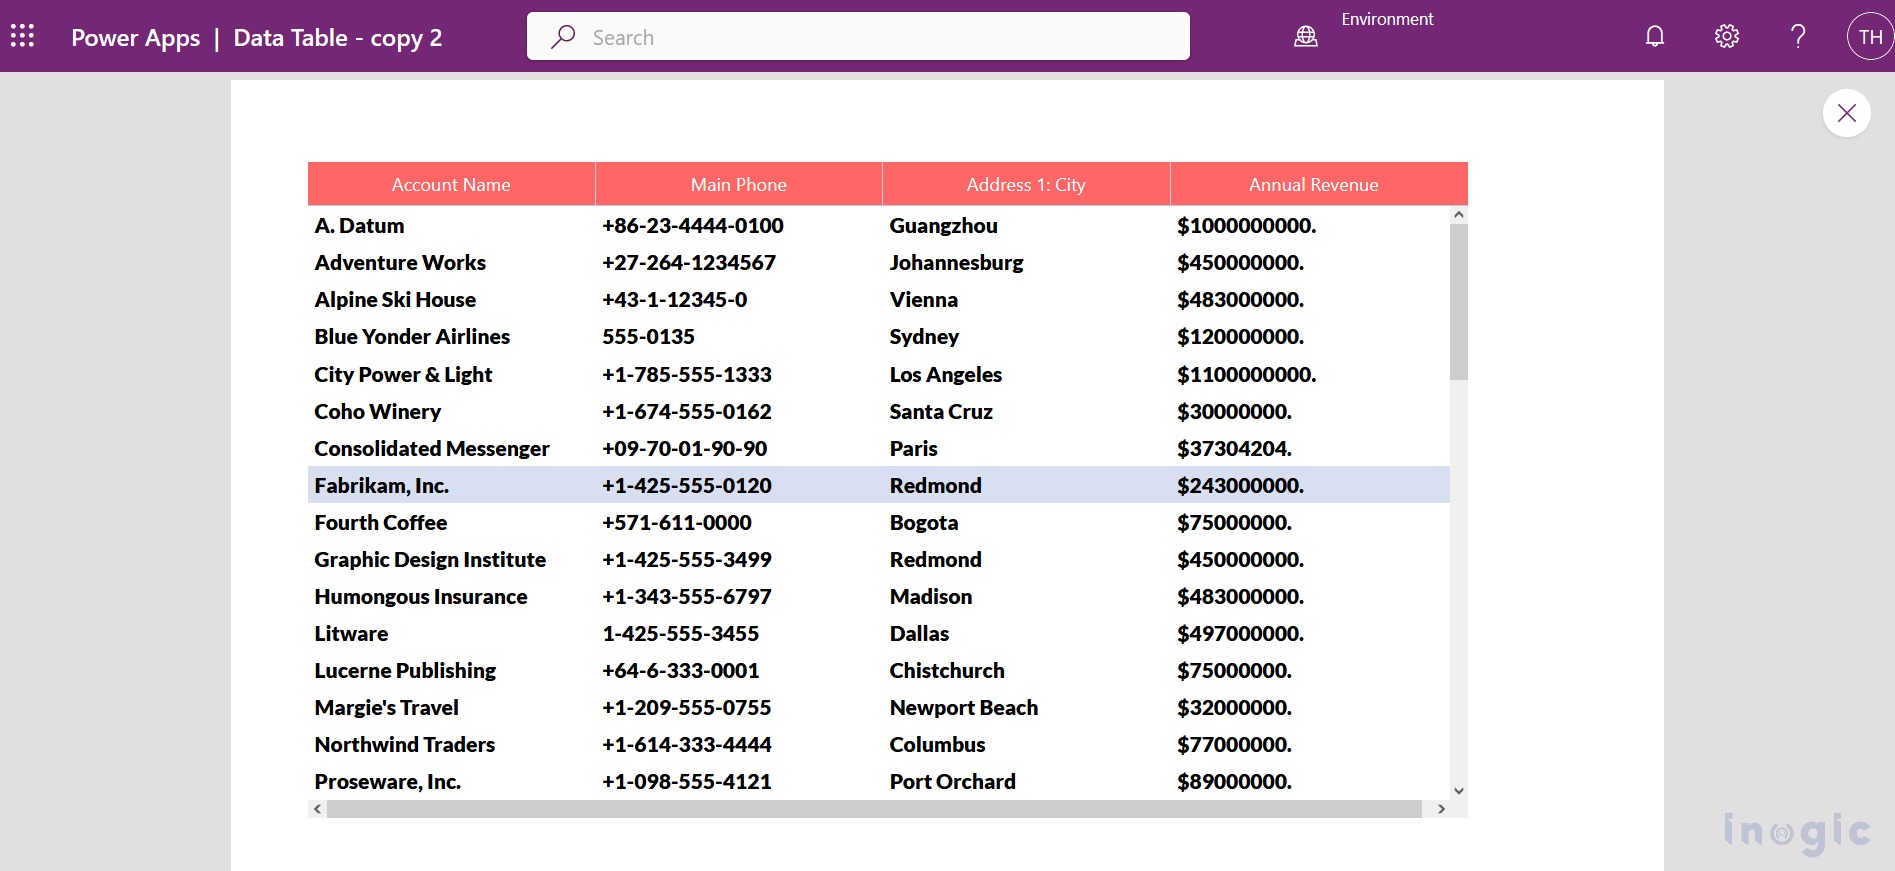
In the filter process, the customer wants to display those Accounts which having Annual Revenue of more than 5000. To achieve this requirement, we have set the below powerFx formula to the Data Table and we have got the correct result as shown below screenshot:
Filter(Accounts,’Annual Revenue’>=5000)
Conclusion:
Using Data Table control in Canvas App we can display the CRM entity records in table format in Canvas App. Also using the Search and Filter function, we can filter the data based on some conditions.