In the earlier article we integrated PVA with an external API using Power Automate HTTP connector. The response returned by the API was displayed in simple text format to the user.
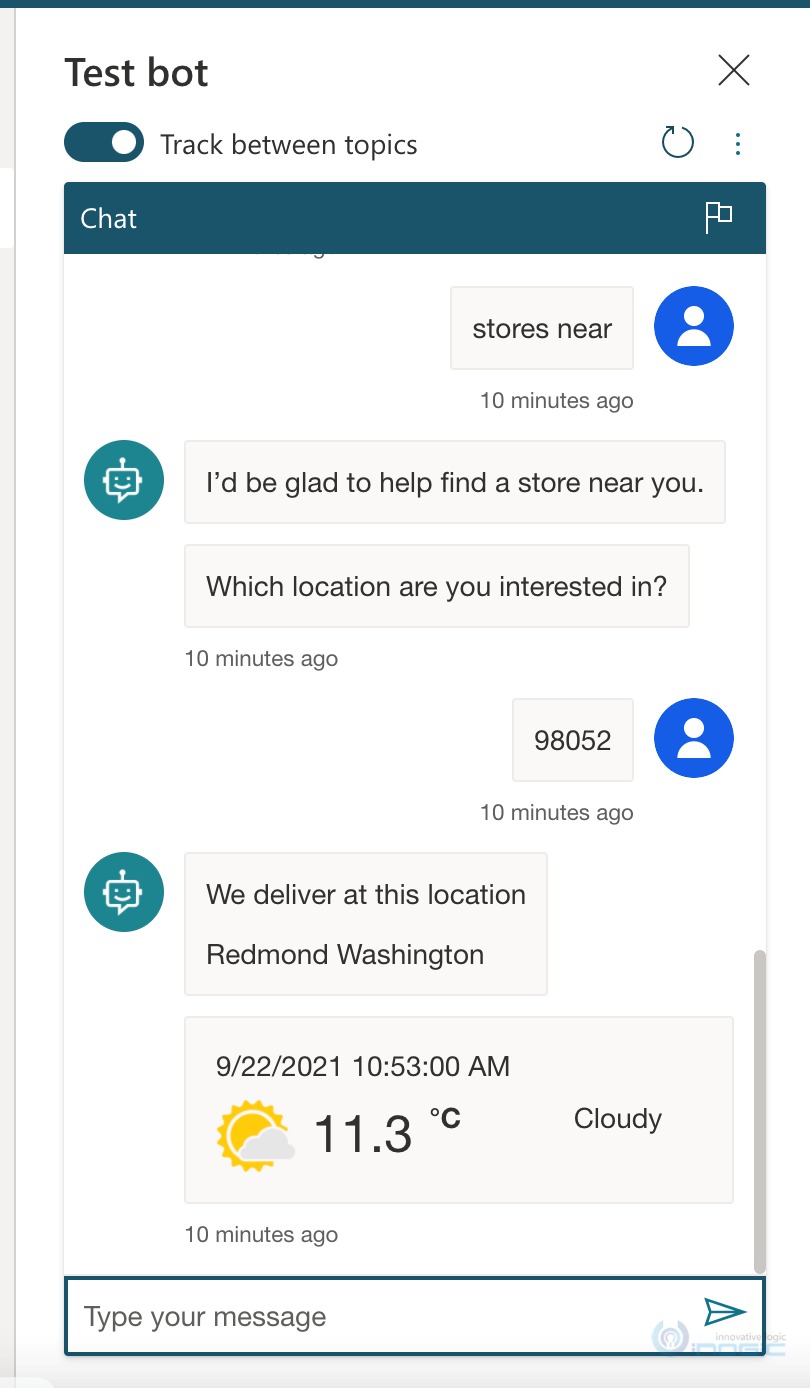
In this article we will explore displaying rich responses using Adaptive Cards. We will extend our earlier example and continue to use the Azure Maps API, this time we will request Weather details of the requested postal code and display the weather card as a response from the bot
To design responses using Adaptive Cards, we need to use the Bot Framework Composer. This downloads an app that needs to be installed locally on your machine and you can then connect to the PVA bot designed using the PVA canvas designer to add the Adaptive Card response.
Navigate to your topics list and choose the Open in Bot Framework Composer option.

This will help you download the Bot Framework Composer if you do not already have it. It is available for Mac as well as Windows.
After install, it will prompt you to login to your azure account. Login with the same credentials that you have used to login to PVA environment and design your chat bot.
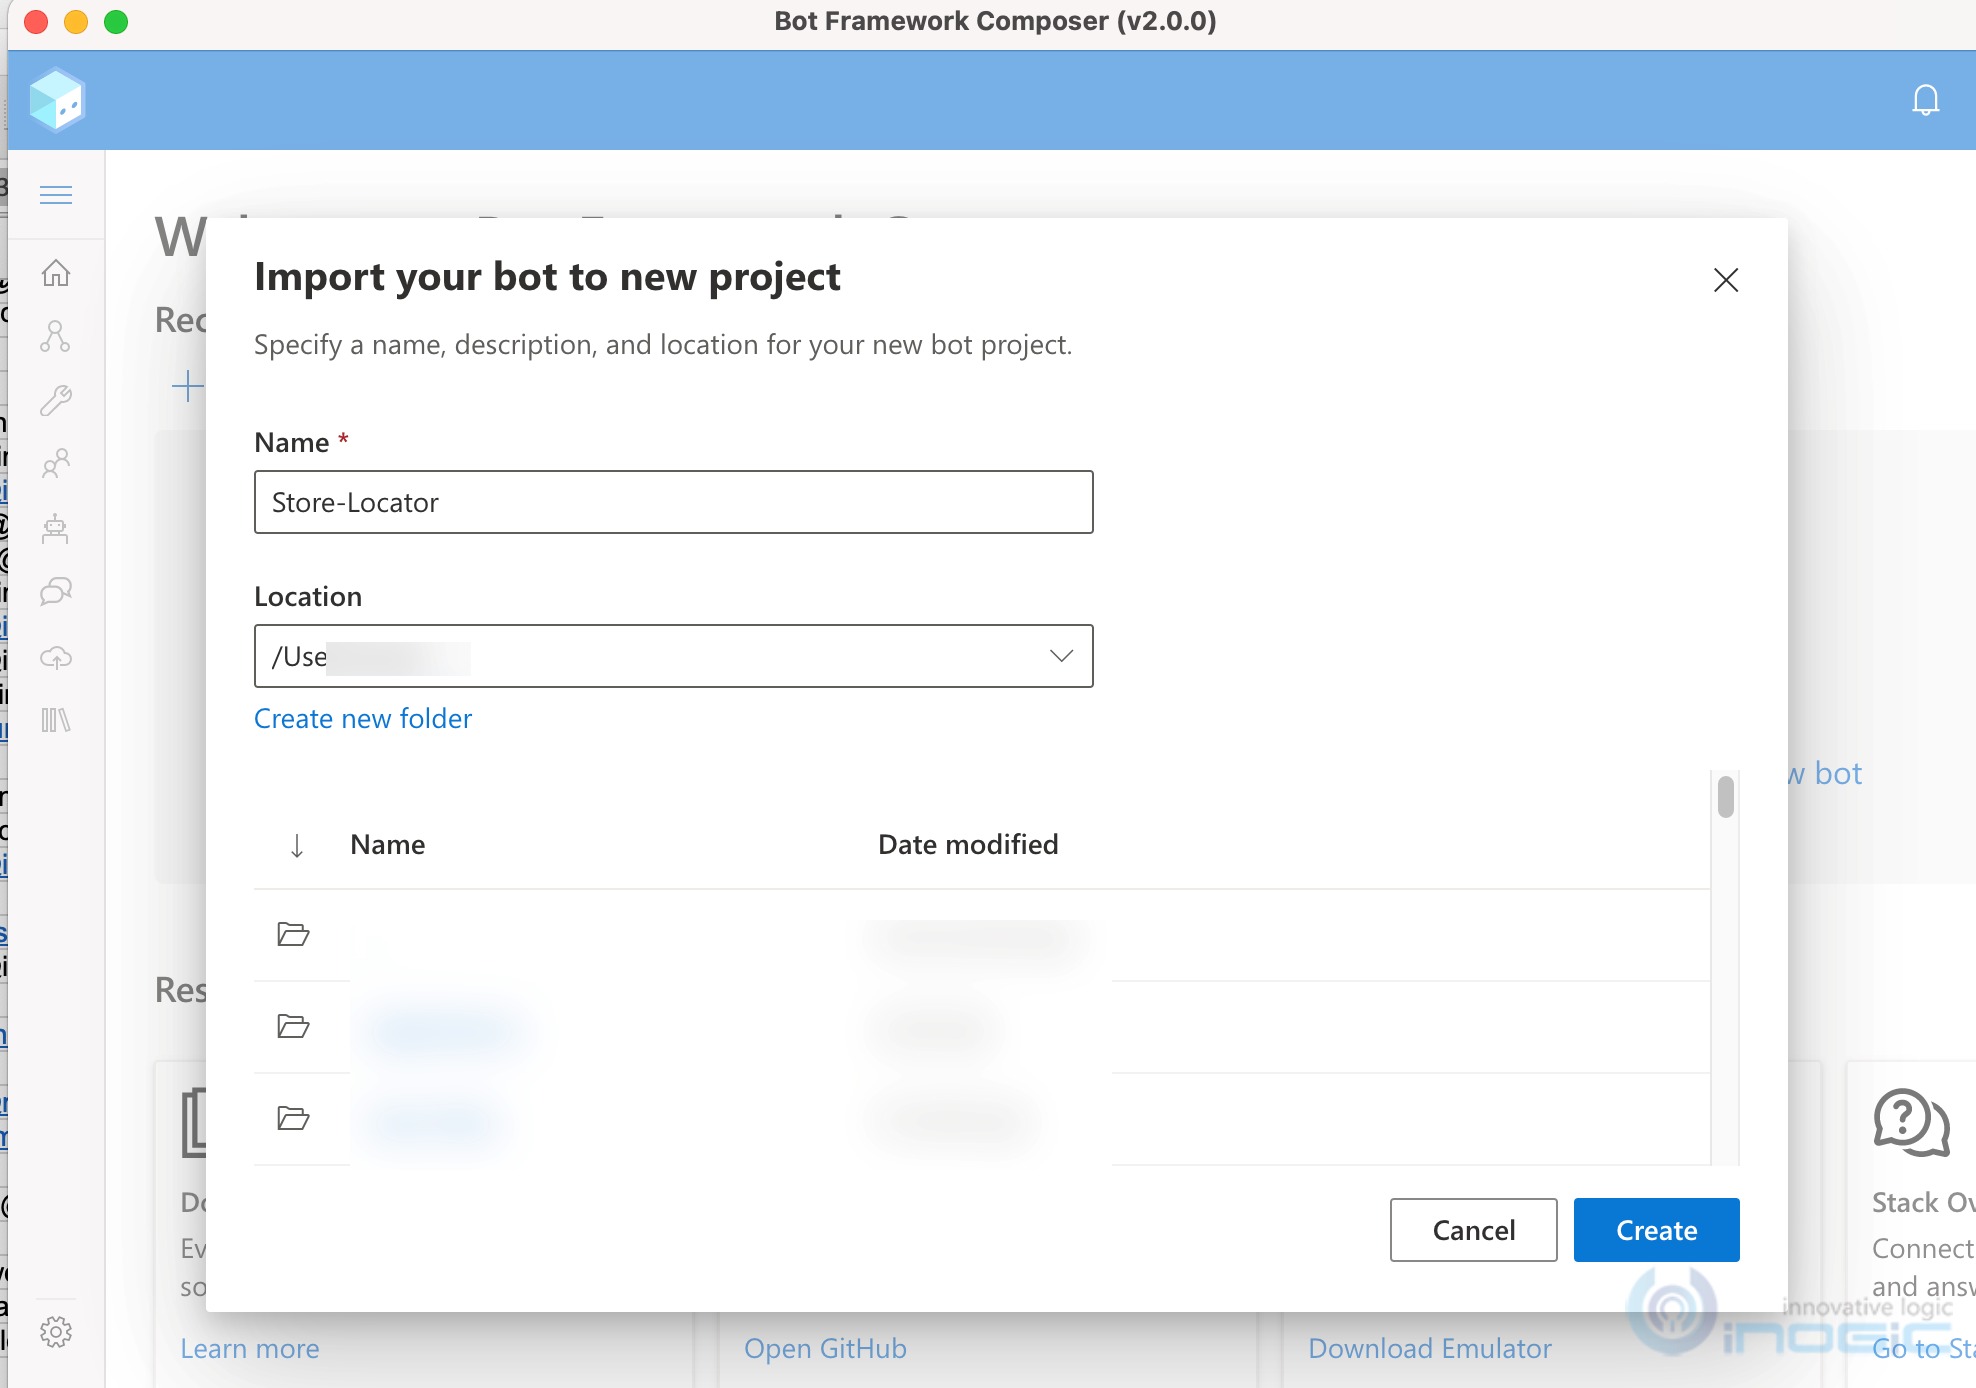
Provide a folder location to download the bot locally to work on.
For this exercise I have referred to this doc and made modification as necessary for my example.
Steps to add the Adaptive Card Dialog using Bot Composer
1. Click Add Dialog in the Create tab of the composer IDE
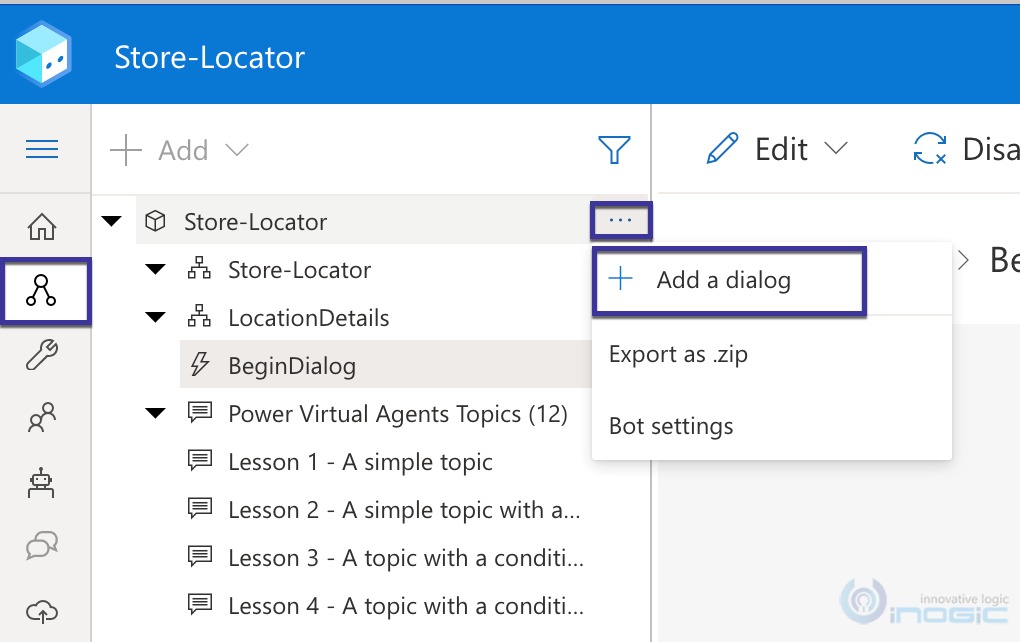
2. Name your dialog – in this example I have named it LocationDetails.
3. Next let us move to designing the response in Adaptive Card Designer at Designer | Adaptive Cards
4. There is already a weather sample adaptive card design available, I have used the same one and altered it to my needs
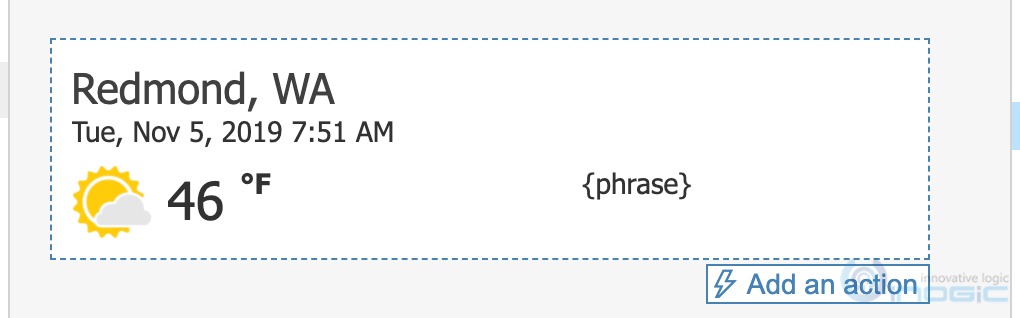
In this card we will display the following information
- Place
- Date
- Temperature
- Weather summary
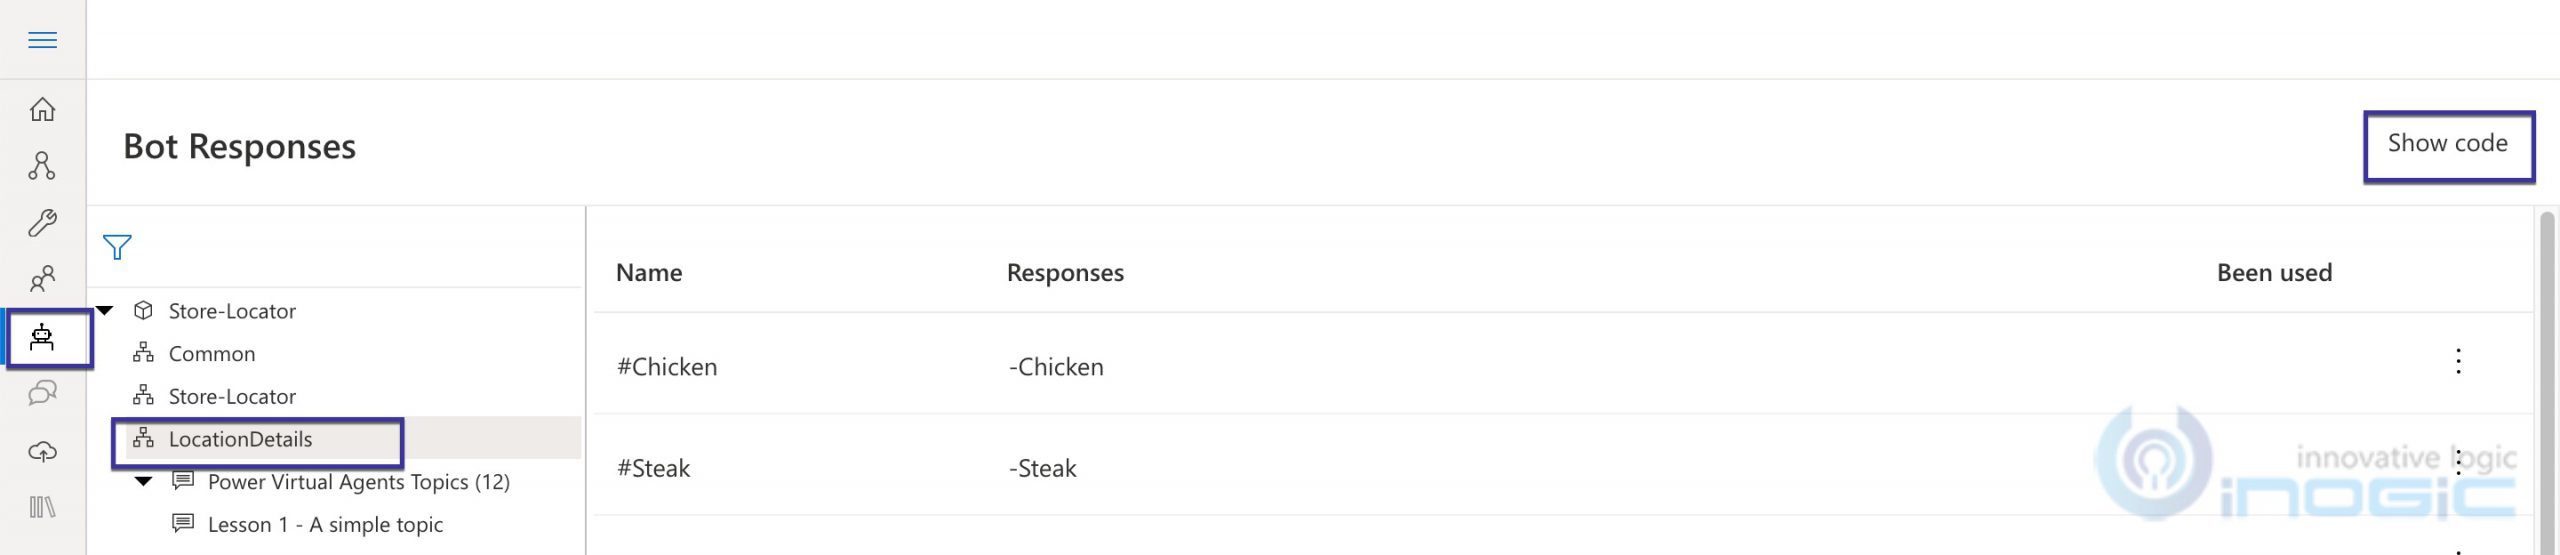
5. Once your card is ready, switch to the bot composer and navigate to Bot Responses tab and choose the dialog that you just created earlier in the step. In my case it was named Location Details. Click on Show Code to switch to code view where we will add our adaptive card design.
6. In the code view add a function as shown below. Make sure to follow the same syntax including the second and third line shown below
# adaptivecardjson_location(location,day,temp,phrase)
– “`
“`
We are going to pass 4 parameters to our function, these are the 4 details that we are to show in our adaptive card.
7. Now go back to your Adaptive Card designer and copy your card payload using the ribbon button available

8. and paste it between second and third line of the function as shown above. Note the payload is JSON format and should include the {}
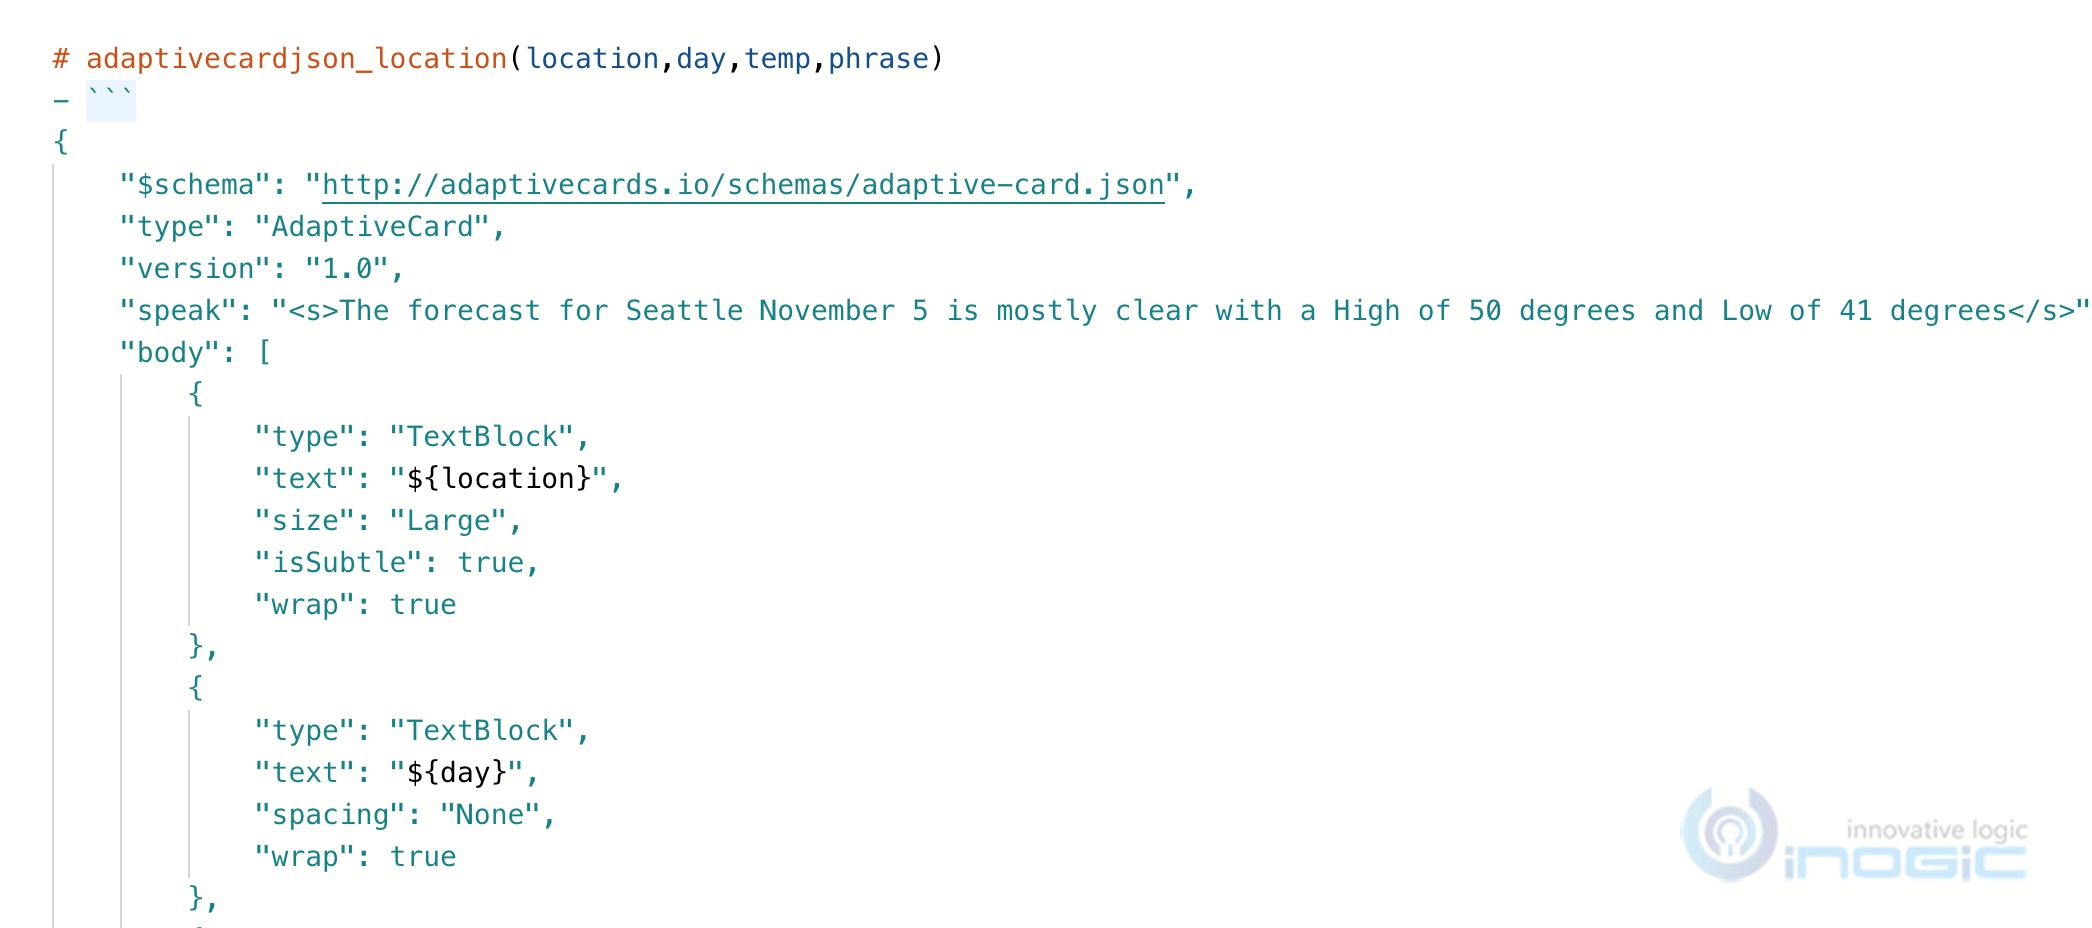
9. Our next step is to modify this JSON payload to refer to our function parameters for the actual values to be displayed. In the above example, you can see I have replaced the text for location block to refer to the parameter “${location}”. This is the syntax please follow the same. Since it is JSON object make sure to have all the references enclosed in double quotes as shown in the screen above.
10. The function to return adaptive card JSON is ready. Now add the following function at the end of this one. This creates an activity that can be invoked. This function again accepts the 4 parameters that it passes as it to the Adaptive Card JSON function created earlier.
# AdaptiveCardLocation(location,day,temp,phrase)
[ActivityAttachments = ${json(adaptivecardjson_location(location,day,temp,phrase))}
]
11. With this done, switch to the Create tab in the bot composer again to edit the dialog that we had added.

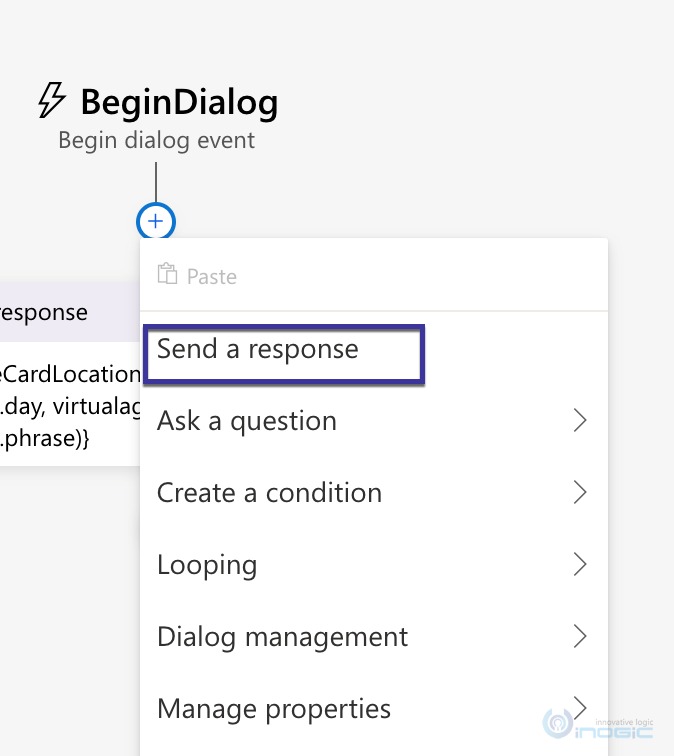
12. In the BeginDialog canvas click on the + icon to add the “Send a Response” action
13. Switch to code view of this action
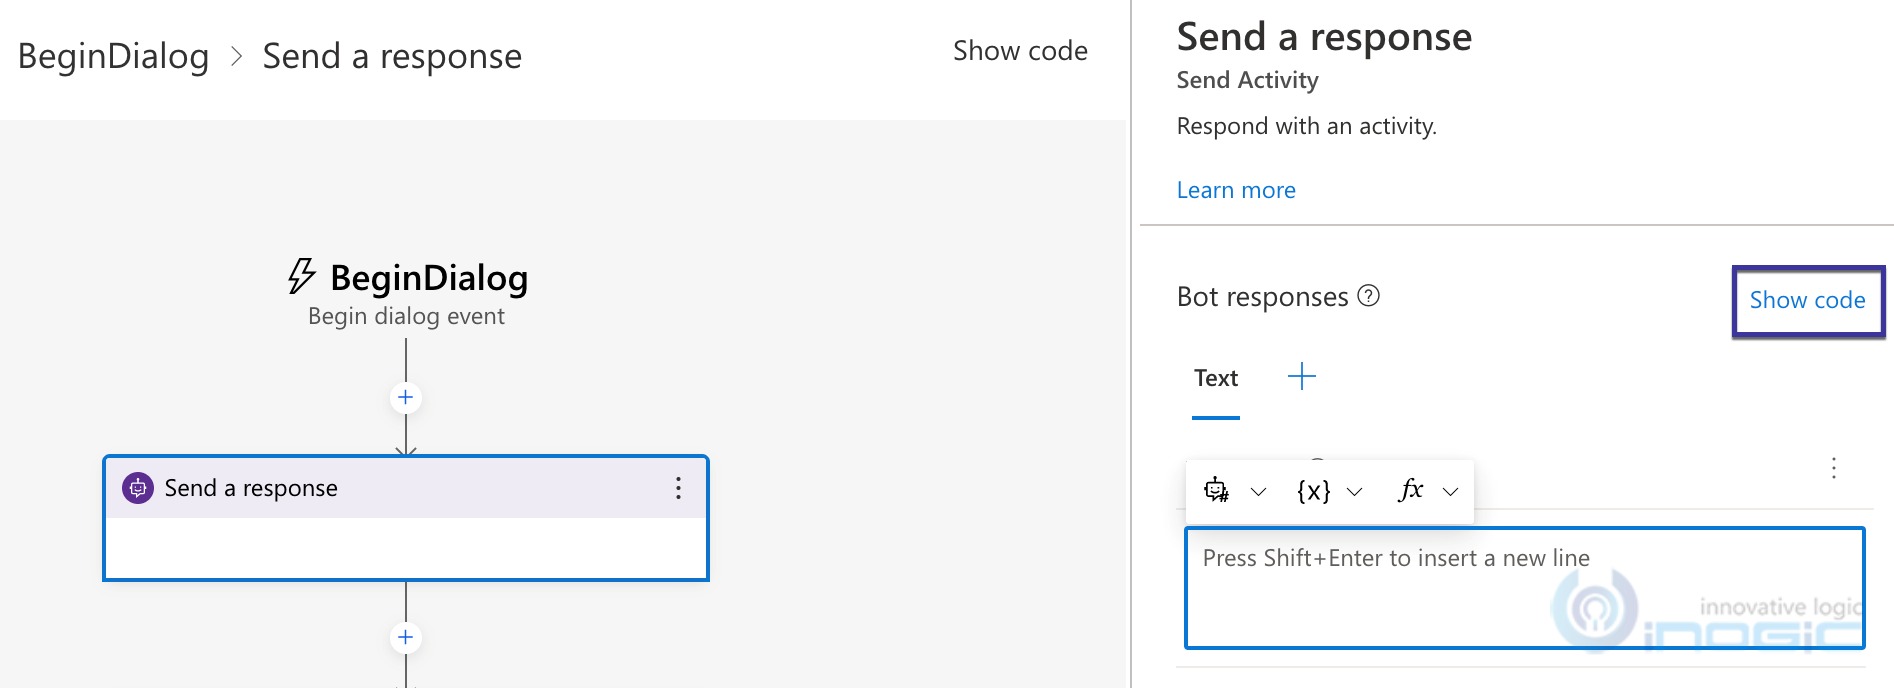
14. It supports intellisense and will list out all functions defined. We need to choose the function that we created to ad the activity in step 10 above. In my case that was AdaptiveCardLocation
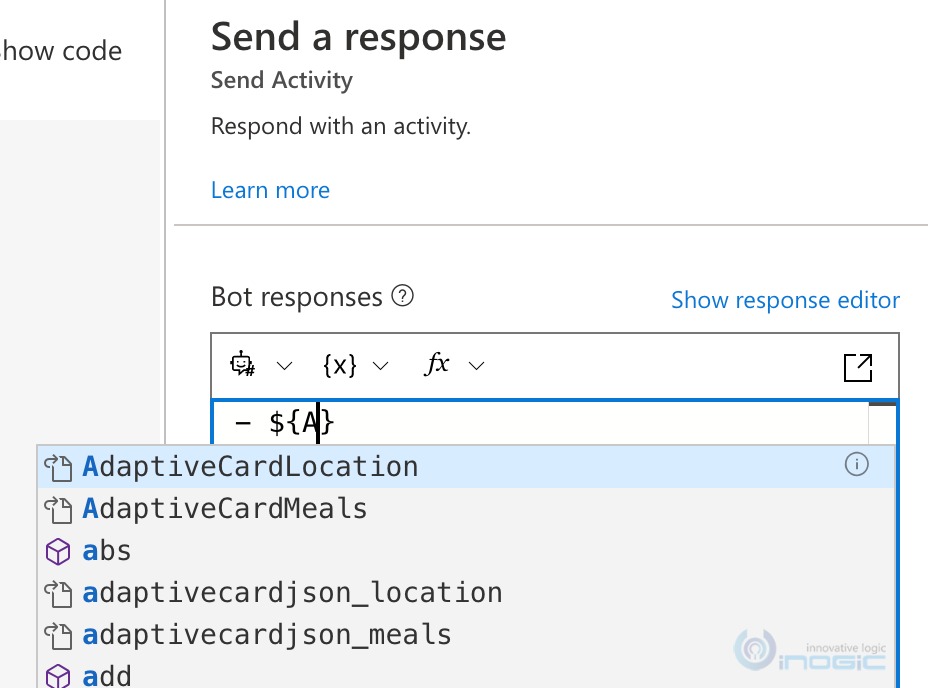
The expression should look as follows
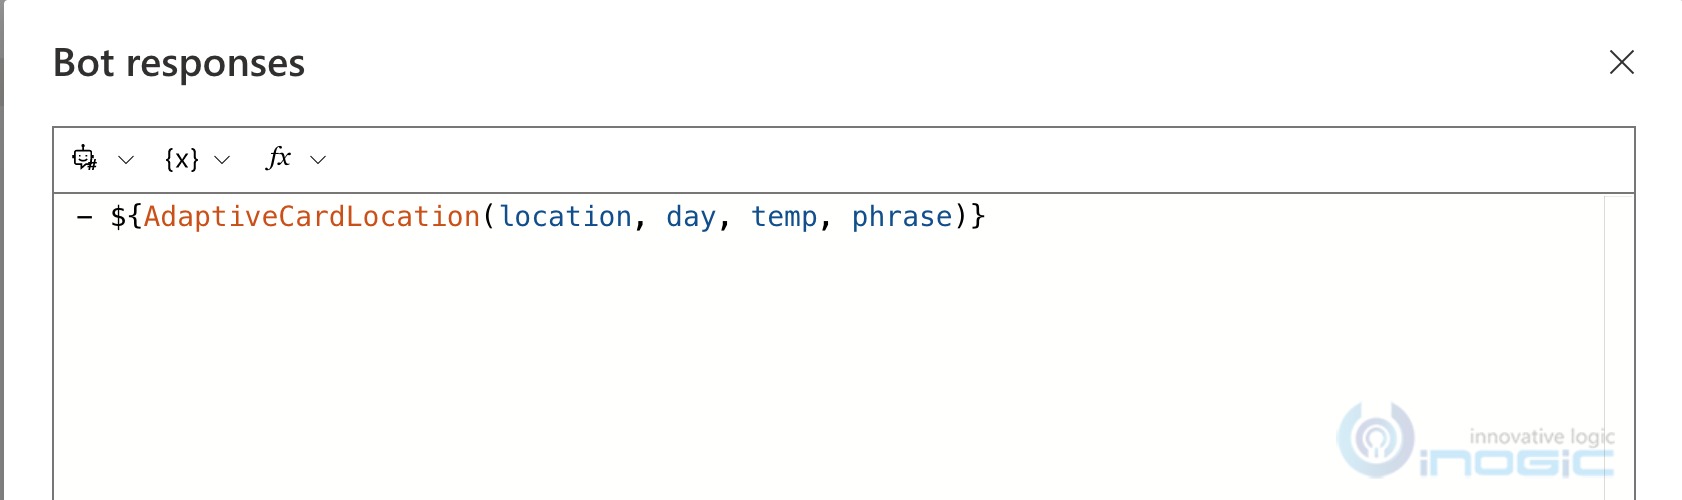
15. Now we need to replace these parameters with references from variables defined in PVA chatbot. Yes, we can pass all information from chatbot to this action so that it could be used later down when displaying the adaptive card.
16. We will create the variables in PVA with the same names. You can refer them here directly by adding virtualagent prefix as shown here
– ${AdaptiveCardLocation(virtualagent.City, virtualagent.day, virtualagent.temp, virtualagent.phrase)}
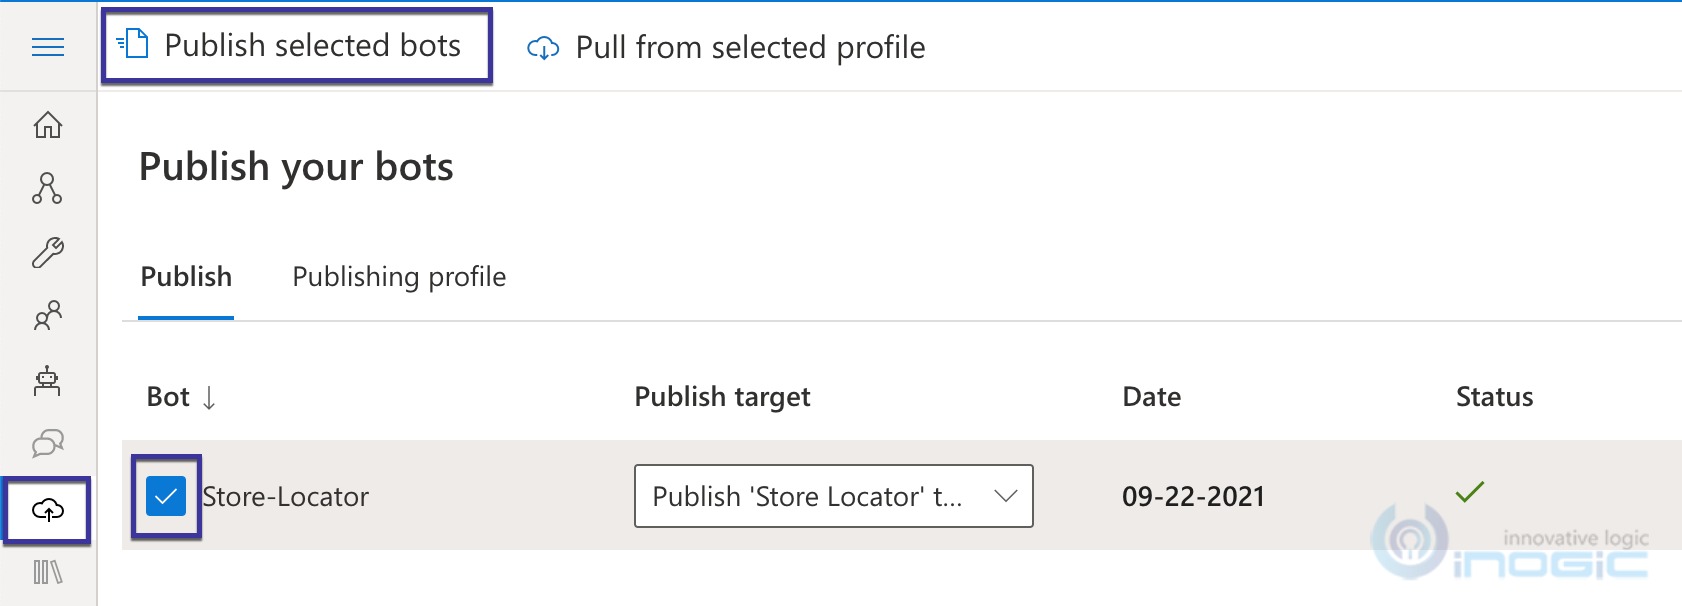
17. With this we are done with the changes required in the Bot composer. We can now publish this update back to PVA. Navigate to the publish tab in bot composer, choose the bot and publish it.
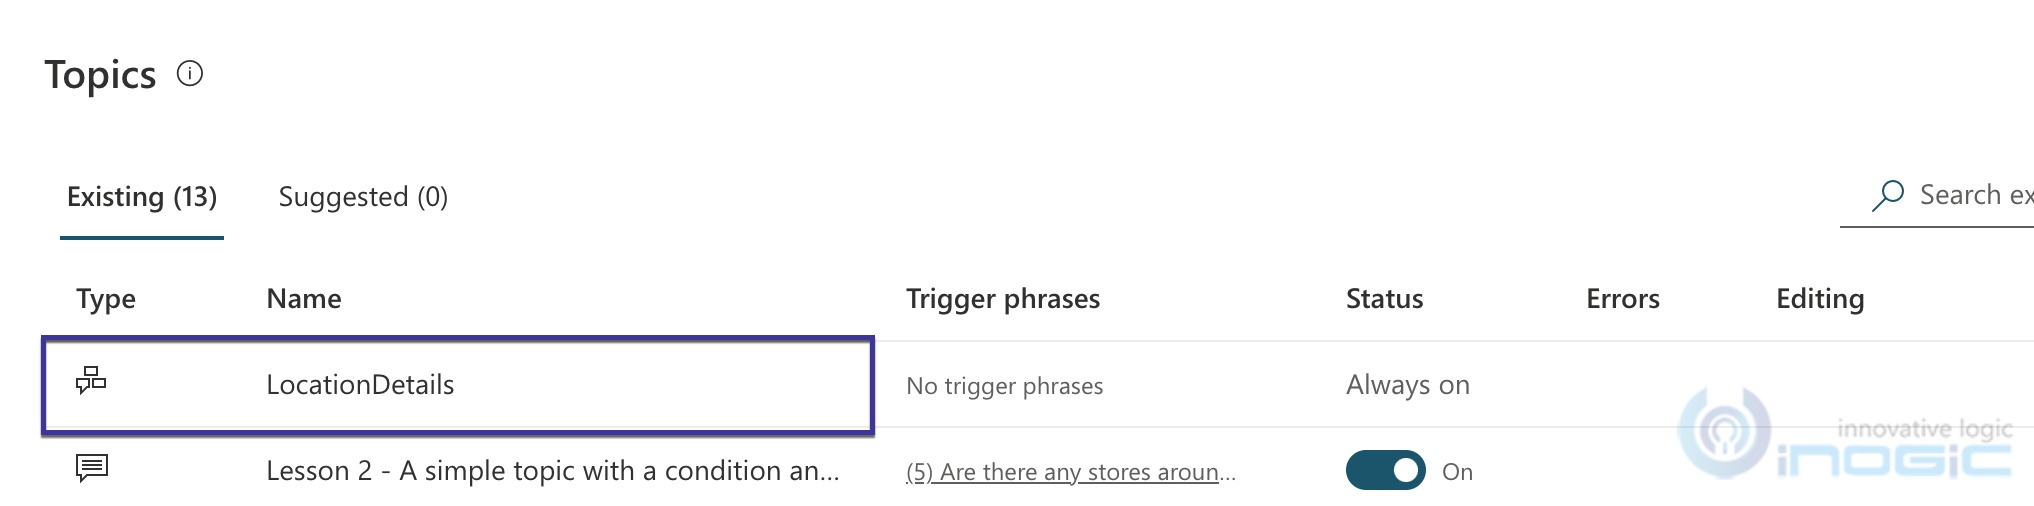
18. When you look back at your topic listing in PVA you will notice a new topic added to the list. This is the dialog designed in bot composer.
19. Let us now extend our Power Automate flow designed in the earlier article to also request weather details from Azure Maps and then return this back to the PVA chat bot.
Steps to modify Power Automate Flow to request weather details from Azure Maps
We will add a new flow step that makes an HTTP request this time to request weather details
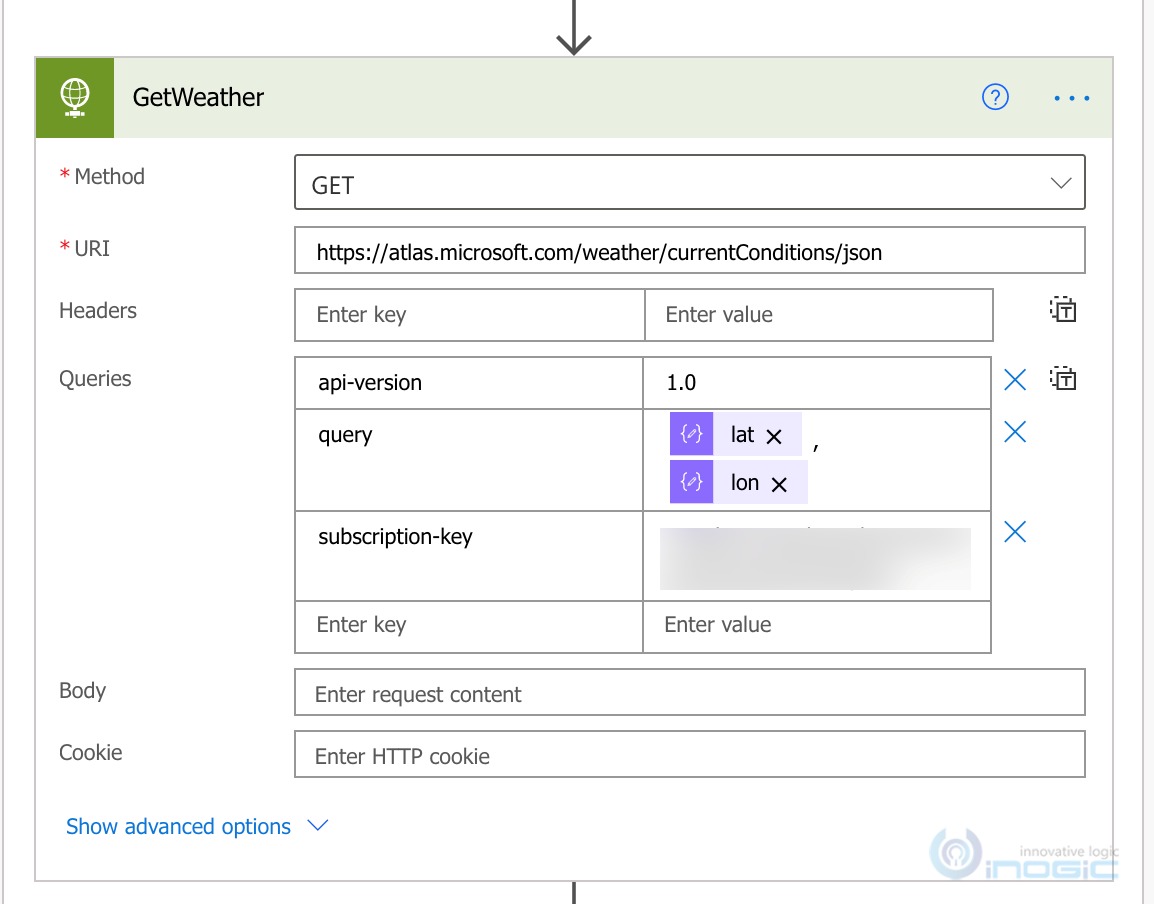
We got the lat/long codes that is required for this request from our earlier request where we requested location details of the given zipcode.
Once again use ParseJSON step to format the response the returned by the http request.
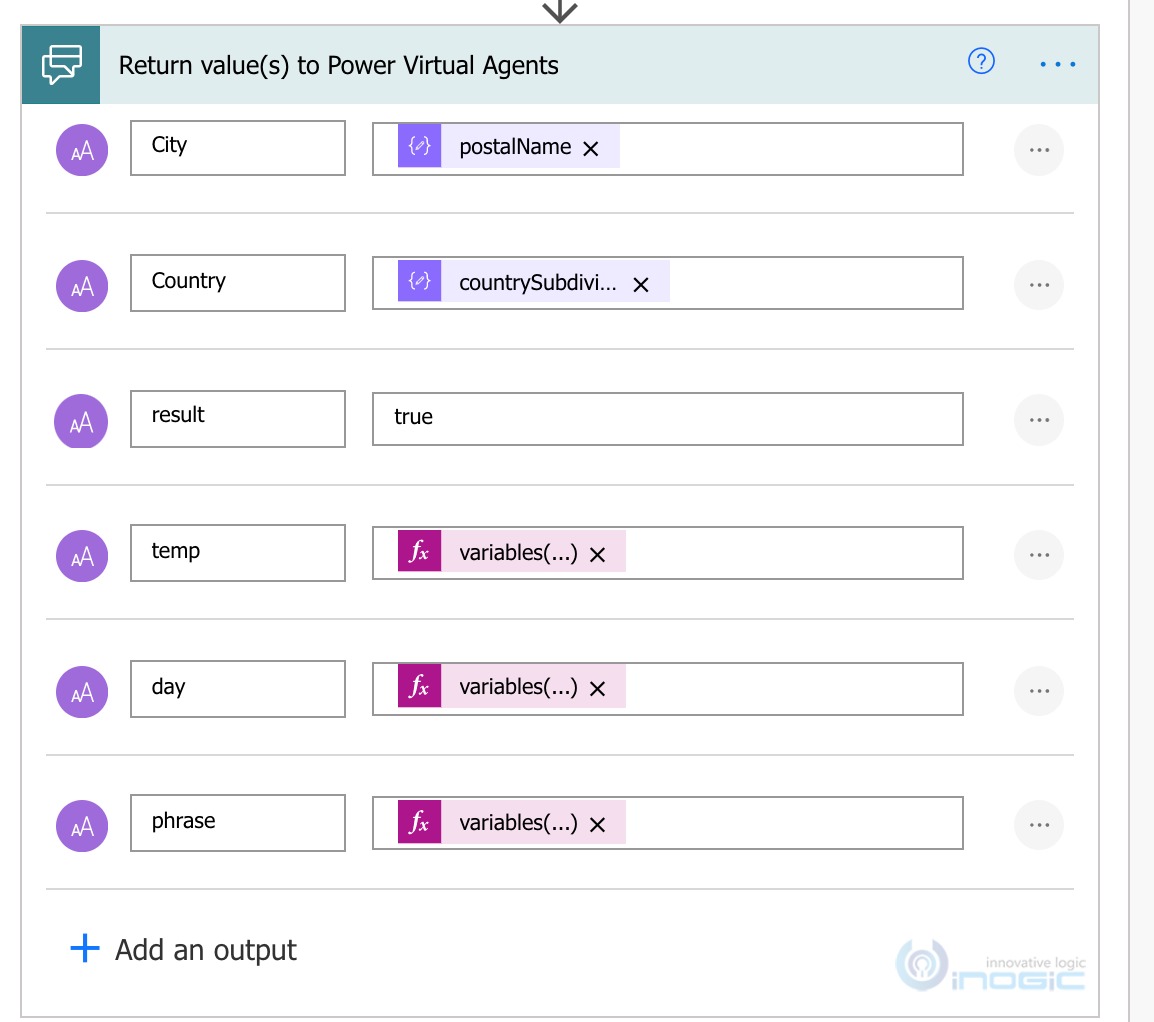
The return values step is modified to return the additional information on temperature, date and weather summary
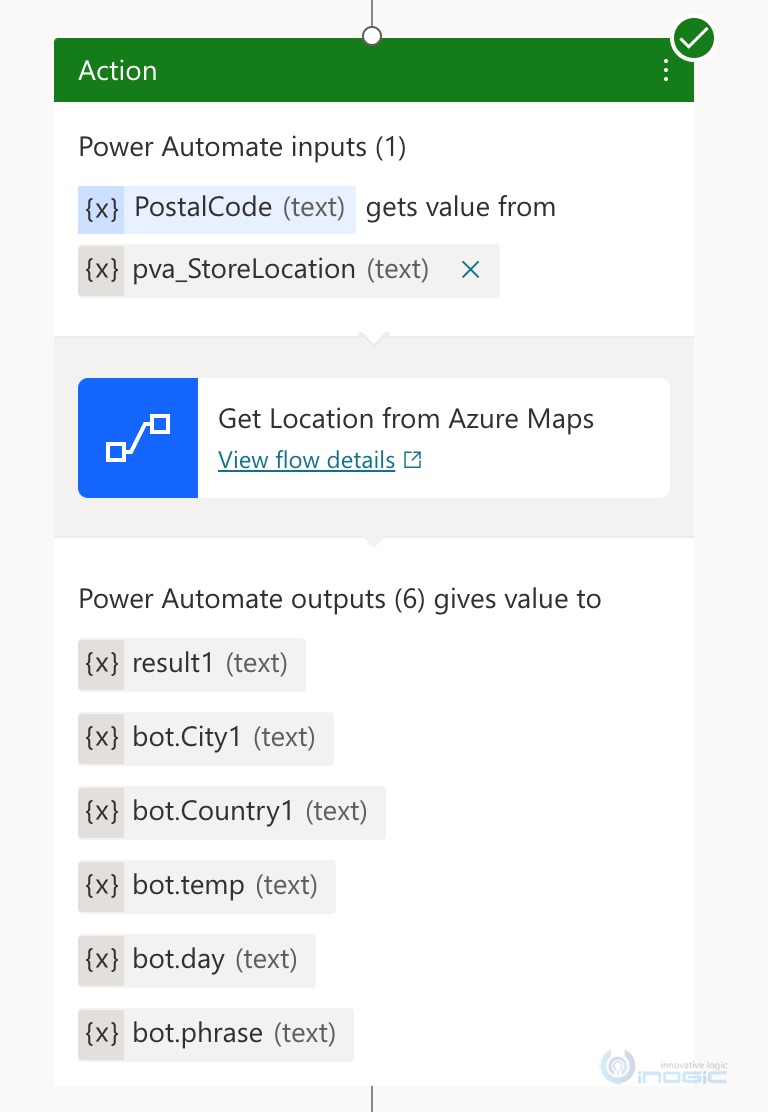
With this our changes to flow are done. We can now move back to PVA. PVA does not automatically refresh the flow references to reflect the updates made to the flow. We need to delete the step and add a new step again
We now need to make a change to these power automate output variable listed here. By default these variable are only available within the topic in which they were defined. In our case however, we noticed that the dialog from Bot Composer was not added to this topic but instead added as a new topic. And you also remember that we were referring to all of these PVA variables using “virtualagent.temp” references. We therefore need to edit these variable to be available across topics.
To do this click on the variable to bring up the Variable Properties pane

Modify the Usage to Bot, which will make the value of this variable available in the other topic as well once it has been set.
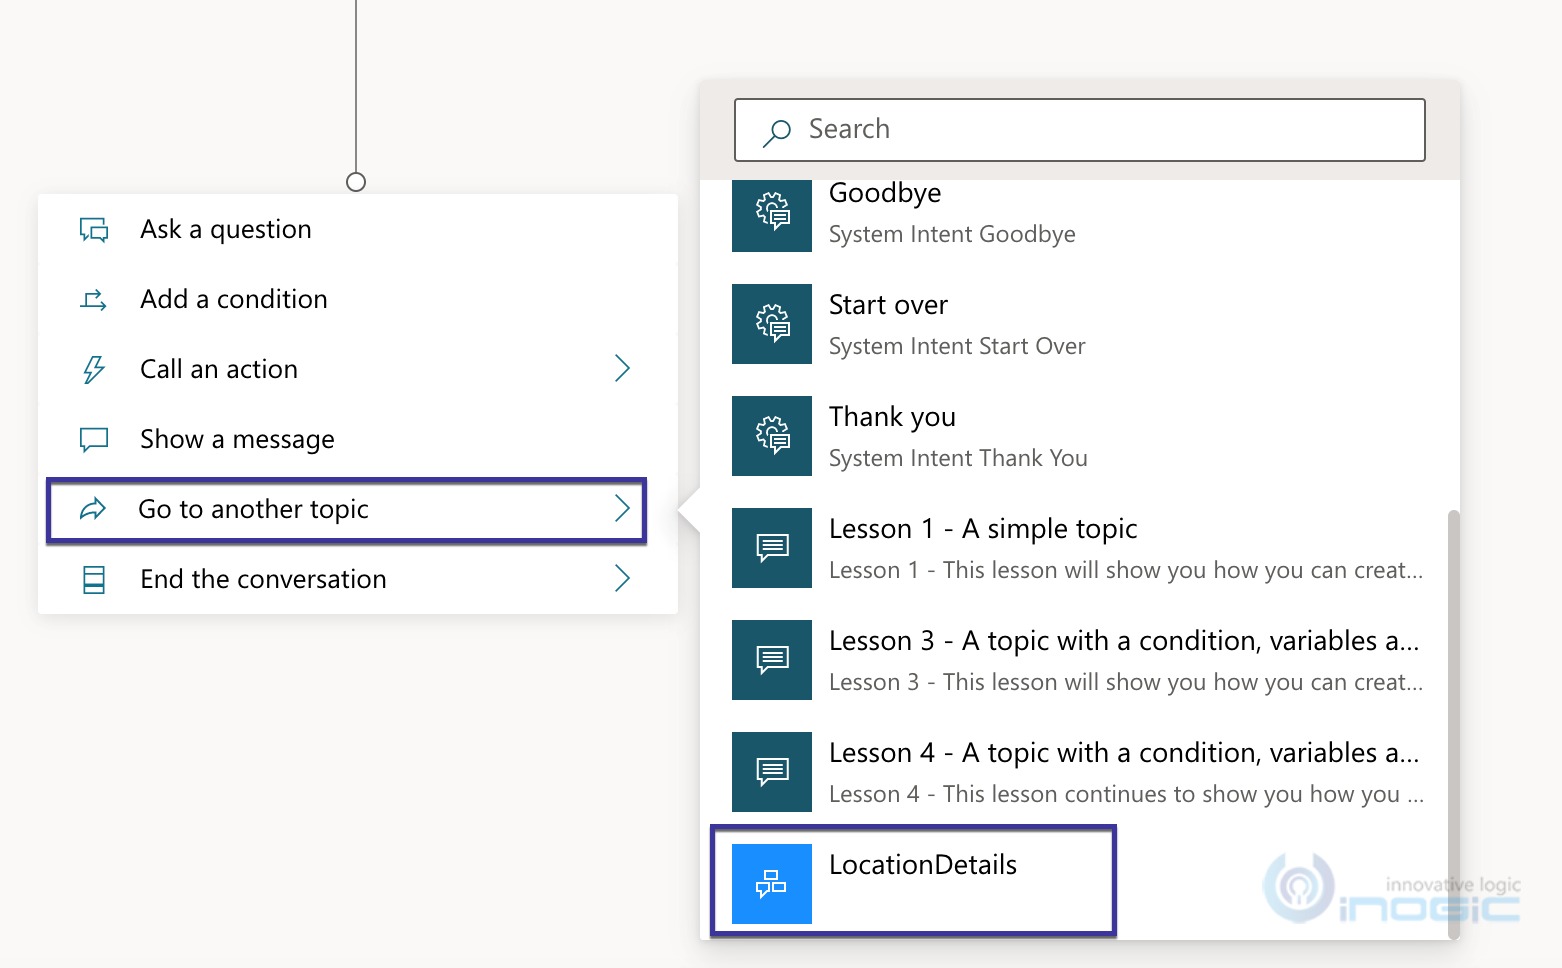
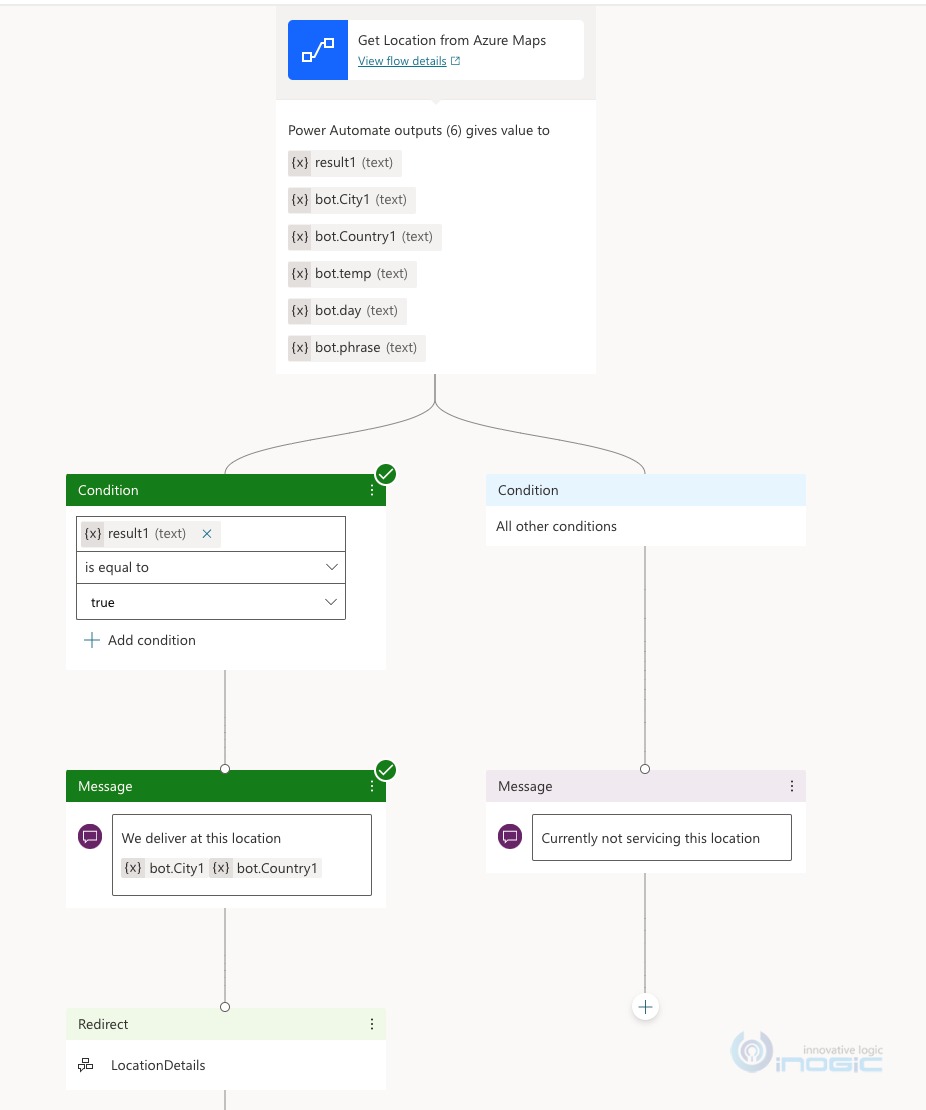
Next simply add the step to call the bot composer topic
This is what your final bot flow looks like
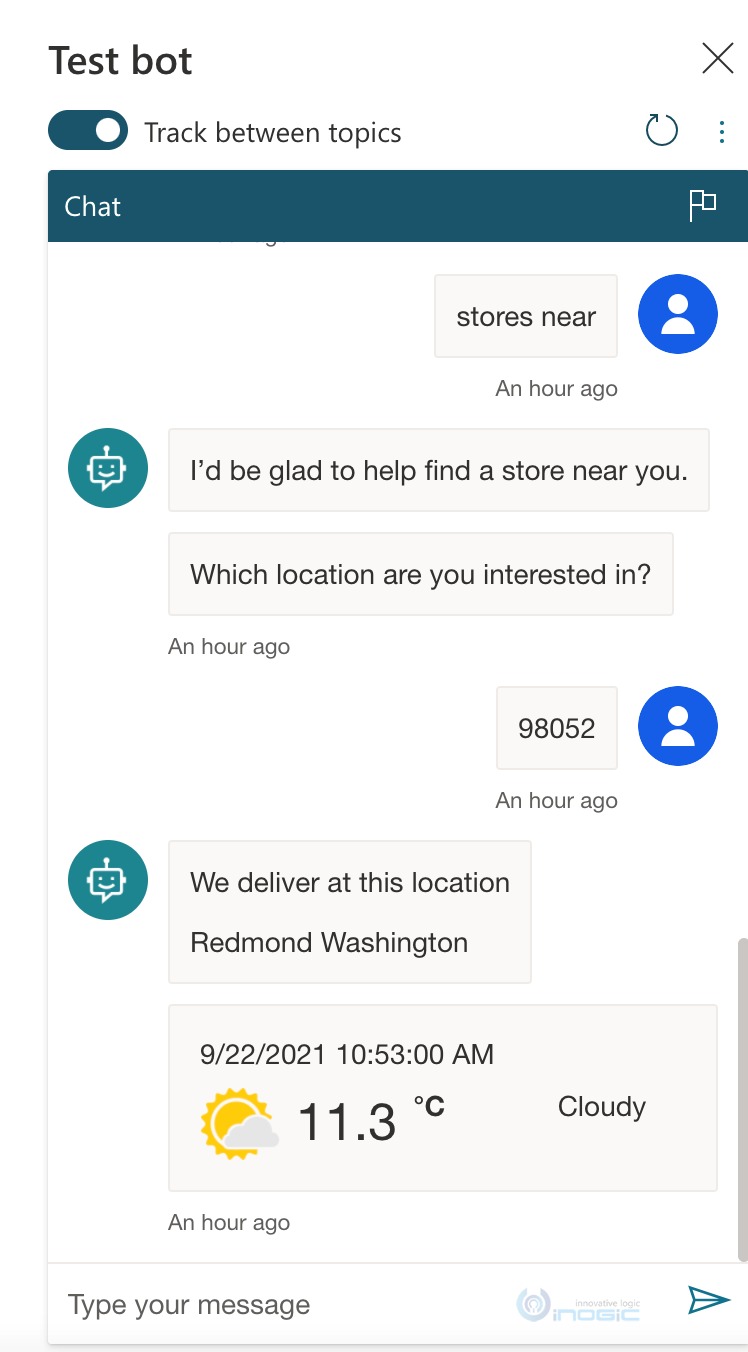
Now when you test the bot, you will get the following result
Adaptive Card extremely powerful markdown language to provide rich message cards and now can be used with Power Virtual Agents as well.
Cut short 90% of your manual work and repetitive data entry!
Get 1 Click apps and say goodbye to all repetitive data entry in CRM –
Click2Clone – Clone/Copy Dynamics 365 CRM records in 1 Click
Click2Export – Export Dynamics 365 CRM Report/CRM Views/Word/Excel template in 1 Click
Click2Undo – Undo & Restore Dynamics 365 CRM data in 1 Click