As we all know, for document management, we require SharePoint to be integrated with the CRM. Therefore, if the CRM is on IFD and if we want to integrate it with SharePoint (on-premise), then we need to extend it in order to make it accessible over the internet. Below are the steps that will help us to extend SharePoint and integrate it with the CRM.
Steps to Extend SharePoint:
- Firstly, we need to install SharePoint on the server.
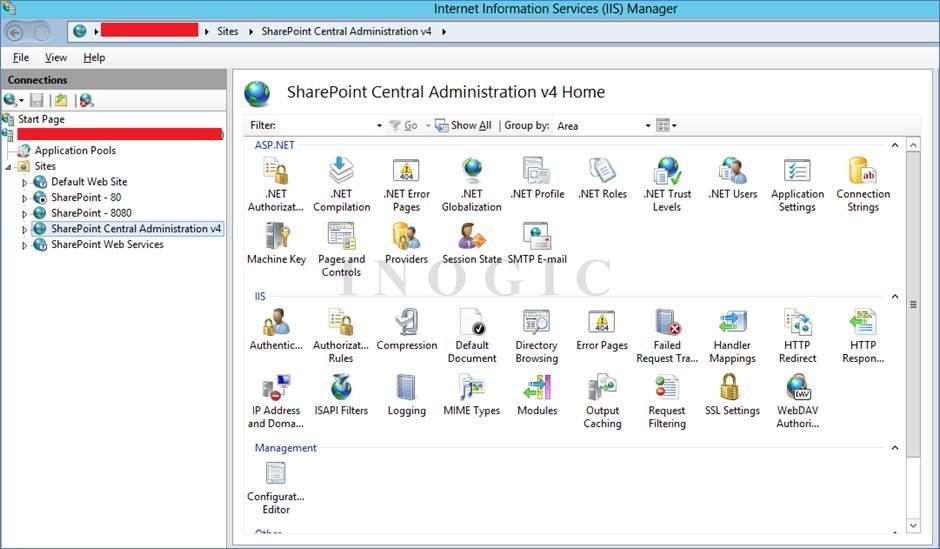
- After the installation, we can move forward to extend SharePoint. For this, we need to open IIS manager and open “SharePoint Central Administration” site. This site allows us to extend SharePoint Site.

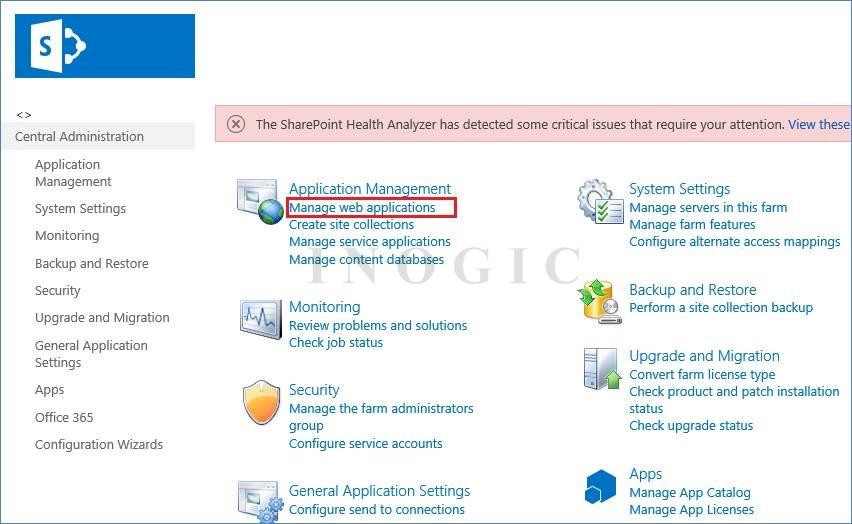
- Select the “SharePoint Central Administration” site and go to Application Management –> Manage web applications.

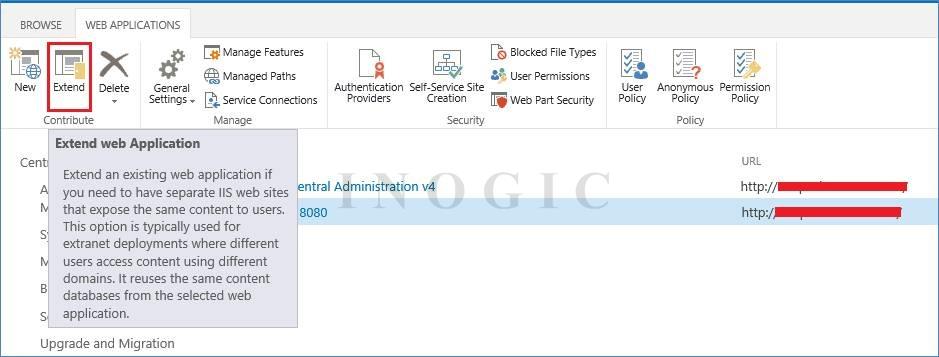
- We will see the 2 SharePoint site Records i.e. Central Administration and SharePoint site. Now to extend SharePoint, select the SharePoint Site (i.e. 2nd one) and click on the Extend button. This extend button at times is in disabled mode, so make sure that the browser is running as an Administrator.

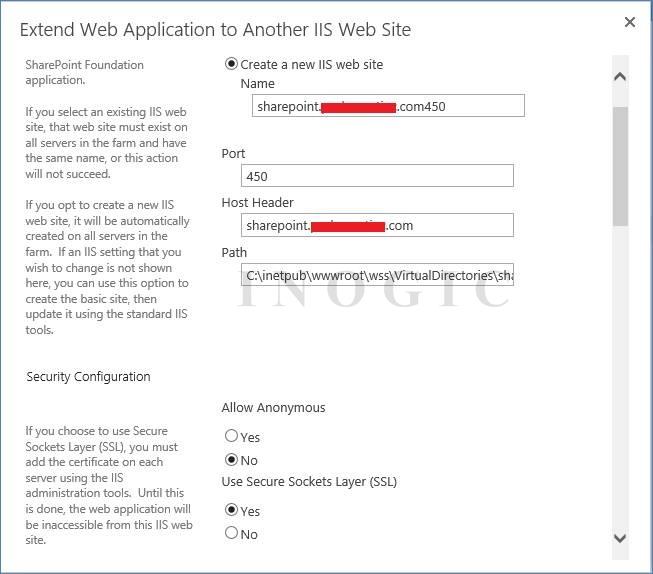
- A pop-up will be prompted named as “Extend Web Application to Another IIS Web Site”. Here we need to provide the following inputs in order to extend it. After that, click on the OK button.
- Select “Create a new IIS web site”
- Port – Provide any port, which is not used in the domain network and make a note of it
- Host Header – It is required to provide host header. For e.g. sharepoint.domainname.com
- Path – Keep the default as it is i.e. wwwroot
- Allow Anonymous: No
- Use Secure Socket Layer(SSL): Yes
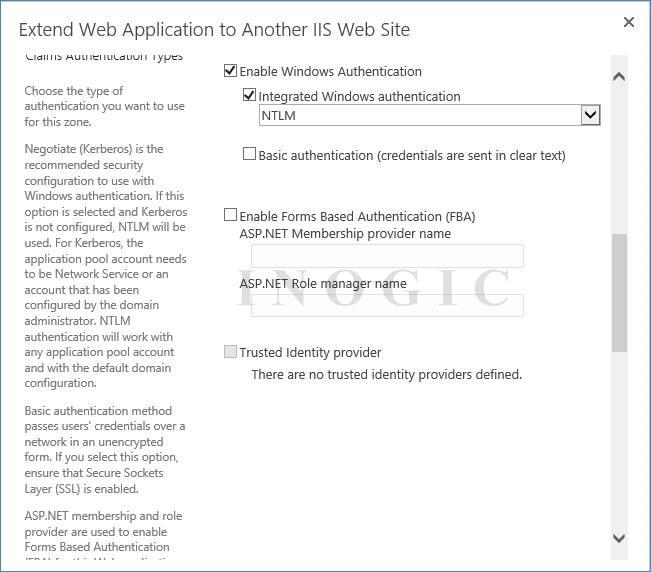
- Enable Windows Authentication : Checked
- Integrated Windows Authentication : NTLM
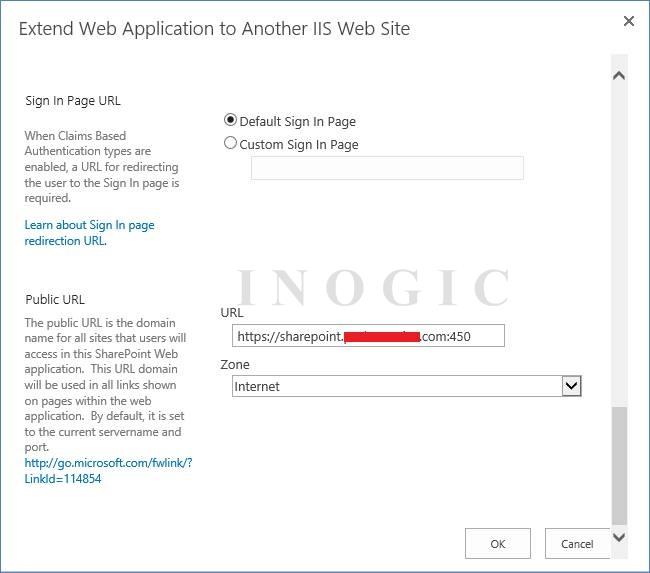
- Default Sign in Page : Checked
- URL: Keep the default as it is and make a note of it for further use
- Zone: Internet (this is required and make sure that it is selected as internet)


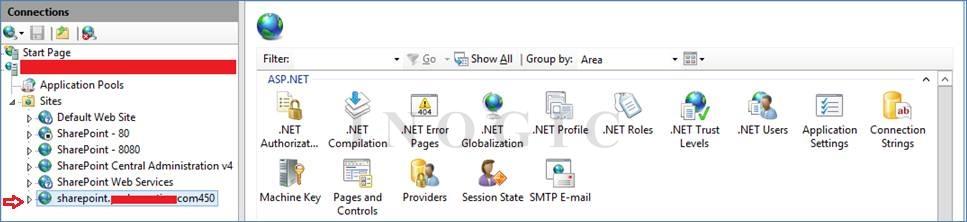
- Now open IIS manager, we will see one more SharePoint site displayed on it.

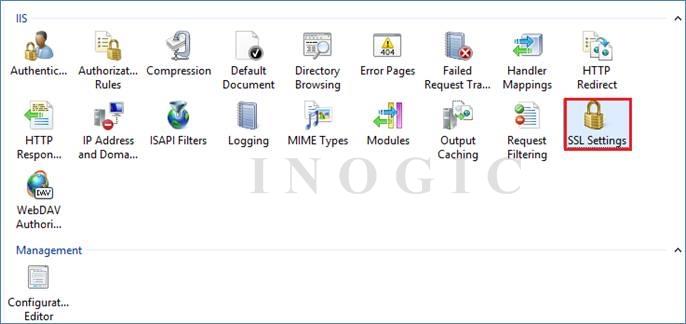
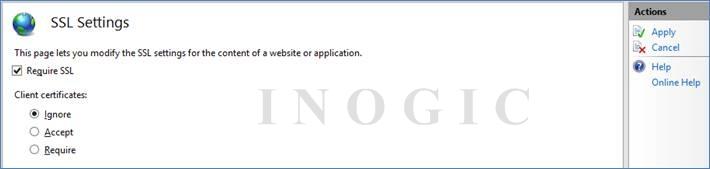
- Then select the Site and Open “SSL Settings” and tick the “Require SSL” and click on Apply button.


- Now to access this site, we need to select the certificate in the Site Bindings. So we need to import SSL domain certificate with *.pfx. To import certificate, follow the below steps:
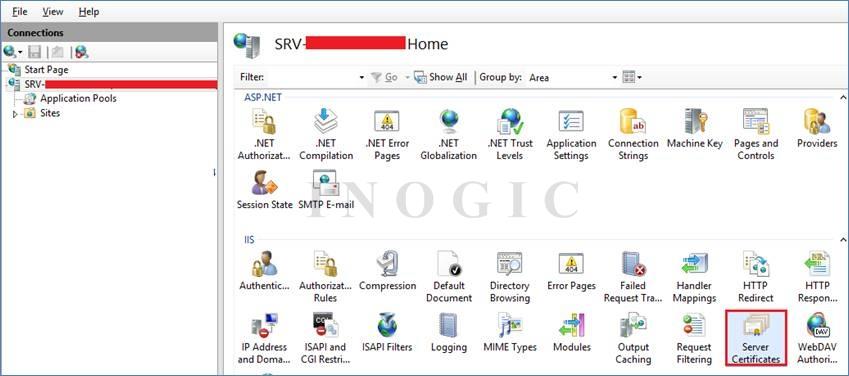
- Select the Server in IIS
- Click on the Server Certificates
- Then in that click on the Import link
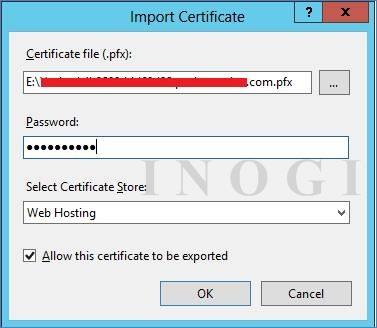
- A window will be prompted named as “Import Certificate”
- Select the certificate, provide the password and select “Select Certificate Store” as “Web Hosting” and click on OK button


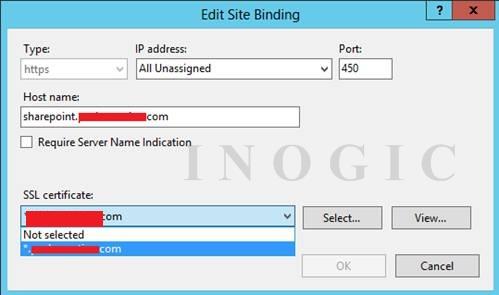
- Now we need to go to the Site again created in step 6, and click on the Bindings. It will allow us to select the SSL certificate, which we had imported in the above step. Select the certificate and click on the OK button.

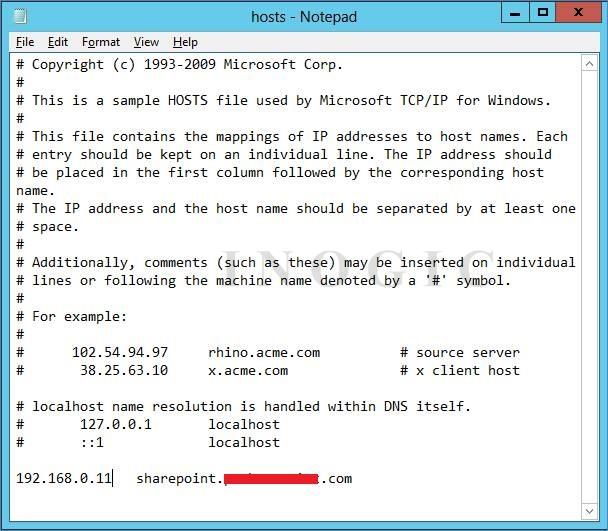
- Temporarily, we can do the Host entry, to access SharePoint using extended URL on the SharePoint Server, hence if we create the extended the SharePoint with user https://sharepoint.mydomain.com:450, then we need to do a host entry for sharepoint.mydomain.com host with corresponding IP address into the Host file. Add below entry in the Hosts file located in the C:\Windows\System32\Drivers\etc.

- Now all the settings are completed. Reset the IIS and browse the website using this URL generated in the step 5.

- Now on the DNS server add the DNS Host entry in the DNS configuration and keep the Port no. open, which we had used in Step 5. This will extend the SharePoint and accessible through the internet. After successfully extending SharePoint, we need to integrate it with the CRM.For this, follow our blog “Integrate SharePoint with the CRM”. This will help you to integrate SharePoint and CRM.

Note: Sometimes after extending the SharePoint, when you access above extended SharePoint URL through the browser it asks for the username and password and even if you provide the correct credentials, it keeps on prompting as there is a loopback check security feature that is designed to help prevent reflection attacks on your computer. Therefore, authentication fails if the custom host header that you use does not match the local computer name.
You can follow this article to resolve this issue http://support.microsoft.com/kb/896861/en-us
Hope this helps!