Automation testing requires interacting with different UI elements in an application. Tests may fail for several reasons such as incorrect selectors, synchronization issues, or unexpected changes in the UI. Identifying reliable UI selectors is therefore crucial when writing complex automation scripts. One of the most common causes of UI automation failures is the use of incorrect or unstable selectors.
Some common reasons why automation scripts fail include:
Targeting Incorrect Selectors
- The UI element no longer exists on the page.
- The selector matches multiple UI elements.
- The UI structure has changed after application updates.
Timing and Synchronization Issues
- Modern web applications often load content asynchronously. As a result, UI elements may appear after a delay. Tests can fail if the script attempts to interact with an element before it is available. Using proper waiting mechanisms such as explicit waits and assertions helps ensure that elements are present and in the correct state before interacting with them.
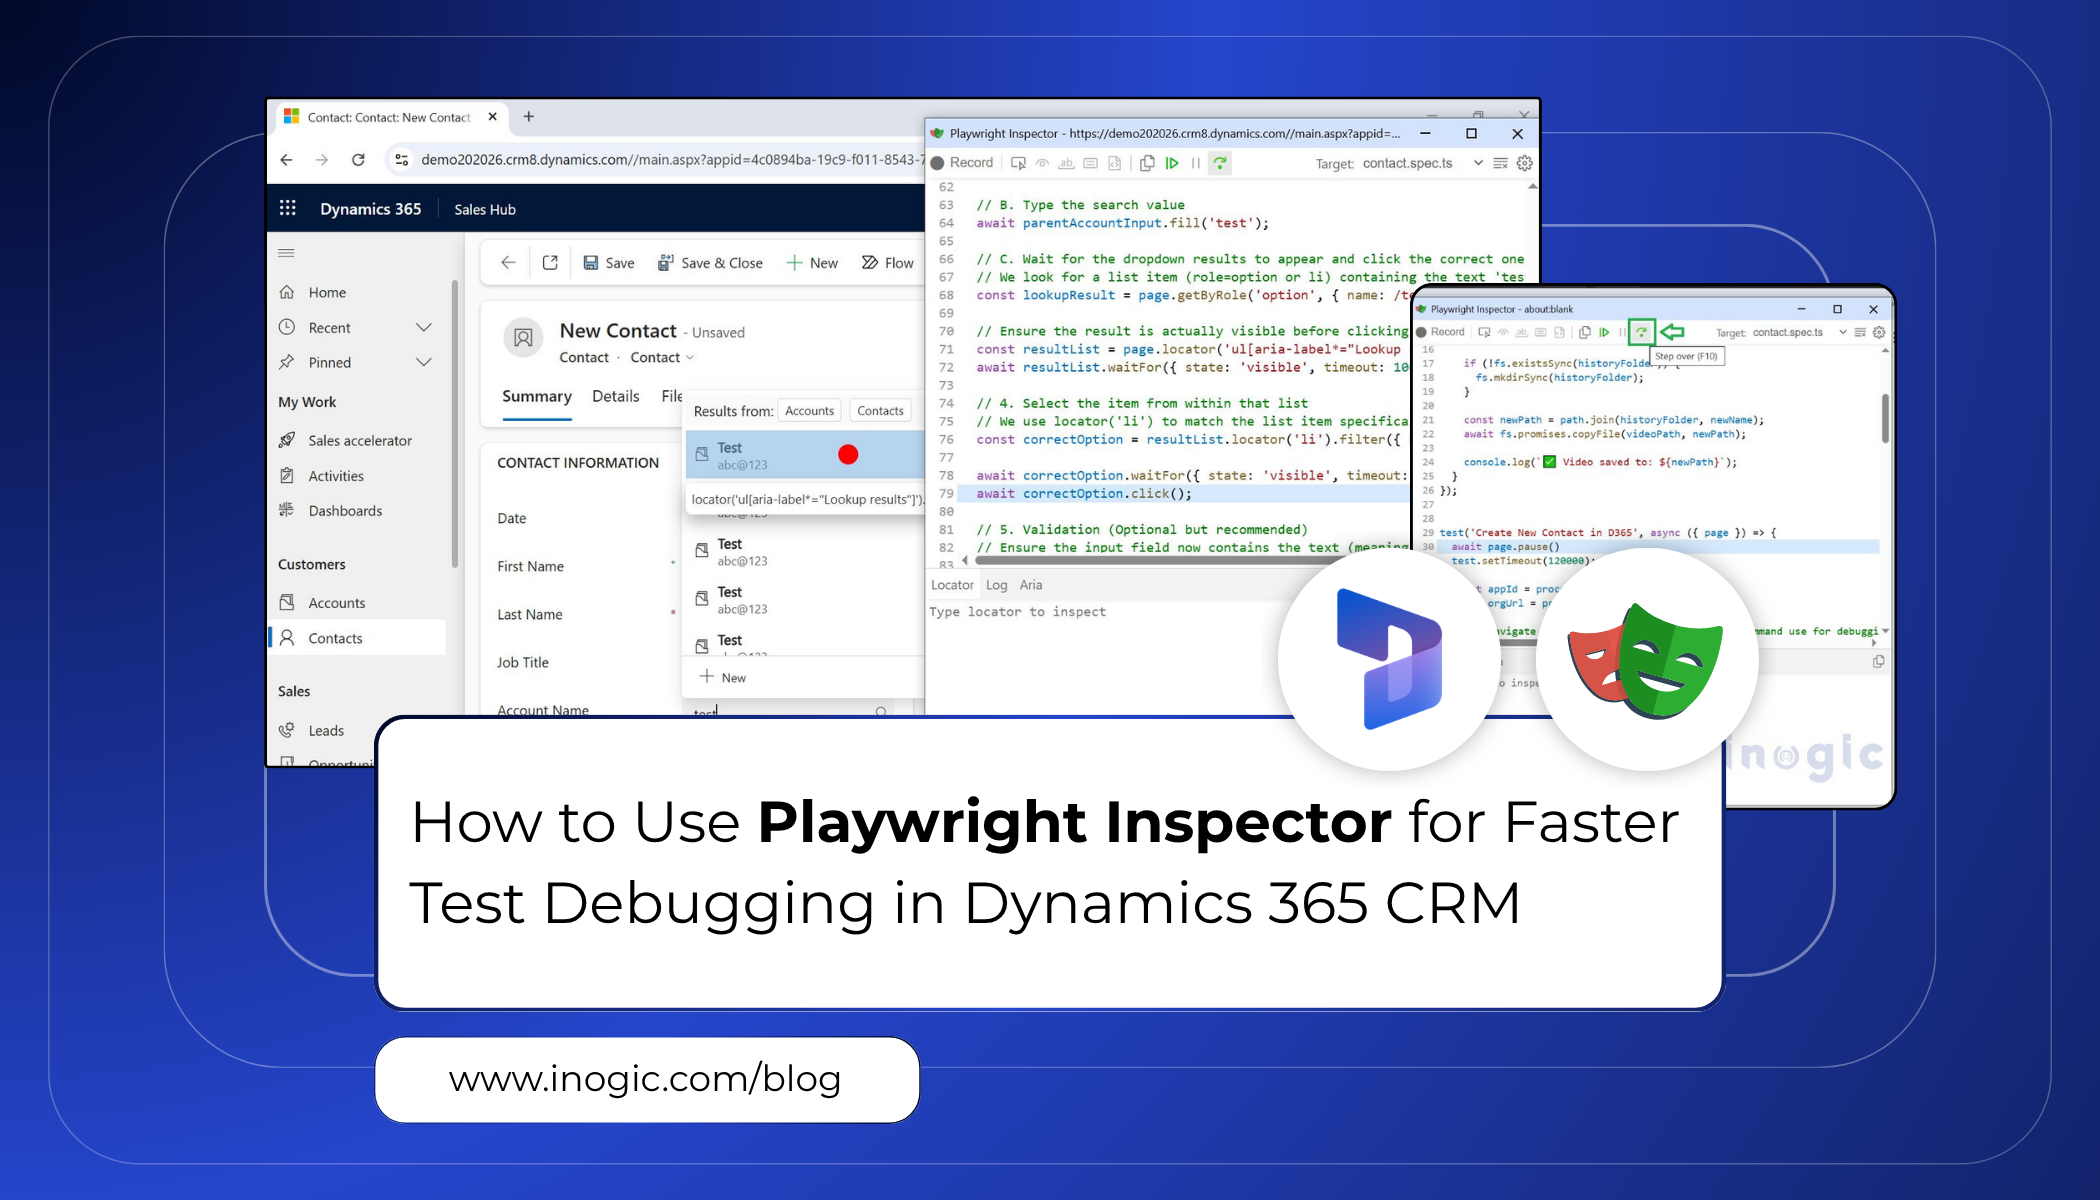
Playwright Inspector
Debugging tools such as the Playwright Inspector allow to pause test execution and visually inspect the web page during test runs. This makes it easier to identify locator issues and understand how the test interacts with the application.
The Playwright Inspector works as a debugging interface that opens when Playwright tests are executed in debug mode. It provides several useful capabilities:
- Pause and step through test execution
- Inspect elements on the page
- Validate selectors used in the test
- Generate reliable locators
- Observe browser actions in real time
Because Playwright interacts with a real browser, it allows to observe actual browser behavior. This helps in verifying that the application performs as expected during automation. With the Inspector, you can:
- Watch the browser perform each action
- Verify navigation, clicks, and form submissions
- Confirm that the application behaves as expected
- Step through the test line by line
- Ensure waits and assertions are placed correctly
In previous blog we have already explored how Playwright can be used for Dynamics 365 automation testing wherein we have simply created contact record using Typescript code.
Using TypeScript with Complex Selectors:
Let’s extend the same use case. While creating a Contact record in Dynamics 365 CRM, we will now work with more complex UI elements such as lookup fields and option set fields. At the same time, we will use the Playwright Inspector for live debugging.
To perform the debugging process you can add a page.pause() method to your test. This way you will see the GUI page appears for “Playwright Inspector” while running the test.
By following the same steps provided in previous blog you can complete the Playwright setup (if not already) and here is the upgraded version of typescript code with more complex selectors and debugging step.
Typescript:
Create tests/contact.spec.ts:
Note: You can refer below code await page.pause () is added explicitly.
import { test, expect, Page } from '@playwright/test';

import { populate } from 'dotenv';

import fs from 'fs';

import path from 'path';


// --- AUTOMATIC VIDEO SAVER (FIXED) ---

test.afterEach(async ({ page }, testInfo) => {

const video = page.video(); // get video BEFORE closing

await page.close();


if (video) {

const videoPath = await video.path();

const timestamp = new Date().toISOString().replace(/[:.]/g, '-');

const newName = `${testInfo.title.replace(/\s+/g, '_')}_${timestamp}.webm`;

const historyFolder = 'video-history';


if (!fs.existsSync(historyFolder)) {

fs.mkdirSync(historyFolder);

}


const newPath = path.join(historyFolder, newName);

await fs.promises.copyFile(videoPath, newPath);


console.log(`✅ Video saved to: ${newPath}`);

}

});


test('Create New Contact in D365', async ({ page }) => {

// Debugging step

await page.pause()

test.setTimeout(120000);


const appId = process.env.APP_ID!;

const orgUrl = process.env.CRM_URL!;


// 1. Navigate directly to Contacts grid, pause command use for debugging


await page.goto(`${orgUrl}/main.aspx?appid=${appId}&pagetype=entitylist&etn=contact`);

await page.waitForLoadState('domcontentloaded');


// 2. Click New (robust selector)

const newButton = page.locator("(//span[contains(.,'New')])[1]");

await expect(newButton).toBeVisible({ timeout: 30000 });

await newButton.click();


// 3. Wait for form to load (First Name field)

const firstName = page.locator('[data-id*="firstname"] input');

await expect(firstName).toBeVisible({ timeout: 30000 });


// 4. Fill mandatory fields

await firstName.fill('Test');

await page.locator('[data-id*="lastname"] input').fill('Bot');

await page.locator('[data-id*="jobtitle"] input').fill('Dev');

await page

.locator('[data-id*="emailaddress1"] input')

.fill('auto34@example.com');


const parentAccountInput = page.locator('[data-id*="parentcustomerid"] input');


// A. Click the field to activate it

await parentAccountInput.click();


// B. Type the search value

await parentAccountInput.fill('test');


// C. Wait for the dropdown results to appear and click the correct one

// We look for a list item (role=option or li) containing the text 'test'

const lookupResult = page.getByRole('option', { name: /test/i }).first();


// Ensure the result is actually visible before clicking to avoid flakes

const resultList = page.locator('ul[aria-label*="Lookup results"]');

await resultList.waitFor({ state: 'visible', timeout: 10000 });


// 4. Select the item from within that list

// We use locator('li') to match the list item specifically, ensuring we don't click other UI elements

const correctOption = resultList.locator('li').filter({ hasText: /test/i }).first();


await correctOption.waitFor({ state: 'visible', timeout: 5000 });

await correctOption.click();


// 5. Validation (Optional but recommended)

// Ensure the input field now contains the text (meaning selection stuck)

//await expect(parentAccountInput).toHaveValue(/test/i);


// --- PREFERRED METHOD OF CONTACT FIX ---


// 1. Target the wrapper, NOT the input (which is invisible)

// We use .first() just in case the selector matches the label and the field

const contactMethodDropdown = page.locator('[data-id*="preferredcontactmethodcode"]').first();


// 2. Wait for the wrapper to be visible

await contactMethodDropdown.waitFor({ state: 'visible', timeout: 10000 });


// 3. Click to expand the list

await contactMethodDropdown.click();


// 4. Select 'Email' from the expanded list

const emailOption = page.getByRole('option', { name: 'Email' });


// Wait for the dropdown animation

await emailOption.waitFor({ state: 'visible', timeout: 5000 });

await emailOption.click();


// 5. Save (button role, not menuitem)

const saveButton = page.locator("(//span[contains(.,'Save')])[1]");

await expect(saveButton).toBeVisible({ timeout: 30000 });

await saveButton.click();


});
Run the test:
Run the above typescript file using below command
npx playwright test contact.spec.ts –headed
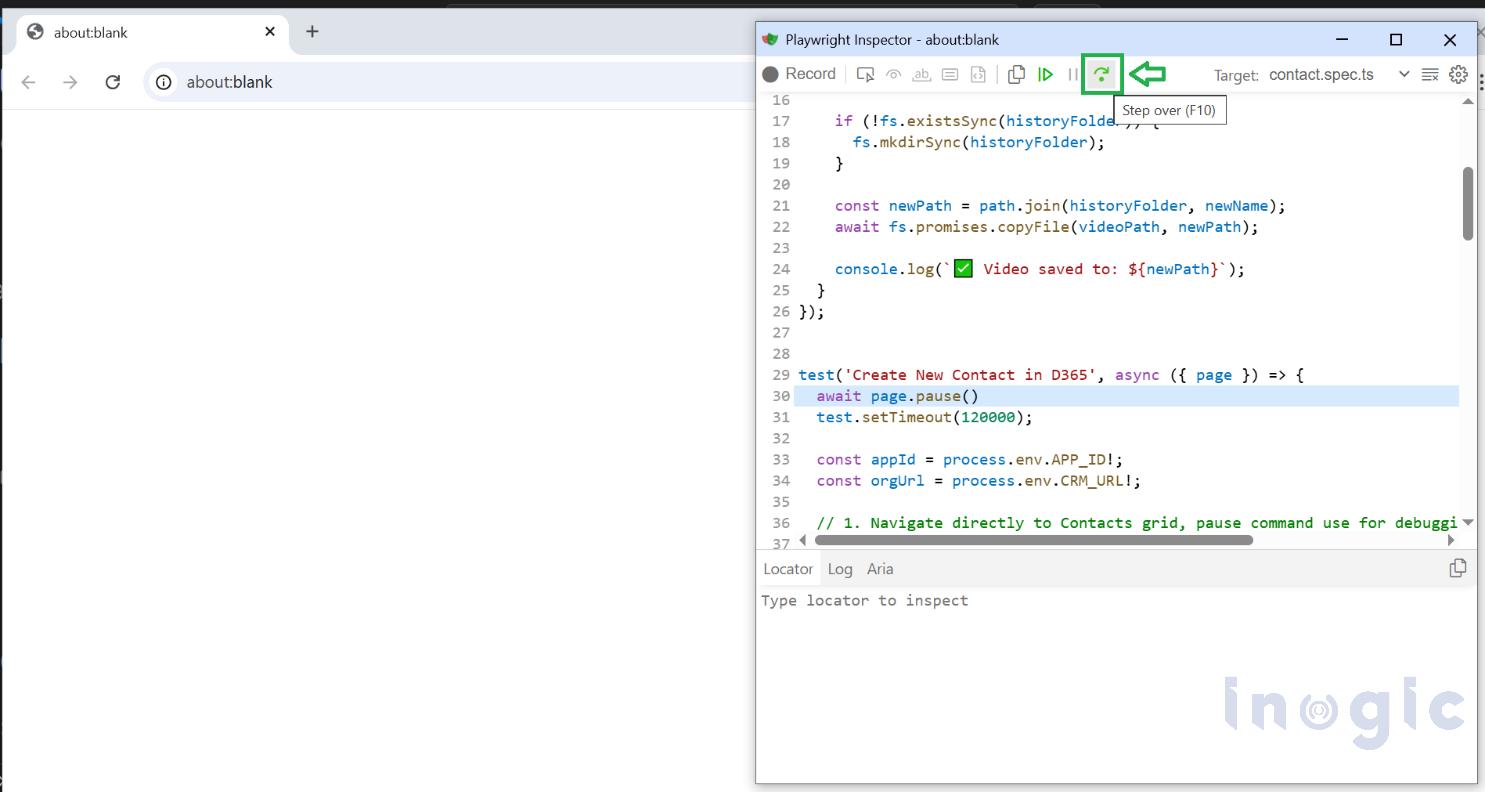
As you have add a page.pause() it run your tests in debug mode. You can play, pause or step through each action of your test using the toolbar at the top of the Inspector.
Step Over:
Clicking the “Step Over” button in the Playwright Inspector will run the test step by step and will show a LIVE execution on browser as shown: You can see the current action highlighted in the test code, and matching elements highlighted in the browser window.
 Pick Locator:
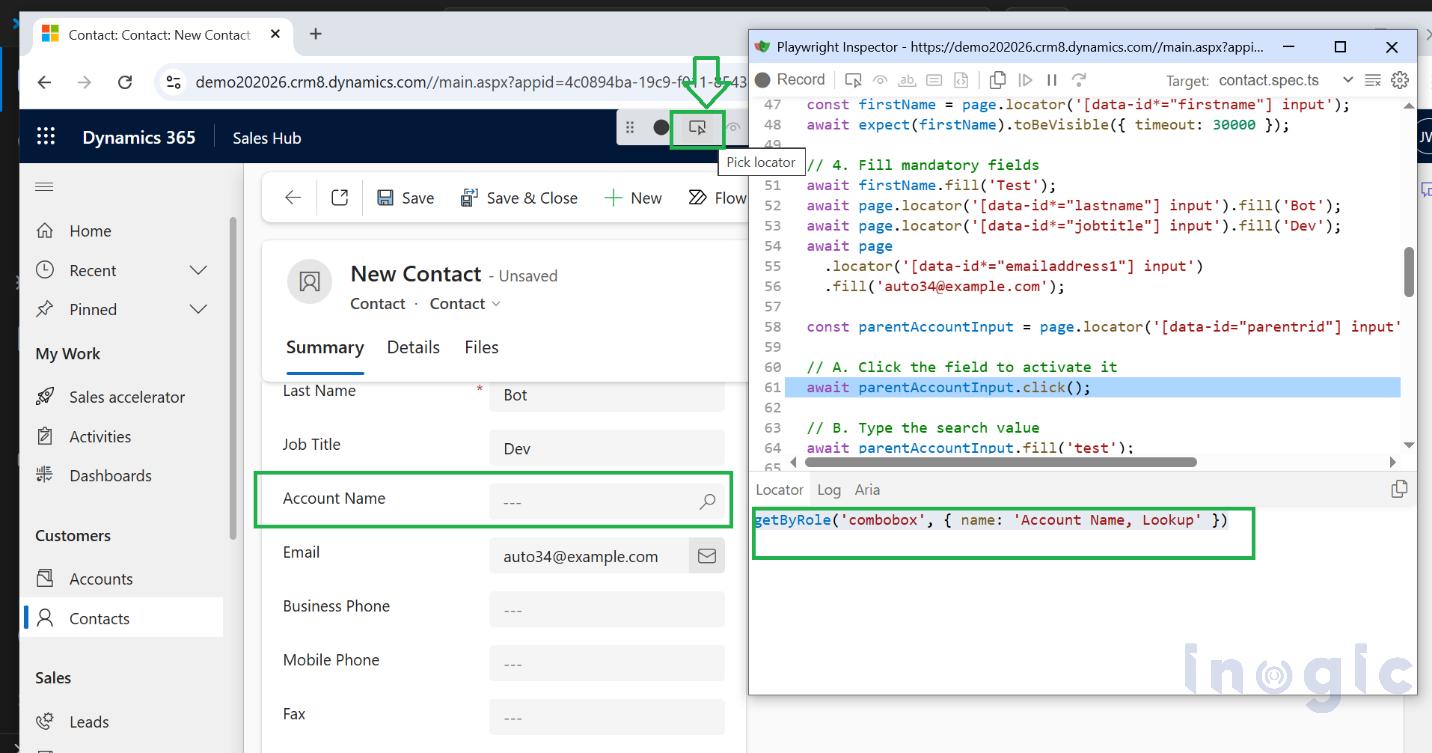
 You can see the current action highlighted in the test code, and matching elements highlighted in the browser window.
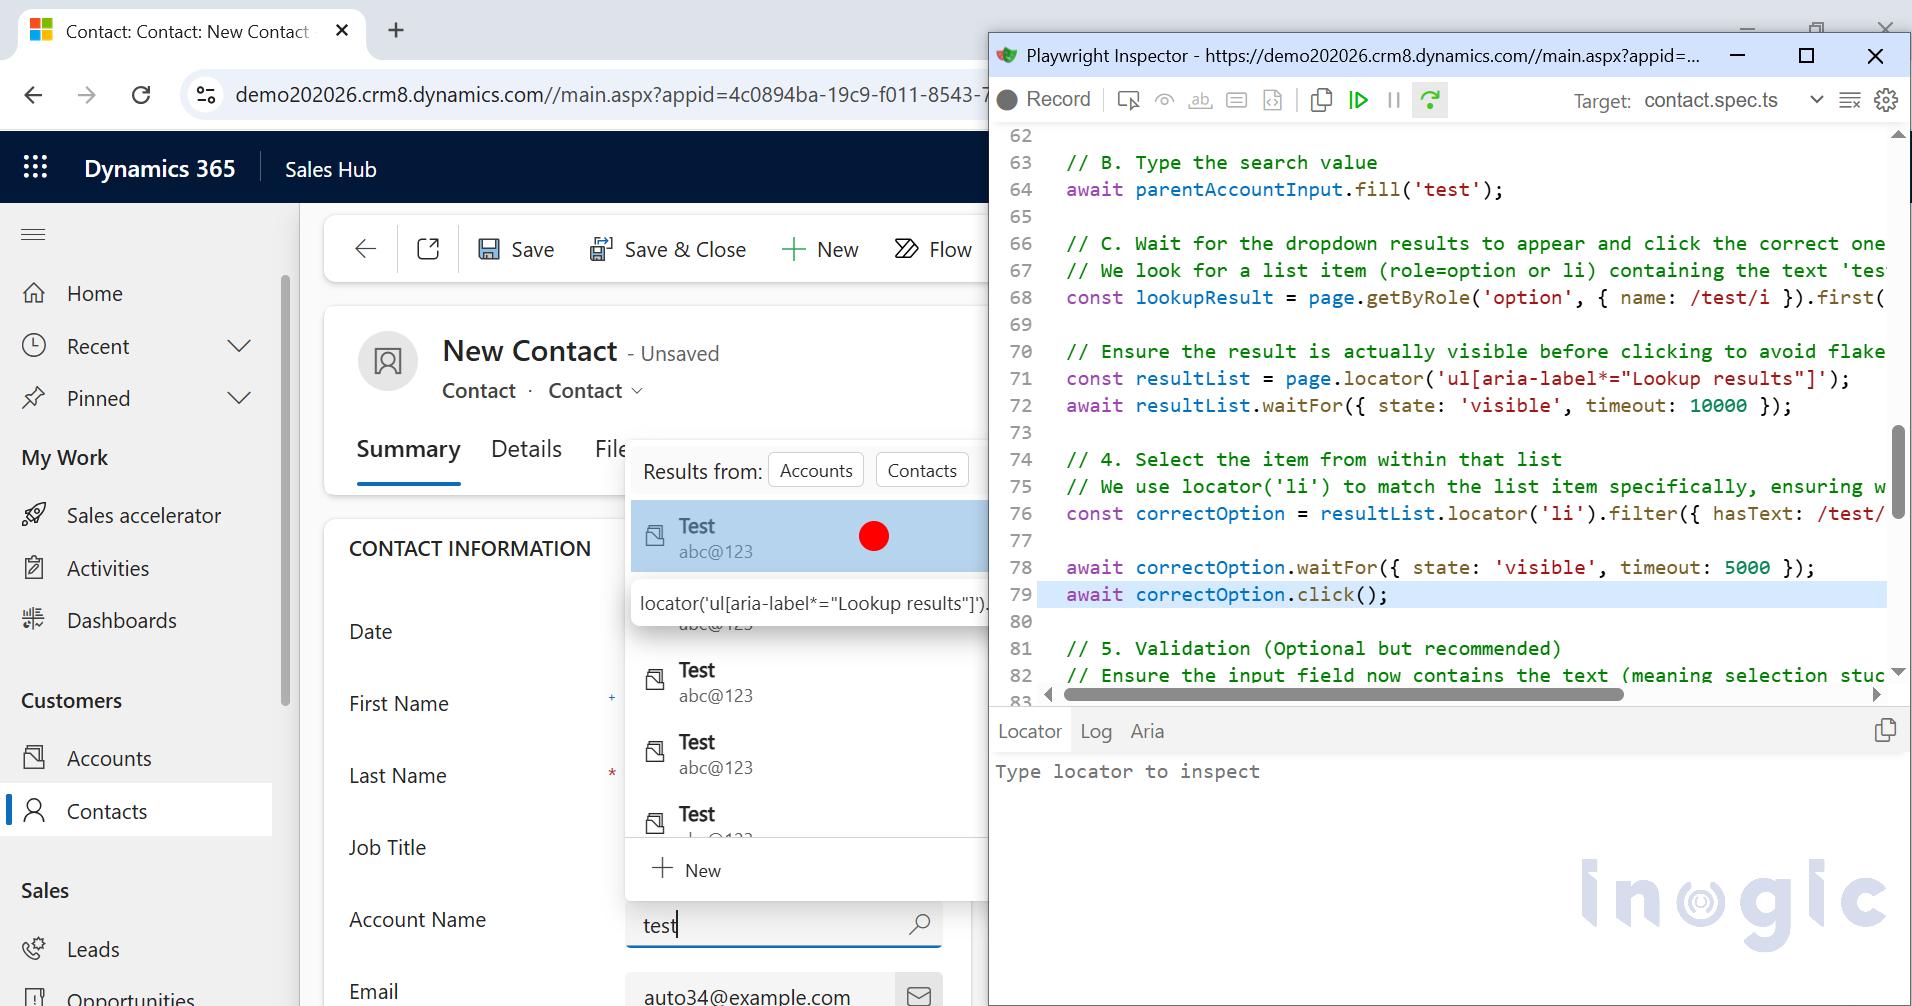 Pick Locator:
While debugging, you might need to choose a more resilient locator. You can do this by clicking on the Pick Locator button and hovering over any element in the browser window. While hovering over an element you will see the code needed to locate this element highlighted below which then you can copy it into your code. Record feature:
 Record feature:
You can click on “Record” button and “Start Recording” the other web element with user interactions corresponding typescript code will be recorded/generated in background through recording feature.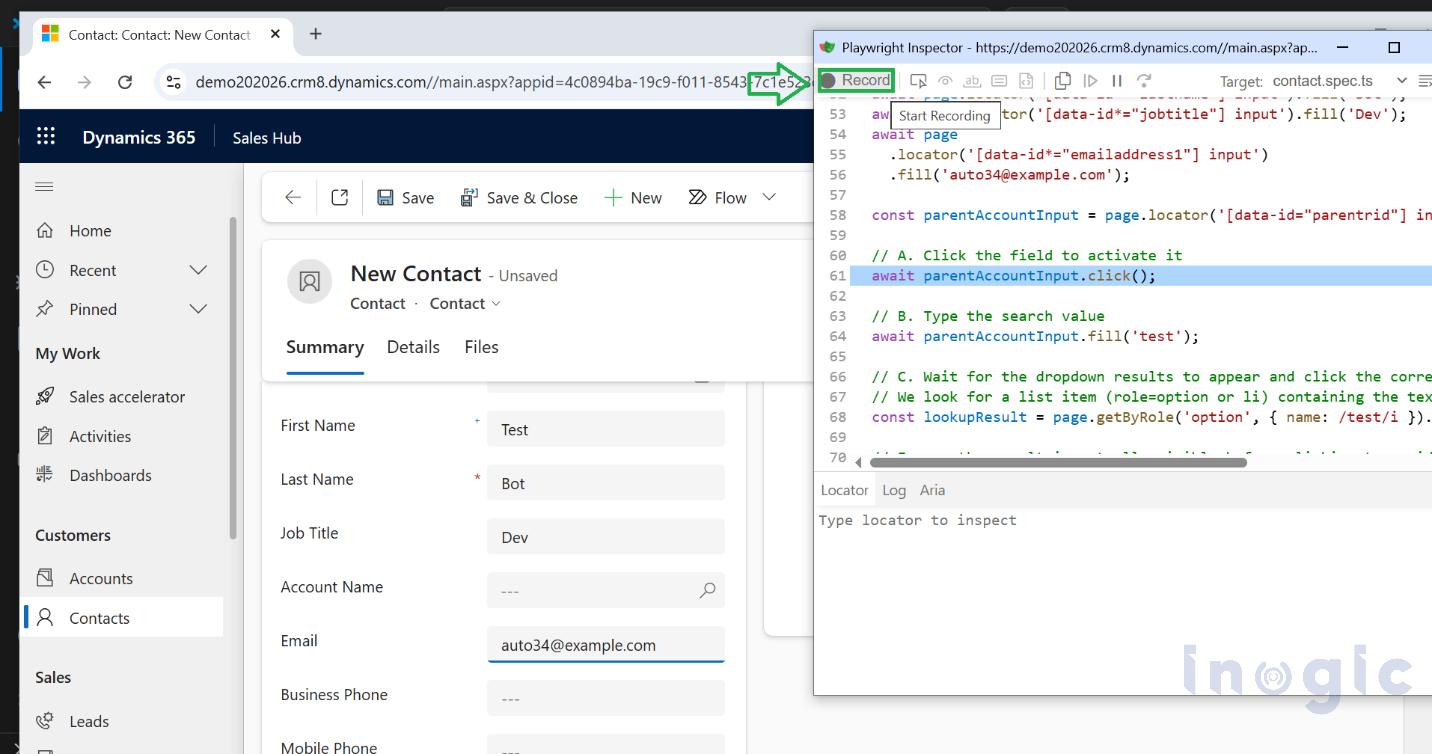 When started recording you will be able to locate the element start filling in data and can view generated code.
 The new Playwright Inspector window opens up where the recording code can be viewed and can be copied in the existing code.
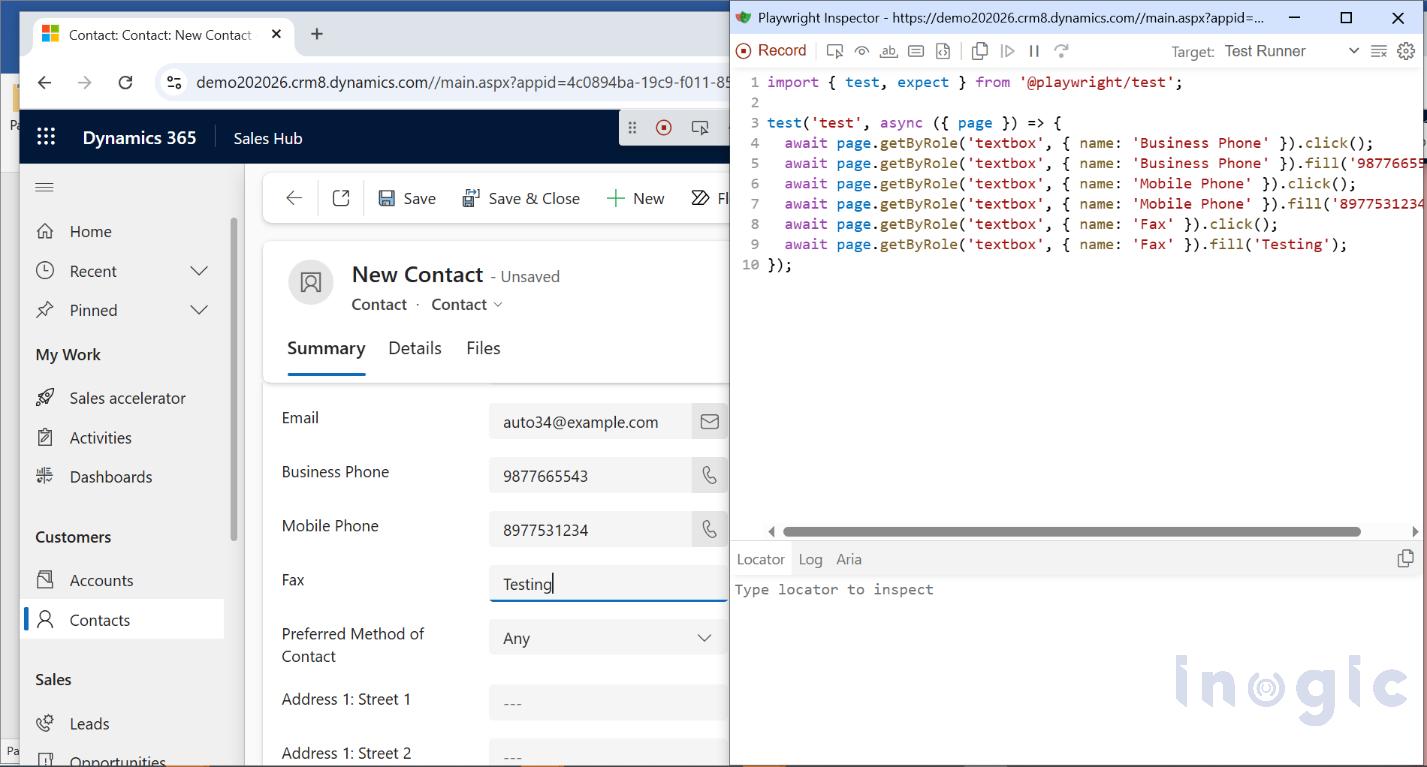 You can explore more about Playwright locators here and may need to tweak little bit in recorded script and start using the same in existing code.
Conclusion:
Using Playwright Inspector makes debugging UI automation much easier by allowing inspect elements and execute tests step by step. This helps identify unstable selectors and improves the reliability of automation scripts. This leads to more stable tests and a smoother automation development process.
FAQs
What are the common causes of UI automation test failures in Microsoft Dynamics 365?
UI automation tests in Microsoft Dynamics 365 commonly fail due to:
- Unstable or incorrect UI selectors
- Frequent UI updates in Dynamics 365
- Asynchronous loading of elements
- Timing and synchronization issues
Using reliable locators and proper wait strategies helps reduce failures.
What is UI automation testing in Microsoft Dynamics 365 CRM?
UI automation testing in Microsoft Dynamics 365 involves simulating user interactions (like form entry, navigation, and record creation) to validate that the CRM application behaves correctly. Tools like Playwright help automate these workflows efficiently.
How does Playwright help with Dynamics 365 automation testing?
Playwright enables:
- Cross-browser automation
- Reliable element handling with auto-waiting
- Powerful locator strategies
- Built-in debugging tools like Playwright Inspector
This makes it highly effective for automating complex Dynamics 365 applications.
Is it possible to automate end-to-end workflows in Microsoft Dynamics 365 using Playwright?
Yes, Playwright supports full end-to-end automation in Dynamics 365, including navigation, form submissions, lookups, and validations. With proper waits and selectors, entire business workflows can be reliably automated.
How can you verify form submission in Dynamics 365 automation?
Form submission can be verified by checking confirmation messages, updated field values, or successful navigation. Assertions ensure that the action has completed as expected.
How do you handle timing issues in Dynamics 365 automation?
Timing issues are handled using Playwright’s auto-waiting along with explicit waits like waitFor() and assertions. This ensures elements are fully loaded and ready before interaction, reducing test failures.
What is the advantage of using role-based selectors in Playwright?
Role-based selectors improve reliability by targeting elements based on accessibility roles rather than structure. This makes tests more stable, especially in dynamic applications like Dynamics 365.