Creating similar records repeatedly in Dynamics 365 CRM can slow down sales and operations teams. Whether it’s duplicating opportunities, quotes, accounts, or custom entities, manually recreating records leads to lost productivity and inconsistent data.
Record cloning solves this problem by allowing users to duplicate an existing record along with selected related data, reducing manual work and improving accuracy.
Using an advanced cloning setup for Dynamics 365 CRM, organizations can configure automated record cloning with flexible rules and entity relationships.
In this step-by-step guide, you’ll learn how to configure record cloning in Dynamics 365 CRM.
What is Record Cloning in Dynamics 365 CRM?
Record cloning in Dynamics 365 CRM is the process of duplicating an existing record along with selected fields and related records to create a new one. Instead of manually entering similar information again, users can simply clone the record and modify only the necessary fields.
How to Clone Records in Dynamics 365 CRM
To set up record cloning in Dynamics 365 CRM:
- Install and open the configuration.
- Create a new cloning configuration.
- Select the source entity (Account, Opportunity, Lead, etc.).
- Define field mappings for the cloned record.
- Configure related entity cloning if child records should also be copied.
- Enable the Clone button on the entity form.
- Save and publish the configuration.
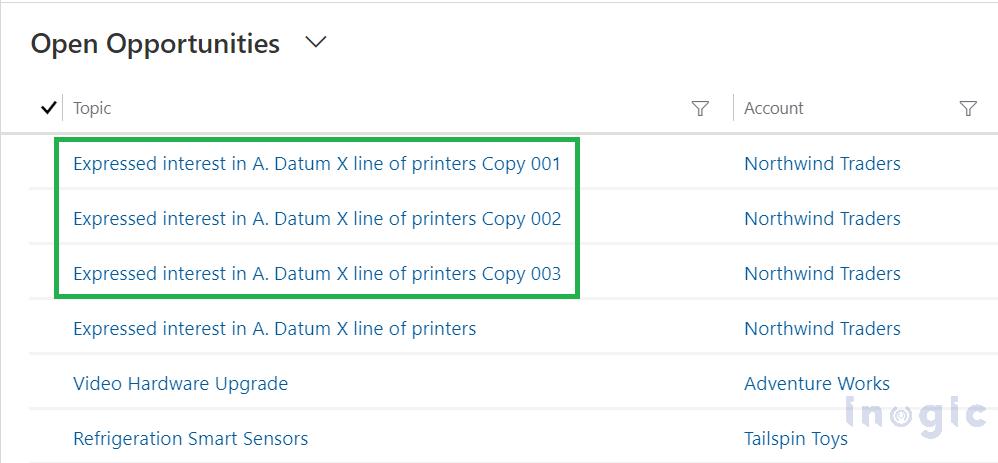
Once configured, users can clone records with a single click, automatically duplicating selected fields and related records.
Step-By-Step Guide: How to Configure Record Cloning in Dynamics 365 CRM
Below is the complete process for configuring cloning with Click2Clone.
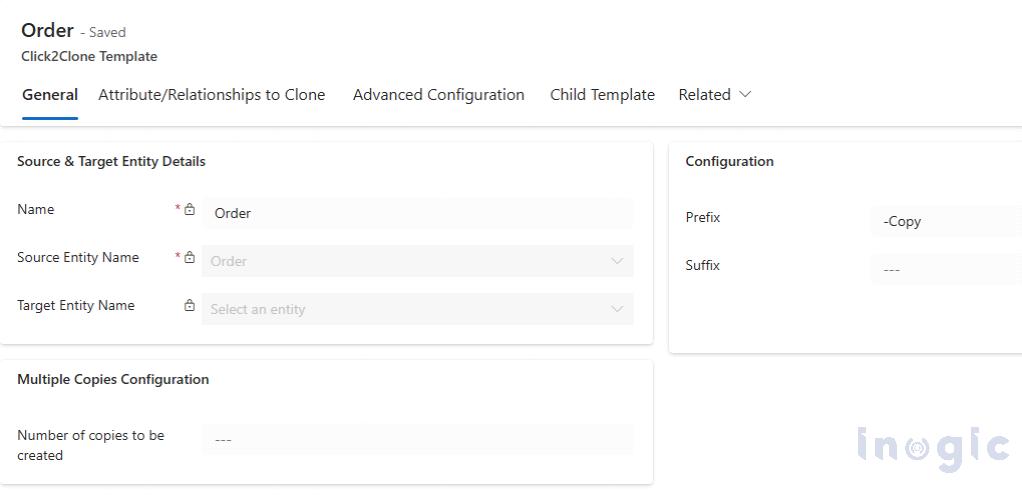
Step 1: Open Click2Clone Configuration
- Navigate to Configuration.
- Open the Configuration page.
- Select New Configuration to create a cloning rule.
This configuration defines which entity can be cloned and what data should be copied.
Step 2: Define the Source Entity
- Enter a Configuration Name.
- Select the Primary Entity you want to clone.
Examples of entities you may clone:
- Account
- Contact
- Opportunity
- Lead
- Custom entities
This entity becomes the source record that will be duplicated.
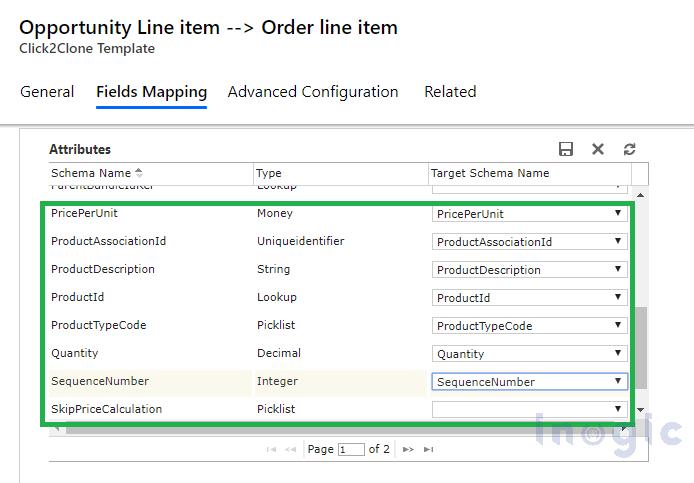
Step 3: Select Fields to Clone
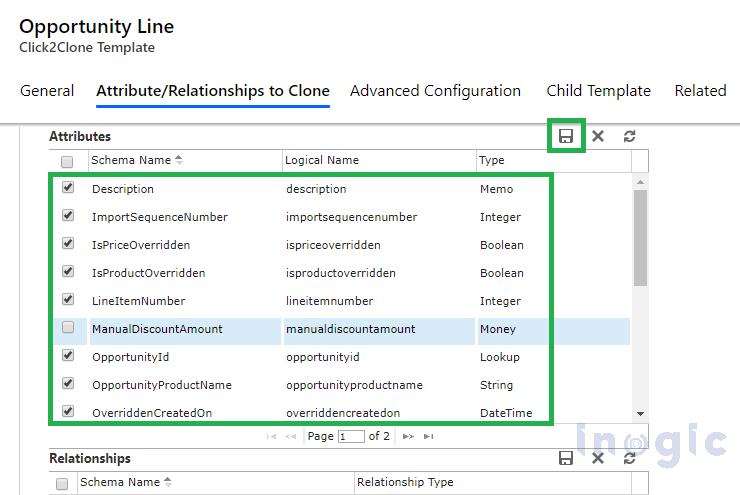
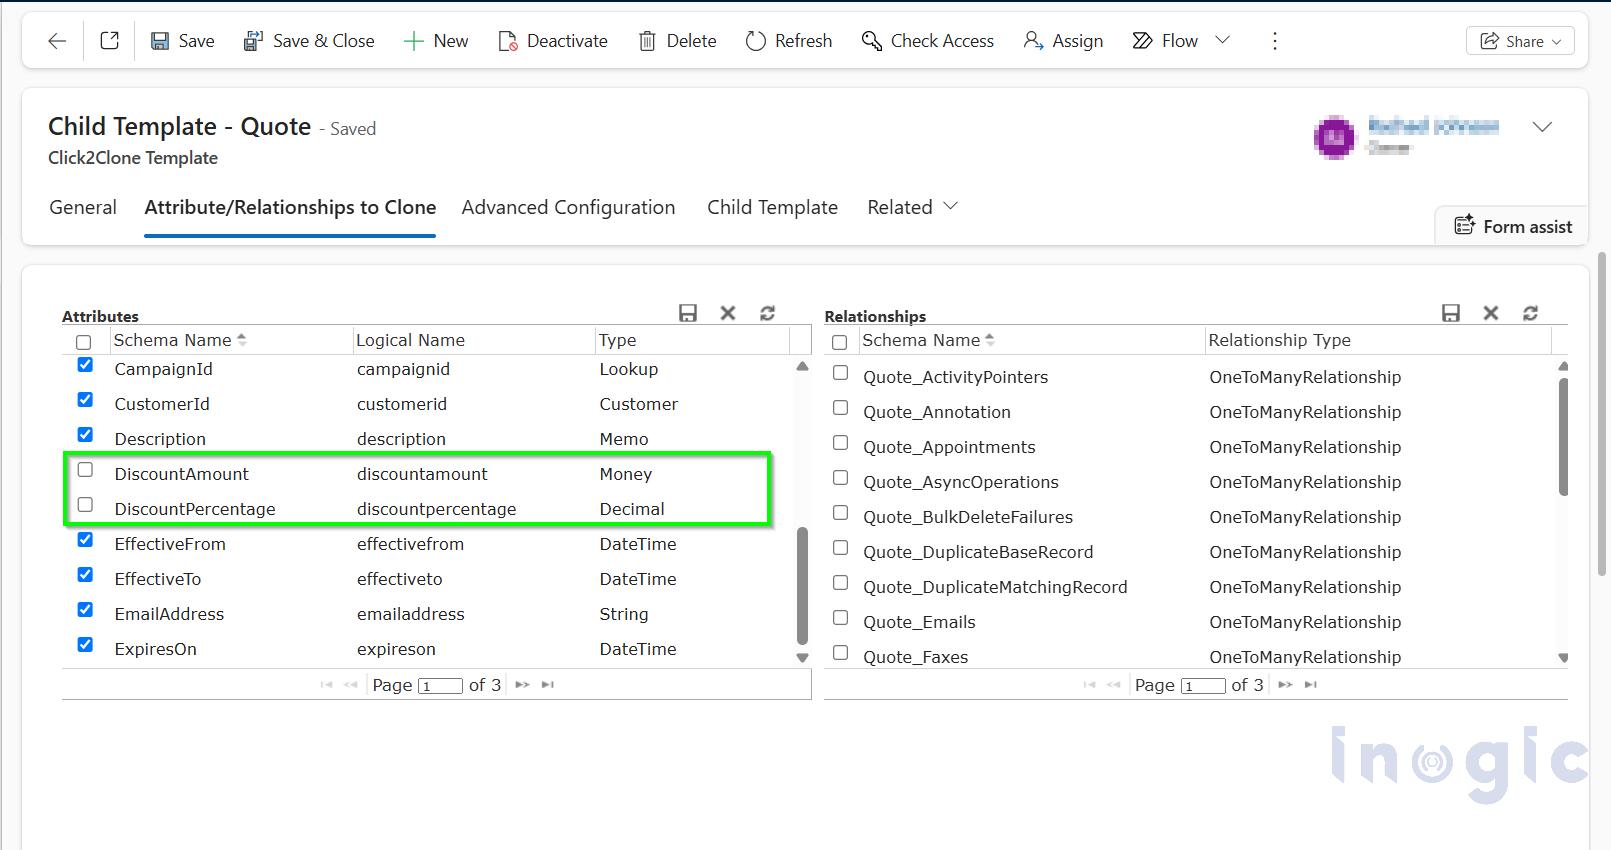
Next, configure which fields should be copied from the original record.
Steps:
- Open Field Mapping Settings.
- Select fields that should be copied to the cloned record.
- Exclude fields that should remain unique.
Typical fields excluded from cloning:
- Record ID
- Created On
- Modified On
- Status fields
This ensures the new record maintains data integrity and uniqueness.
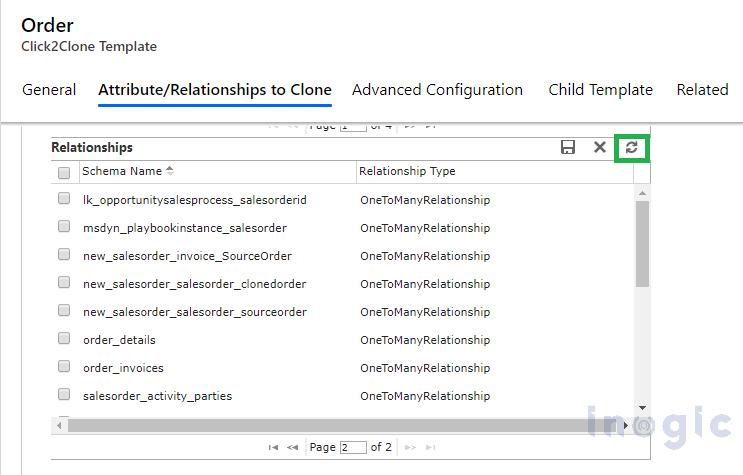
Step 4: Configure Related Entity Cloning
Click2Clone allows administrators to clone child records linked to the parent entity.
Examples:
- Opportunity Products
- Activities
- Notes
- Tasks
- Custom related entities
Steps:
- Select Add Related Entity.
- Choose the child entity.
- Define how relationships should be mapped.
This ensures the cloned record includes all necessary related data.
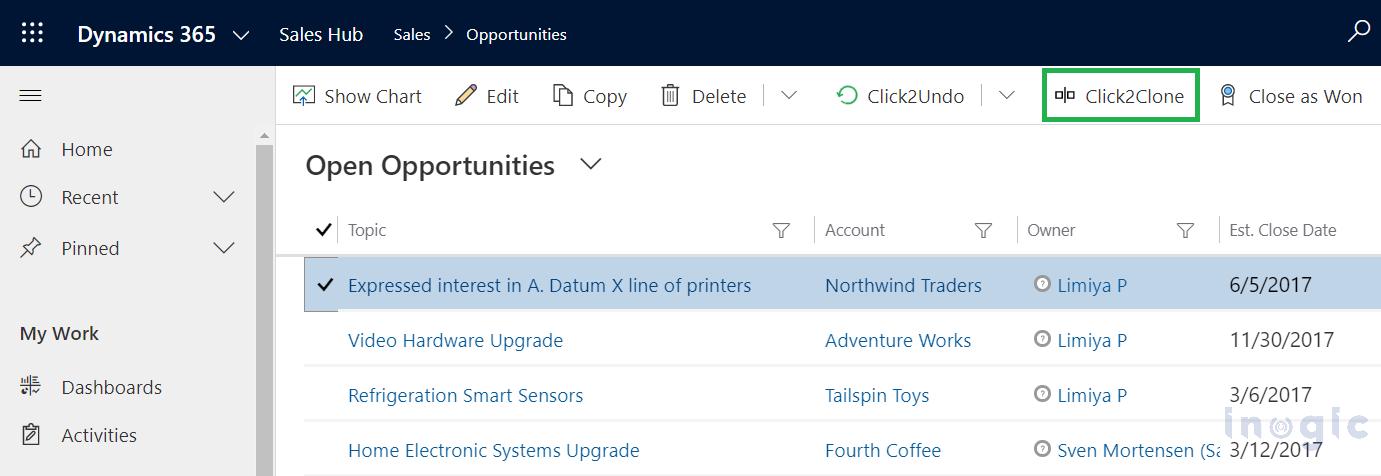
Step 5: Configure Clone Button Visibility
Administrators can control where users see the Clone button.
Steps:
- Choose the entity form or ribbon location.
- Enable the Clone button.
- Define security roles if needed.
This ensures only relevant users can trigger record cloning.
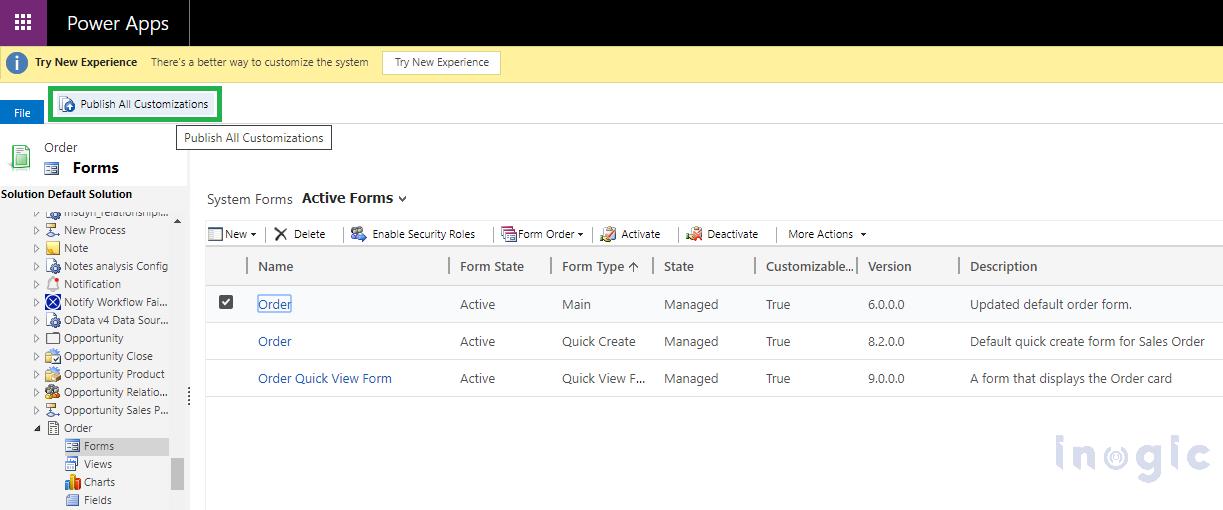
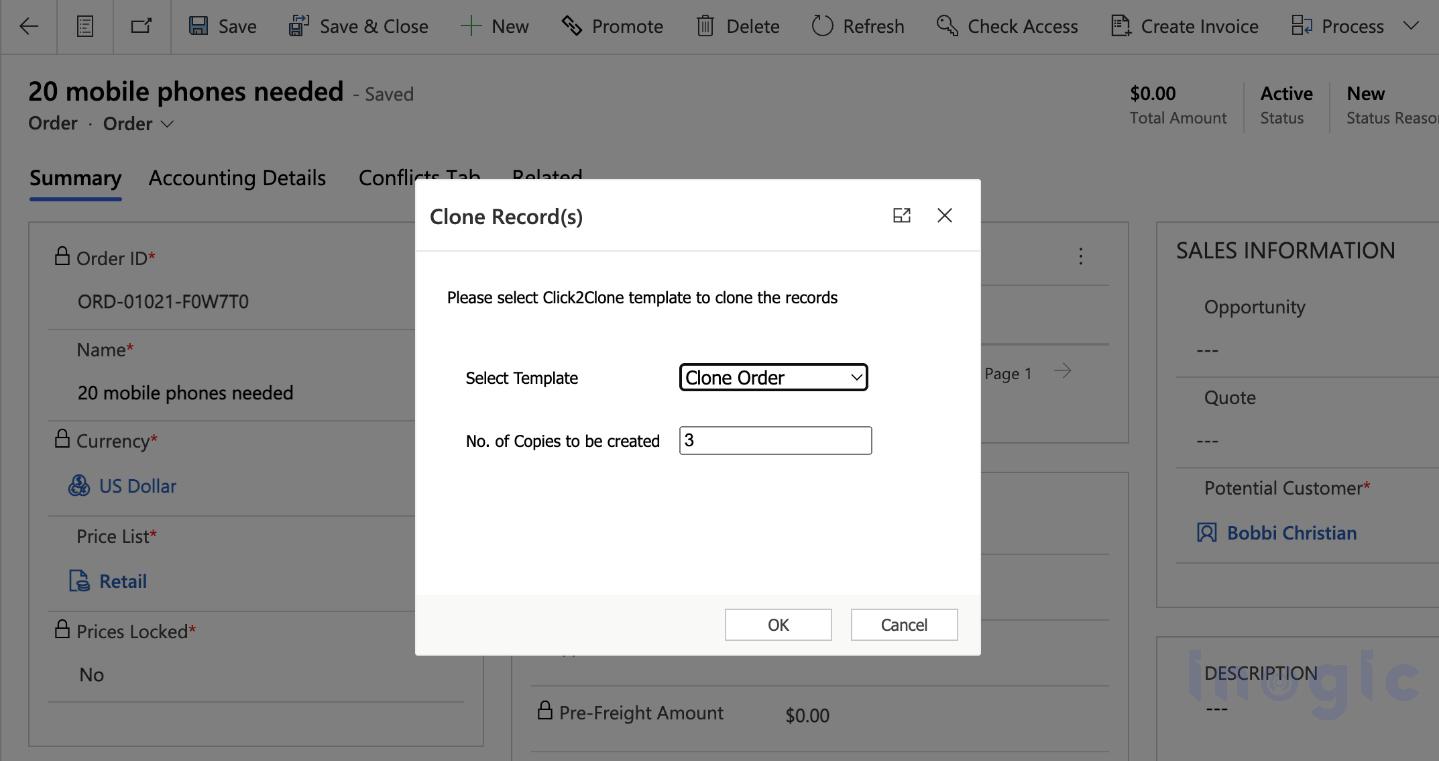
Step 6: Save and Publish the Configuration
- Save the configuration.
- Publish the changes.
- Test cloning on a sample record.
After publishing, users will see the Clone button directly on the record form.
How Record Cloning Works for End Users
Once the configuration is complete, the cloning process is simple.
Users just need to:
- Open an existing record.
- Click Clone Record.
- Review the copied data.
- Save the new record.
The system automatically duplicates the configured fields and related records.
Best Practices for Dynamics 365 Record Cloning:
To ensure optimal CRM performance:
- Avoid cloning unnecessary fields: Exclude fields like timestamps and IDs.
- Review related entity relationships: Ensure child records maintain the correct parent relationship.
- Test cloning scenarios: Validate configurations using test records before deploying for users.
- Use role-based access: Control who can clone records to avoid unintended duplication.
Conclusion
Record cloning is one of the most effective ways to reduce repetitive work in Dynamics 365 CRM.
By using Click2Clone, organizations can easily configure cloning rules, copy related records, and streamline CRM data entry. The result is faster record creation, improved data accuracy, and higher productivity for CRM users. If your team frequently creates similar CRM records, implementing record cloning can significantly improve efficiency across sales, service, and operations.
Ready to simplify record creation in Dynamics 365 CRM?
Instead of manually recreating similar records, enable automated record cloning with Click2Clone. Configure cloning rules, copy related records, and let your CRM users duplicate records with just one click.
Explore Click2Clone and start a 15-day free trial on the Inogic website or in the Microsoft Marketplace to efficiently clone Dynamics 365 records.