Microsoft’s standard approval emails make it easy to send and capture user feedback directly through Outlook. However, one major limitation is that when multiple users receive the same approval email, only the first response is considered, leaving others frustrated when they try to act on an already-approved request.
To overcome this limitation and deliver a more intuitive, brand-aligned experience, we designed a customized approval interface that not only eliminates confusion but enhances user confidence and professionalism in every interaction.
The Business Challenge: Creating Seamless Email Approvals
While the standard Power Automate approval system works for basic tasks, it lacks flexibility—especially in providing clear feedback when a request has already been completed.
Our goal was to create a smarter, smoother process where each user action leads to a clean confirmation page that reflects the brand identity.
Most importantly, if a user tries to respond to a completed request, they see a clear “Already Processed” message instead of an error—ensuring a consistent, frustration-free experience.
Step 1: Create a Flow to send the Email
The initial process issues the approval request but does not pause for a response.
Start with a Trigger

- Depending on your configuration, you may utilize:
- “When a row is created, altered, or removed” (Dynamics 365)
Add Action “Send an email (V2)”
- Create a custom email body where you can add parameters that you are using in 2nd
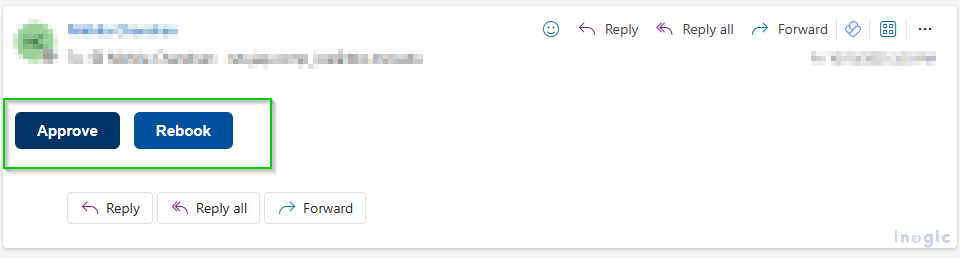
- Change your email body to HTML format to create your personalized buttons.
Pro Tip: Design your buttons with clear labels like ‘Approve’ or ‘Reject,’ using colors that align with your brand guidelines. This helps users instantly recognize and act

- Ensure that each button contains a distinct record identifier for future reference.
Step 2: Build the Action Handler Flow
This second process activates when a person clicks on one of the buttons.
Set Up the HTTP Trigger

- Establish a new flow by utilizing the “When an HTTP request is received” trigger.
- Use this JSON schema to capture the action and record ID:
{
“type”: “object”,
“properties”: {
“action”: {“type”: “string”},
“id”: {“type”: “string”}
}
}
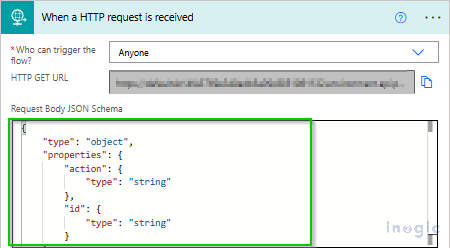
- After saving it, Power Automate will generate a unique HTTP POST URL for you.

- That is the link you will insert into your email buttons.
Add compose action
- Add a “Compose” action immediately after the HTTP trigger
- Configure it to capture the query parameters from the incoming request
Pro Tip: Using a Compose action early in the flow helps simplify debugging and ensures your parameters are being passed correctly.
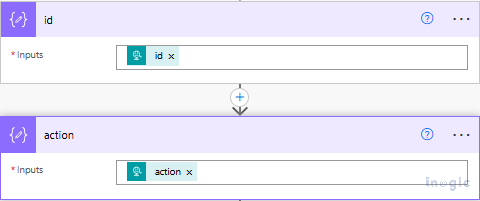
Add Your Custom Logic
- Following this, you have the option to determine the next steps—whether to update CRM entries, dispatch a confirmation message, or record the user’s action.
- The process recognizes the button that was pressed by extracting the “action” and “id” parameters from the URL.
Step 3: Connect the Flows
Update Email Button Links
- Substitute “YOUR_HTTP_URL_HERE” in the email HTML with the actual HTTP trigger URL you have.
- Make sure the URLs contain the appropriate parameters: action = “approve” and action = “reject.”
Test the Solution
- Initiate the initial flow to dispatch a test email.
- Select each button to ensure the second flow is triggered.
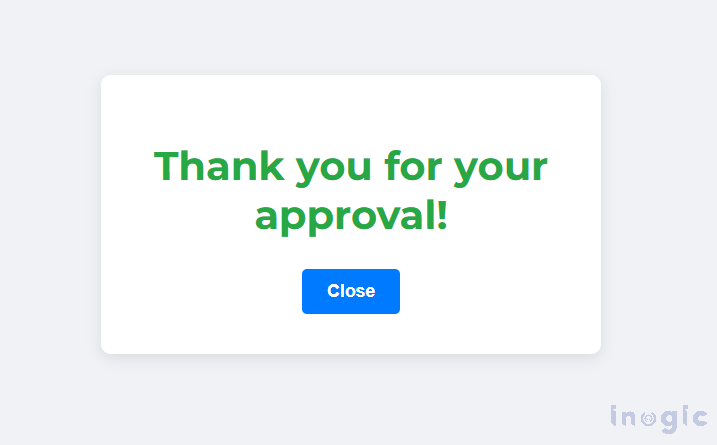
- After clicking any button, you’ll be redirected to the custom page with a response.
- You can further personalize this confirmation page by adding your organization’s logo, background color, or success messages that reflect your tone of communication.
- Verify that CRM records are updated accurately.
- Verify that CRM records are updated accurately.
Troubleshooting & Best Practices
- Always test your flows with multiple user scenarios to ensure no duplicate approvals occur.
- Keep your HTTP endpoint secure and authenticated.
- Use environment variables or connection references for portability.
- These small practices ensure your flow remains reliable, secure, and scalable.
Frequently Asked Questions
1. Can I use this setup for multiple users?
Yes. Each approval link includes a unique record identifier, ensuring every response is processed individually.
2. What happens if someone clicks after an approval is completed?
They’ll see a clear “Already Processed” message—avoiding any confusion or repeated entries.
3. Can I apply this design to other Power Automate workflows?
Absolutely. The same logic can be extended to other automated approvals or status update scenarios.
Conclusion: Turn Basic Approvals into Branded Experiences
This customized approach transforms basic approval workflows into professional, user-friendly experiences. Instead of relying on standard templates, we create clear and well-designed messages that make every interaction feel thoughtful and consistent.
By enhancing the visual experience and adding contextual logic, your approval process not only looks better—it performs smarter. Each interaction reinforces brand trust, reduces confusion, and improves operational efficiency.