Canvas Apps in Power Platform provide a flexible way to build rich, custom user interfaces using a low-code approach. However, as these apps grow in complexity—handling multiple screens, dynamic logic, and business-critical processes—the need for automated, repeatable UI testing becomes critical.
Automated testing is essential to ensure application reliability by consistently validating functionality across different scenarios. It reduces the need for repetitive manual testing, saving valuable time and resources. Moreover, catching defects and regressions early in the development cycle improves overall code quality and accelerates delivery timelines.
This is where the Power Platform Test Engine comes into the picture.
The Power Apps Test Engine, developed by Microsoft, allows developers to automate end-to-end testing for both Canvas and Model-Driven Apps. Using YAML-based test cases and Power Fx expressions, it simulates user interactions such as filling fields, clicking buttons, and verifying outcomes, before any changes are deployed.
This blog provides a step-by-step guide to setting up and using the Test Engine for Canvas Apps, demonstrating how to utilize basic Power Fx queries and .NET to execute automated tests, using a common form submission scenario as an example.
Prerequisites
Before you begin, ensure that you have the following prerequisites:
- Latest .NET installed
- PowerShell (v5.1 or later)
- Your Canvas App is published and ready in an environment
Step-by-Step Setup Guide
Let’s walk through how to install and configure the Power Platform Test Engine:
1. Create a Test Engine Workspace
Create a new folder on your system where you want to work with the Test Engine. Open the folder in Visual Studio Code and launch the integrated terminal in VS Code.
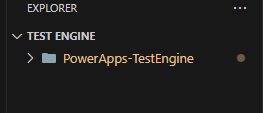
2. Clone the PowerApps Test Engine Repository
Run the command below in your terminal to fetch the latest version of the PowerApps Test Engine source code.
git clone https://github.com/microsoft/PowerApps-TestEngine.git
This will create a new folder named PowerApps-TestEngine inside your workspace
3. Navigate to the Source Folder
Move into the folder where the Test Engine source code is located.
cd PowerApps-TestEngine/src
4. Build the Test Engine Project
Build the PowerApps Test Engine project.
dotnet build
5. Install Playwright
PowerApps Test Engine uses Microsoft Playwright for simulating browser actions like clicking buttons and typing text. Navigate to PowerApps-TestEngine folder and install Playwrite using below command.
.\bin\Debug\PowerAppsTestEngine\playwright.ps1 install
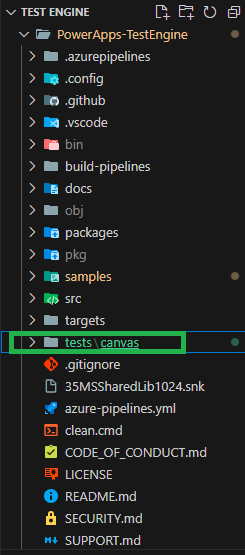
6. Create Folder Structure for Your Tests
Under PowerApps-TestEngine root directory, create the folders where your test files and configuration will live using below command:
cd ../..
mkdir tests
cd tests
mkdir canvas
cd canvas
You should now be inside:
PowerApps-TestEngine/tests/canvas/
7. Create the json File
Create a file with the name config.json and include the following content:
{
“environmentId”: “your-environment-id”,
“tenantId”: “your-tenant-id”,
“installPlaywright”: false,
“user1Email”: “your-email@example.com”,
}
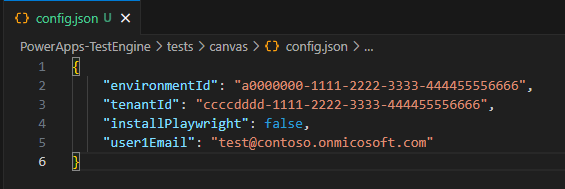
- environmentId: The ID of your Power Platform environment where the Canvas app is deployed.
- tenantId (optional): Your Azure Active Directory tenant ID.
- installPlaywright: Set to false if Playwright is already installed.
- user1Email: Email of the user who will run the tests.
Note: You do not need to specify a password here, as authentication uses the saved StorageState.
8. Define Test Cases in YAML File
Create a file named formsubmit.yaml, and add the following test definition:
testSuite:

testSuiteName: Form Entry Test

testSuiteDescription: Verifies that users can fill and submit a form successfully

persona: User1

appLogicalName: your_app_logical_name

testCases:

- testCaseName: SubmitFormTest

testSteps: |

= Screenshot("form_load.png");

SetProperty(TextInput_Name.Text, "John Doe");

SetProperty(Dropdown_Country.Selected, { Value: "Canada" });

SetProperty(Toggle_Subscribe.Value, true);

Assert(TextInput_Name.Text = "John Doe", "Verify Name input value");

Assert(Toggle_Subscribe.Value = true, "Verify subscribe toggle is set to true");

Screenshot("form_filled.png");

Select(Button_Submit);

Screenshot("form_submitted.png");

testSettings:

locale: "en-US"

recordVideo: true

headless: false

browserConfigurations:

- browser: "chromium"

environmentVariables:

users:

- personaName: User1

emailKey: user1Email
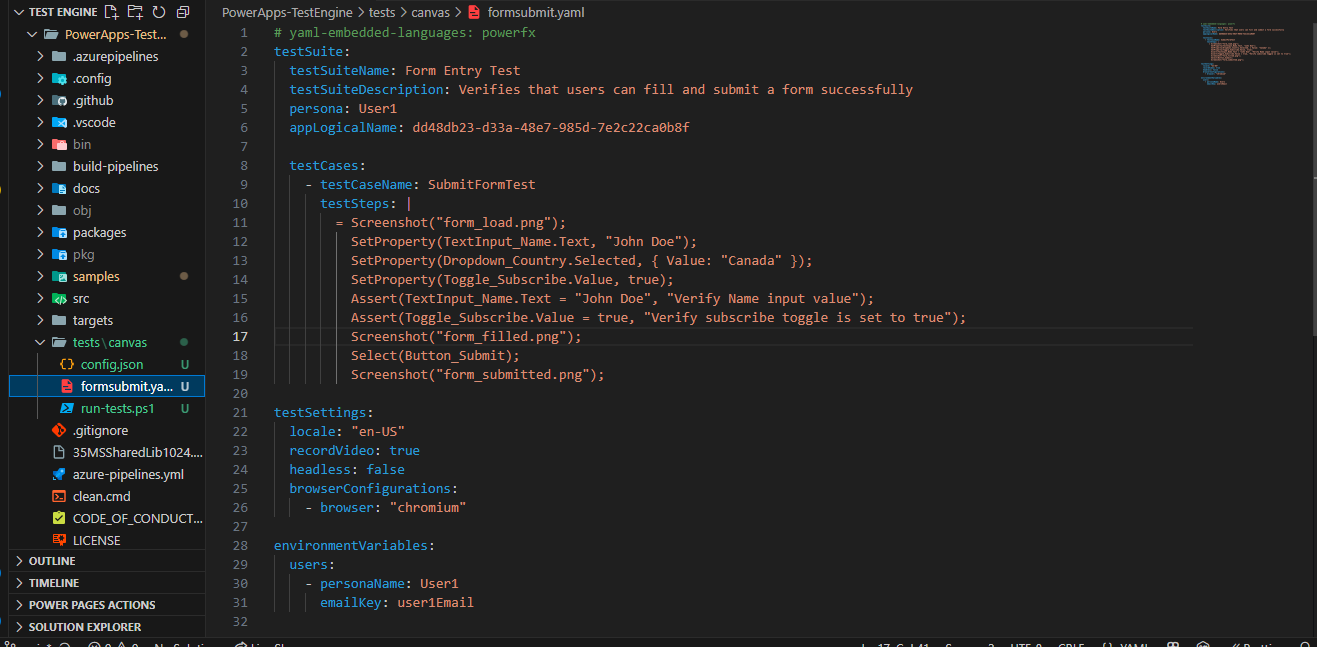
In the above YAML, SubmitFormTest simulates a user filling out and submitting a form. It sets the Name to “John Doe”, selects “Canada” from the Country dropdown, and turns on the Subscribe toggle. The test then verifies these values with assertions and clicks the Submit button. Screenshots are captured at key steps—before filling, after filling, and after submission—to validate the process visually.
9. Create a PowerShell Script to Automate the Test Run
Create a file named run-tests.ps1 with the necessary code to automate test as shown below:
# Get the current working directory

$currentDirectory = Get-Location

# Load config

$config = Get-Content -Path .\config.json -Raw | ConvertFrom-Json

$tenantId = $config.tenantId

$environmentId = $config.environmentId

$user1Email = $config.user1Email

if ([string]::IsNullOrEmpty($environmentId)) {

Write-Error "Environment not configured. Please update config.json"

return

}

# Build the latest version of the test engine

Set-Location ..\..\src

dotnet build

# Install Playwright if specified

if ($config.installPlaywright) {

Start-Process -FilePath "pwsh" -ArgumentList "-Command `"..\bin\Debug\PowerAppsTestEngine\playwright.ps1 install`"" -Wait

} else {

Write-Host "Skipped Playwright install"

}

# Set credentials as environment variables

Set-Location ..\bin\Debug\PowerAppsTestEngine

$env:user1Email = $user1Email

# Run the test using .NET

dotnet PowerAppsTestEngine.dll -u "storagestate" --provider "canvas" -a "none" -i "$currentDirectory\formsubmit.yaml" -t $tenantId -e $environmentId

# Reset to original directory

Set-Location $currentDirectory
Note: Make sure to rename formsubmit.yaml with your specific file name.
10. Run the Script
Inside the canvas folder, execute: .\run-tests.ps1
A browser window will launch automatically with the email address pre-filled. You’ll only need to enter the password manually once. This password is securely stored in the StorageState file for future test executions. After the first login, the tests will proceed automatically without any additional input, as shown in the video below.
All output from your test runs will be saved in the TestOutput folder located at: %USER_PROFILE%\AppData\Local\Temp\Microsoft\TestEngine\TestOutput
You can review logs, screenshots, and videos of the test execution in this folder to verify results and debug if necessary.
- Check Test Cases Status
Once the test cases have successfully executed, you can view the debug log under the TestOutput folder. This log provides detailed information about the test execution, including any errors or warnings, allowing you to verify that your tests ran as expected.
Conclusion
Using the Power Platform Test Engine with .NET execution provides a structured, automated way to validate your Canvas Apps before deployment. It supports a variety of user actions and verifications through YAML using basic Power Fx, and helps ensure your app behaves as expected during form entry, submission, and UI transitions.