
As developers, we often encounter scenarios where the same logic needs to be written in multiple places. This may result in code redundancy and possible discrepancies. To address this, Microsoft has introduced Power Fx Functions (Preview) — enabling a low-code approach to creating reusable logic within Power Apps.
With Power Fx Functions, you can define custom business logic once and use it across Canvas Apps, Power Automate Flows, and Dataverse—all while maintaining consistency and efficiency.
What Are Power Fx Functions?
Power Fx Functions are reusable formulas that accept input parameters and return calculated output. Once published in Dataverse, these functions can be called just like built-in Power Fx functions, but with your custom logic.
Benefits:
- Reusability: Write once, use anywhere.
- Maintainability: Update logic centrally.
- Consistency: Avoid mismatched business logic.
- Modularity: Break complex logic into manageable pieces.
Use Case: Tiered Discounts for a Grocery Shop
Let’s consider a grocery store that offers tiered discounts based on the total invoice:
| Total Invoice | Discount |
| 3,000 – 5000 | 10% |
| 5,000 – 10000 | 20% |
| 10,000 and above | 30% |
Let’s implement this logic using a custom Power Fx Function in Dataverse.
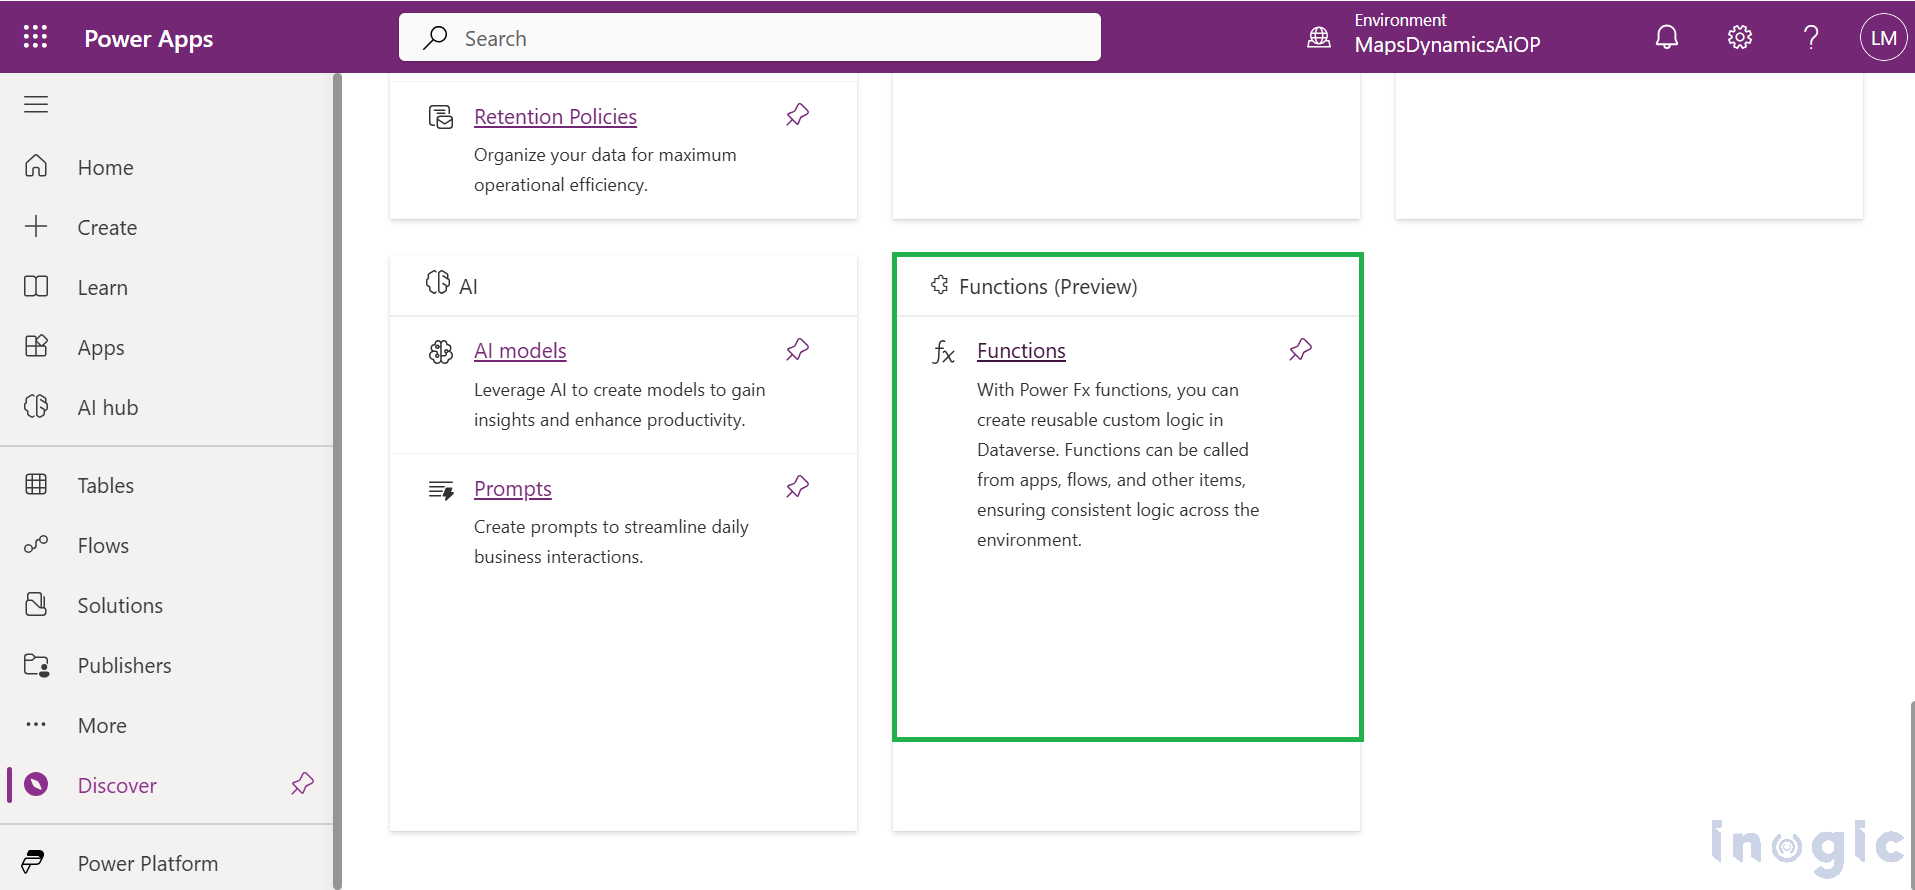
Step 1: Navigate to Power Fx Functions
- Go to PowerApps.
- In your selected environment, open the left menu and select “Discover,” then click on “Functions (Preview)
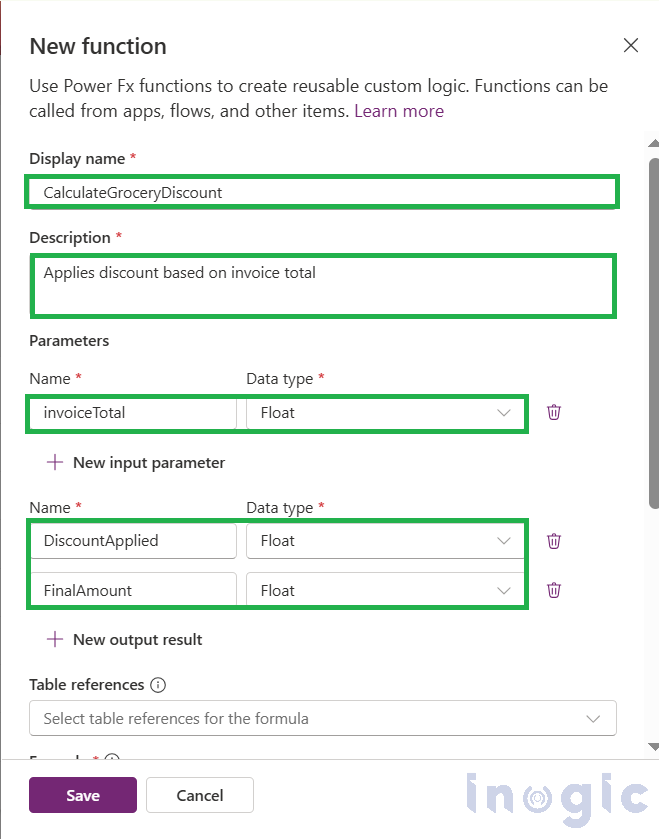
Step 2: Create New Function
Click on Functions, then hit + New function.

Provide the following details:
- Display Name: Give the relevant name as per functionality.
CalculateGroceryDiscount
- Description: Explain what actually function does.
Applies discount based on total invoice
- Input Parameter: The data the function needs to work with.
- invoiceTotal (Float)
- Return Fields: The result the function returns.
- DiscountApplied (Float)
- FinalAmount (Float)
Formula :
With(

{


discount:

If(

invoiceTotal >= 3000 && invoiceTotal <= 5000, 0.1,

invoiceTotal > 5000 && invoiceTotal <= 10000, 0.2,

invoiceTotal > 10000, 0.3,

0

)

},

{

DiscountApplied: discount,

FinalAmount: invoiceTotal * (1 - discount)

}

)
Once defined, Click Save Then click Publish.
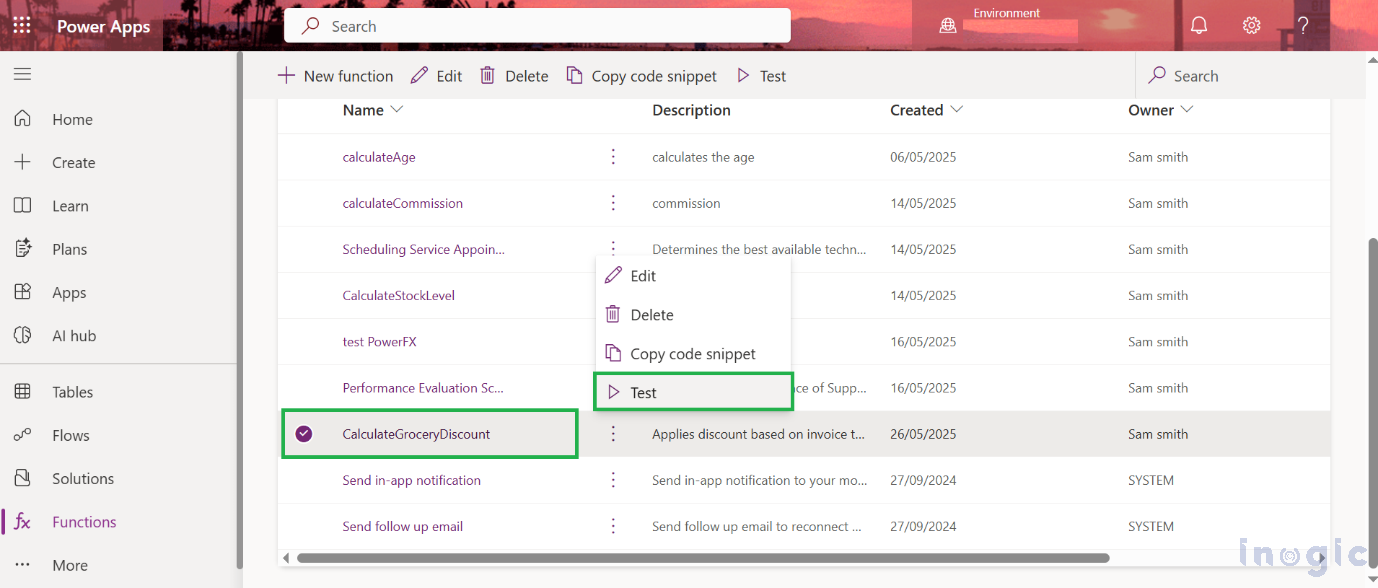
Step 3: Test the Power Fx Function
Click the ellipsis (…) next to the function.
Click Test.
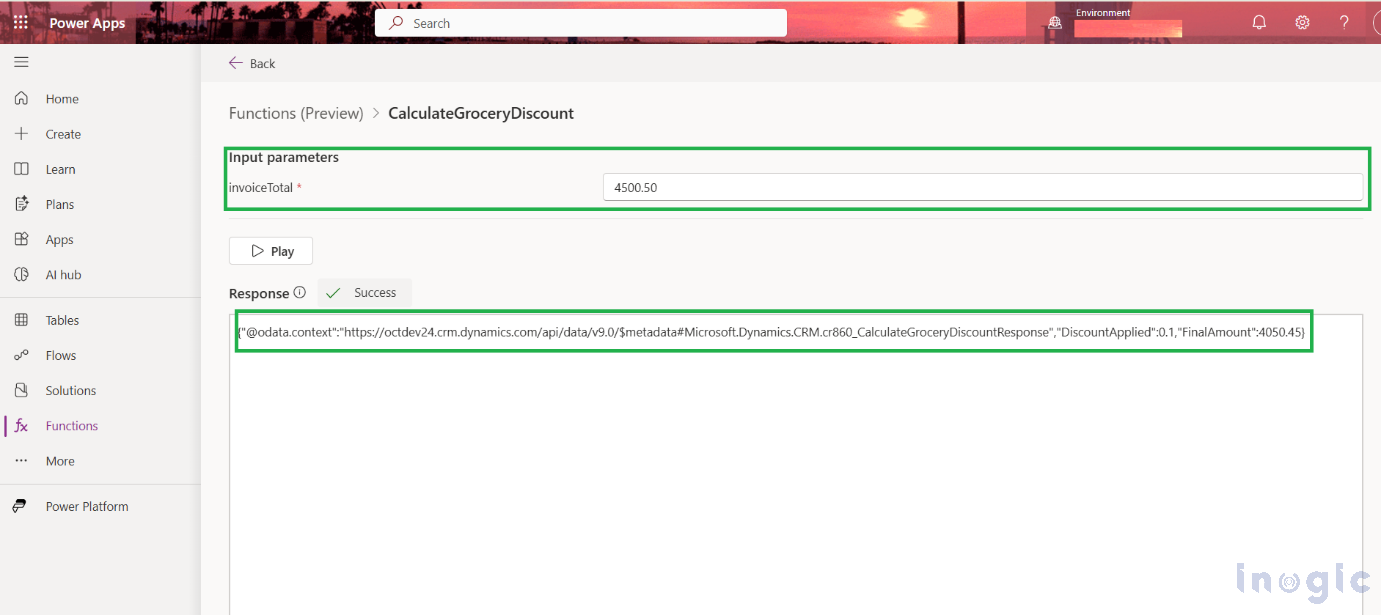
Enter a test value for invoiceTotal and click Play
You will see the discount applied and final amount returned.
Step 4: Integrate above Power Fx Function in Canvas App
We’ll now use this function in a simple app named GroceryDiscountApp.
1. Add a Button to Create Sample Cart.
Set its OnSelect property to:
ClearCollect(

    colCart,

    { Item: "Item1", Quantity: 2, Price: 1000 },

    { Item: "Item2", Quantity: 1, Price: 400 },

    { Item: "Item3", Quantity: 3, Price: 100 }
2. Add a Gallery to Display Cart Items.
Set its Items property to:
colCart
Inside the gallery, add labels to show:
- Item
- Quantity
- Price
- Quantity * ThisItem.Price
3. Add a Button to Calculate Discount.
Set its OnSelect property to:

Set(invoiceTotal, Sum(colCart, Quantity * Price));

Set(discountResult, Environment.cr860_CalculateGroceryDiscount({ invoiceTotal: invoiceTotal }))
4. Add two labels:
Label 1 (Discount): "Discount: " & Text(discountResult.DiscountApplied * 100) & "%"
Label 2 (Final Amount): "Final Amount: ₹" & Text(discountResult.FinalAmount)
Click > Preview the app > generate the cart, run the function, and display the results!

This enables you to include the function in your Power Apps formulas, treating it like other standard Power Fx functions.
Note : Currently, The Power Fx Function is in Preview State.
Conclusion
The ability to create custom, reusable Power Fx functions is a significant step forward for Power Apps. It empowers developers to build more robust, efficient, and maintainable applications. As Power Fx continues to evolve, we can expect even more powerful features that further bridge the gap between low-code and pro-code development.