If you’re managing Dynamics 365 CRM solutions across multiple environments, manually exporting and importing solutions can quickly become error-prone, time-consuming, and inconsistent. This is where setting up a proper CI/CD pipeline makes a real difference.
In this blog, you’ll learn how you can implement a streamlined Continuous Integration and Continuous Deployment (CI/CD) process for Dynamics 365 CRM using Azure DevOps Pipelines. By automating solution exports and imports, you can ensure consistency across environments, reduce manual effort, and speed up your deployment cycles.
In Dynamics 365 CRM, automating solution movement is essential for maintaining deployment reliability. By using Azure DevOps Pipelines along with Power Platform Build Tools, you can seamlessly export solutions from source environments, version them, and deploy them to target environments with minimal intervention.
Why You Should Automate Dynamics 365 CRM Deployments
When you automate your CRM deployments, you eliminate common challenges such as manual mistakes, environment drift, and inconsistent solution versions. A CI/CD pipeline helps you move faster while maintaining control and traceability across environments.
This approach:
- Reduces manual intervention
- Improves deployment accuracy
- Supports agile and scalable development practices
Prerequisites
- Admin Access: Ensure you have administrative privileges for both Azure DevOps and the Power Platform environments.
- Required Tools: Install the Power Platform Build Tools from the Visual Studio Marketplace: Power Platform Build Tools
Setting Up Azure DevOps for Dynamics 365 CI/CD
Step 1: Create an Organization and Project
Log in to Azure DevOps and create a new Organization and Project. (Azure DevOps Organization)
This project will serve as the central place where you manage pipelines, service connections, and deployment artifacts for your Dynamics 365 CRM solutions.
You can refer to the official documentation for more details on Azure DevOps organization setup.
Step 2: Enable Classic Editor (Optional)
Azure DevOps has deprecated the Classic Editor by default. However, if you prefer using it:
You can enable the Classic Editor through Azure DevOps settings by following the official documentation or trusted guides.
This step is optional and depends on your preferred pipeline configuration experience.
Creating Build and Release Pipelines for Dynamics 365 CRM
Let’s walk through how you can create, build, and release pipelines to export solutions from a source environment and import them into a target environment.
Build Pipeline: Export Dynamics 365 CRM Solution
Create Build and Release Pipelines
- Build Pipeline:
- Set up a pipeline that handles the export of your Dynamics 365 CRM solution from the source environment.
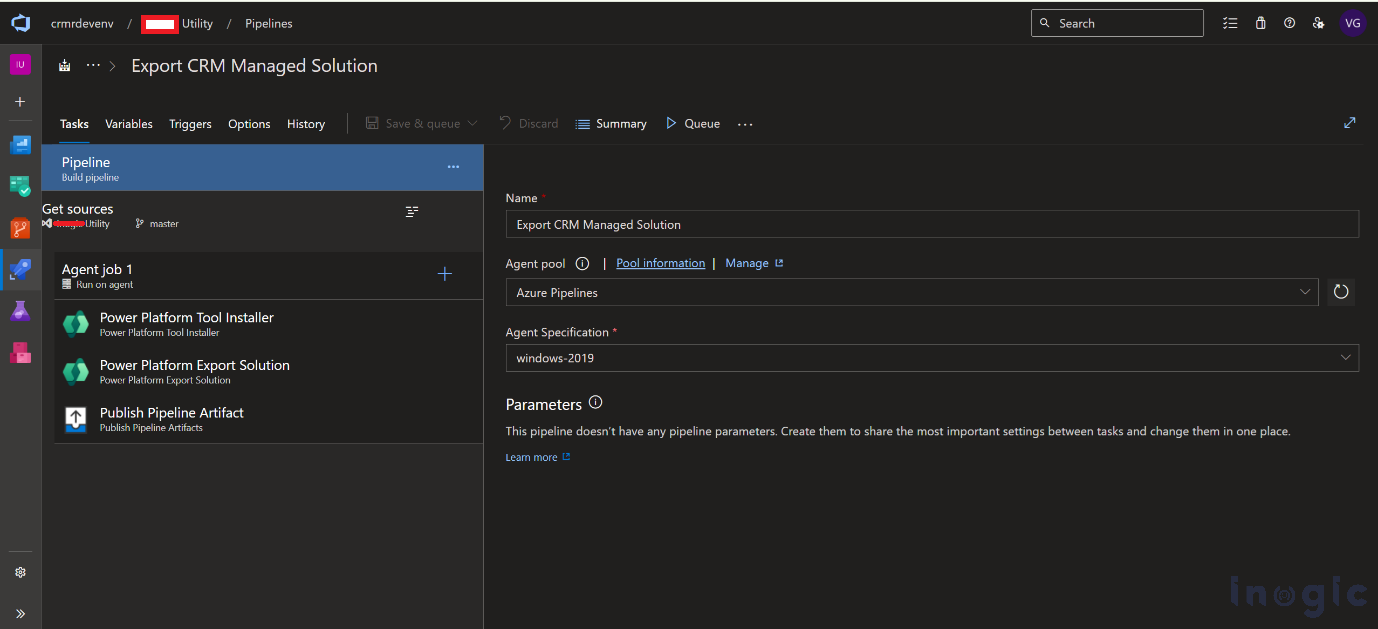
- To begin configuring the build pipeline, go to Pipelines in Azure DevOps and select New Pipeline.
Please refer to the screenshot below
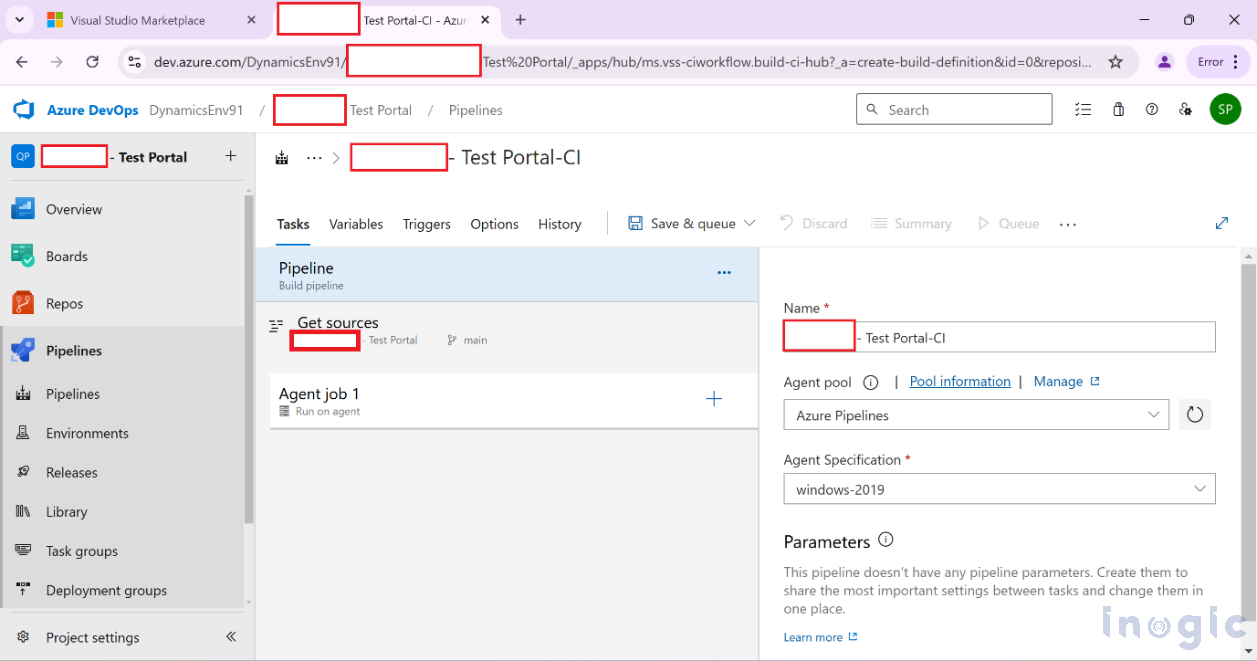
Update the pipeline name to match your project’s naming conventions so it’s easy to identify later.
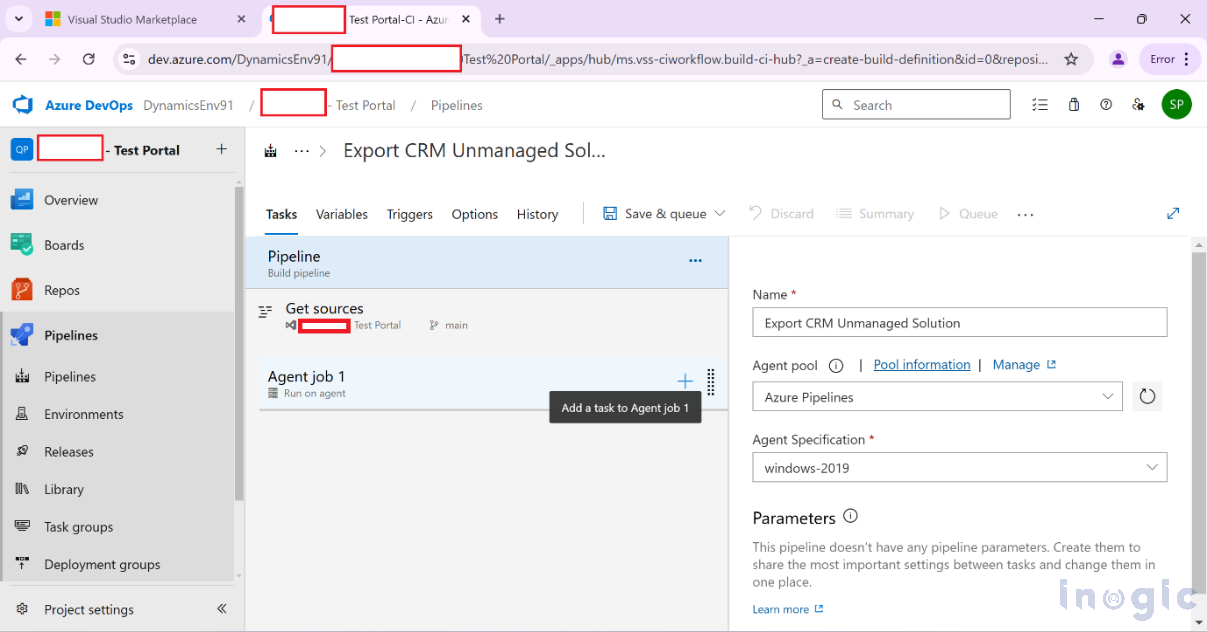
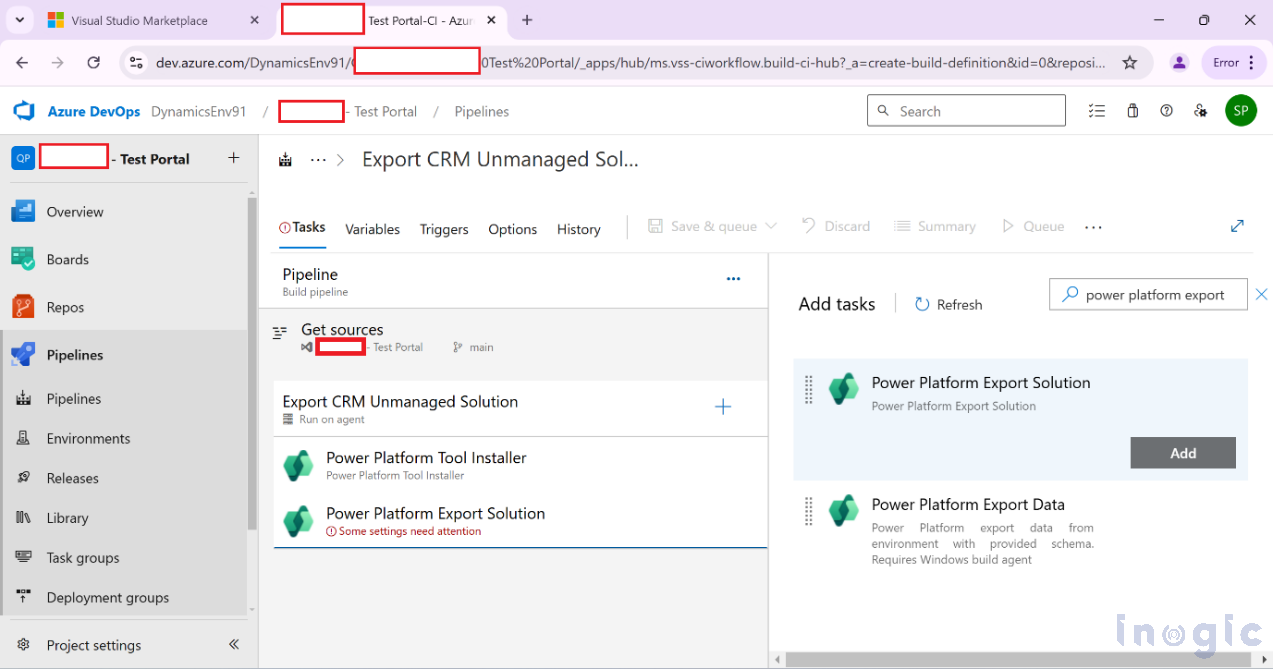
Search for Power Platform tasks to ensure the required tasks are available.
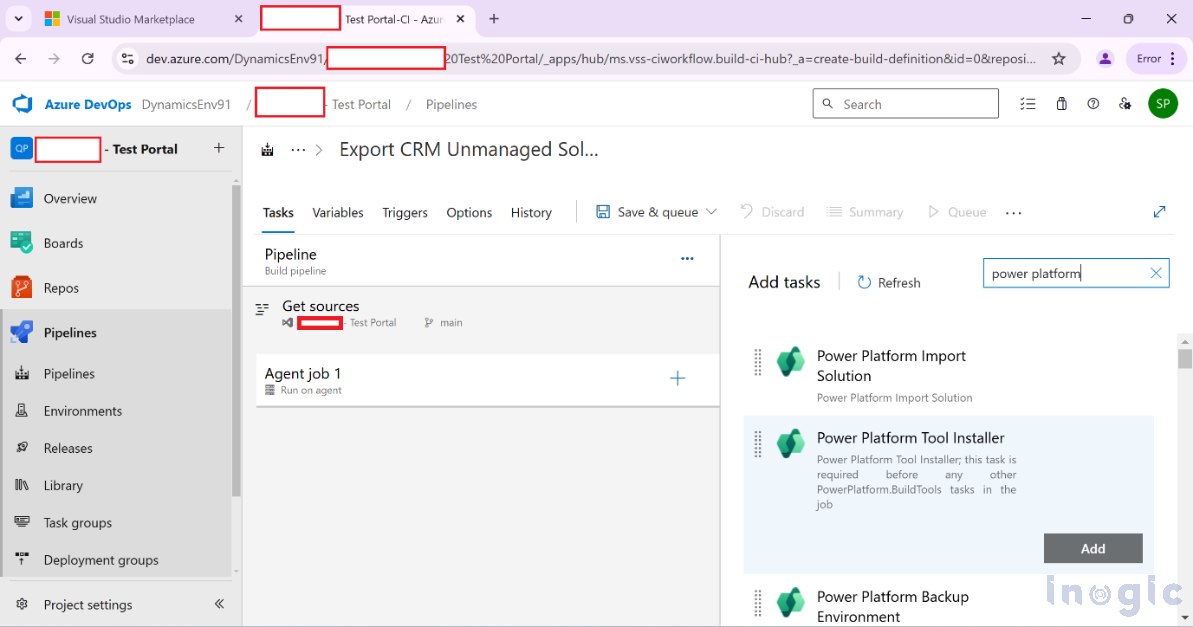
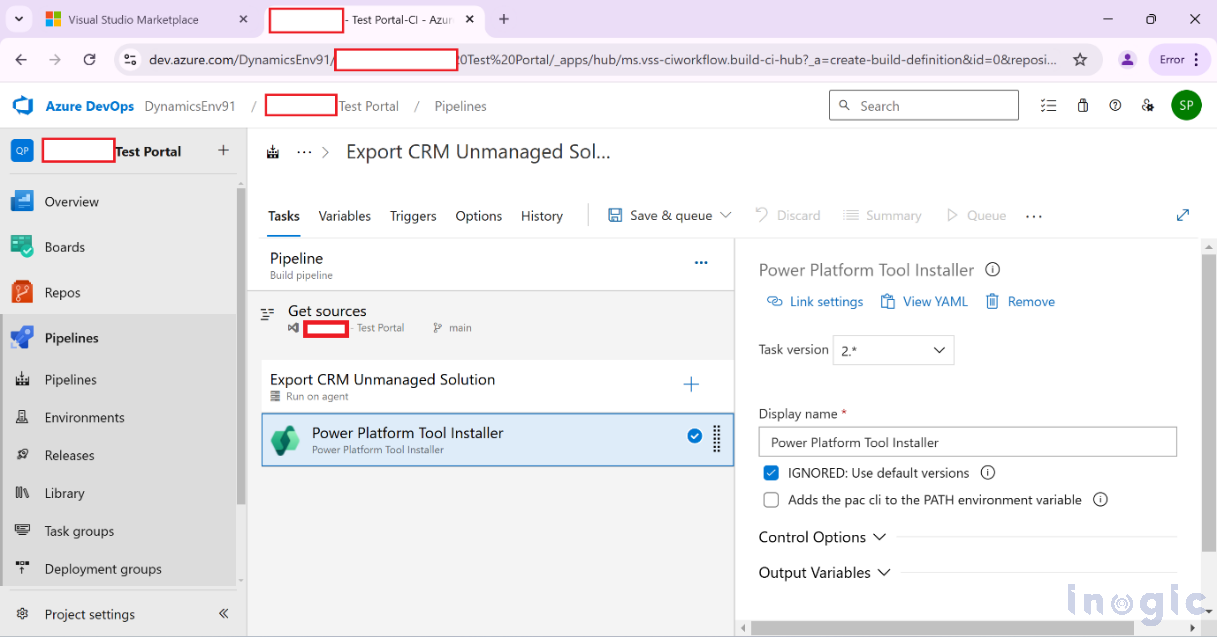
Add the Power Platform Tool Installer task to your pipeline.
This ensures the necessary Power Platform CLI tools are available during pipeline execution.
Add the Power Platform Export Solution task to the pipeline.
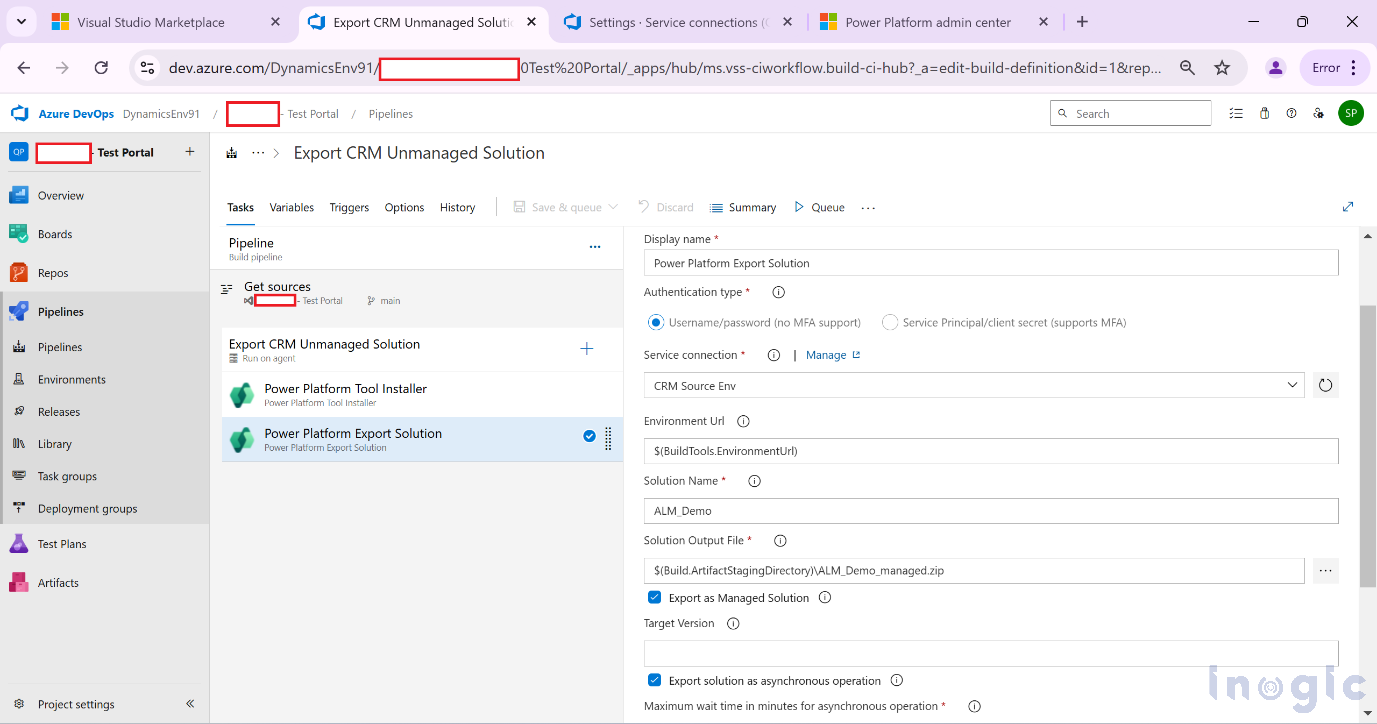
Rename the display name if required and click Manage under Service Connection settings.

Establish a service connection by providing the necessary details.

Search for Generic and click Next.
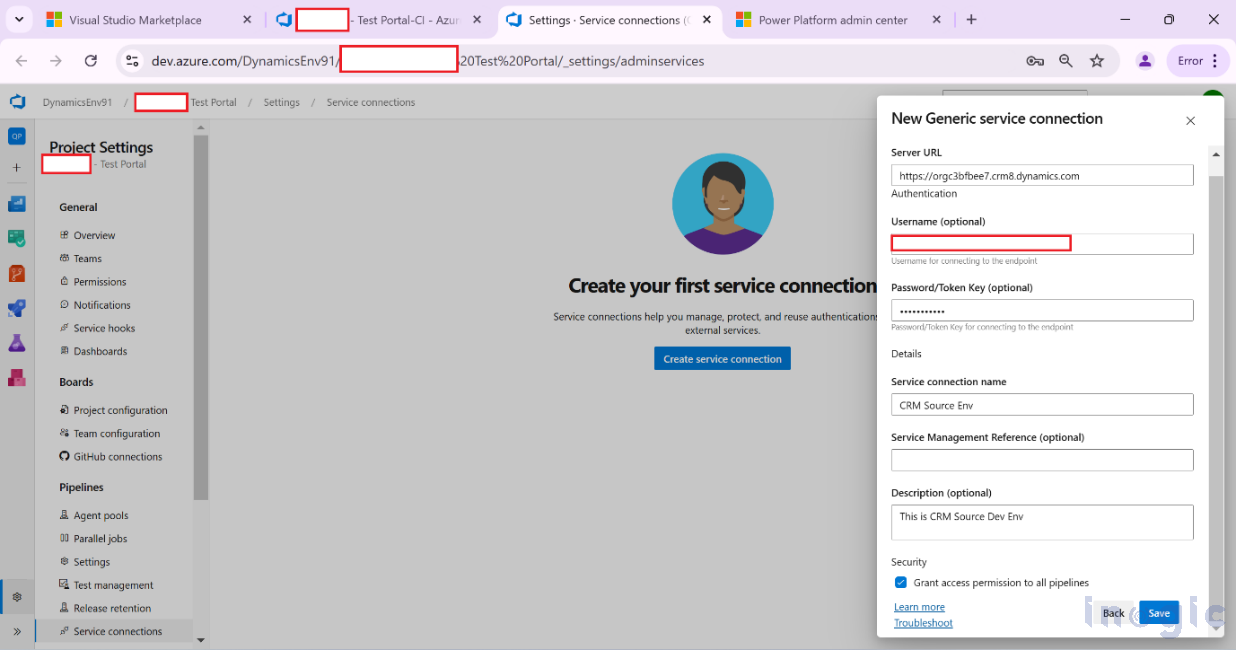
Configure Service Connection
Create a new Service Connection by selecting Generic and clicking Next.
Provide the following details:
- Server URL: Dynamics 365 CRM environment URL
- Username: CRM environment username
- Password: CRM environment password
Next, add the Power Platform Export Solution task to the pipeline.
Refer to the screenshot below for guidance.
Publish Pipeline Artifact
After exporting the solution, add the Publish Pipeline Artifact step.
This artifact will later be consumed by the release pipeline for deployment.
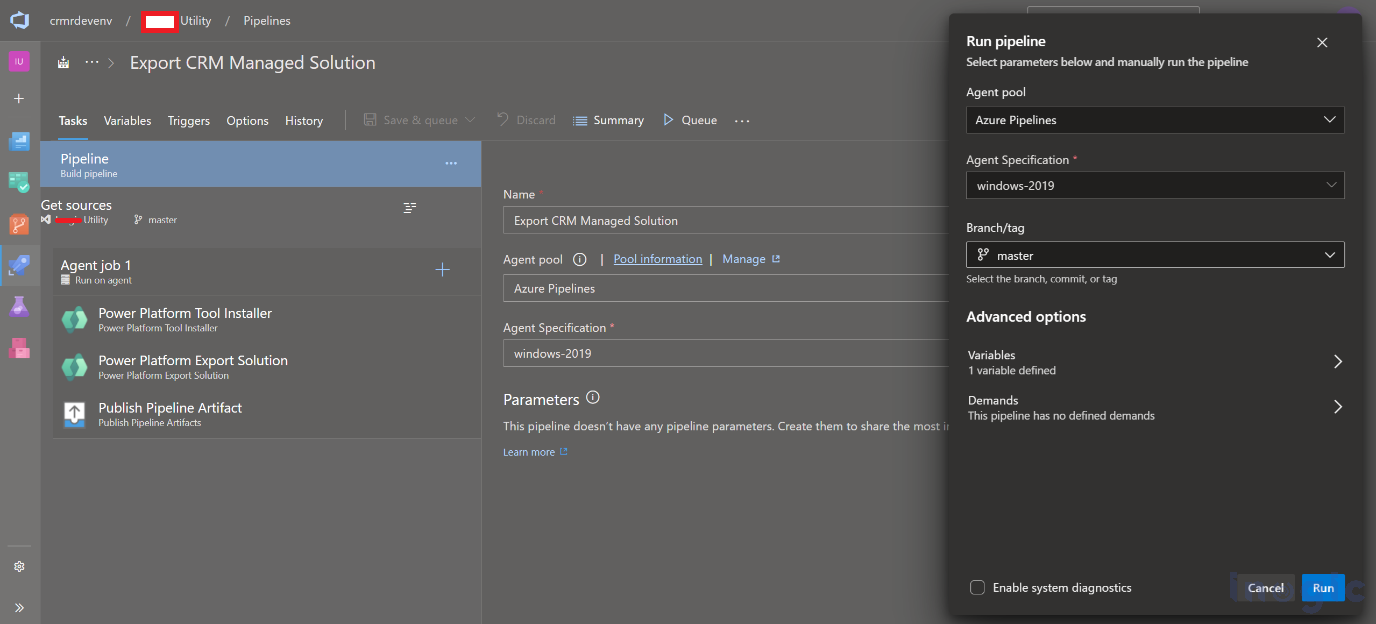
Save your pipeline configuration.
Finally, click Save & Queue to trigger the pipeline and begin the export process.
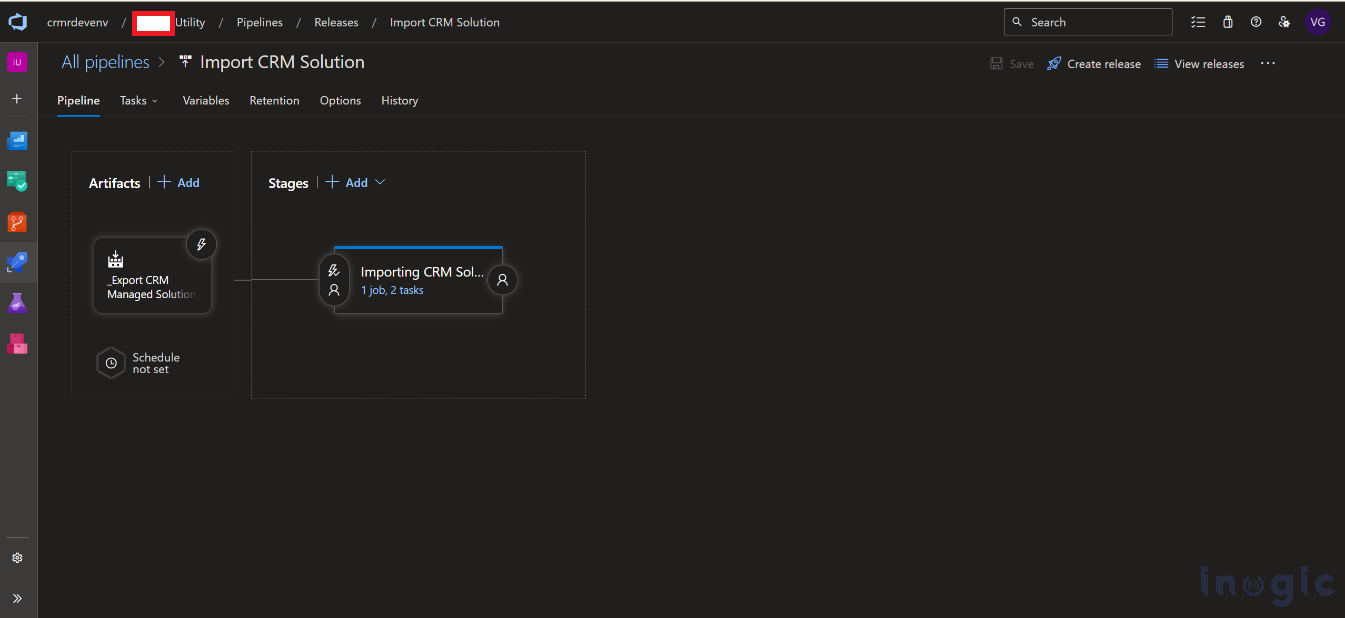
- Release Pipeline
After exporting the solution and generating the artifact, create a release pipeline to import the solution into the target tenant.
Start by adding the Power Platform Tool Installer as the initial task in your release pipeline.
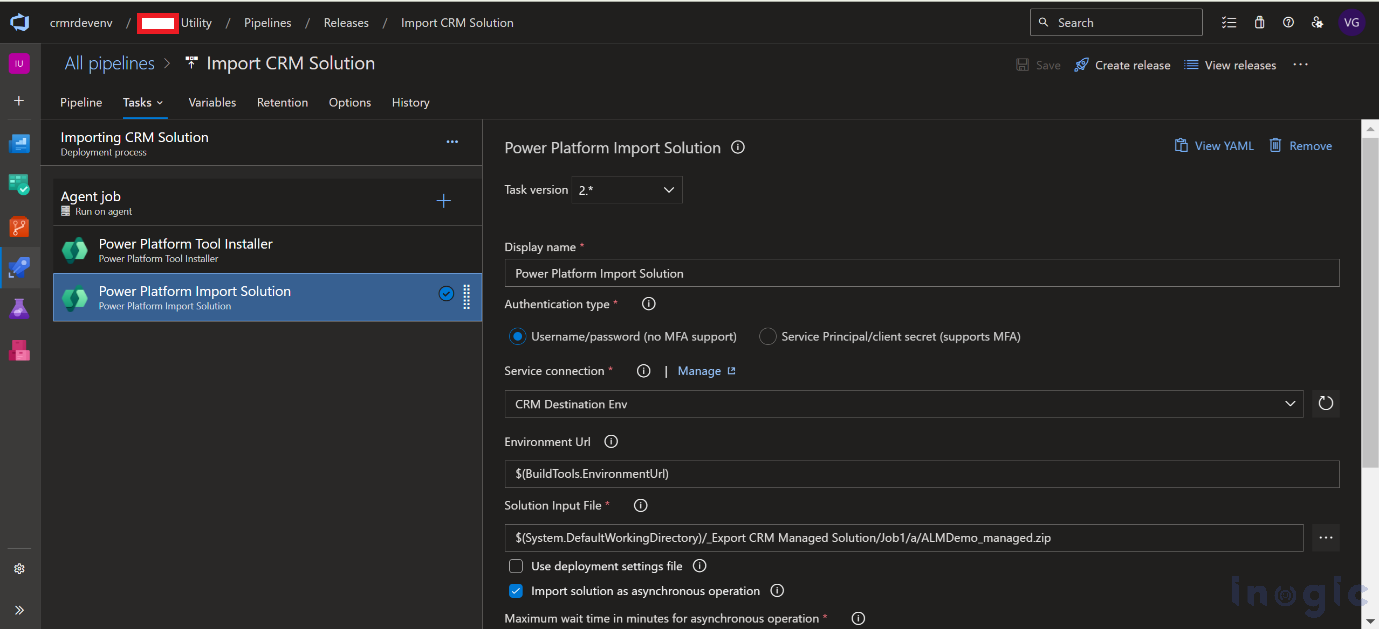
Then, add the Power Platform Import Solution task and choose the correct Service Connection for the target environment.
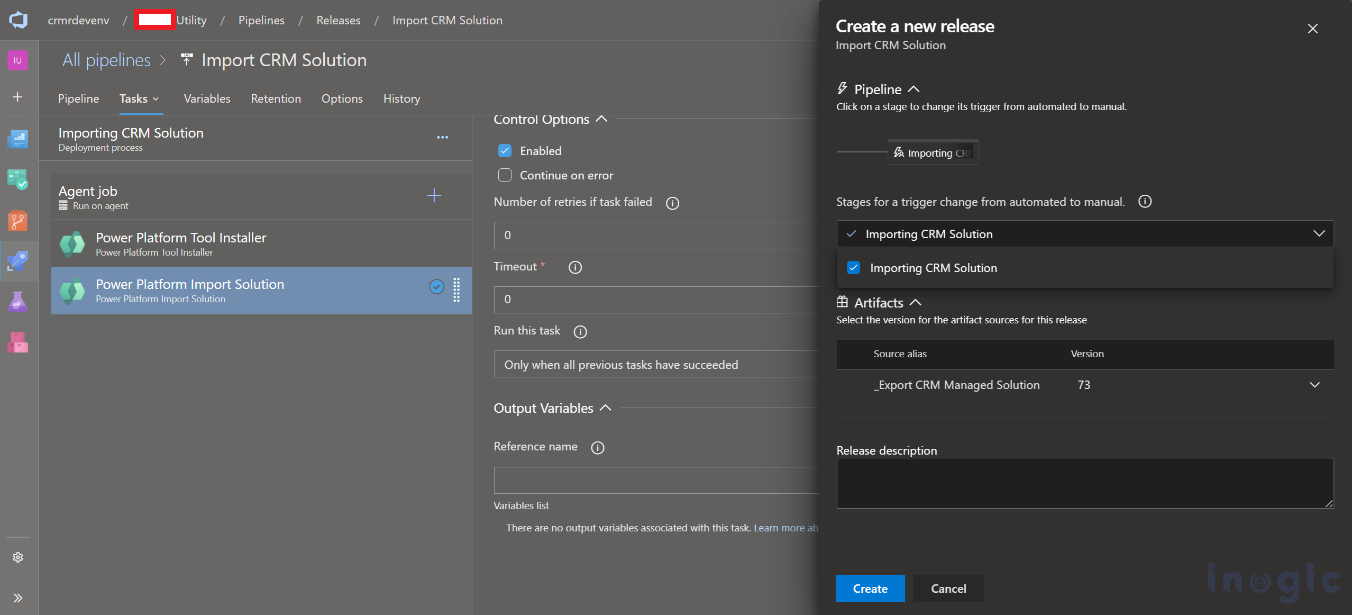
This will open the window shown below. Select the artifact generated from the previous pipeline.
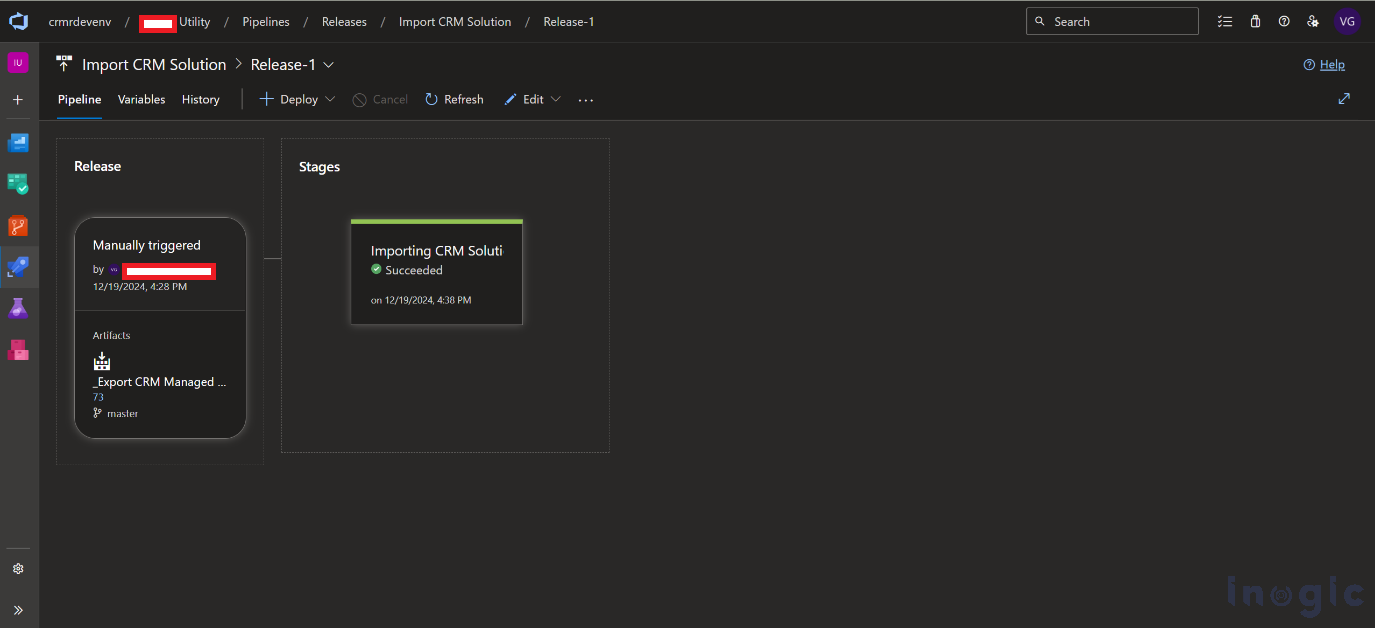
Click Deploy to initiate the release pipeline, importing the solution from the exported artifact to the destination tenant.
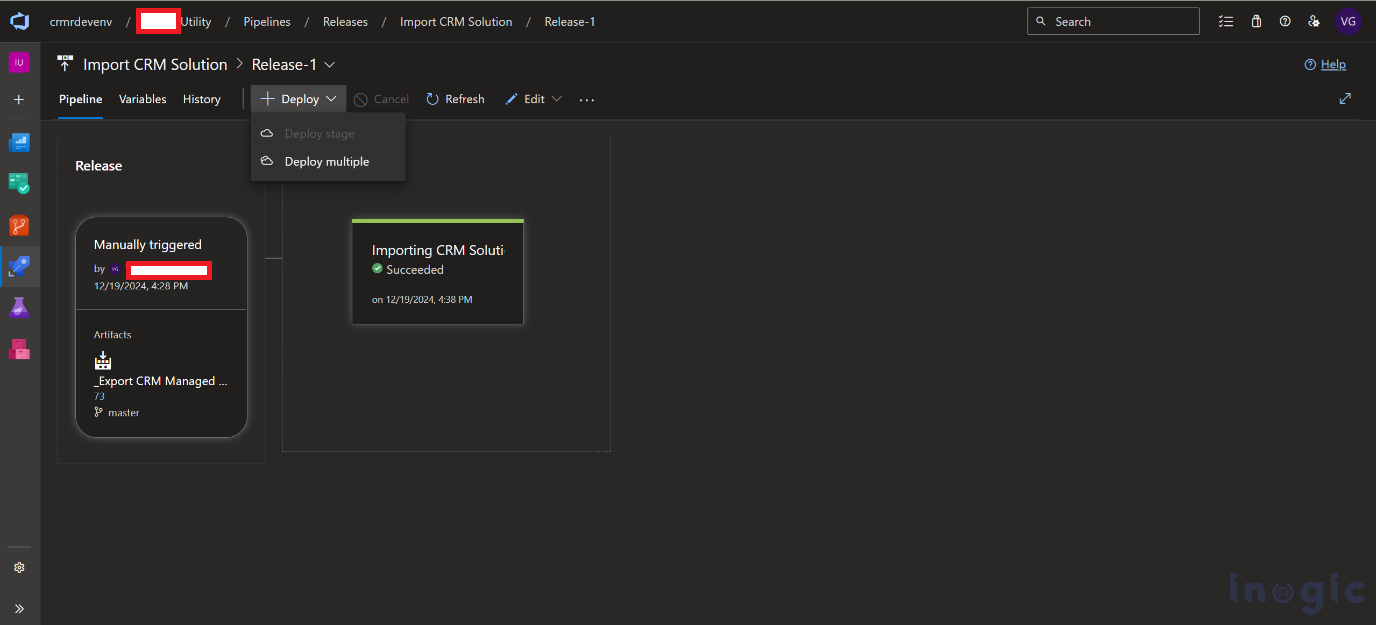
This process will begin importing the solution from the exported artifact to the destination tenant.
Frequently Asked Questions:
Why should you use Azure DevOps for Dynamics 365 CI/CD?
Azure DevOps provides native pipeline support, secure service connections, and seamless integration with Power Platform Build Tools, making it ideal for automating CRM deployments.
Can you use the same pipeline for multiple environments?
Yes. By configuring different service connections and release stages, you can deploy the same solution across multiple environments.
Does Azure DevOps for Dynamics 365 CI/CD approach support enterprise-scale deployments?
Absolutely. This setup supports scalable, repeatable deployments and aligns well with enterprise DevOps practices.
Conclusion
By automating Dynamics 365 CRM solution deployments using Azure DevOps Pipelines, you bring consistency, speed, and reliability into your development lifecycle.
With a clear separation between build and release pipelines and seamless integration with Power Platform Build Tools, you can reduce manual effort, minimize errors, and scale your CI/CD strategy as your CRM footprint grows, allowing your team to focus more on building features and less on deployments.