Microsoft Power Automate enables organizations to automate approval processes and document workflows across multiple platforms, including SharePoint, Dynamics 365, Salesforce, and OneDrive for Business. It helps eliminate manual follow-ups, reduce delays, and ensure consistent decision-making across teams.
One powerful yet often underutilized feature in Power Automate is the “Send Email with Options” action, which allows approvers to respond directly from their email without opening Power Automate or any other system.
In this blog, we’ll walk through how to build an approval workflow using Power Automate that sends actionable approval emails, captures responses, and automatically updates records based on the approver’s decision.
This approach works well for scenarios such as purchase invoice approvals, leave requests, document sign-offs, and expense approvals.
Approval Scenario Overview
Let’s consider a purchase invoice approval scenario.
When a new invoice is created, an automated email is sent to the approver with two options:
- Approve
- Reject
Based on the approver’s response:
- If Approved, the Is Billed field is updated to Yes
- If Rejected, the Is Billed field is updated to No
This automation ensures faster approvals, accurate record updates, and complete visibility for stakeholders.
Prerequisites:
- Power AutomateFlow: Microsoft 365 account with permission to use Power Automate.
- Data sources: Make sure all of your Data sources such as Dynamics 365 CRM, SharePoint are configured and available.
We will take the following steps to fulfill this requirement.
Step 1: Create an Automated Flow
- Navigate to Power Automateand sign in with a Microsoft account.
- Create > Automated cloud flow or Instant cloud flow and name your flow.
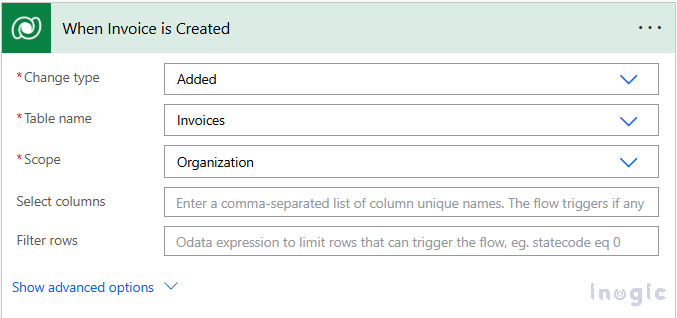
- Select a trigger for your flow, such as “When an item is created”in SharePoint or “When a record is added” in Dynamics 365.
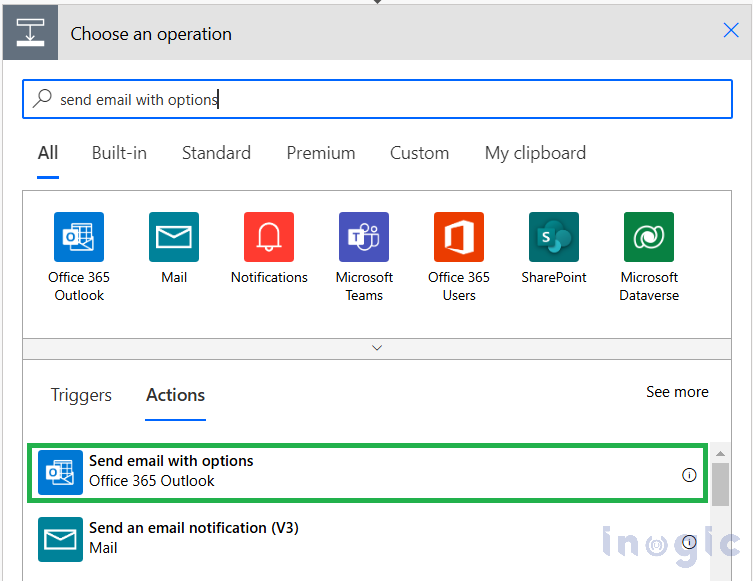
Step 2: Add the ‘Send Email with Options’ Action
- Click New Stepand Select Send Email with options action.
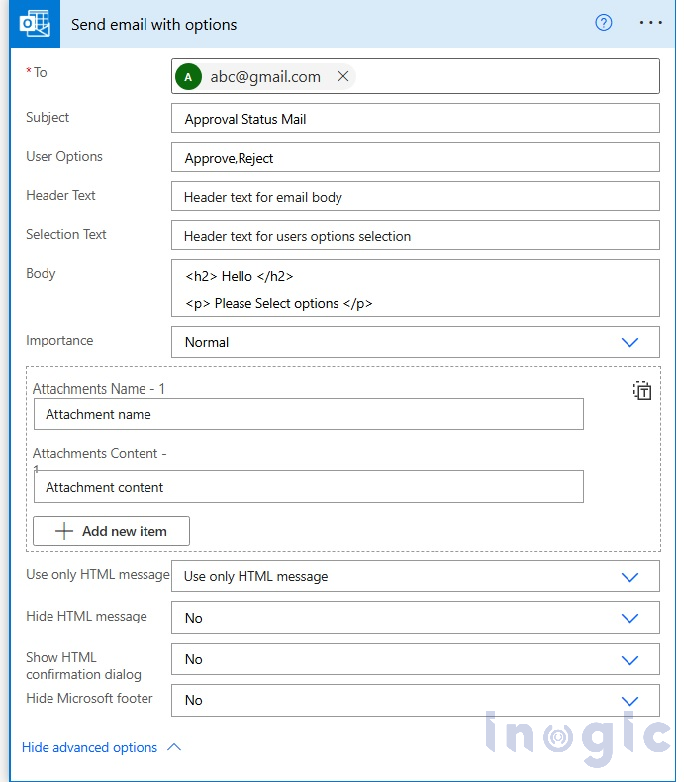
- Configure the Fields
- To:Add the approver’s email address.
- Subject: Specify a clear subject.
- User Options:Define Response Choice E.g. we have used (Approve, Reject).
Step 3: Create an Automated Flow
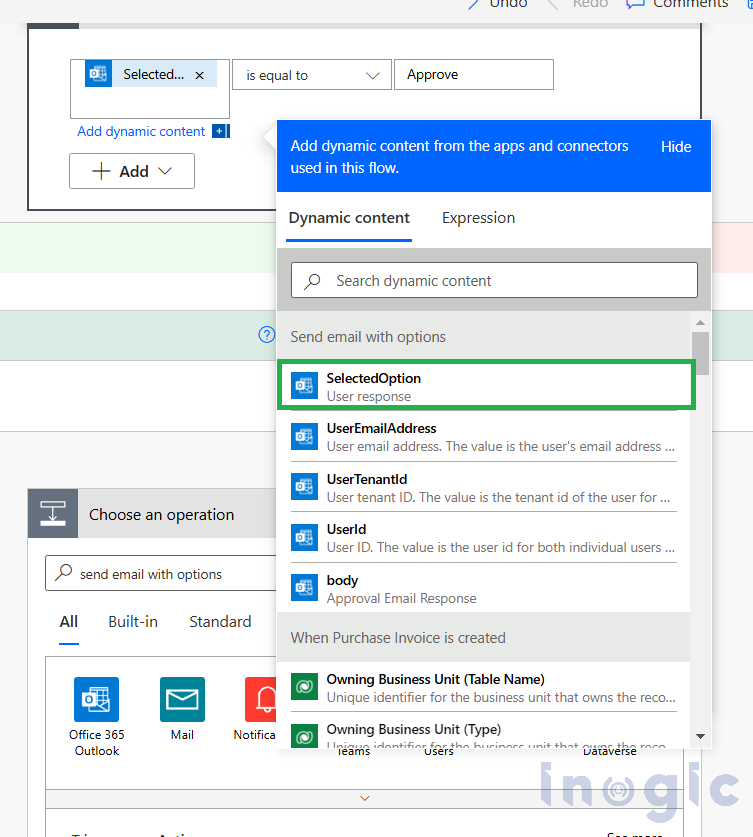
Once the approver submits a response:
- Power Automate captures the selected option
- A Condition action checks the response value
Logic example:
- If response = Approve → Set Is Billed = Yes
- If response = Reject → Set Is Billed = No
This ensures the system record is updated immediately based on the approver’s decision.
Step 4: Approval via Email
The approver receives an email containing interactive buttons for approval.
No login is required, making the process:
- Faster
- User-friendly
- Ideal for managers and external stakeholders

Conclusion
Using the Power Automate Flow, “Send Email with Options” action, you can create simple yet effective approval workflows. This feature allows approvers to respond directly from their email, making the process seamless and efficient. By following this guide, you can streamline your approval process, save time, and improve organizational efficiency.
FAQs
What is “Send Email with Options” in Power Automate?
“Send Email with Options” is a Power Automate action that sends an email containing clickable response options (buttons) and captures the recipient’s selection for further automation.
Can approvers respond without logging into Power Automate?
Yes. Approvers can respond directly from their email without accessing Power Automate or any connected system.
Is this different from Power Automate Approvals action?
Yes.
- Approvals action uses the Power Automate approvals center
- Send Email with Options is email-based, simpler, and ideal for lightweight approval scenarios
Can this be used with Dynamics 365 records?
Absolutely. This method works seamlessly with Dynamics 365 CRM, SharePoint, and other supported connectors.
Is this approach suitable for multi-level approvals?
It works best for single-level approvals. For complex or multi-stage approvals, the native Approvals connector is more suitable.