Recently, we were tasked with a client requirement to customize SharePoint forms, specifically the SharePoint file properties form within a document library. The client needed us to add and modify fields by changing control types. To meet this requirement, we successfully leveraged PowerApps. In this blog post, we will detail the steps we took to achieve this customization.
Microsoft has already introduced the capability to personalize SharePoint forms by leveraging Power Apps. This enhancement enables users to modify and enhance the SharePoint document library and list forms by employing Power Apps.
With this functionality, individuals can effortlessly adjust control types, implement conditional formatting, and apply validation rules to SharePoint forms without the need for manual coding.
In this blog, we will see how to integrate SharePoint forms with PowerApps and with the data sources. Adding the different fields related to the SharePoint data source. We will see how we can change the control types and how to hide SharePoint forms using the RequestHide() function from SharePoint.
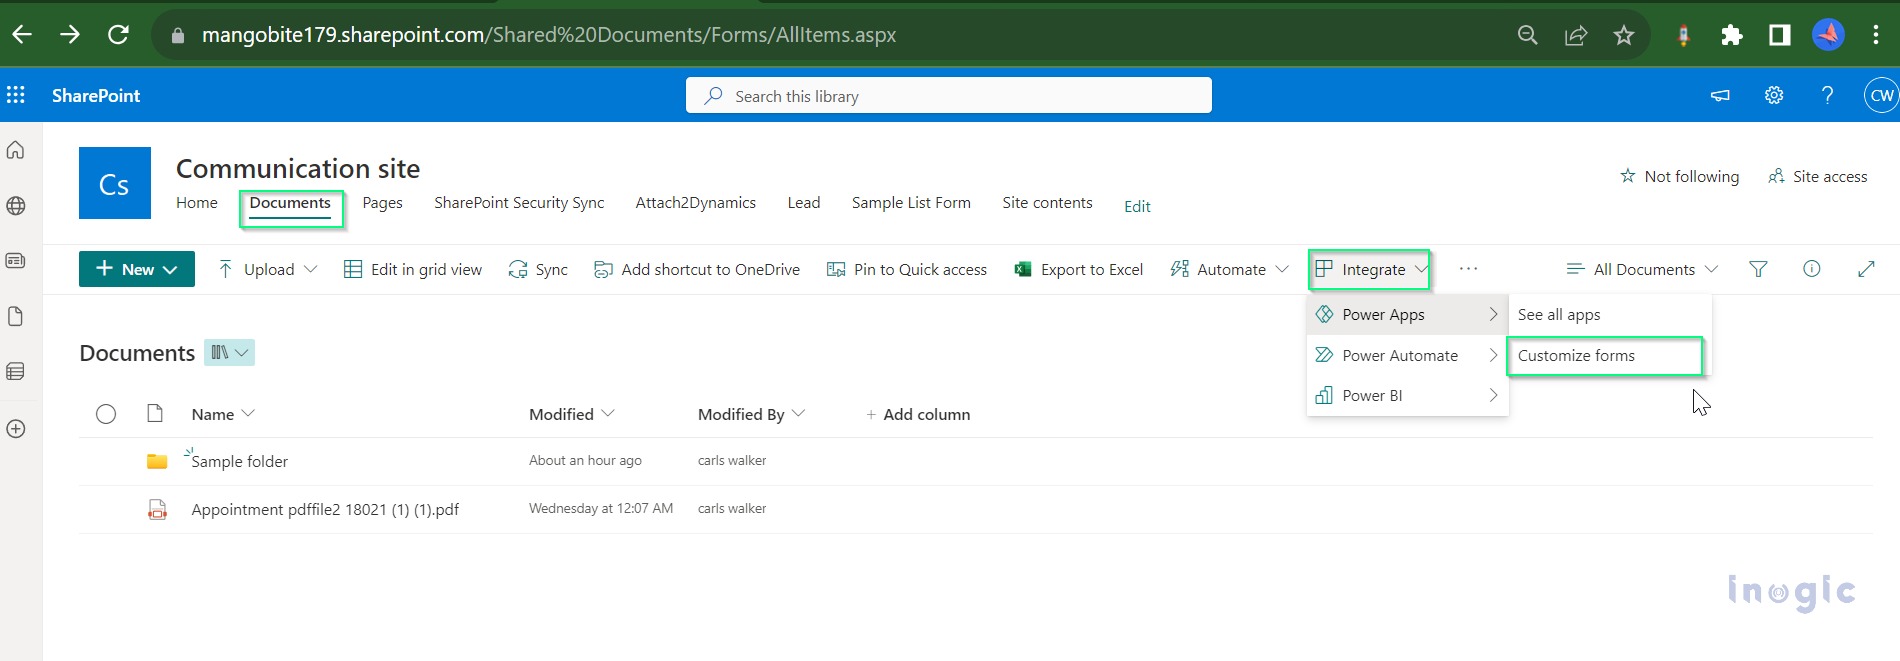
To integrate the SharePoint forms into PowerApps, select any tab that you want to customize, click on the Integrate button, and select PowerApps >> Customize Forms.
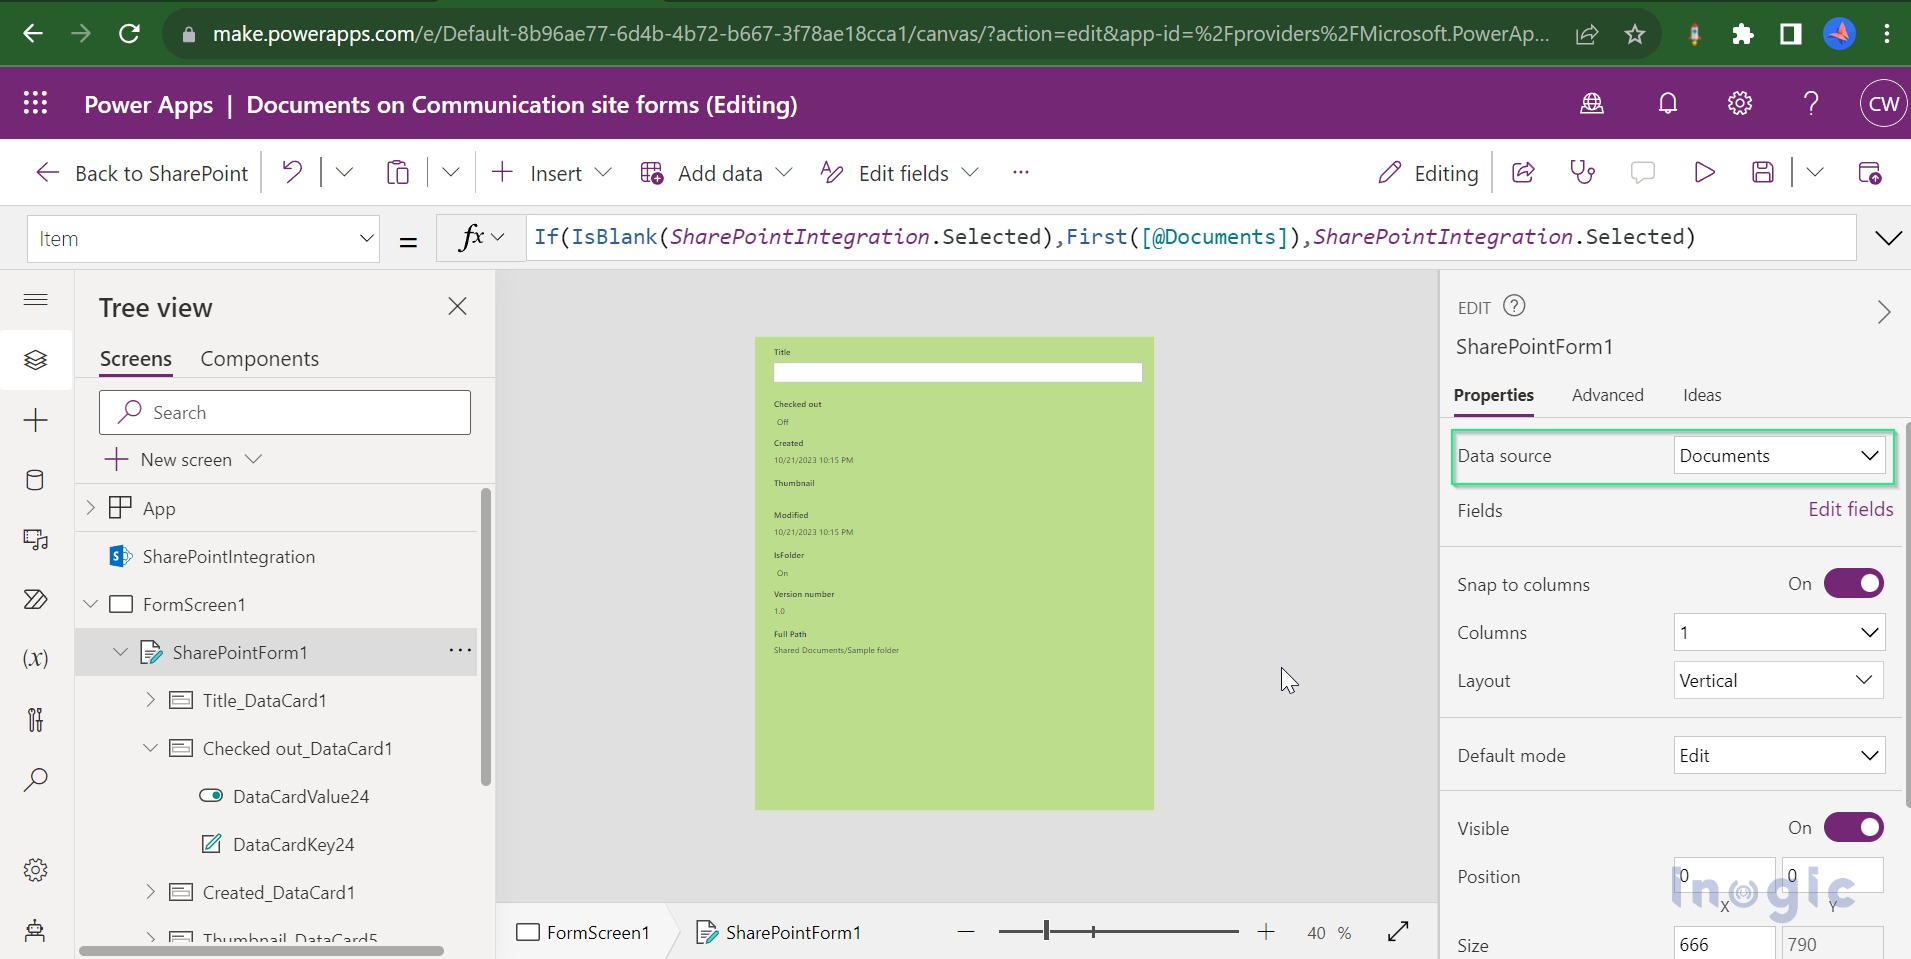
After integration while customizing the SharePoint forms, these forms are by default connected to a SharePoint data source.

The data source will be your SharePoint List or the document library of the form you have integrated with PowerApps.
Adding different fields based on the data source and changing their control type as per the requirement.
After integration, using PowerApps, we can add different fields on the SharePoint forms related to the data sources, i.e., SharePoint list or SharePoint document libraries.
To add fields, select the SharePoint form in PowerApps, then click on the Edit fields. From there, you can select fields and add multiple fields that are related to the SharePoint data source.
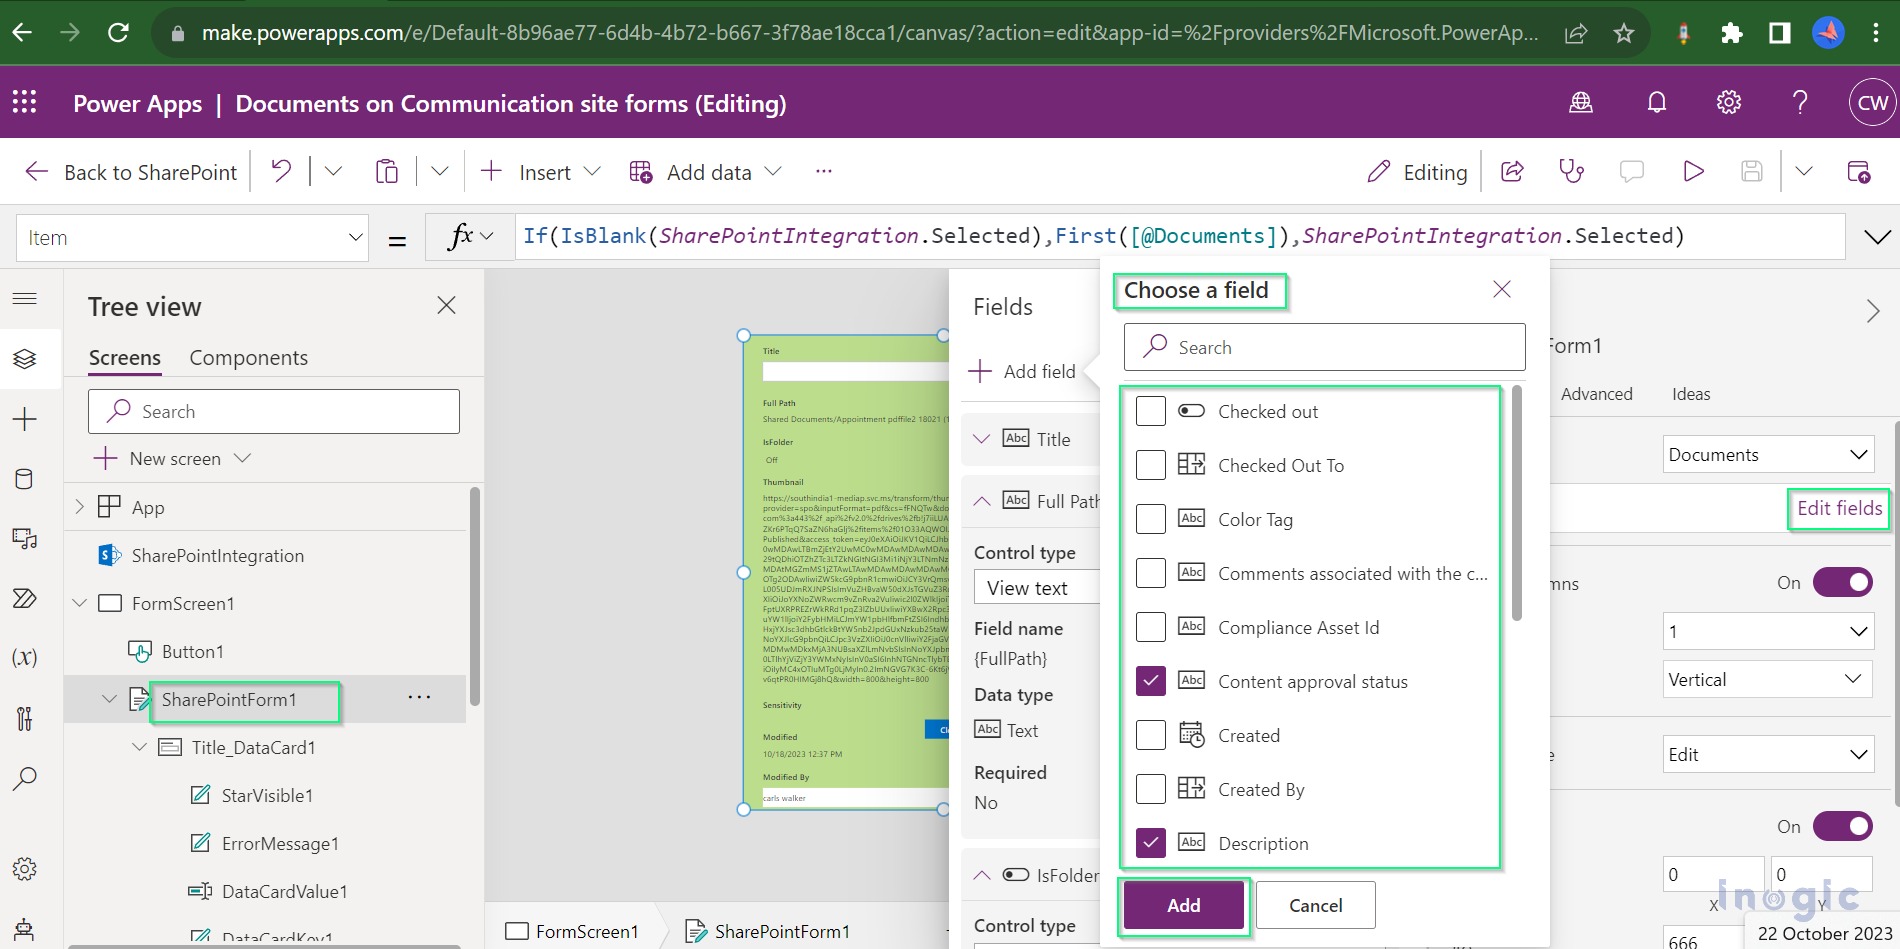
Not only can we add multiple fields, but we can also change their control type as per our requirements. For example, I have one description field, and we can change the control type of the field to different types.
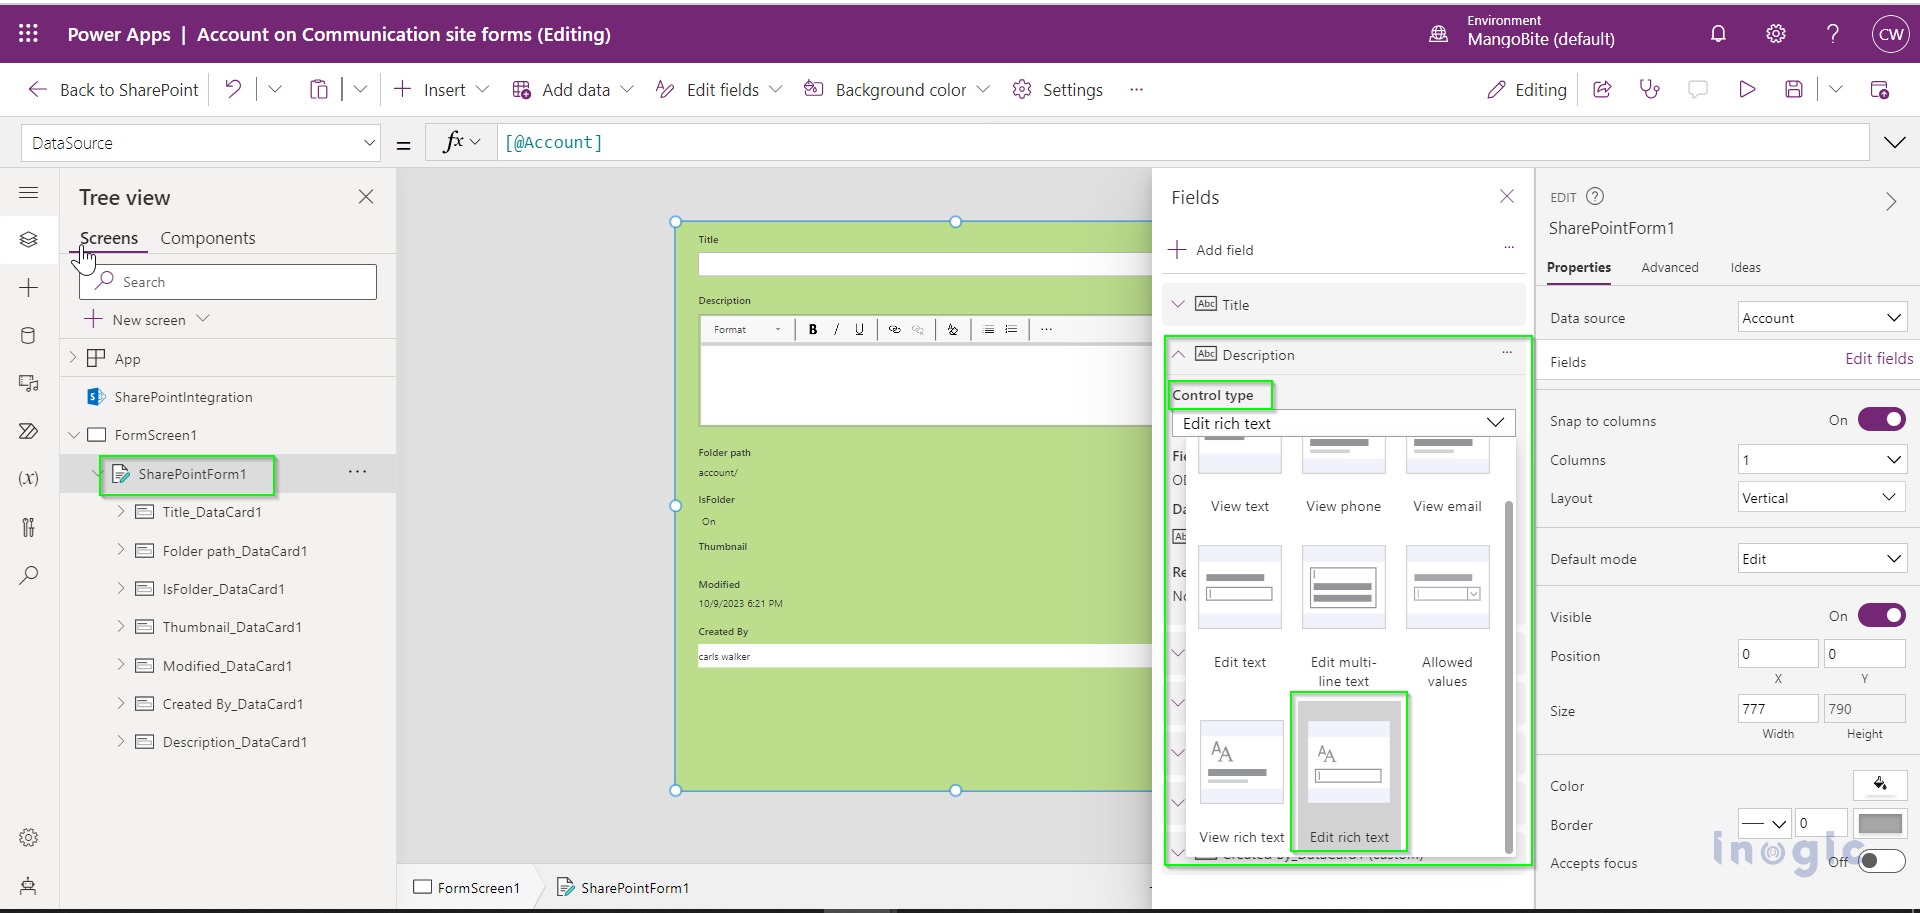
I have selected the control type as Edit rich text so I can edit this field, i.e., description, using rich text format.
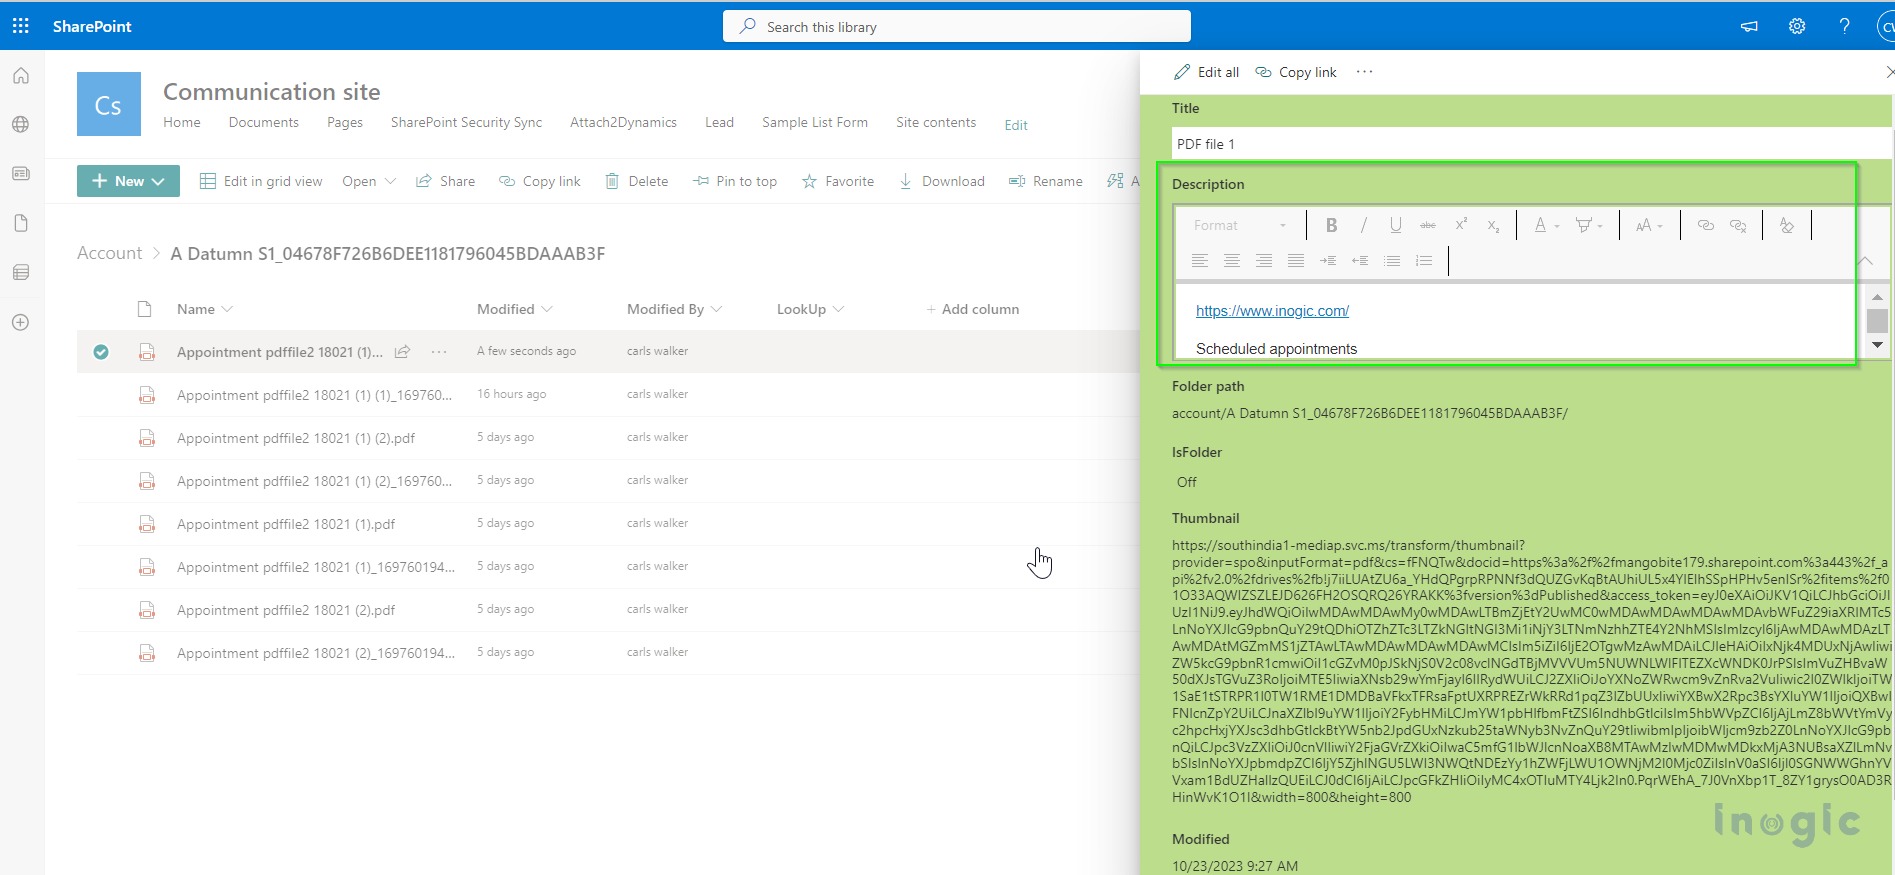
There are multiple control types, like text, where the value is shown in a simple text format, or view phone or email if the description has any phone number or email address. By using these control types, we can open the text as a phone number or particular email address.
Hide forms using the RequestHide() function.
In a recent release, Microsoft introduced the RequestHide() function, which is used to hide SharePoint forms from SharePoint. As we can see in the below screenshot, this function is already used in an OnSuccess control, so it will keep hiding the form when any record item is created or saved successfully. After we select the record and click on the properties, the form will open again.
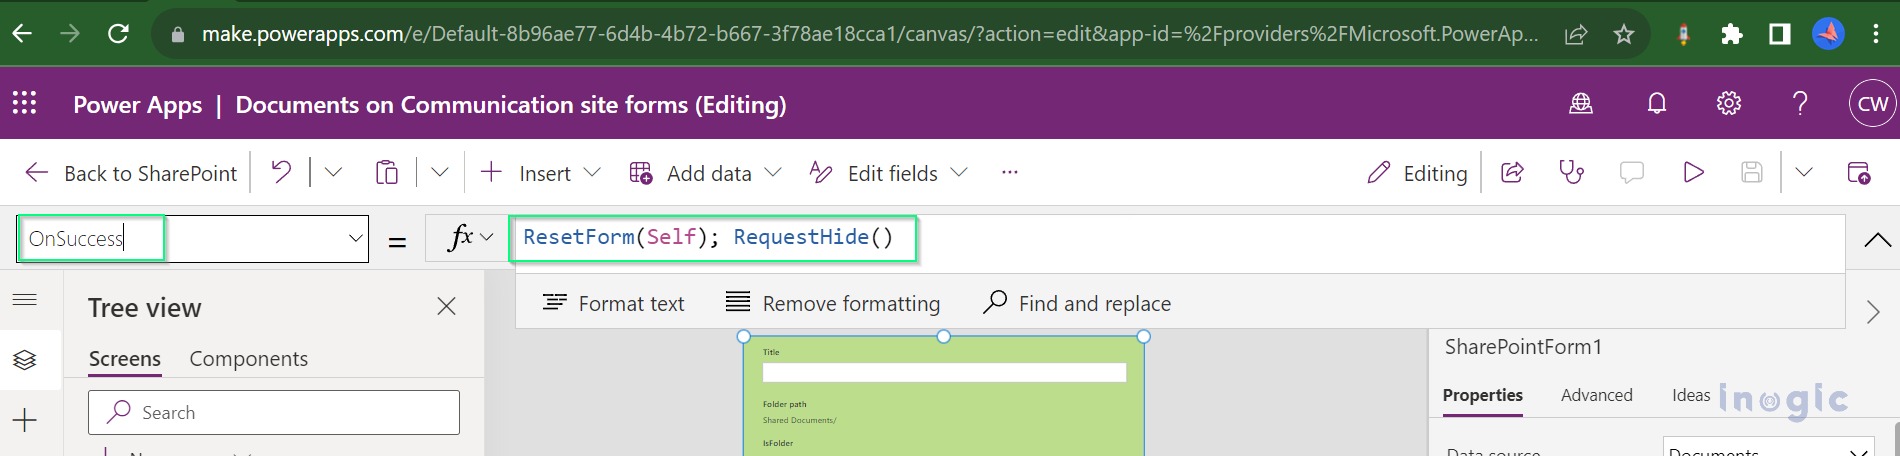
Also, we can manually use this function to close the SharePoint form. In the below example, we have added a button that will close the SharePoint form.
The RequestHide() function is used for manually hiding the SharePoint forms with conditional scenarios. Currently, this function only works on SharePoint forms. So we can use it only with SharePoint.
Conclusion
In summary, our blog covered the integration of SharePoint forms with PowerApps, which allowed us to add and tailor fields using various control types. Additionally, we explored the functionality of the RequestHide() function for concealing SharePoint forms.