Introduction
InoLink is an integration tool aimed at synchronizing data between Dynamics 365 CRM Online and multiple Intuit QuickBooks (Online) to provide a 360 degree view of Customer accounting details to the sales team, within Dynamics 365 CRM.
User can sync Customer data from Dynamics 365 CRM to QuickBooks and vice versa based on lookup as well as option set field values. Lookup and Option Set value should be set on Account and Contact record to sync data from CRM to QuickBooks companies’ and vice versa.
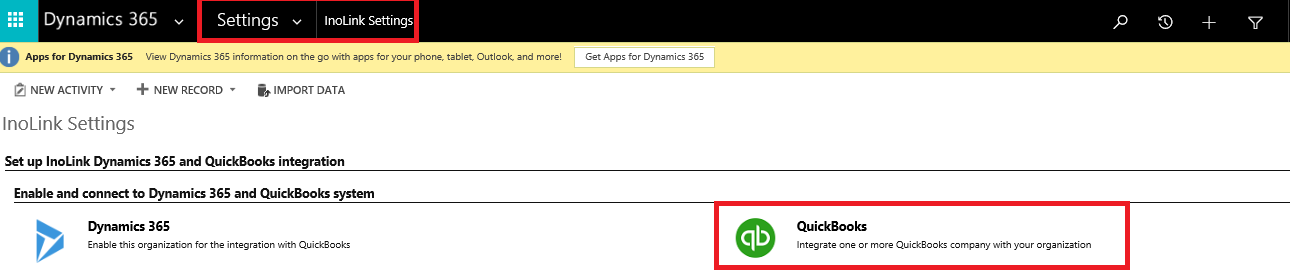
For this, first you need to configure QuickBooks with Dynamics CRM 365. When you click on QuickBooks, Configuration Page will be displayed where you can configure single QuickBooks Company with Dynamics 365 CRM. Further you can also configure multiple QuickBooks companies with single Dynamics 365 CRM.
Note: – User should have System Administrator or InoLink Administrator security role.
Account and Contact Attributes are the dropdowns that populate all the lookups as well as option set fields on Account and Contact entity. You have to select value which would be considered as criteria for syncing data from CRM to QuickBooks and vice-versa. The default value is considered as Owning Business Unit. User can select any OOB or custom lookups or option set fields as Attributes.
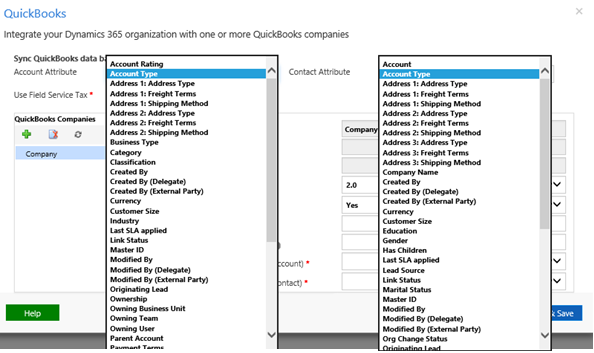
Note: – Both Account and Contact Attribute should be same, like, if you have selected any option set as Account Attribute then Contact Attribute should be also option set but value can differ.
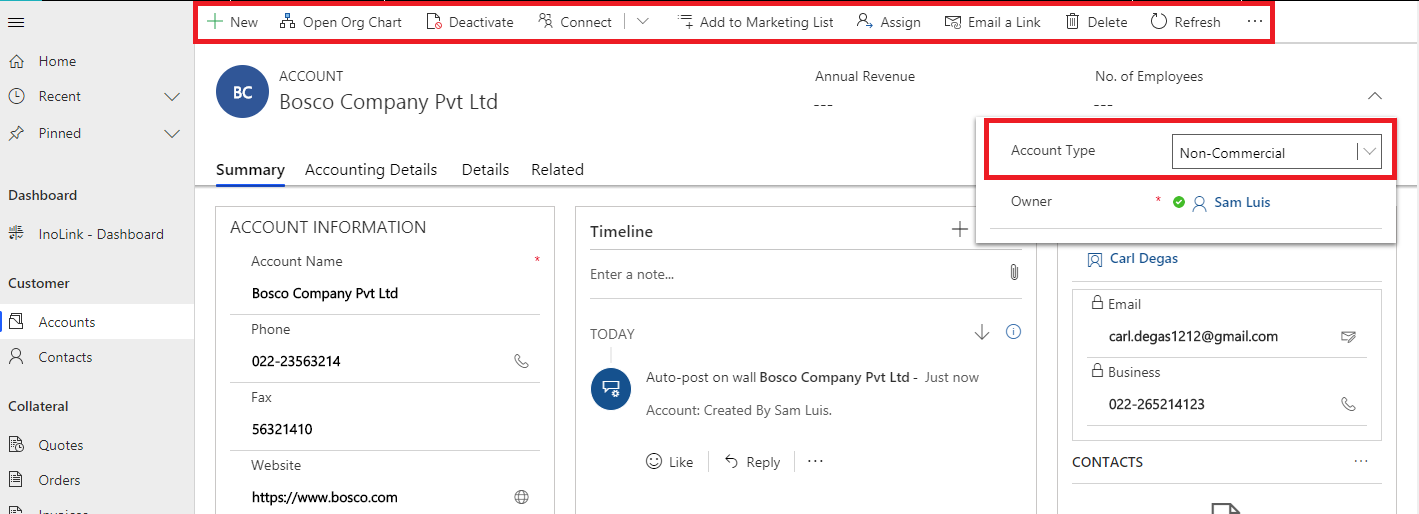
For example: – We have created custom option set field as Account Type. You have selected custom option set field i.e. Account Type on Account and Contact Attribute as considered criteria for syncing the data from Dynamics 365 CRM to QuickBooks and vice versa.
There are two option set values – Commercial and Non-Commercial under Account Type.

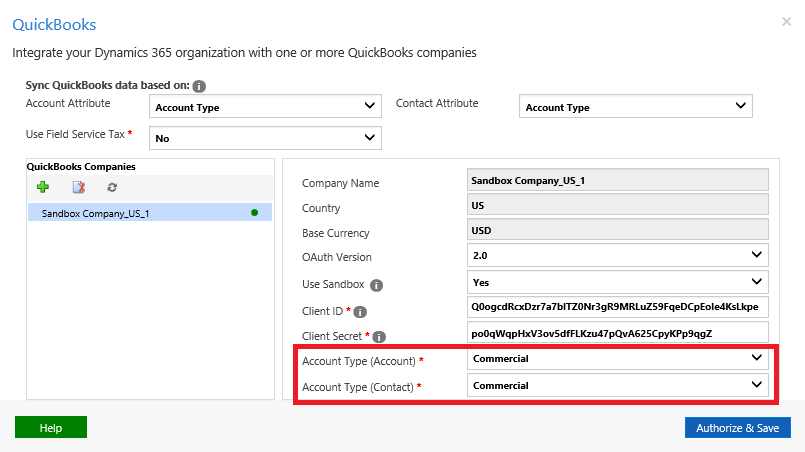
Let’s set Commercial as Account Type value for both Account and Contact as shown below. It means when user creates an account and contact record with Account Type as Commercial set on it then, Promote/Unlink button will be displayed on form otherwise, it won’t be displayed on form.
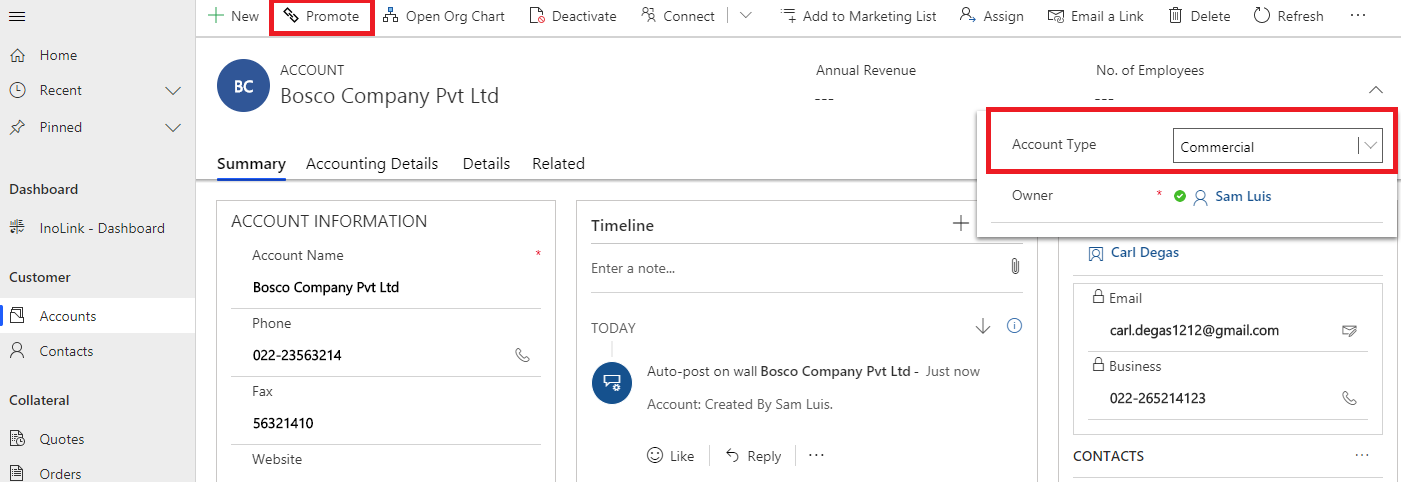
When Account Type is selected as ‘Commercial’ then Promote/Unlink button will be displayed on record.
When Account Type is selected as ‘Non-Commercial’ then Promote/Unlink button won’t be displayed on record.
Once user clicks on Promote/Unlink button then Record will get synced from Dynamics 365 CRM to configure QuickBooks Company i.e. Sandbox Company_US_1 as shown below:

User can add one more company and set Non-Commercial Account Type for both Account and Contact. In this case, promoted records has Account Type as Non-Commercial and it will get synced in second configured company – Sandbox Company_US_2. Likewise user can create multiple company to maintain customer data.
Account Type value will be different like Account Type for Account will be Commercial and for Contact it will be Non-Commercial. In this case the record has Commercial as Account Type value on Account and Non-Commercial on Contact. After promoting this record it will get synced to configured QuickBooks Company.
For example: Suppose an Account ‘Andrews Company Pvt Ltd’ has ‘Commercial’ as an Account Type value i.e. option set value then after Promoting, it will get synced to ‘Sandbox Company_US_1’ QuickBooks Company.
Conclusion
In this way by using Option Set, you can sync data from Dynamics 365 CRM to QuickBooks and vice versa.
Hi… These blogs offer a lot of information about QuickBooks integration.Your blog is incredible. I am delighted with it. Thank you for sharing this wonderful post.