In SharePoint Security Sync users can configure multiple connectors for SharePoint. For example SharePoint_1, SharePoint_2, SharePoint_3, etc. for different SharePoint sites. Follow below steps to configure the same:
Navigate to SharePoint Security Sync App and then click ‘Connector’ Entity. Next, click ‘New’ to create a new ‘Connector.’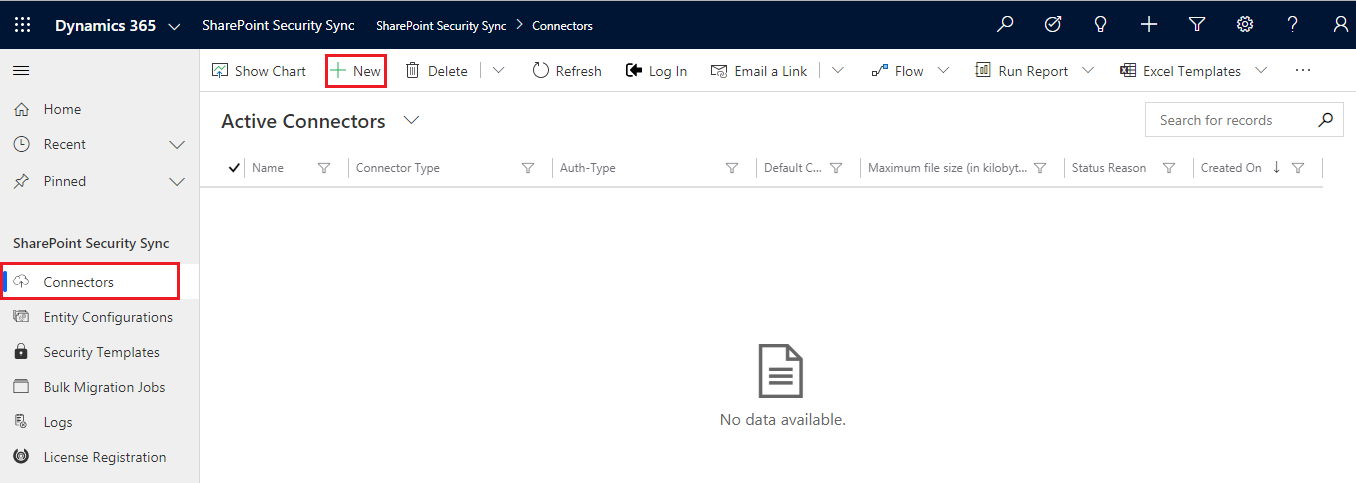
Configuring SharePoint Connector
a) Name: Give name to the connector.
Connector Type: Choose SharePoint from the drop-down.
Default Connector: If required, enable the checkbox to set SharePoint_1 as default connector.
b) SharePoint Site: It is the location of SharePoint, where files and folders will be stored. Select the valid SharePoint site here.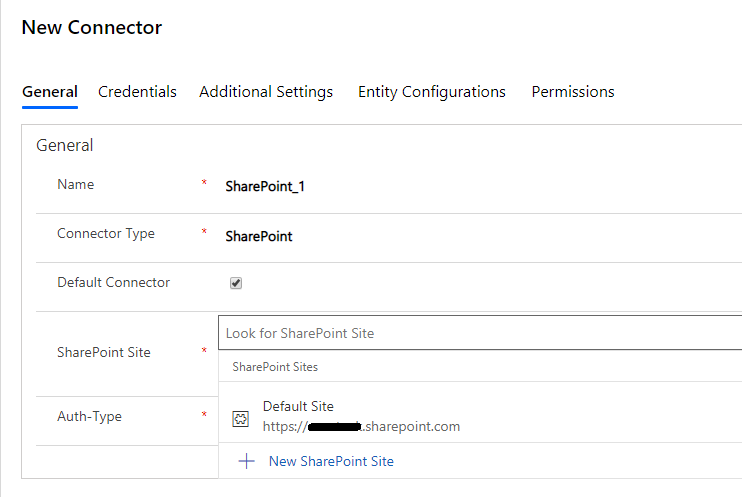
Note: User cannot reuse the same SharePoint site for each new connector.
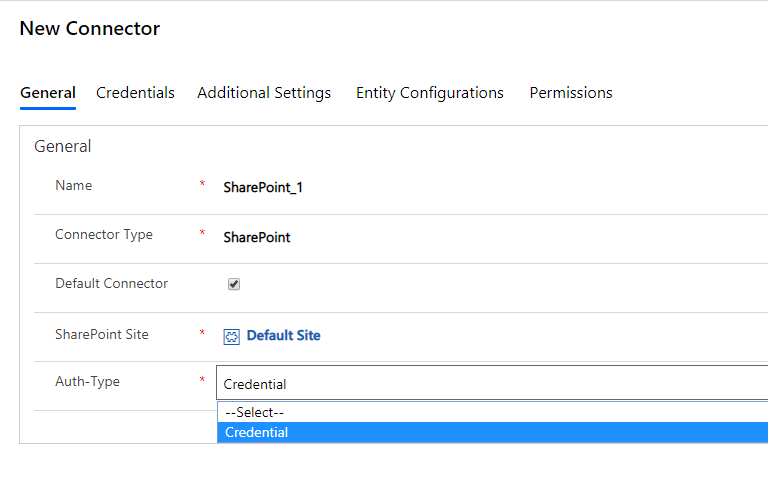
c) Auth-Type: Select the value ‘Credential’ This indicates that Authetication with the connector is done through Credential.
 d) Credentials: It is mandatory to enter credentials in order to create a new Connector. Enter value for Id and Password/Secret. Next authenticate the credentials.
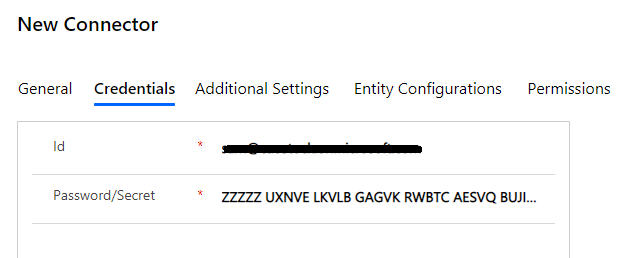
Note:
Id and Password for SharePoint: In the Id field enter your username and in Password/Secret field enter password. It can be your normal Dynamics 365 CRM credentials.
To know more visit our Website and for any queries, mail us at crm@inogic.com.