Using Click2Clone the task of cloning becomes a lot convenient. In our last blog we covered how to Set Reference of Cloned Record and Source Record. One of the functionality of Set References is to update records by Workflow. In this blog we are going to cover how using a workflow we can easily update Cloned records whenever there is some alteration in business requirement.
Below is the process how to Clone records using workflows.
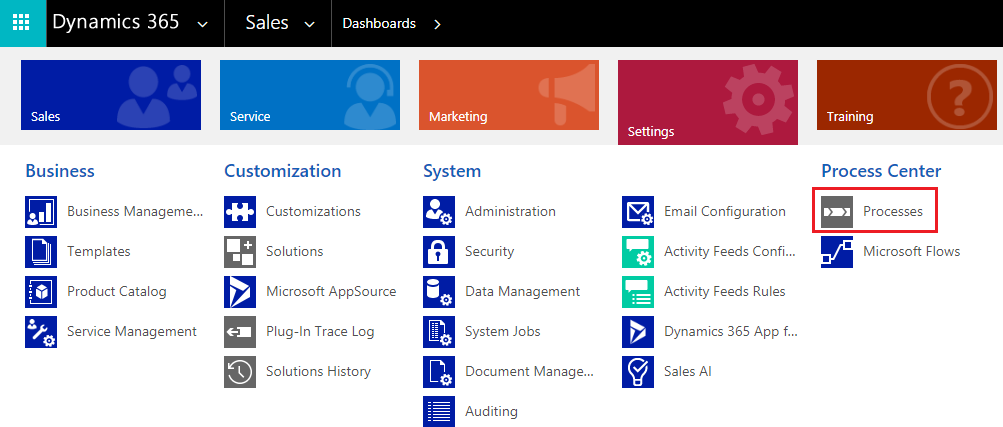
1. Click2Clone now supports cloning with workflows. To create a workflow, navigate to Settings > Processes and click on New to create a new workflow.
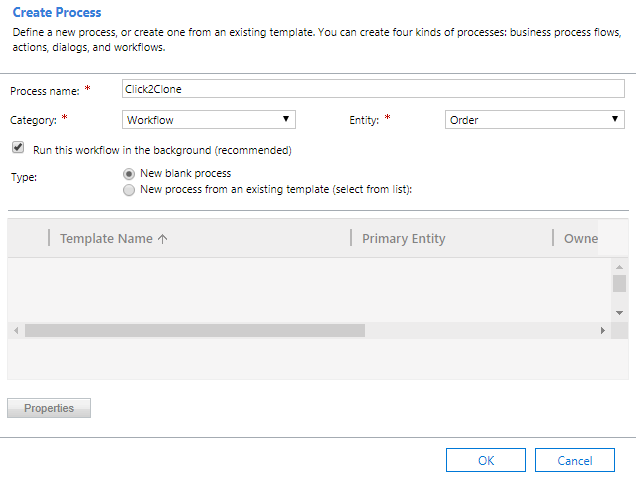
2. Enter the Process Name, select the Category as Workflowand Entity for which you want to create this workflow. Click on OK.
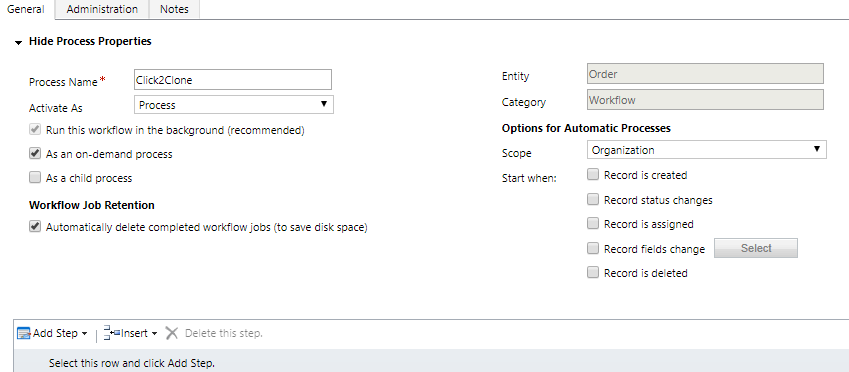
3. Here you can select whether you want the Workflow to be On Demand or trigger on a change.
4. Click2Clone ships with workflow assembly Click2Clone.Automation
5. Click on Add Step, and click on Inogic.Click2Clone.Automation you will see Inogic.Click2Clone.Automation.CloneRecords. With this assembly user can clone large number of related records for example, order with more than thousand line items.
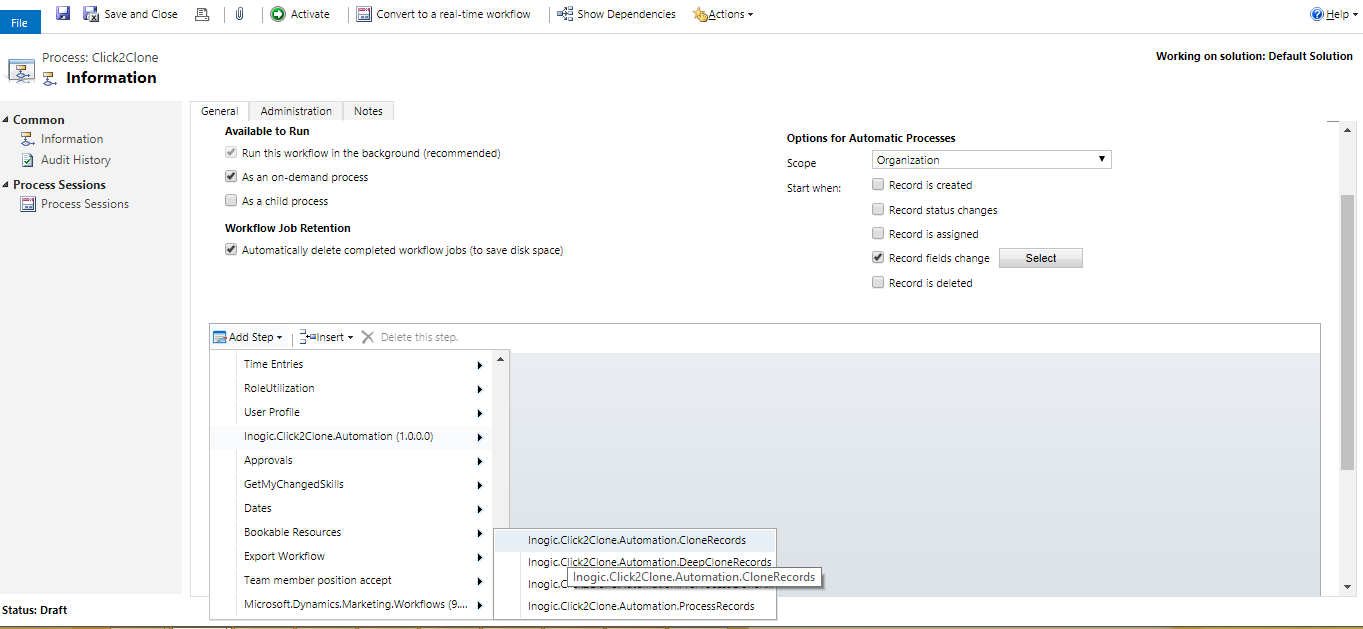
6. After you select this assembly click on Set Properties for Inogic.Click2Clone.Automation.CloneRecords.

To see workflow status, navigate to settings → Click2Clone group → Bulk Cloning job
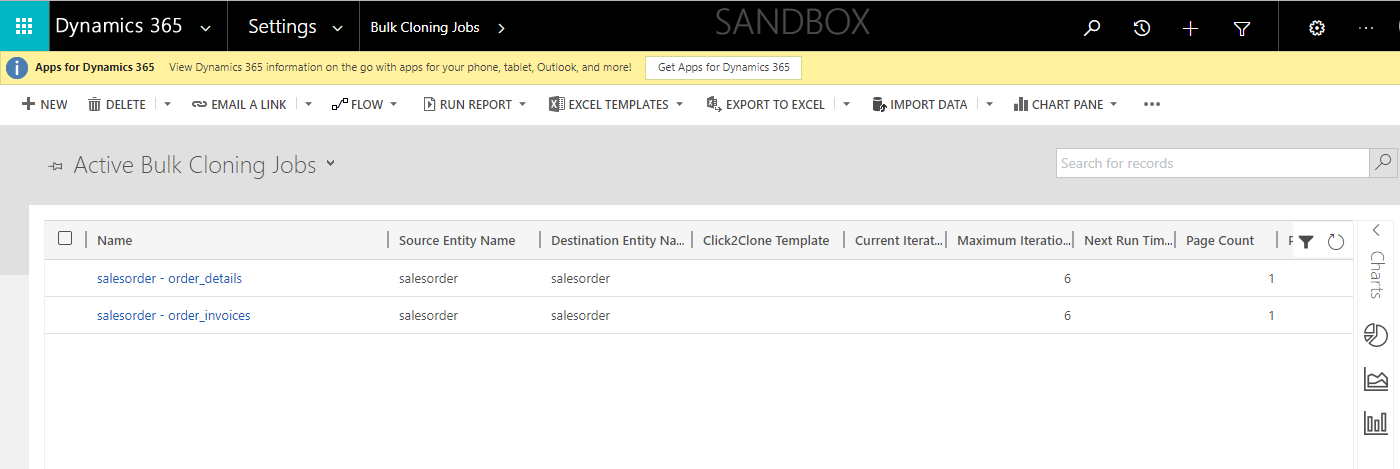
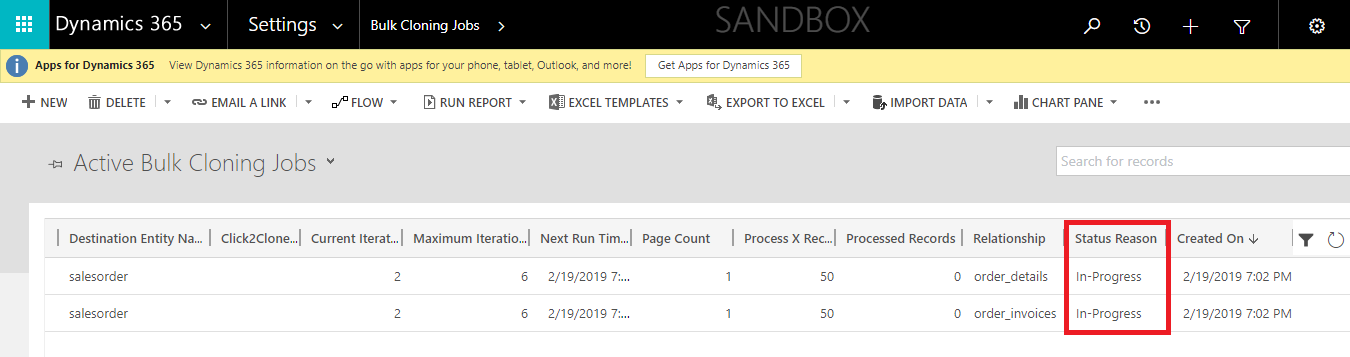
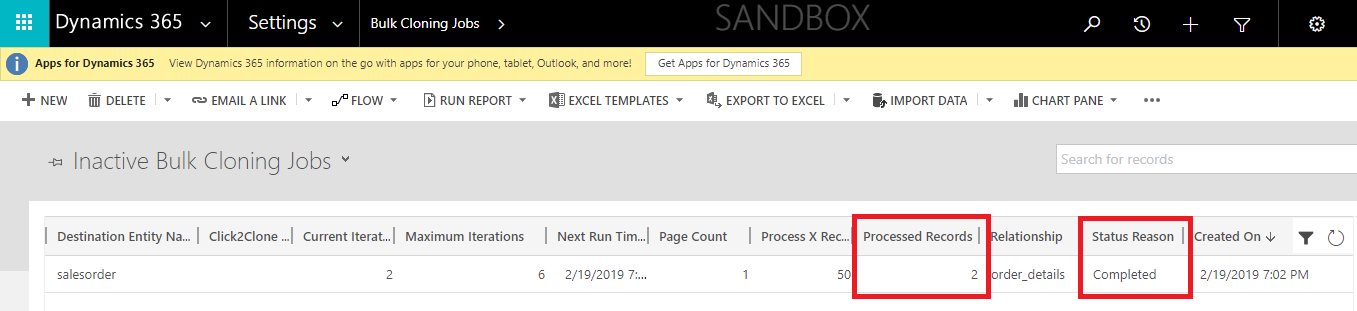
It will show status of the cloning jobs as seen in the screenshot below.
Once completed it will show Status as completed in Inactive Bulk Cloning Jobs
7. With the Second assembly Click2Clone.Automation.DeepCloneRecords users can deep clone related records for example, Order with Order line items along with Invoice and Invoice line items.
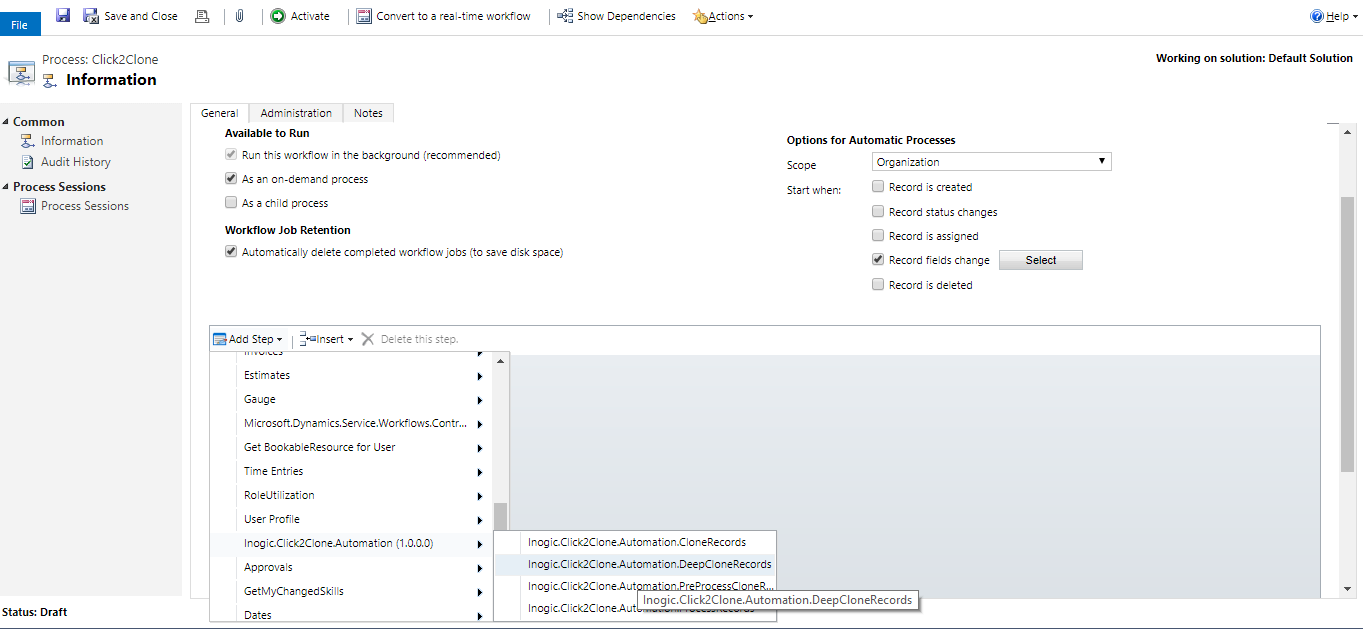
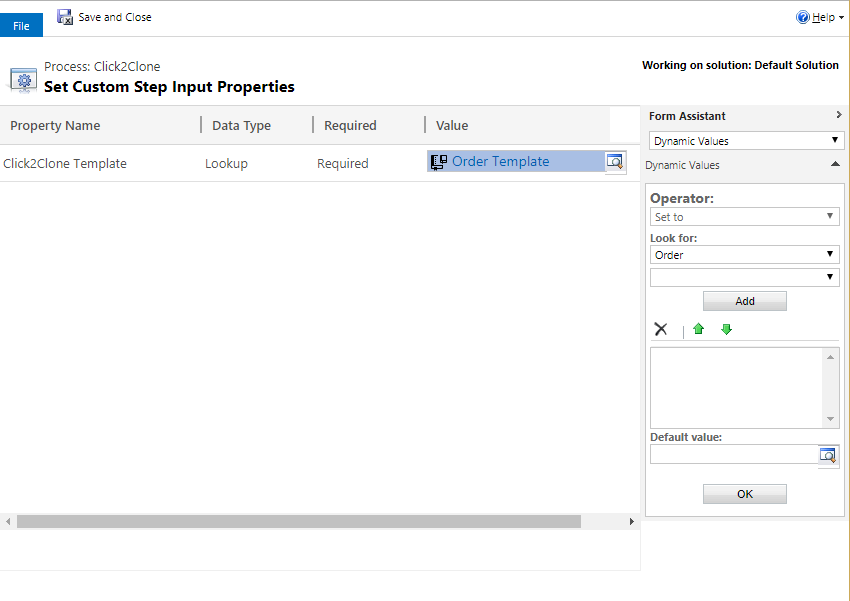
8. After you select this assembly, click on Set Properties for Inogic.Click2Clone.Automation.DeepCloneRecords. Then select the Click2Clone Template for the Entity for which the workflow is created and click on Save and Close.
9. Now Save and then Activate the process.
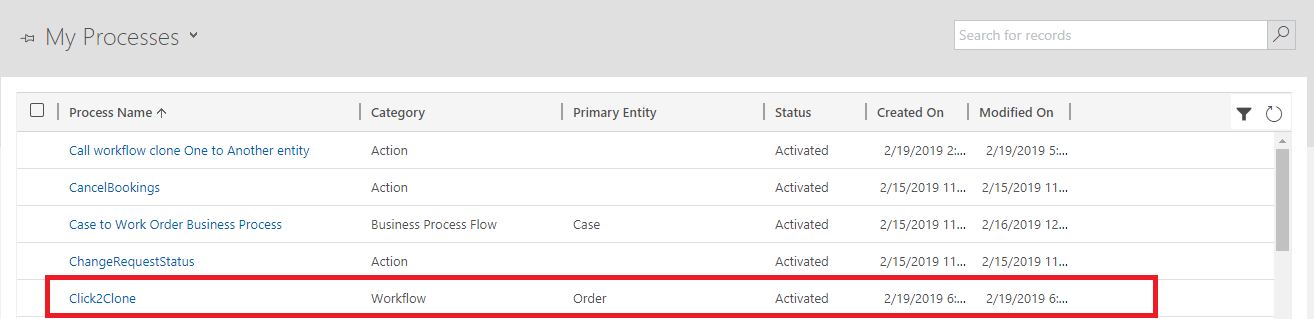
10. You can now see the workflow in My Processes.
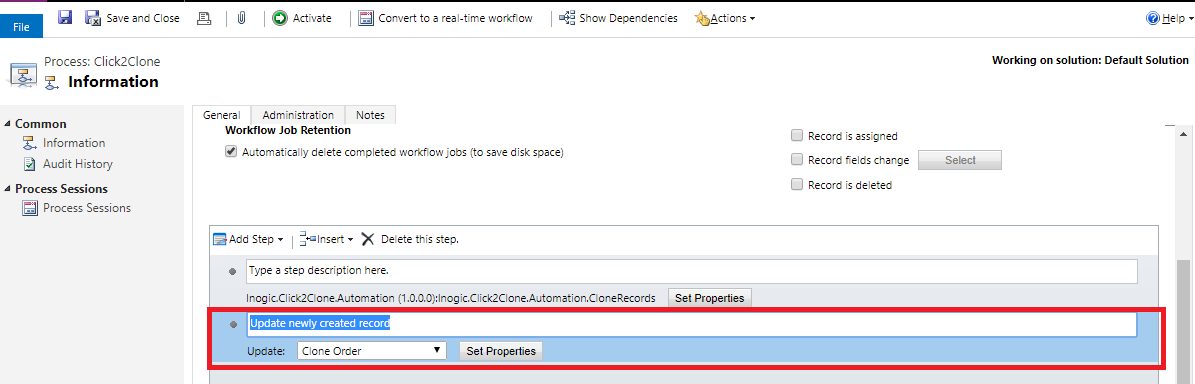
11. Users can also do needful updates in the cloned record. With the help of workflow, the user can access the cloned record for further operations. Thus, the users can update the cloned record. For this users need to add a new step as Update and select the related entity. i.e. the display name of the source entity field value that is defined in the Set References section of respective Click2Clone Template.
Thus it is easy to update Cloned records as per your business needs using Click2Clone. It not only reduces the task of repititive entry but also expedites the entire business process.
So, did you download the trial version yet, No? Download it from Website or AppSource!
For any demo, suggestion or query mail at crm@inogic.com
Go back to Click2Clone InfoCentre homepage.
Happy Cloning!