In this blog, you will learn how to set schedule to export and auto send Reports/Word Templates as email attachments at regular intervals.
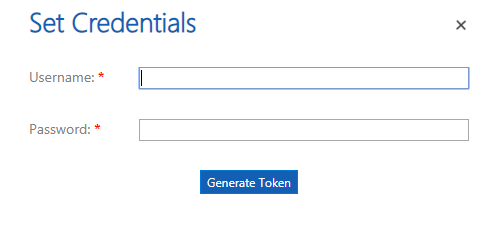
1) The first step to Schedule Reports is to Generate Tokens. For this navigate to Click2Export Configurations–> Set Credentials.

2) The below pop-up will appear. The user has to enter credentials and click on Generate Token.
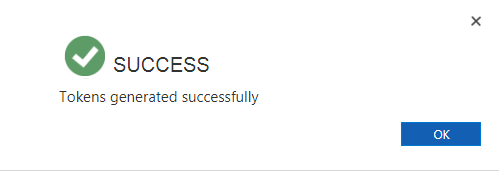
3) Once the user clicks on Generate Token button, token will be generated.
Note:
- Click2Export Administrator has to generate token only once through Click2Export Configuration
- Click2Export User need to generate token for each and every record while scheduling reports/word templates
4) Once the token is generated navigate to Click2Export–>Schedule Reports–>New and fill the relevant details in the New Schedule Reports Template.
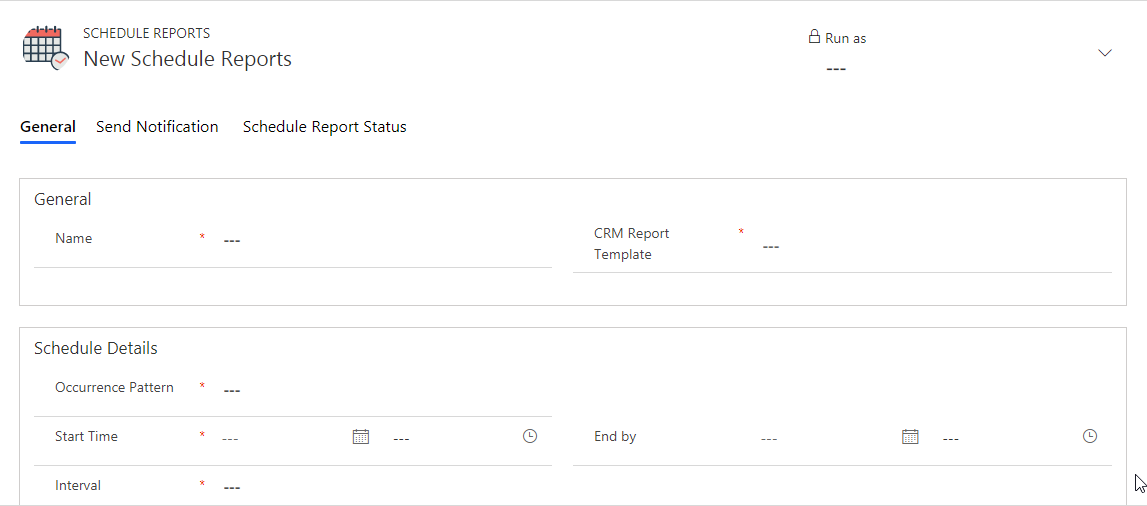
In General details the following fields need to be defined.
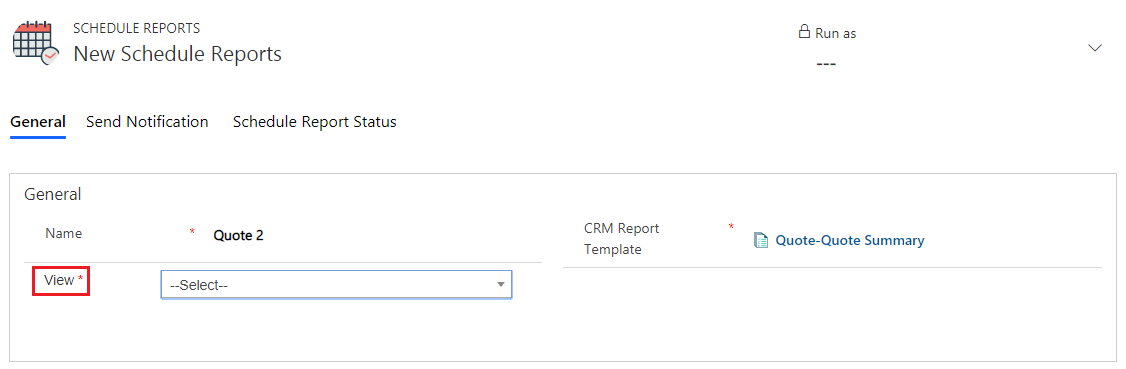
Name: Give name for the record (Schedule Reports).
CRM Report Template: Select the required CRM Report Template from the lookup field.
View: Select the necessary view from the drop-down. Export and mail selected Word Template against each individual record present in the selected view. (This field appears only if Word Template is selected for CRM Report Template).
Under Schedule Details the user has to fill the following requirements.
Occurrence Pattern: Select any one option from – Daily, Weekly and Monthly
Start Time: Select the starting date and time to trigger the first export. Date and time should be current. Past date and time is not considered.
End by: Select the end date and time till when the report should be exported on a regular basis.
Interval: The interval period depends upon the occurrence pattern selected by the user.
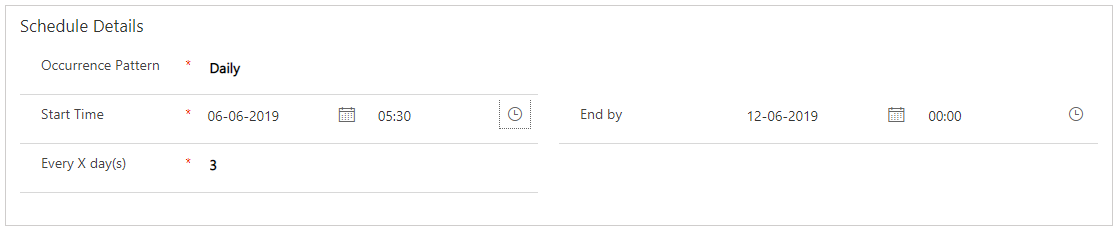
a) In the below screenshot, Occurrence Pattern is set as Daily and Every X day(s) is set as 3. Here the first process will occur on 6th June 2019, at 5:30 and from there onwards every 3rd day till the End by date & time.
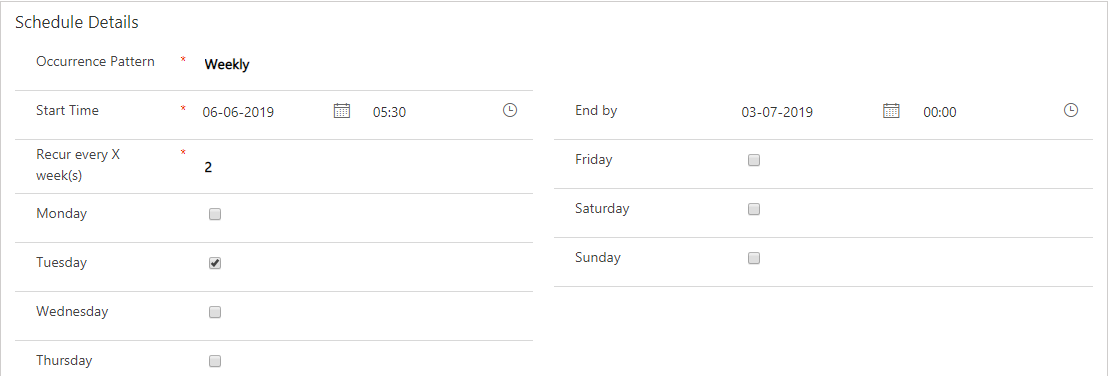
b) In the below screenshot, Occurrence Pattern is set as Weekly and Recur every X week(s) is set as 2. Here the first process will occur on the set Start Time. Next it will occur on the coming Tuesday and from there onwards every 2 weeks on Tuesday, till the End by date & time.
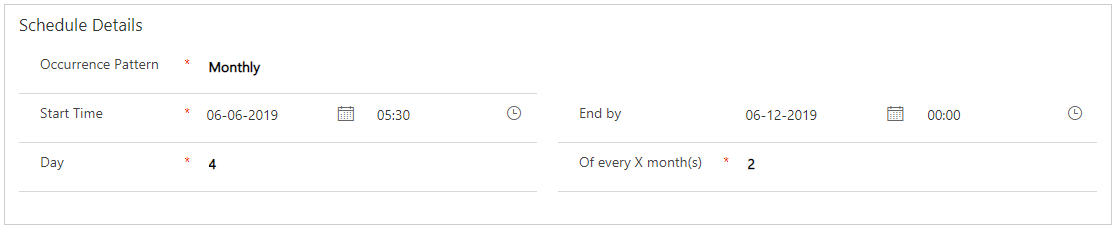
c) In below screenshot, Occurrence Pattern is set as Monthly, Day is set as 4 and Of every X month(s) is set as 2. Here the first process will occur on the set Start Time and from there onwards 4th day of every 2 months, till the End by date & time.
Fill the required fields and click on Save.
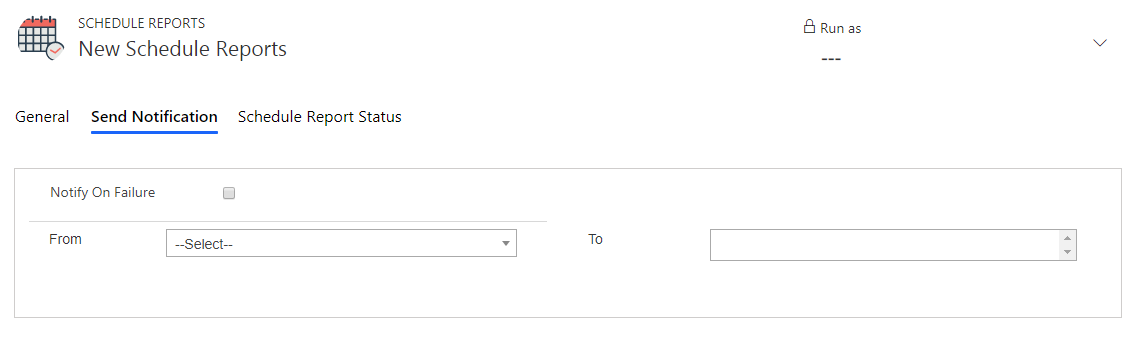
5) Next go to Send Notification Enable Notify on Failure checkbox and select sender and recipient(s) from the dropdown. This will ensure that an email is sent to notify recipient(s) about Schedule Reports process failure. Click on Save and complete the configuration of Schedule Reports.
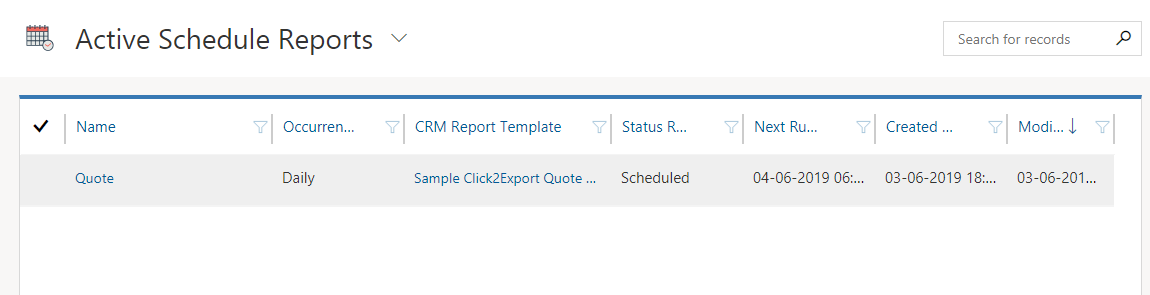
6) To view configured Schedule Reports navigate to Click2ExportàSchedule ReportsàActive Schedule Reports.
7) Similarly, to view Schedule Reports with completed process navigate to Click2Export–>Schedule Reports–>Inactive Schedule Reports.

Note: If End by date is not defined, then the process will go on nonstop.
Want to explore Click2Export? You can get it from Website or Microsoft AppSource.
For any suggestion, query or demo mail at crm@inogic.com
Go back to Click2Export InfoCentre homepage.
Keep Exporting!